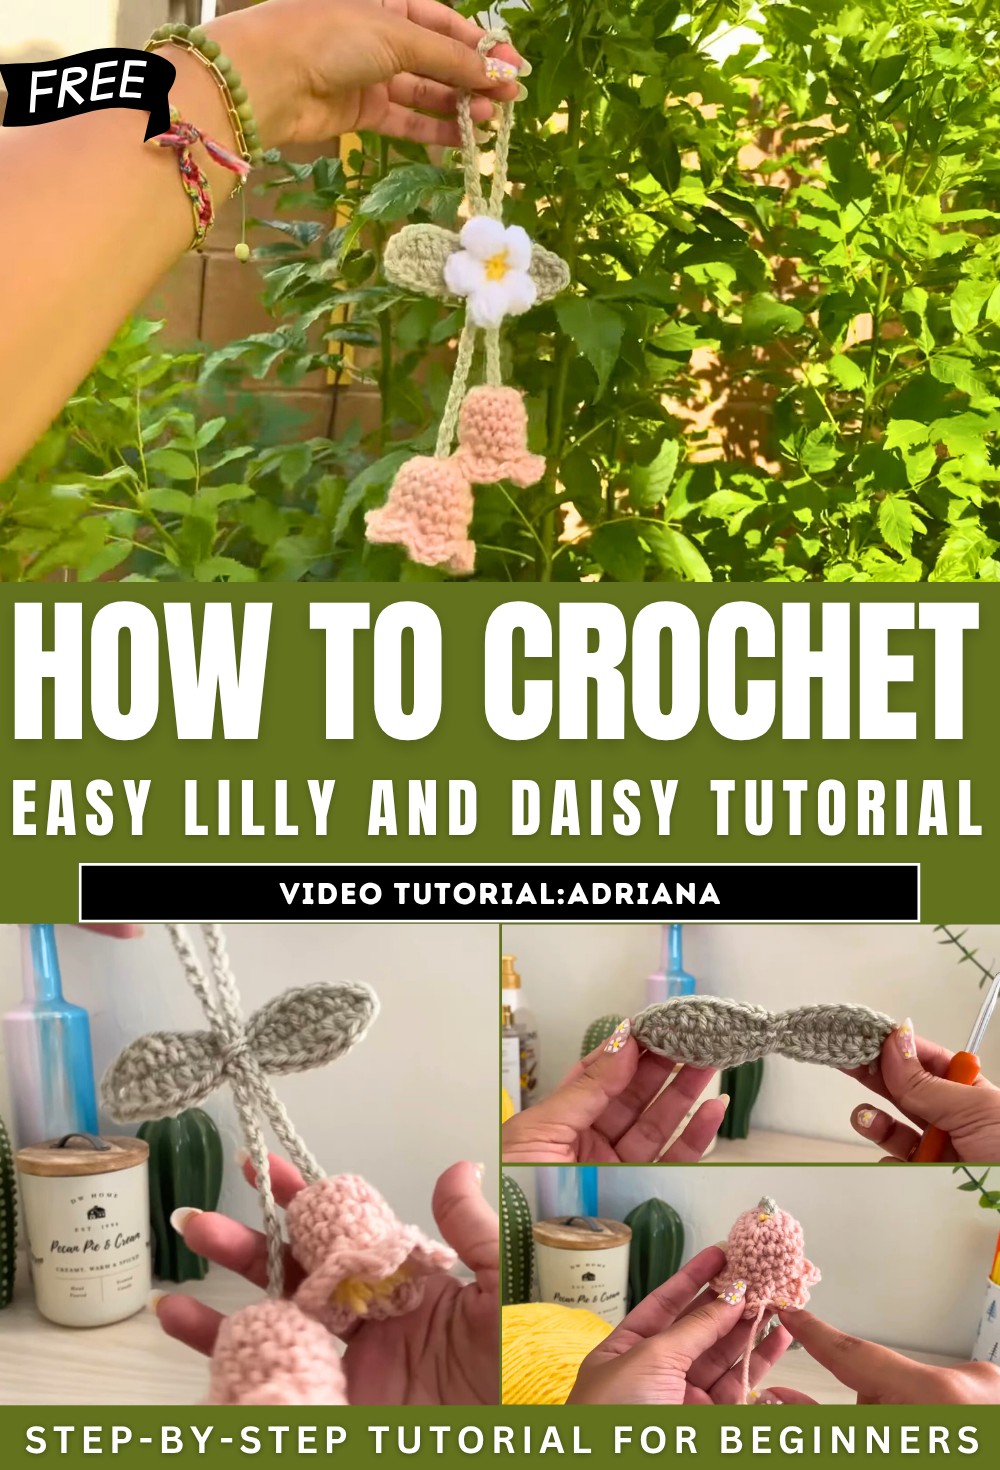
How to Crochet Easy Lilly and Daisy Tutorial for Beginners
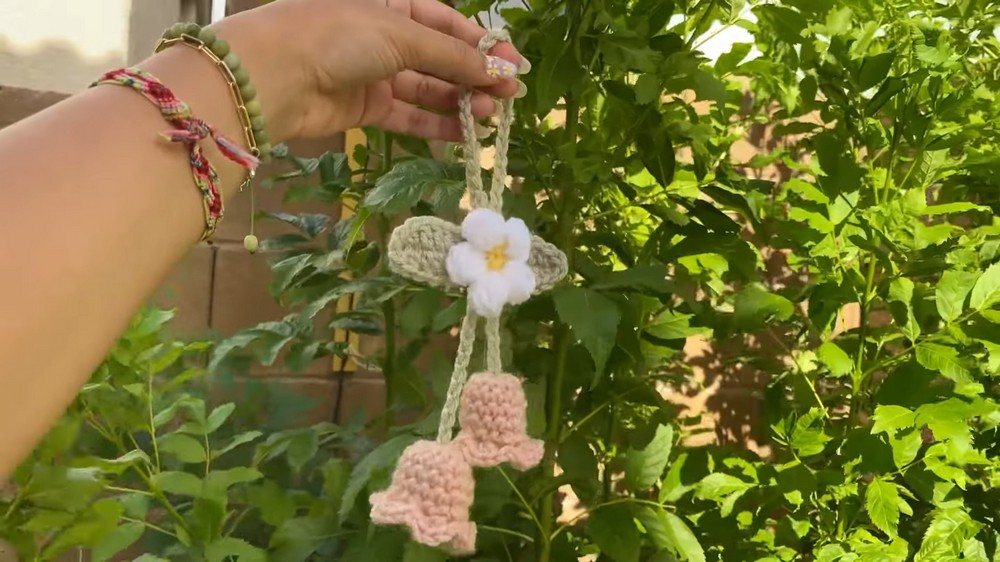
In this post, you’ll learn how to crochet a beautiful lily mirror hanger step by step with a tutorial for beginners and experts. Using basic materials like yarn, a crochet hook, scissors, and a tapestry needle, you’ll learn to make a slipknot, crochet leaves, design lilies, and assemble the final piece.
Clear instructions cover techniques like single crochet, double crochet, and creating magic circles. By layering petals and adding pops of color, you can create a delicate, decorative piece to elevate your space. So, follow through with us for the complete tutorial.
Introduction
- The creator begins by explaining that this is their first tutorial and acknowledges that it may not be perfect while encouraging viewers to follow along.
- The tutorial details how to crochet a decorative lily mirror hanger step by step, showcasing their personal approach to the design.
Materials Needed
- Yarn (color and type can vary based on preference).
- Tapestry needle for weaving ends.
- Scissors for cutting yarn.
- Crochet hook (the creator uses a size 5 hook).
Step-by-Step Tutorial
Making the Hanger Strap
- Create a strap that will hold the lilies and wrap around the mirror.
- Begin with a slipknot, chain the desired length, and cut the yarn, leaving extra to finish off the strap neatly.
Crocheting the Leaves
- Start by chaining a base to create the leaf.
- Work on the first half by using various crochet techniques (e.g., single crochet, double crochet).
- Create a symmetrical second half of the leaf by repeating the pattern on the opposite side of the chain.
- Finish by slip-stitching to secure the ends and cutting the yarn neatly.

Attaching the Leaves to the Strap
- Use the tapestry needle to weave together the strap and leaves.
- Attach securely to ensure the leaves are aligned and hold well.
- This forms the base layer for the decorative piece.

Making the Lily Flower Petals
Step 1: Base of the Flower
- Use a magic circle to form a small base for the lily petals.
- Expand the base by adding rows of single crochet and increasing the number of stitches gradually.
- Start shaping the base of the lily to prepare for the petals.
Step 2: Creating Petal Layers
- Begin crocheting the individual petals by working into the loops from the base.
- Use a combination of single and double crochet techniques to form the petals.

- Repeat the pattern as needed to create five evenly spaced petals.
- Finish off by tying off the yarn neatly and shaping the petals.
Adding the Puffball Center
- Create a puffball for the center of the lily using yellow yarn.
- Wrap the yarn multiple times to form loops and tie the loops together to create the puff.
- Cut the loops to give texture to the puffball and attach it to the center of the lily.

Assembling the Lily
- Attach the puffball to the crocheted petals using the tapestry needle and yarn.
- Secure everything with knots and trim excess yarn for a clean finish.
- Position the lily appropriately for decorative purposes.
Crocheting Mini Puff Decorations
- Create mini puff decorations for extra detail by combining loops and chains.
- Attach these small decorative pieces to enhance the overall look.