How to Crochet the STRADIVARIUS Bag Free Pattern + Tutorial

Add a unique twist to your accessories collection with a free crochet Stradivarius bag pattern that’s easy to follow and stunningly stylish.
Looking for a stylish and practical accessory to brighten up your looks this season? The magic knots channel introduces a charming design that perfectly blends elegance with everyday functionality. This handcrafted item is ideal for those who appreciate thoughtful details and timeless style.
Crochet STRADIVARIUS Crochet Bag with This Free Pattern

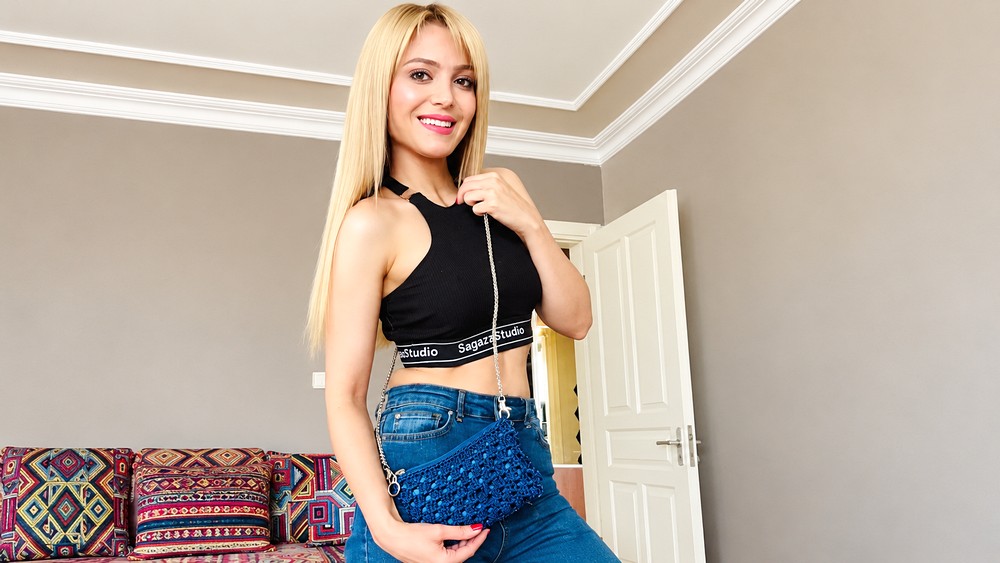
The Free crochet STRADIVARIUS BAG pattern features a sleek and compact silhouette, enhanced by a glittery finish that catches the light beautifully. Designed with attention to detail, the bag includes a sturdy satin lining and a smooth zipper closure, ensuring both durability and ease of use. The dark blue color with subtle shimmer adds a sophisticated touch, making it versatile enough for casual outings or special occasions.
Beyond its stunning appearance, this bag serves as a wonderful gift idea. Handmade with care, it carries a personal touch that mass-produced items often lack. Its manageable size makes it perfect for carrying essentials like a phone or wallet, making it a practical yet fashionable companion. The intricate crochet work combined with carefully chosen materials delivers a unique decorative charm, elevating any outfit effortlessly.
Whether you want to gift it to a friend or add a lovely piece to your own collection, the STRADIVARIUS BAG stands out as a delightful project with lasting appeal. Its stylish design and comfortable fit are sure to attract compliments and spark conversations wherever it goes.
Stradivarius-Style Handbag Crochet Pattern
This crochet pattern guides you through crafting a chic Stradivarius-inspired handbag using shimmering polyester macramé yarn. With its structured base, textured body, and refined finishing touches including a satin lining, zipper, and chain handle, this handbag adds a handmade elegance to your accessory collection.

Skill Level
Intermediate
This project is suitable for crocheters with an understanding of foundational stitches, working in the round, and basic assembly techniques such as adding linings and zippers.
Materials Needed
- Yarn:
- Shimmering polyester macramé yarn in your desired color (used here: navy blue, color code 262).
- Hook:
- 3.5 mm crochet hook.
- Accessories:
- Silver bag chain for the strap.
- Matching zipper (length depends on the top opening of your crocheted bag).
- Satin fabric for the inner lining.
- Miscellaneous Tools:
- Sewing needle and matching thread for zipper and lining attachment.
- Scissors for trimming yarn and fabric.
Special Stitches Used
- Double Crochet (Dc):
- Yarn over, insert the hook into the stitch, yarn over again and pull up a loop (3 loops on the hook).
- Yarn over and pull through the first 2 loops, yarn over again and pull through the last 2 loops.
- Single Crochet (Sc):
- Insert hook into the stitch, yarn over, and pull up a loop. Yarn over and pull through both loops on the hook.
- Group of 3 Double Crochets:
- Work three Dc stitches into the same space or stitch.
Stitch Abbreviations
- Ch: Chain
- Sc: Single Crochet
- Dc: Double Crochet
- Sl St: Slip Stitch
Useful Tips
- Tension Control: Ensure uniform tension, especially when using shimmering macramé yarn, as it can be slippery. Keep your chains soft and relaxed.
- Foundation Chain: Work foundation chains slightly loose to avoid a tight or uneven base.
- Flat Base Construction: Begin by increasing stitches evenly to ensure the base remains flat and does not curl up. Use stitch markers to identify corners for your increases.
- Lining and Zipper: Prepare and measure the satin lining and zipper in advance for smoother sewing to your finished crocheted bag.
- Hardware Attachment: Make sure the bag chain is securely attached for durability. Test before finalizing.
Pattern Instructions
Foundation Chain
Starting Chain:
- Using the 3.5mm crochet hook, Ch 23 stitches for the foundation.
- Keep these chains slightly loose to avoid a tight starting edge.
Phase 1: Base Formation
The base is worked in rounds to create a flat oval foundation.
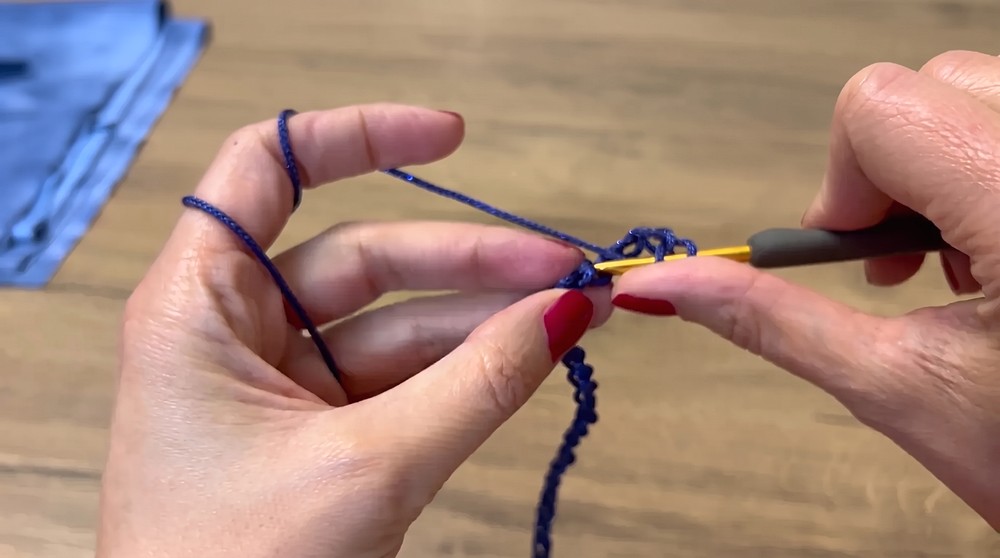
Round 1:
- Ch 3 (acts as the first Dc), then work 1 Dc into each chain across the foundation chain.
- At the end of the foundation chain, work 9 Dc into the last stitch. This helps turn your work to the opposite side (this will form the oval shape).
- Continue by working 1 Dc into each stitch along the opposite side of the foundation chain.
- When you reach the beginning Ch-3, join with a Sl St.
Round 2:
- Ch 3 (counts as first Dc).
- Along the long edges, work groups of 3 Dc stitches into the spaces between the previous row’s stitches.
- At the corners, work 9 Dc stitches into the same spaces to maintain the oval shape.
- Repeat the pattern until you complete the round, and join with a Sl St.
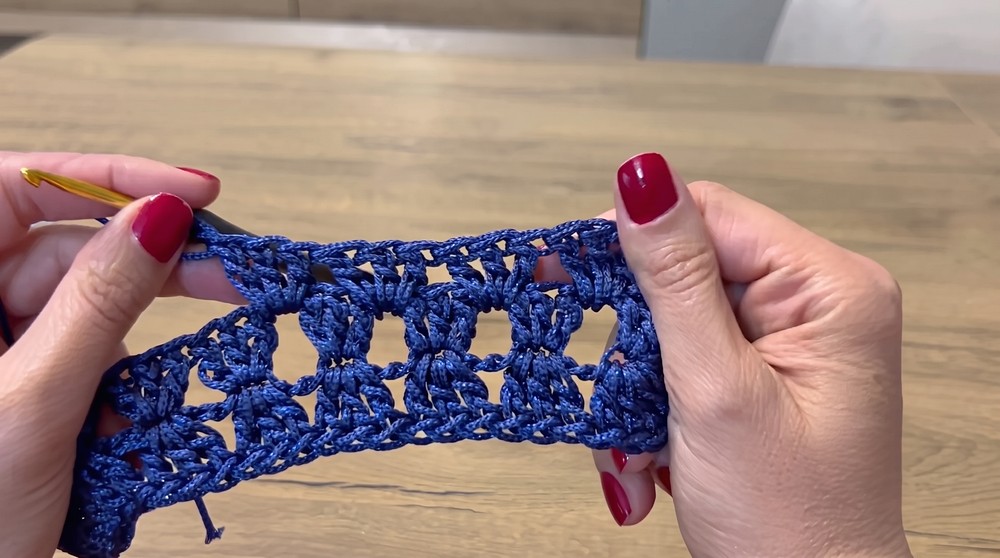
Round 3:
- Repeat the previous round, maintaining the same structure: groups of 3 Dc along the long edges and 9 Dc in the corner turns.
- Continue working until the base reaches your desired dimensions. End the base construction with a total of 8 Dc groups along each long edge.
Phase 2: Body Rows
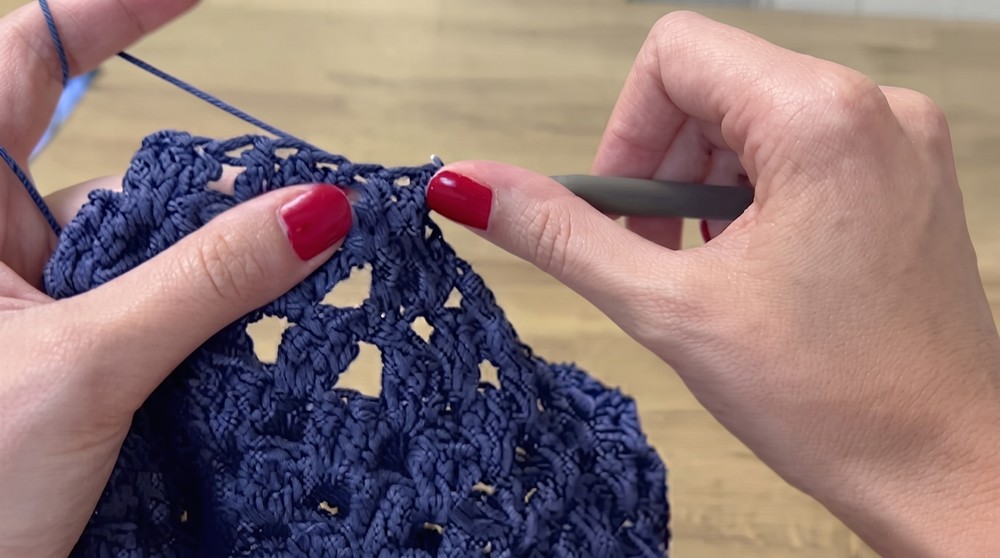
The body section features repeating groups of double crochets separated by spaces, creating an elegant and structured texture.
Rounds (4–12):
- Begin working in the round without turning, using the spaces between the groups of Dc from the base.
- Maintain the groups of 3 Dc stitches pattern, placing them into the spaces between the groups of the previous round.
- At the corners, continue working groups of 3 Dc into the spaces without disrupting the placement of the stitches.
- Work this pattern for 8 rounds in total to achieve the bag’s desired height, ensuring consistent tension throughout.
Phase 3: Finishing the Crochet
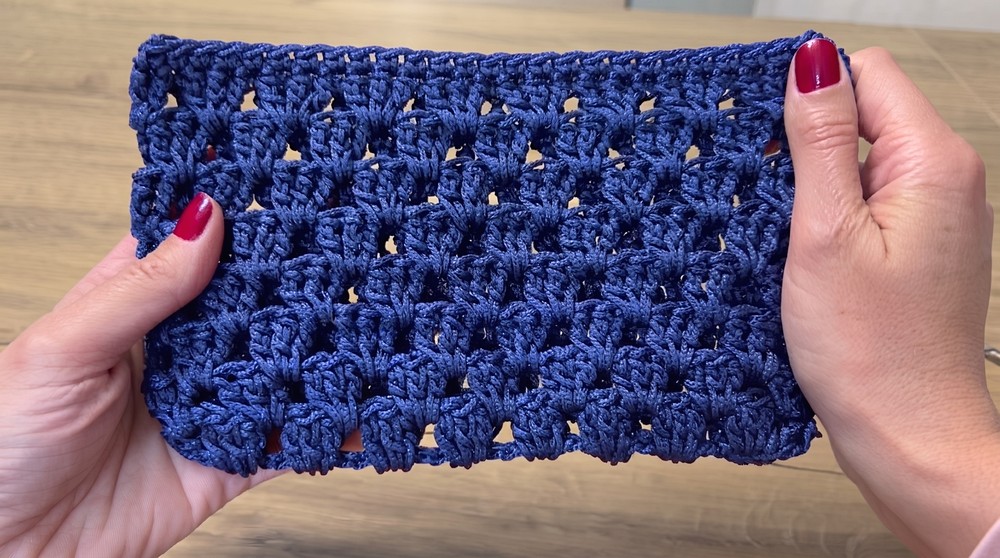
Top Rim (Final Round):
- To stabilize and neaten the top edge, work a row of Sc stitches around the entire top rim of the bag.
- Use a steady hand and even stitches for a polished look.
- Once completed, fasten off and weave in all loose ends.
Phase 4: Assembly and Lining
Lining Installation:
- Prepare the Lining:
- Cut the satin fabric to fit the interior of your bag. Leave extra fabric for seam allowances along the edges.
- Hem the edges of the fabric neatly to prevent fraying.
- Attach the Lining:
- Fold the satin lining neatly into the interior of the bag. Secure it evenly in place with pins, making sure the fabric is snug inside.
- Hand-sew the lining to the inner edge of the crocheted bag using a sewing needle and thread for a clean finish.
Zipper Attachment:
- Align the zipper across the top opening of the bag.
- With a needle and matching thread, securely sew the zipper in place. Test the zipper is evenly aligned and fully functional.
Phase 5: Final Touch: Strap Attachment
- Attach the silver chain to the bag’s top edges for the strap. You can loop the ends of the chain into bag rings or secure them directly by tightly sewing the chain to the crocheted fabric.
- Ensure the chain is securely fastened for durability and make any necessary adjustments to the length.

Final Measurements
- Bag Dimensions: Approx. 23cm x 15cm, depending on your tension and the yarn used.
- Chain Length: Adjust to your preference before attachment.
Conclusion
This Stradivarius-style crochet handbag combines elegance and craftsmanship, featuring a structured base, satin lining, zipper closure, and metal chain handle. By carefully following the steps provided and paying attention to details like tension and finishing touches, you’ll create a professional-looking accessory that is stylish and functional for any occasion.