Latest Free Crochet Bag Pattern with Simple Detail
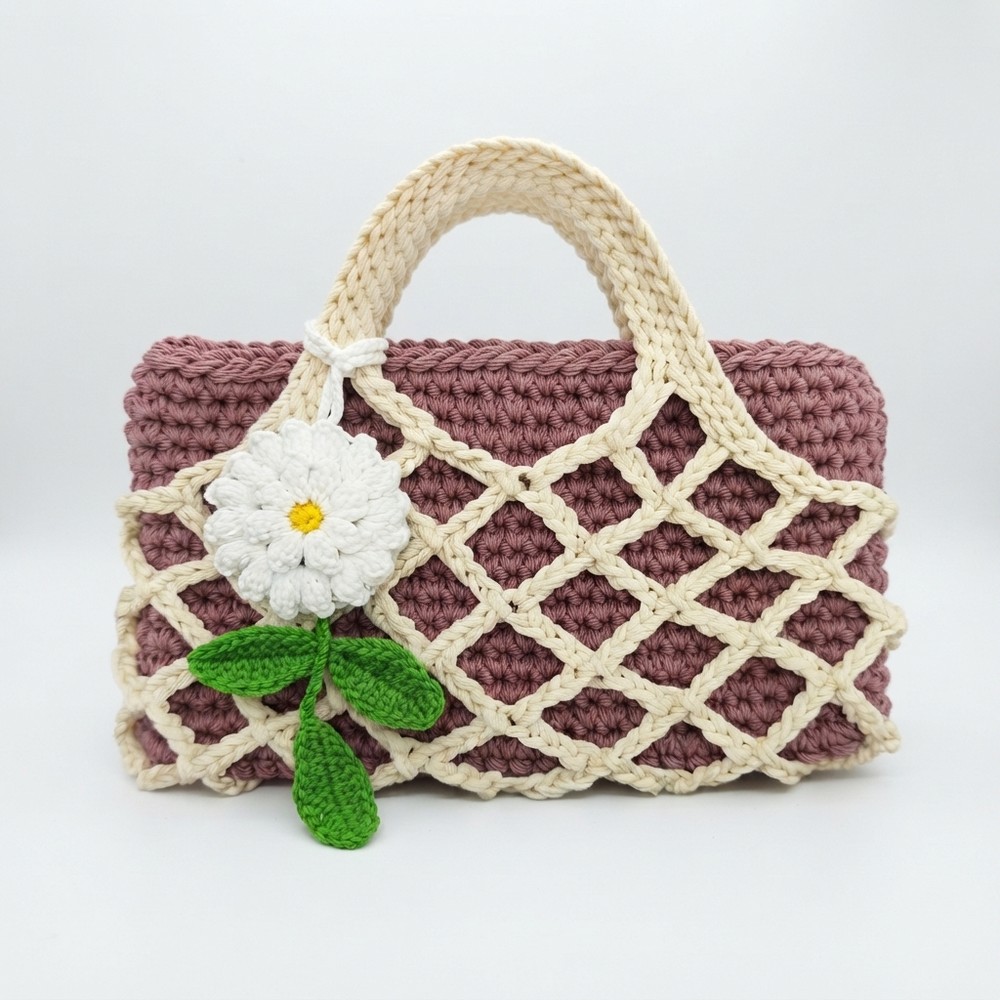
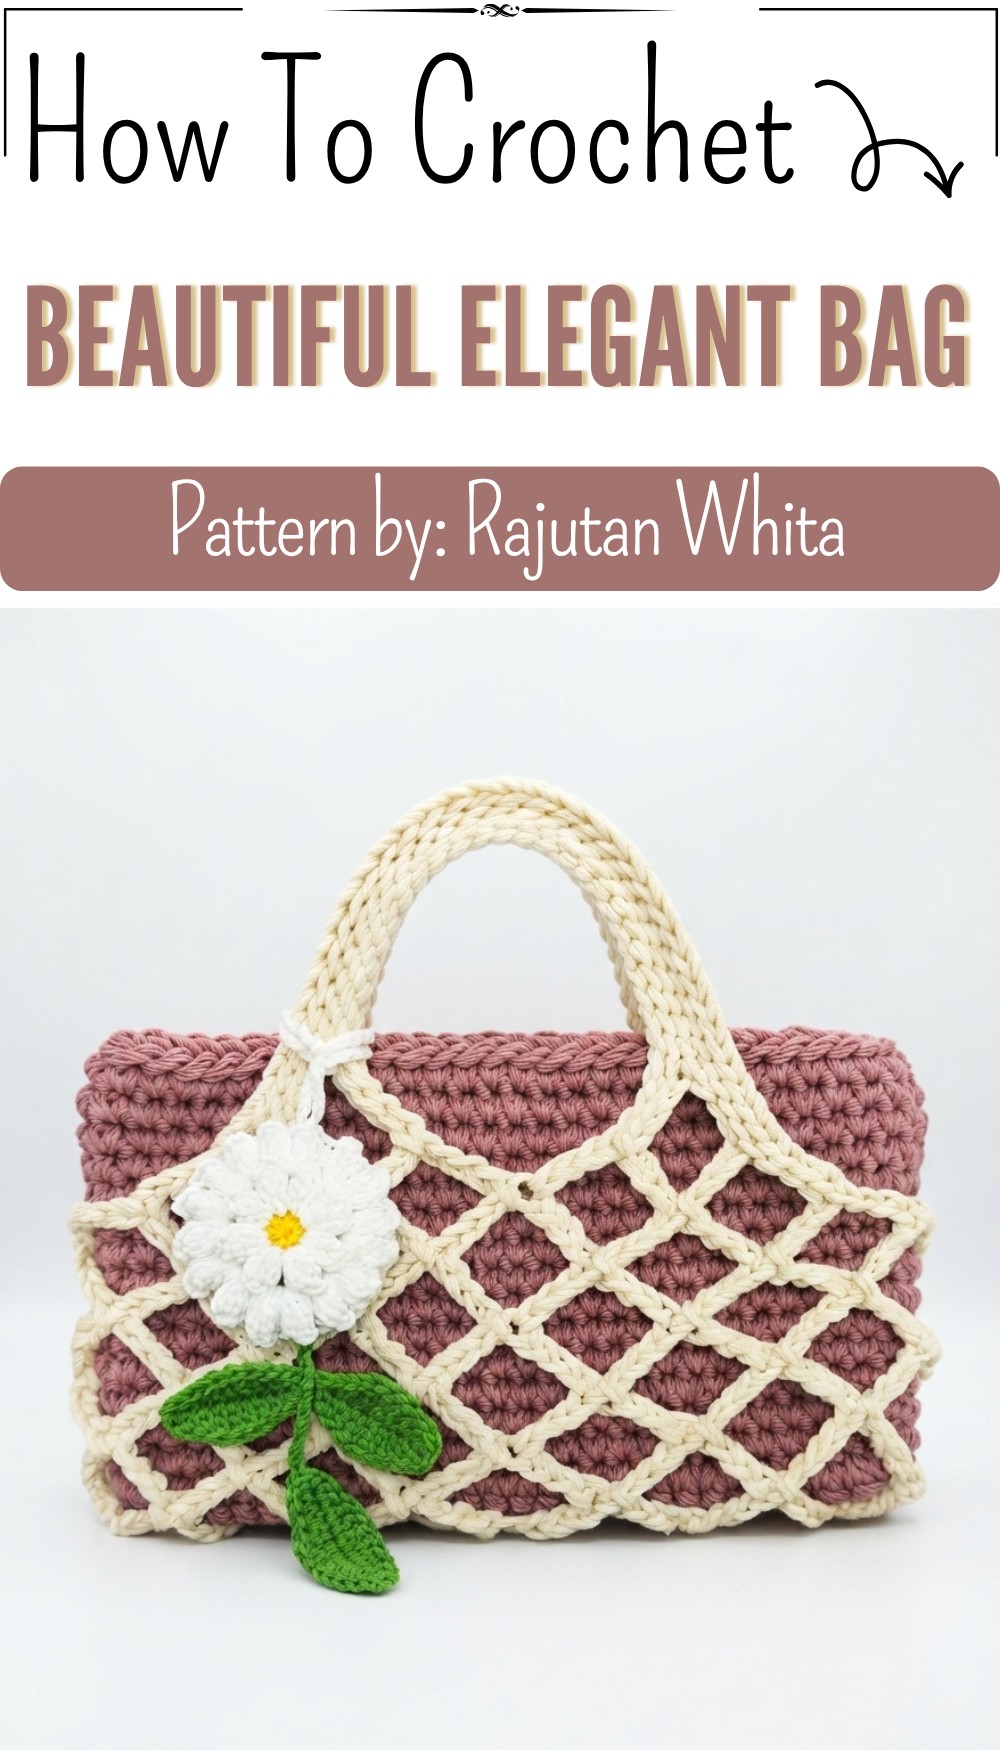
Refresh your style with Free Crochet Bag Pattern that’s featuring charming details, practical shape, and easy appeal for daily outings and casual looks.
A cute crochet bag can make everyday outfits feel more fun while giving you space for the things you need. The Free Crochet Bag Pattern brings together useful storage and a soft handmade style in one lovely accessory.
The finished bag has a neat shape, a comfortable handle, and a simple look that can match many outfits. Its crochet texture gives the surface a warm, cozy feel, while the clean shape keeps it easy to carry. The design can look pretty with soft colors or more playful with bright shades. Small details can also give the bag its own special character.
Free Bag Crochet Pattern for Everyday Style
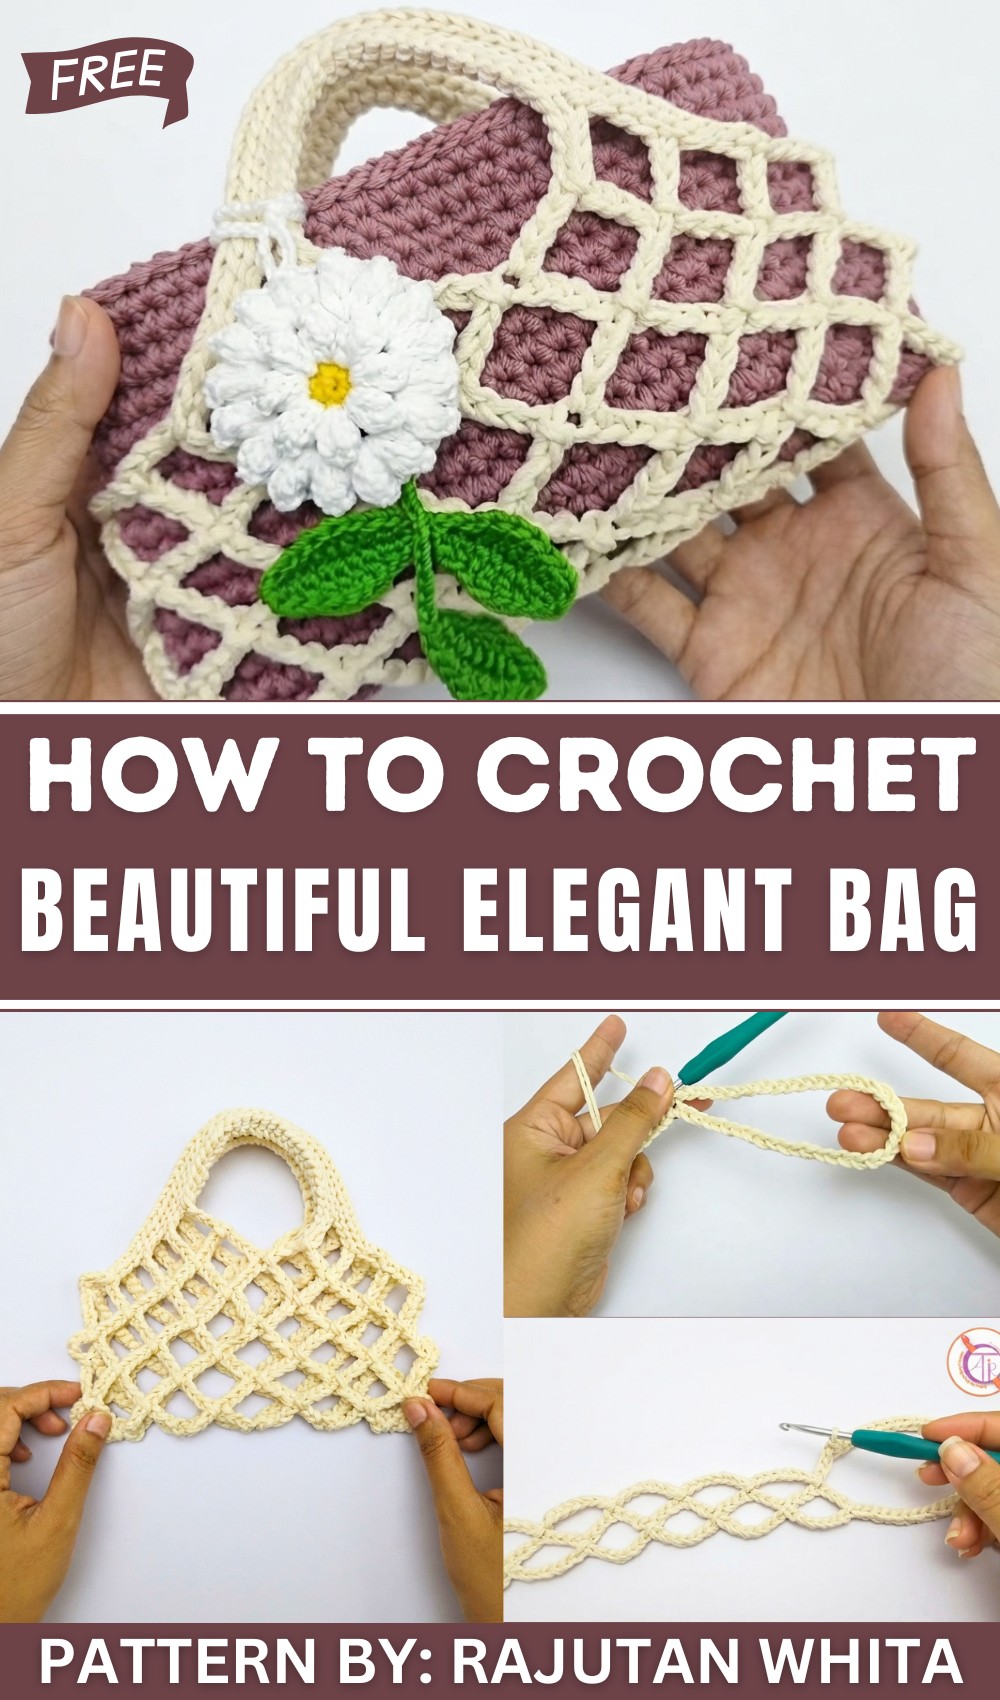
Rajutan Whita shares this lovely crochet project through its YouTube channel. The bag works well for daily trips, shopping, short walks, or casual outings. It can hold small personal items such as a phone, wallet, keys, glasses, or other things you like to keep close. Its useful size makes it a handy choice without feeling too bulky.
One of the nicest things about this type of bag is how easy it can fit into different styles. Carry it with jeans and a simple shirt for a relaxed look, or pair it with a dress when you want a soft handmade touch. The crochet surface gives the accessory a friendly feel that stands apart from many regular bags.
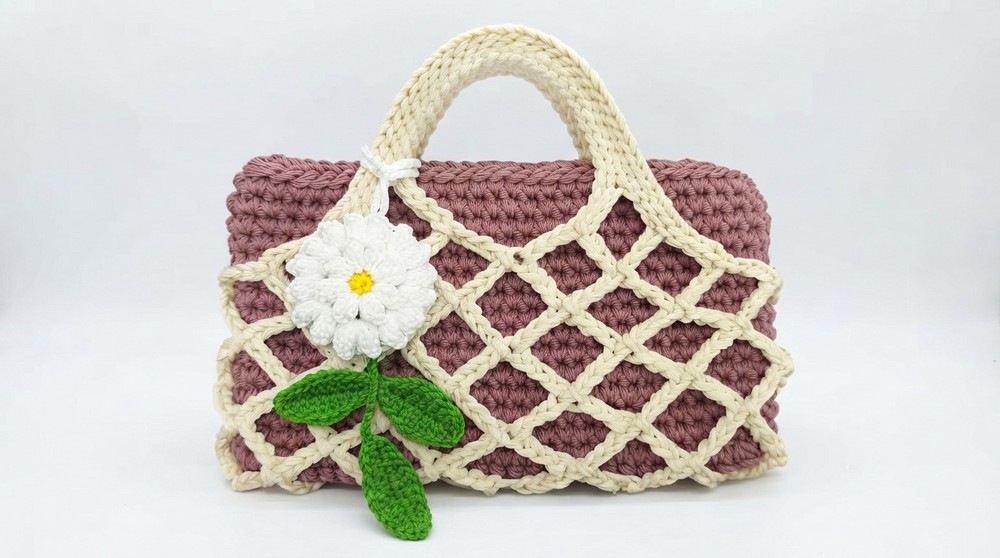
A crochet bag can also become a thoughtful gift for someone who enjoys useful handmade items. It may be a sweet choice for a birthday, holiday, or special day. Since it can be carried often, the person receiving it can enjoy its beauty while also making good use of it.
The Free Crochet Bag Pattern is a charming project for anyone who loves practical accessories with a handmade feel. Its useful shape, soft texture, and simple style make it a lovely addition to everyday life and a special piece to keep in a crochet collection.
Crochet Net Bag with Inner Pouch – Detailed Step-by-Step Pattern by Rajutan Whita
In this detailed tutorial, you will learn to crochet an elegant and functional net bag with a matching inner pouch, designed by Rajutan Whita. Combining aesthetics with practicality, the project uses double-stranded yarn for durability and a visually appealing openwork net pattern for the bag body. The secure inner pouch complements the bag for carrying essentials neatly. This comprehensive step-by-step pattern explains how to master both components and assemble them together for a chic, handmade accessory.
Quick Overview Of Pattern
- Phase 1: Works the net bag body starting with a long chain foundation and subsequent crocheted arches and slip stitch rows to create a flexible mesh structure.
- Phase 2: Joins the edges of the crochet panel with chain-slip stitch combinations to construct the bag’s cylindrical shape.
- Phase 3: Crafts an inner pouch in single crochet rounds with a rectangular base and body, finished with a clean edge and magnetic button closure.
This project balances openwork crochet techniques with solid fabric making, resulting in a versatile and stylish bag.
Notes
- Use double-stranded yarn throughout the bag body for strength and to maintain the mesh’s form.
- Slip stitches worked in the back loop only add subtle texture and flexibility.
- Pay attention to stitch counts and spacing within arches for an even mesh pattern.
- When assembling the bag, join wrong sides together to keep seams neat and subtle.
- The inner pouch is worked in solid single crochet rounds for practicality and durability.
- Attachments such as a magnetic button can be sewn on securely but delicately to maintain the bag’s appeal.
Skill Level
Intermediate. Requires familiarity with:
- Chain stitches, slip stitches, and single crochet.
- Working with double strands.
- Understanding the back loop only technique.
- Seam joining using chains and slip stitches.
- Working continuous rounds without slip stitching.
Materials
- Off-white cotton or cotton-blend yarn (for net bag body; doubled strands).
- Matching yarn for the inner pouch (same or complementary).
- Crochet hook suitable for yarn weight (recommend 3.5 mm or adapted to yarn).
- Stitch marker or marker yarn (for marking chains and rows).
- Magnetic button closure.
- Yarn needle, scissors.
Measurements / Sizing (Approximate)
- Net bag panel length after foundation: About 93 chains in foundation. Width depends on gauge and hook.
- Inner pouch base: 28 chains (27 stitches).
- Inner pouch height: 14 rounds of single crochet.
- Final net bag with assembled pouch approx. suitable for daily essentials like wallet, small books, or phone.
Gauge (and Stitch Pattern)
- Gauge is not strict for this type of mesh bag, but consistent tension ensures even arches and mesh size.
- Stitch patterns include arching chains connected with slip stitches to create the net.
- Back loop only slip stitches add texture and elasticity to selected rows.
- Single crochet in rounds for pouch creates dense, strong fabric.
Stitch Abbreviations
| Abbreviation | Meaning |
|---|---|
| ch | Chain |
| sl st / ss | Slip stitch |
| sc | Single crochet |
| BL | Back loop (of stitch) |
Special Stitches
- Back Loop Only (BLO): Working into the back loop of the stitch provides a ribbed effect and creates stretch or texture.
- Arch Pattern: Series of chains with slip stitches anchoring the chain arches to create open mesh.
The Crochet Pattern
Phase 1: Creating the Net Bag Body
Foundation
- Using double strands of off-white yarn held together, start with a slip knot.
- Chain 53 stitches to form the base, mark this 53rd chain with a stitch marker or piece of yarn for reference.
- Continue chaining 40 more stitches after the marker. The total chain count is therefore 93.
- Slip stitch (sl st) into the marked 53rd chain, creating a large loop foundation.
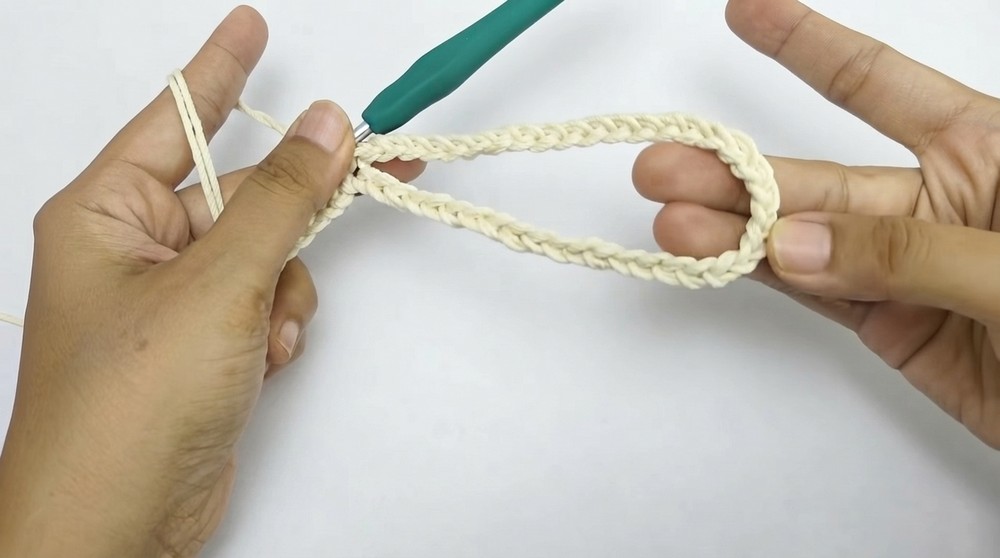
Row 1
- Chain 7 to start forming the first arch.
- Skip 7 chains on the foundation, then slip stitch into the 8th chain.
- Repeat this arching sequence 6 times across the foundation (creating 7 arches).
- After the last slip stitch, chain 36.
- Slip stitch into the first chain of this last chain sequence, completing Row 1.
Row 2
- To start Row 2, chain 7 to form the first arch.
- Slip stitch into the 4th chain of the previous row’s arch to anchor it.
- Repeat chaining 7 and slip stitching into the 4th chain of the prior row’s arches across, building stacked arches.
- Finish the row with 33 slip stitches to close it smoothly.

Row 3
- Repeat the arch pattern: chain 7, slip stitch into the 4th chain of the previous row’s arch 8 times (creating arches).
- Then, work 25 slip stitches using back loop only (BLO) technique along the remaining stitches.
- This provides a firm bottom edge with subtle texture.
Row 4
- Begin by working 4 slip stitches (noted standard, not BLO).
- Complete 7 arches by chaining 7 and slip stitching into the 4th chain of the previous row, building the mesh on both sides.
- Work 33 slip stitches (standard) for reinforcement.
- Repeat 7 arches again along the next section.
- Finish the row with 29 slip stitches.
Row 5
- Start with 8 slip stitches (back loop only) to add elasticity.
- Follow with 6 arches (chain 7, slip stitch 4th chain) to continue the repetitive mesh.
- Work 41 slip stitches (BLO) for stability and structure.
- Make 6 arches again.
- Conclude the row with 45 slip stitches (standard to finish the edge).
Phase 2: Bag Assembly
- Fold the crocheted piece so that the wrong sides face each other, preparing to join the edges into a tubular shape.
- Use a joining pattern of 4 chains followed by a slip stitch in the 4th chain of the opposite edge to create a secure and stretchy seam.
- Repeat this chain and slip stitch join down the length of the edges until completely closed, forming the body of the bag.

Phase 3: Inner Pouch
Base
- With matching yarn, chain 28 stitches.
- Work 27 single crochets (sc) across this chain for the foundation row.
- For Row 2, work 27 single crochets again, forming a solid rectangular base.
Body
- Without slip stitching at the end of rounds, crochet 58 single crochets in continuous rounds around the base, increasing the stitch count to accommodate sides.
- Continue crocheting 14 rounds in this manner to build the pouch walls.
Finishing
- Work a final round of slip stitches in the back loop only (BLO) around the top edge to produce a neat and flexible border.
- Sew on a magnetic button to the pouch flap or opening for closure functionality.
- Place the pouch securely inside the net bag.

Assembly & Finished Size
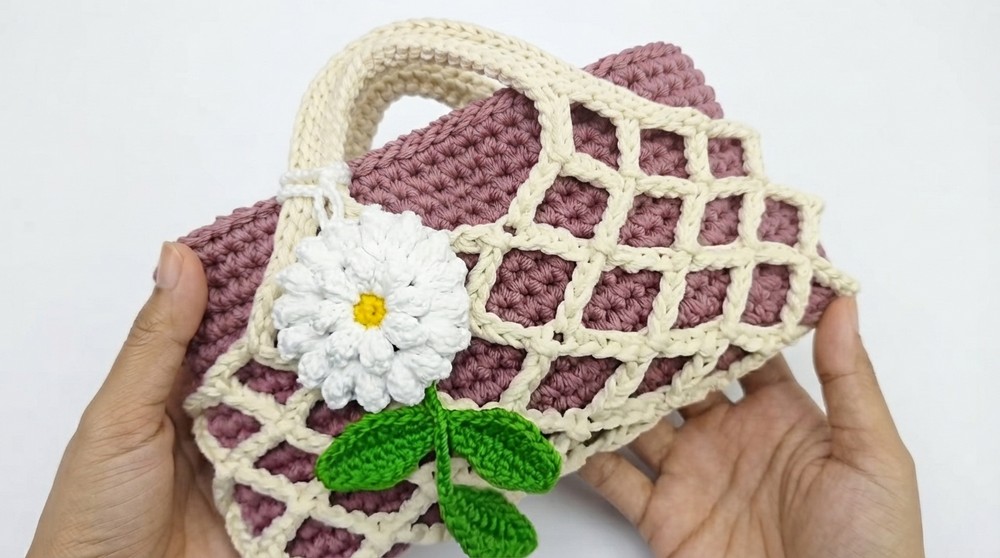
- The full bag measures approximately 35–40 cm in height when assembled with the pouch inside.
- The net body retains a flexible, airy structure suited for carrying light to medium objects.
- The pouch offers a durable solid storage compartment enclosed by the elegant net exterior.
- This combination makes the bag both visually striking and practical.
- The magnetic button attachment provides ease of access and security.
Conclusion
The Rajutan Whita crochet net bag with inner pouch is a stylish and functional accessory that masterfully blends open mesh crochet with secure storage. The double-stranded yarn along with back loop slip stitches lend strength and subtle texture to the mesh body, creating a lightweight yet dependable carrier. The soft inner pouch, crafted in tight single crochet rounds, offers organization and protection for essentials. By carefully following the systematic chain, arch, and joining sequences, crocheters can confidently produce a piece that’s both elegant and highly usable. Whether for casual outings or market shopping, this bag stands as a testament to the beauty and versatility of crochet artistry.