How to Crochet Easy Mickey Keychain for Tutorial
Learn how to crochet a beautiful, beginner-friendly bow mickey keychain using two yarn colors, a crochet hook, and a cutter with a step-by-step tutorial. The process involves crocheting three rectangular strips, crocheting a small bow with a magic circle, and assembling them with glue to form a lovely circular design.
Key stitches include magic circle, chain, double crochet, and slip stitch. The result is an elegant and easy-to-make accessory perfect for any crochet enthusiast. Follow through with us for the complete tutorial!

Crochet Mickey Keychain Tutorial
The video, posted by Club Craft Area, demonstrates how to create a beginner-friendly bow keychain. The final product is both cute and easy to make, making it accessible even for those new to crochet.
- Materials used include:
- Two yarn colors.
- A crochet hook.
- A cutter.
- Hot glue for assembly.
Skills Required
- The project requires knowledge of basic crochet stitches, including:
- Magic Circle.
- Slip Knot.
- Chain Stitch.
- Double Crochet.
- Slip Stitch.
Step-by-Step Instructions
1. Making Rectangular Strips
- Objective: Create three rectangular strips (two small, one longer) to form the base of the keychain.
- Start by creating a slip knot and crocheting chains to the desired length (shorter for two strips, longer for the third).
- Work in the second chain from the hook to create rows of double crochet across the length of the strip.
- Once complete, fasten off the yarn with a knot and snip the end. Repeat the process for all three strips:
- Two smaller pieces.
- One larger piece.

2. Creating the Bow
- Objective: Craft a small bow that will be used as a decorative element on the keychain.
- Begin with a magic circle and work the following pattern:
- Create loops with chains and double crochet within the circle.
- Slip stitch to secure the stitches.
- Repeat to form two equal sections of the bow.
- Pull the yarn to fasten the center of the magic circle and make adjustments.
- Wrap extra yarn around the center to give the bow a neat, finished look.
- Secure the yarn at the back of the bow.
3. Rolling the Rectangular Strips
- Objective: Roll the strips into circular shapes and assemble them for the keychain base.
- Apply hot glue along one edge of each strip.
- Roll the strip tightly to form a circular shape, ensuring the glue holds it together securely.
- Repeat this process for all three strips.
4. Assembling the Keychain
- Objective: Combine all the keychain components into a finished piece.
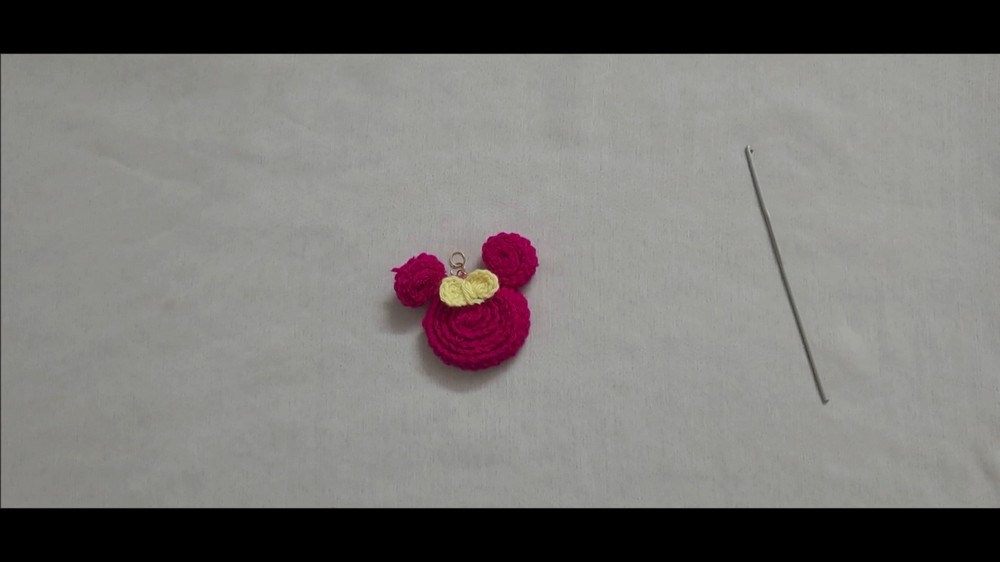
- Attach the rolled circles together using hot glue, with the larger circle in the middle and the smaller two pieces on either side.
- Use hot glue to attach the decorative bow to the center of the completed piece.
Final Touches
- After assembling all the components, ensure that the pieces are securely glued together.
- The finished product is a beautiful, handmade bow keychain.