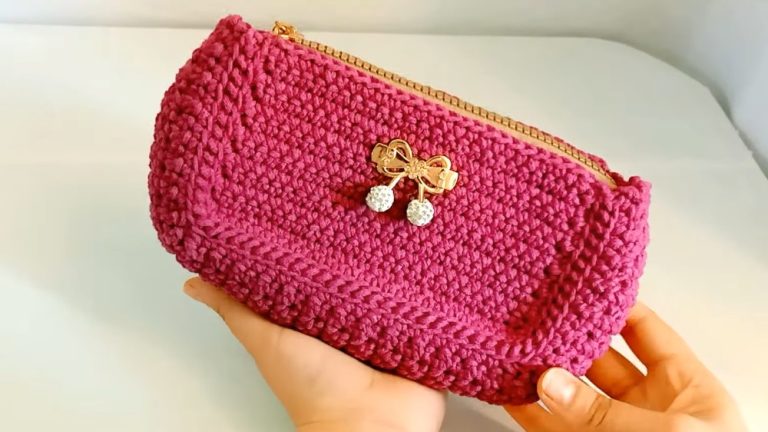
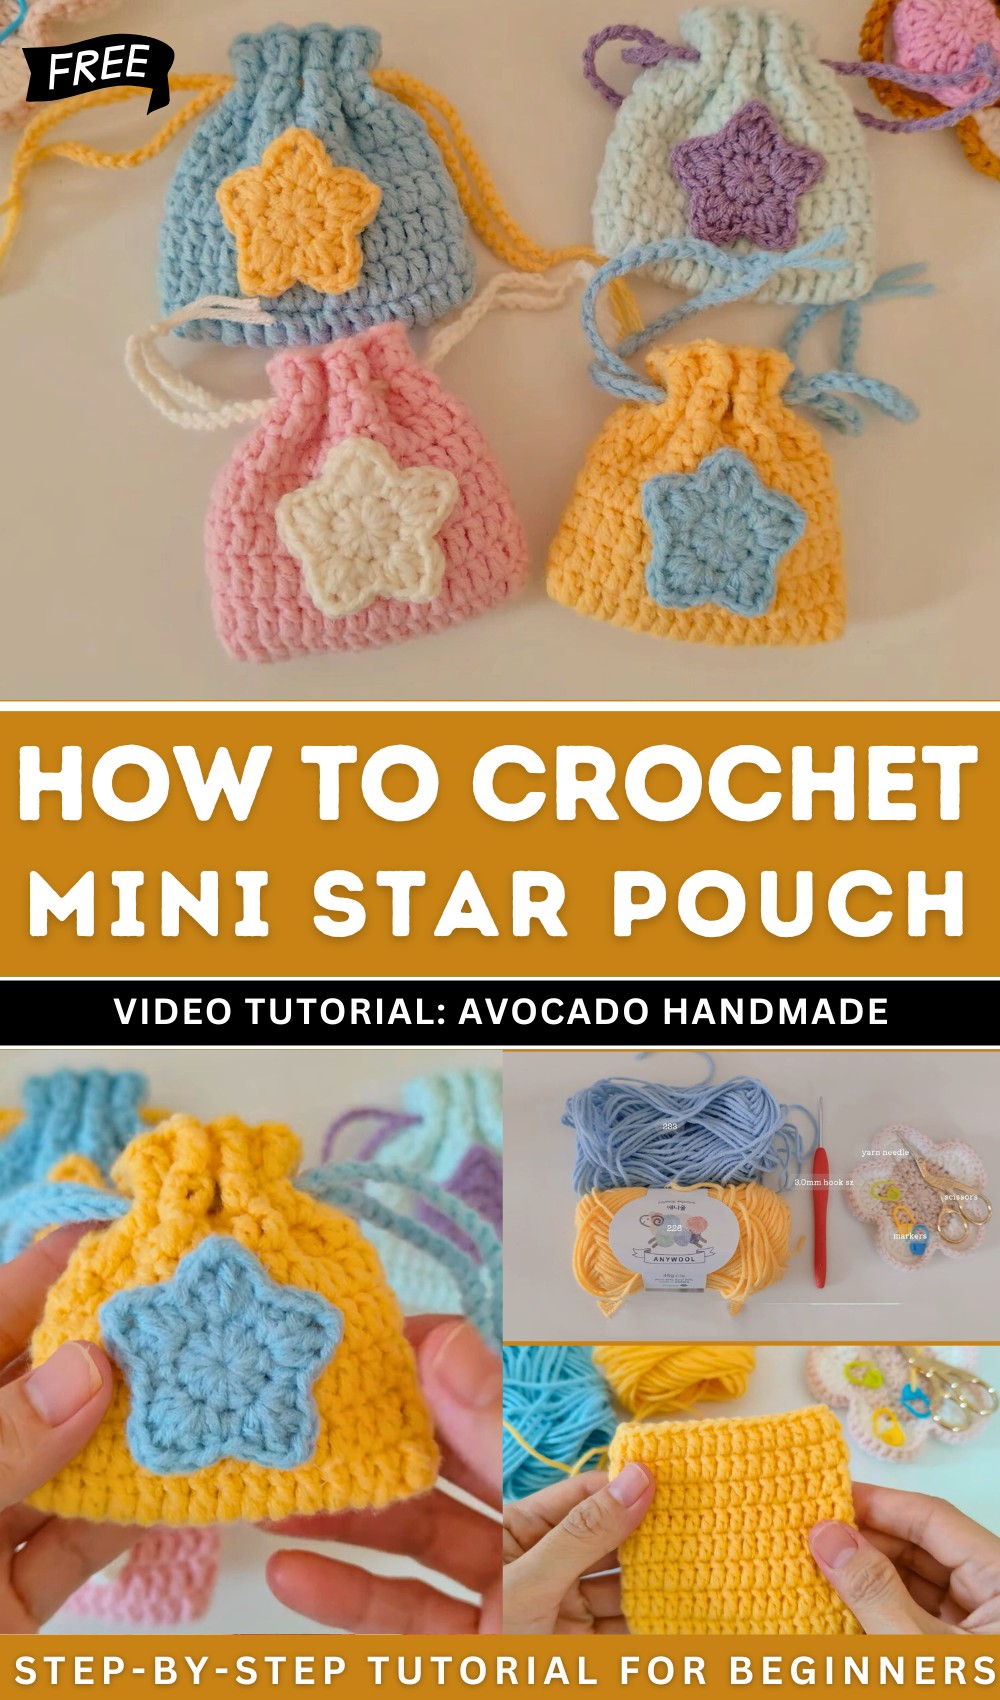
How to Crochet Easy Mini Star Pouch For Beginners

This tutorial teaches how to crochet a simple and stylish mini star pouch in any color, perfect for beginners. Using Anywool, the video demonstrates foundational techniques like making a slip knot, chains, double crochets, and slip stitches. The pouch size can be customized by adjusting chain counts, and additional rounds determine its height.
The drawstring and decorative elements, such as stars, add charm and functionality. Follow through with us for the complete tutorial!
Free Crochet An Easy Pouch
The video tutorial demonstrates how to crochet a simple and stylish pouch, making it an easy and quick project suitable for beginners. The creator uses Anywool from Wool Club as the primary material and provides all necessary details in the description box. The pouch can be customized in size, decoration, and design according to personal preferences.
Materials Needed
- Yarn: Anywool from Wool Club, or any medium-weight (worsted/aran) yarn
- Hook Size: 4 mm (G/6) crochet hook (adjust size based on your yarn and preference)
- Optional: Yarn needle for weaving ends, stitch markers, decorative buttons or appliques (e.g., small star)

Key Abbreviations (US Terms)
- ch: chain
- sl st: slip stitch
- dc: double crochet
- st(s): stitch(es)
- r: round/row
Special Notes
- The foundation chain determines the width of your pouch. To make your pouch larger or smaller, adjust the number of foundation chains.
- Crochet loosely for ease and flexibility.
- The chain 2 at the beginning of the round does not count as a stitch.
- Use stitch markers to easily identify the first and last stitches in rounds.
Pattern
Foundation Chain
- Make a slip knot.
- Ch 15 (loosely; do not pull tightly).
- Adjust the number of chains for your preferred pouch width.

Round 1
- Work into the back bump of the chain:
- Mark the first stitch location.
- Ch 2 (does not count as a stitch).
- Dc in marked stitch (first back bump of the chain).
- Mark this stitch, as it is your first double crochet.
- Dc in each ch across until you reach the last chain.
- In the last chain:
- Place 3 dc to round the edge.
- Turn your work so you are working down the other side of the chain.
- Dc in each ch along this side.
- Sl st to the first dc to join the round.
- Tighten your yarn tail after the slip stitch.

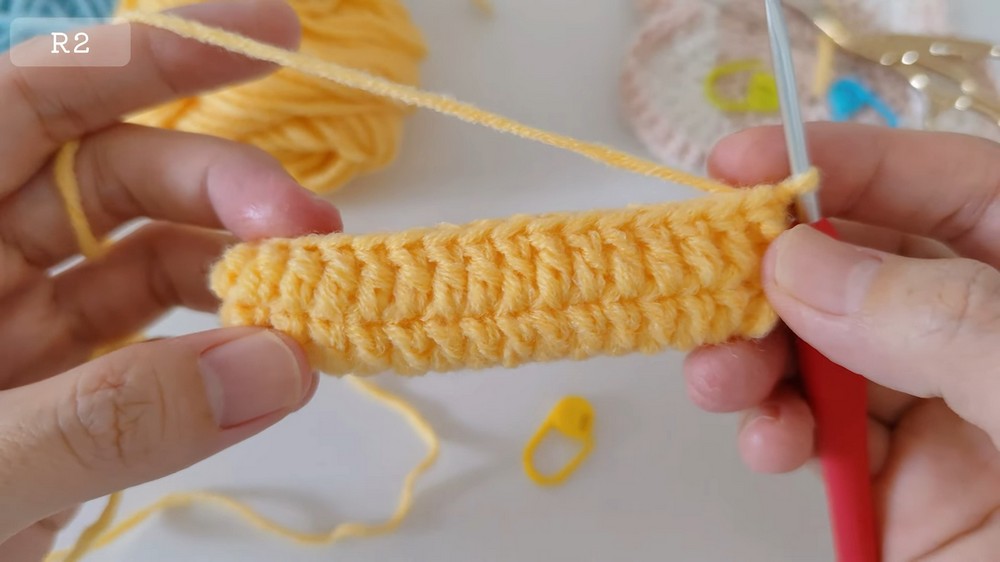
Rounds 2 and Onward
- Ch 1, pull up the loop slightly.
- Dc in each st around.
- Mark the first stitch if you find it helpful.
- Sl st to the first dc to join.
- Repeat Round 2 for additional rounds (R3 to desired height).
- For this example, 8 rounds total yields a pouch approximately 9 x 8.5 cm.
Finishing the Main Pouch
- After reaching your desired height, cut the yarn leaving a tail.
- Use a yarn needle to weave in yarn ends securely.

Drawstring
- Create a chain of your desired length (to wrap around the pouch and tie securely).
- You can make one or two drawstrings, depending on personal preference.
- Weave the drawstring(s) through the stitches near the top of the pouch.
- You can thread it through a single round or between two rounds.
- For 2 strings, thread each in opposite directions for easier cinching.
Optional Decoration
- Attach decorative items such as a crochet star or button to personalize your pouch.

Conclusion
This easy and quick crochet pouch is perfect for beginners and can be customized in size, color, and decoration. Its simple construction and flexible pattern allow you to create a variety of cute and practical pouches for everyday use.
Pattern Correction & Tips
Correction
- Chain 2 at the start of the round does not count as a stitch. Always place your first double crochet in the marked or indicated stitch.
Tips
- Mark your rounds: Use a stitch marker for the first and last stitches to keep your work even.
- Loosen up: New crocheters may crochet too tightly; work loosely for best results.
- Personalize: Feel free to use different yarn textures, colors, or add appliques for extra flair.
- Adjust size: Increase or decrease foundation chain and round number to adapt pouch size.