3D Bag Crochet Pattern: Free & Easy Guide
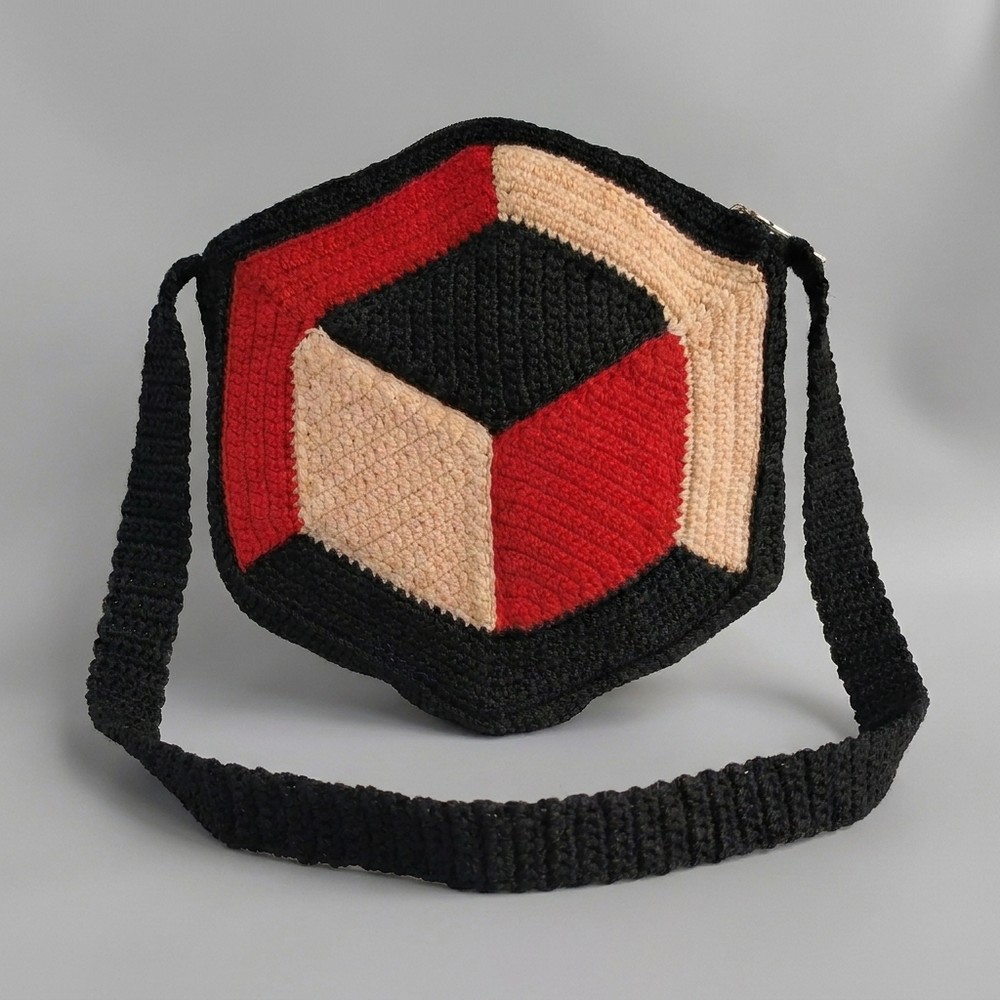
Enhance carrying convenience through this Free Crochet 3D Bag Pattern that’s created to provide sturdy hold and distinctive visual appeal for daily use.
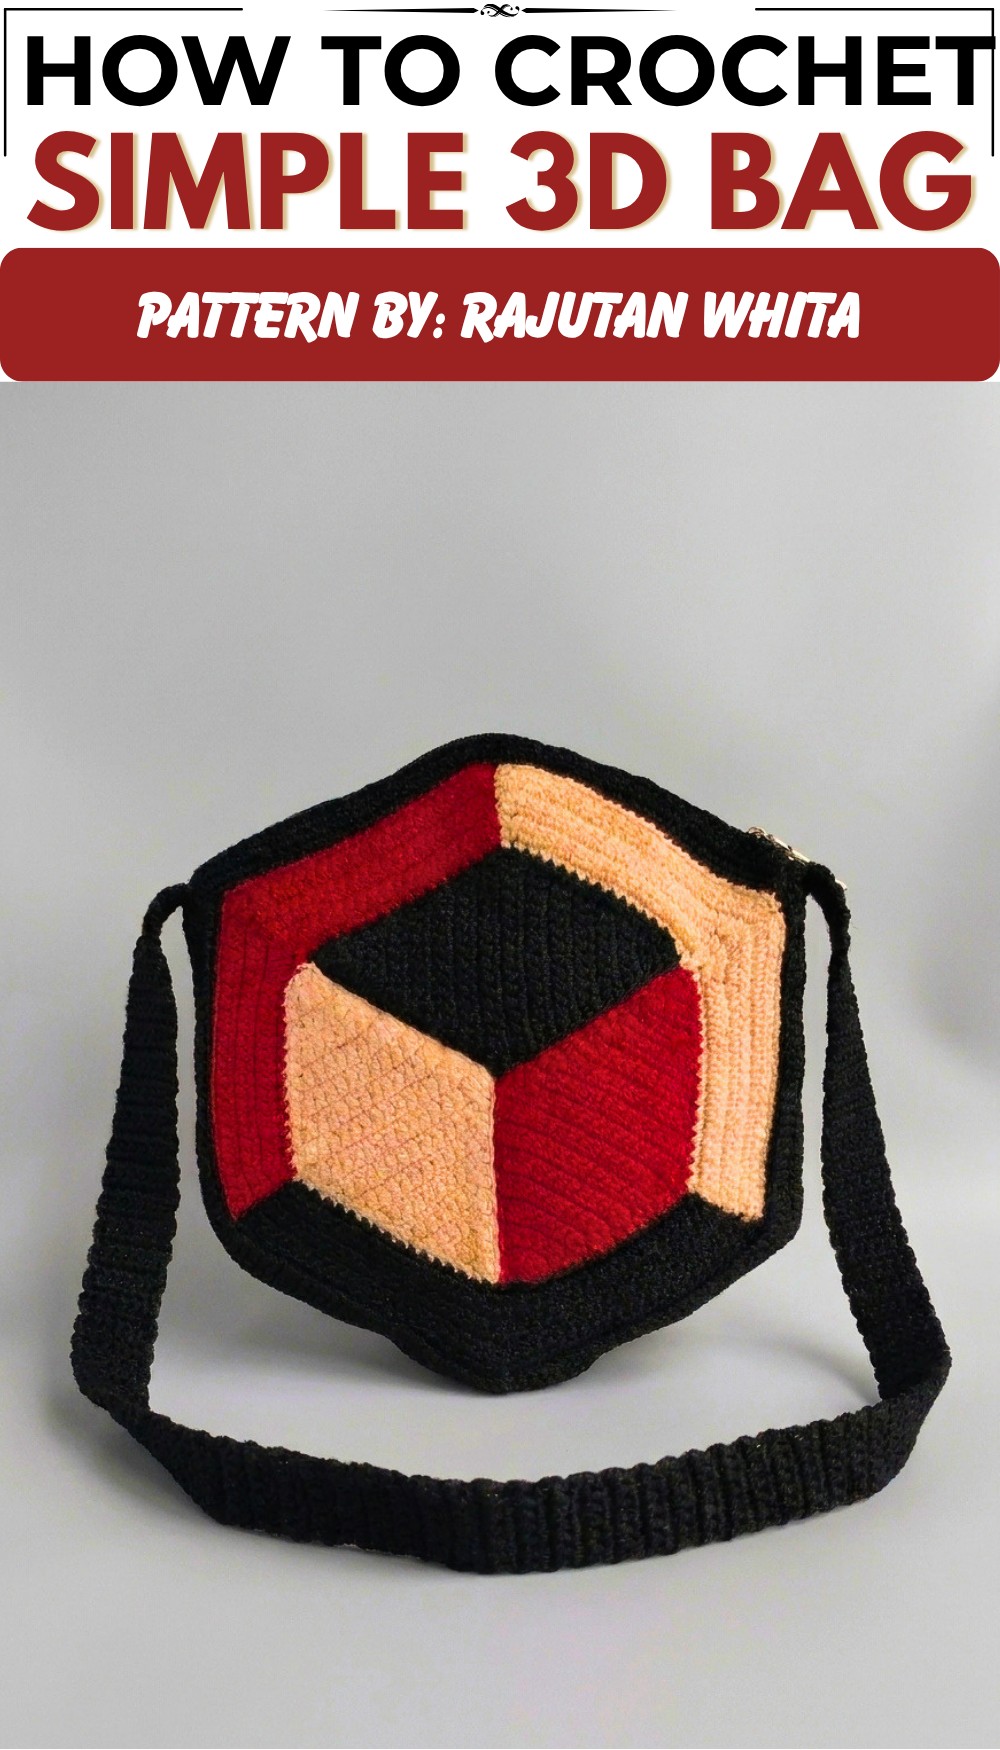
A stylish crochet bag can bring both beauty and everyday use to your wardrobe. The Free crochet 3D Bag pattern is a lovely choice for anyone who enjoys bags with a raised look and a fun shape, and Rajutan Whita shares the project as a helpful source of crochet inspiration.
The bag has a neat shape with a special 3D look that gives the surface more depth. Its raised design makes it stand out from plain crochet bags. The soft texture adds warmth, while the clean shape keeps the style easy to match with different outfits. It has a fresh handmade feel that can make a simple look more interesting.
Free 3D Bag Crochet Pattern for Everyday Use
This bag can be carried for shopping, casual outings, visits, or a relaxed day with friends. It can hold useful daily items while also working as a pretty fashion piece. The 3D surface is the main detail that gives the bag its own style and makes it fun to carry.
A crochet bag like this can also make a thoughtful gift. It may suit a birthday, holiday, special event, or simple surprise for someone who loves handmade fashion. Its useful purpose means the gift can be enjoyed often instead of sitting away as a decoration.
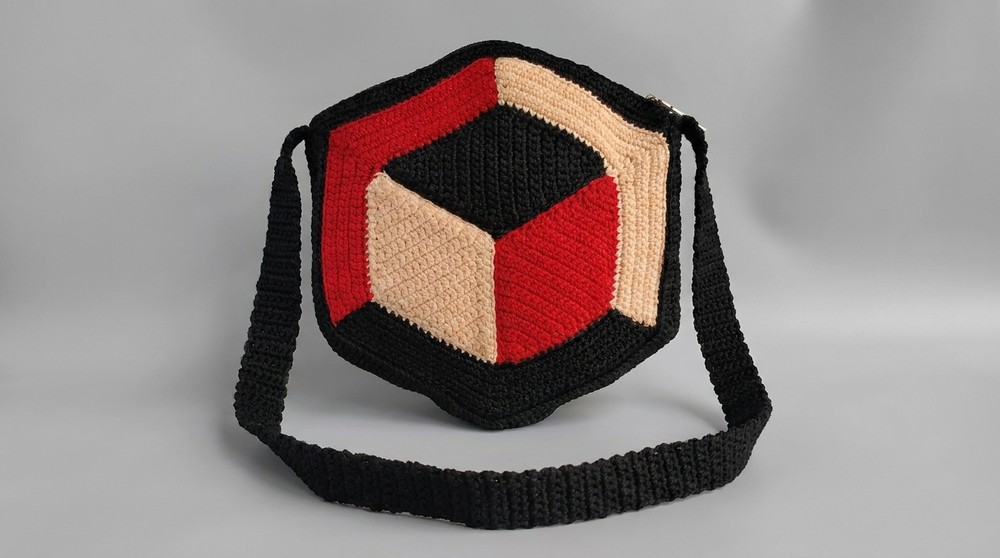
Another nice feature is its mix of simple beauty and eye-catching detail. The raised texture gives the bag a lively look, while the overall shape keeps it practical. It can work with casual clothes and can also add a handmade touch to a more dressed-up outfit.
For crochet fans, this project is a fun way to enjoy a bag that feels different from common styles. The Free crochet 3D Bag pattern brings together useful space, soft texture, and a standout raised design, making it a charming accessory for everyday use or a special handmade gift.
Crochet 3D Geometric Bag Pattern for Beginners
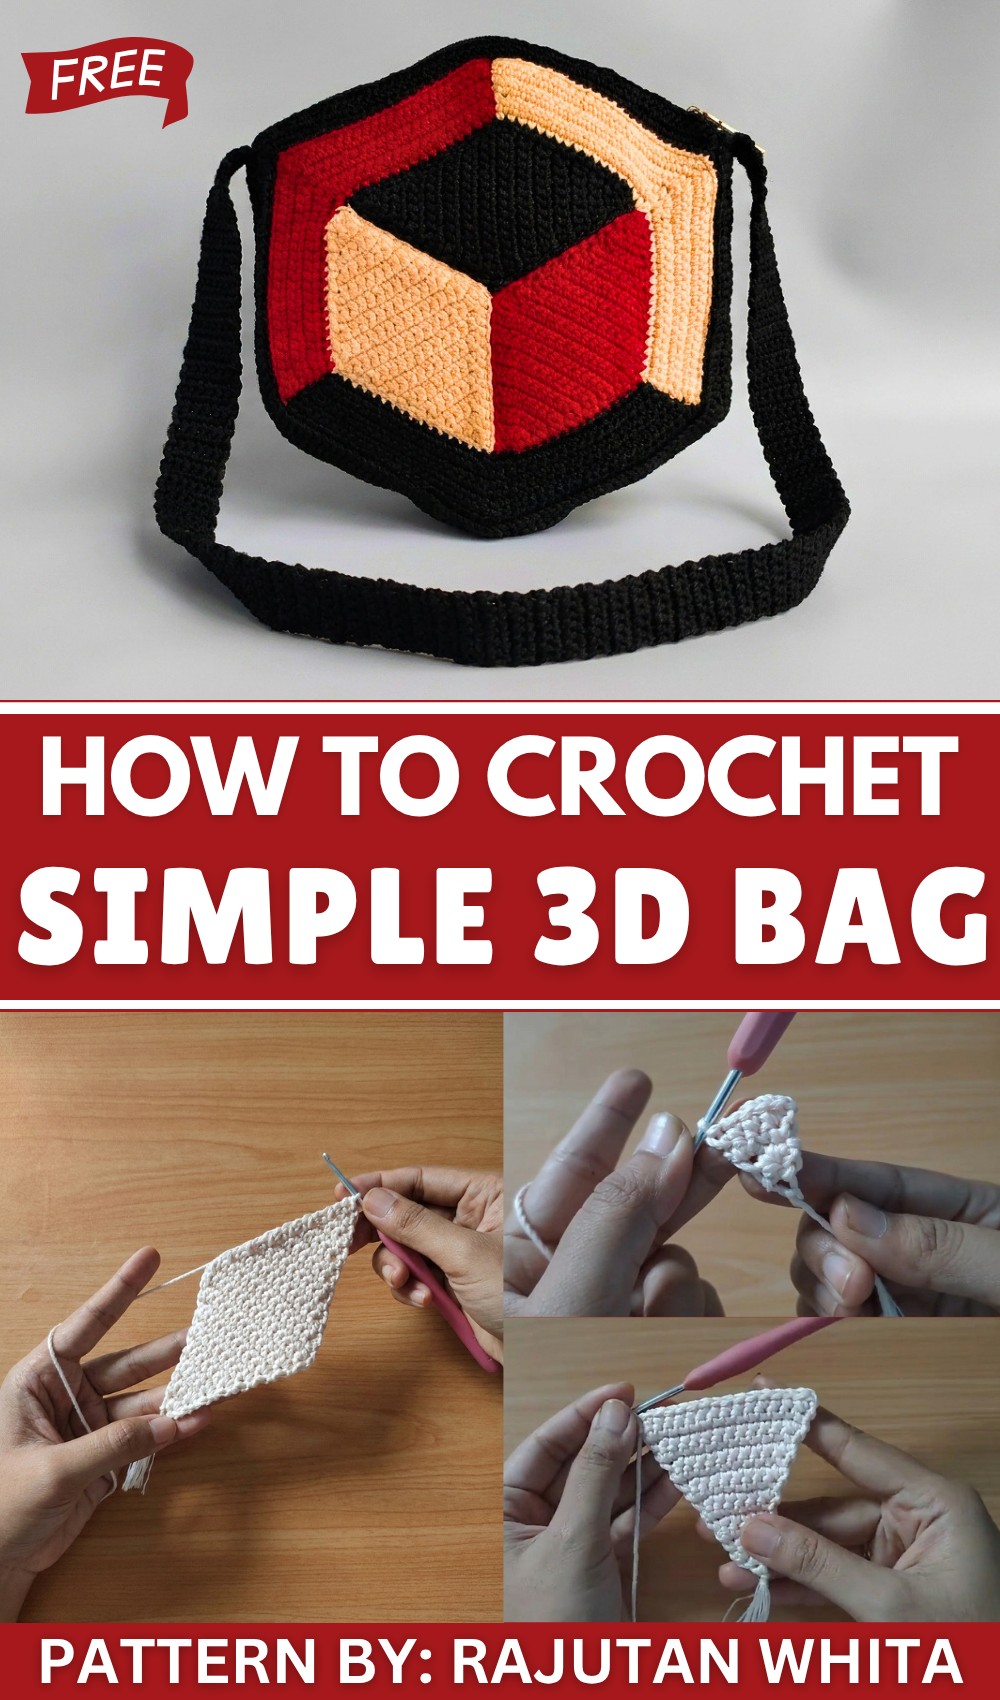
This beginner-friendly pattern will guide you through making a unique three-dimensional crochet bag with beautiful geometric shapes. The bag is made by crocheting colorful triangles, joining them into rhombus shapes, assembling the panels, adding a base, zipper panels, and a sturdy handle. Clear instructions and stitch highlights will help you confidently complete this stylish and functional bag.
Pattern Highlights
- Construct colorful triangular panels with single crochet (SC) and increases.
- Join triangles into rhombus (diamond) shapes.
- Sew six rhombus panels into the bag body with neat assembly.
- Crochet a firm base to give the bag structure.
- Add zipper panels for closure and a handle for carrying.
- Insert foam and fabric lining for durability and shape.
Notes
- Maintain even tension for uniform triangle shapes.
- Use tapestry needle and thread for strong, neat sewing.
- Adjust handle length to your comfort.
- Secure yarn ends to avoid unraveling.
Skill Level
Beginner to Intermediate
Skills needed:
- Chain (CH)
- Single Crochet (SC)
- Increase (2 SC in the same stitch)
- Slip Stitch (SLST)
- Basic sewing techniques
Materials Required
- Polycherry yarn in 3 colors (e.g., cream, red, black)
- Crochet hook 3.0 mm (size 5)
- Scissors
- Lighter or match (to finish yarn ends)
- Tapestry needle and sewing thread
- Foam for lining
- Fabric for lining
- Zipper of matching length
Measurements
| Part | Approximate Size |
|---|---|
| Triangle panel | 10 cm per side |
| Rhombus shape | Formed by two triangles |
| Base | 4 cm wide |
| Finished bag | 25 cm wide × 15 cm high |
| Handle | Customizable length |
Stitch Abbreviations
| Abbreviation | Stitch | Description |
|---|---|---|
| CH | Chain | Yarn over, pull through loop |
| SC | Single Crochet | Insert hook, yarn over, pull through 2 loops |
| SLST | Slip Stitch | Insert hook, yarn over, pull through both loops on hook |
| Inc | Increase | 2 SC stitches in the same stitch |
Step-by-Step Crochet Pattern
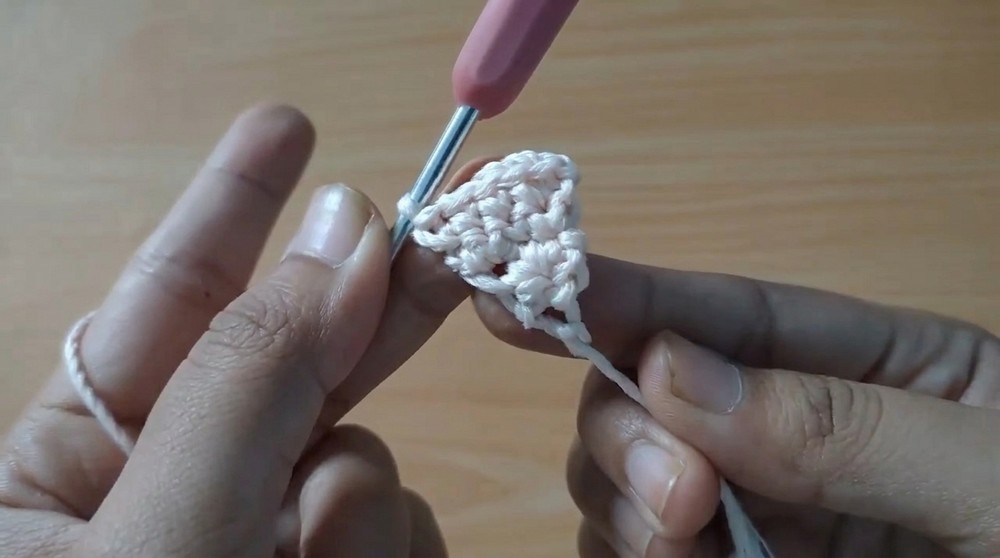
Step 1: Make One Triangle Panel
- Foundation Chain:
- Chain 2.
- Row 1:
- Work 2 SC in the 2nd chain from hook (this is your first increase).
- Total stitches: 2 SC.
- Row 2:
- CH 1, turn.
- Work 2 SC in first stitch.
- Work 1 SC in next stitch.
- Work 2 SC in last stitch.
- Total stitches increase by 1.
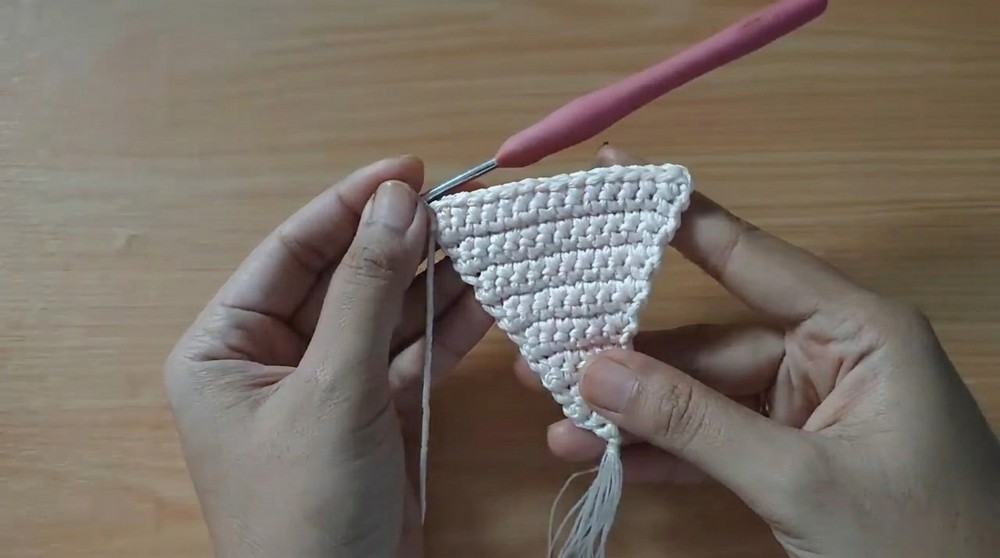
- Rows 3 to 15:
- CH 1, turn.
- Work 2 SC in first stitch (increase).
- Work 1 SC in each stitch across until last stitch.
- Work 2 SC in last stitch (increase).
- Increase total stitch count by 1 per row.
- Continue until you have 15 rows completed, forming a triangle shape.
- Finish:
- Fasten off and weave in ends.
Step 2: Make 12 Triangles in 3 Colors
- Make 4 triangles in each color (for example, cream, red, black).
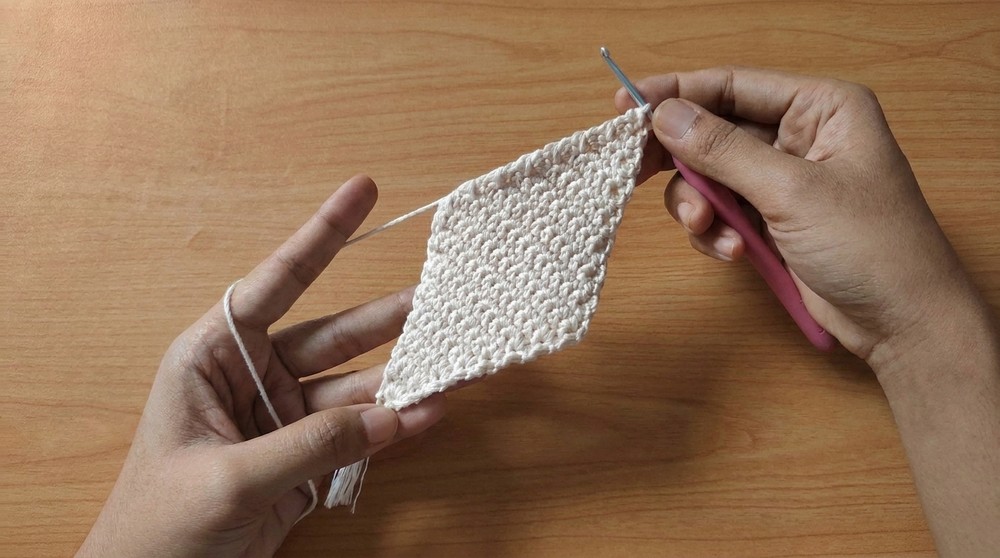
Step 3: Join Two Triangles into One Rhombus
- Place two triangles with right sides facing each other.
- Using matching yarn and tapestry needle, sew along one slanting edge with backstitch or whipstitch.
- Repeat to make 6 rhombus shapes (2 in each color).
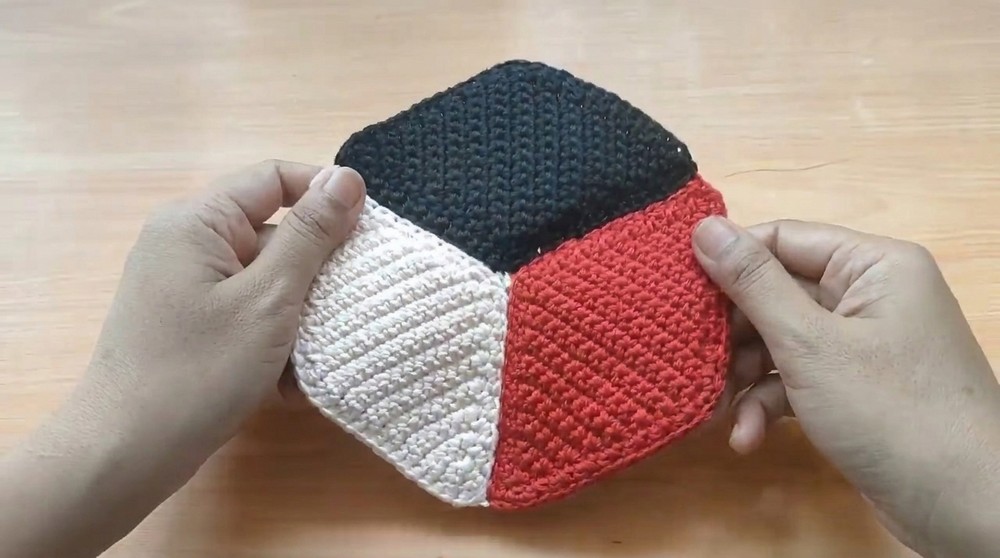
Step 4: Assemble the Bag Body
- Arrange rhombus shapes to your liking (e.g., alternating colors).
- Sew the rhombus panels together along adjacent edges to form the bag body.
- Make sure seams are tight but not stretched to preserve 3D shape.
Step 5: Crochet the Bag Base
- Foundation chain: Chain 8.
- Row 1: SC in each chain across (8 SC).
- Subsequent rows:
- CH 1, turn.
- Work SC across same number of stitches.
- Repeat until base is approximately 4 cm wide or matches the bag bottom circumference.
- Fasten off and weave in ends.
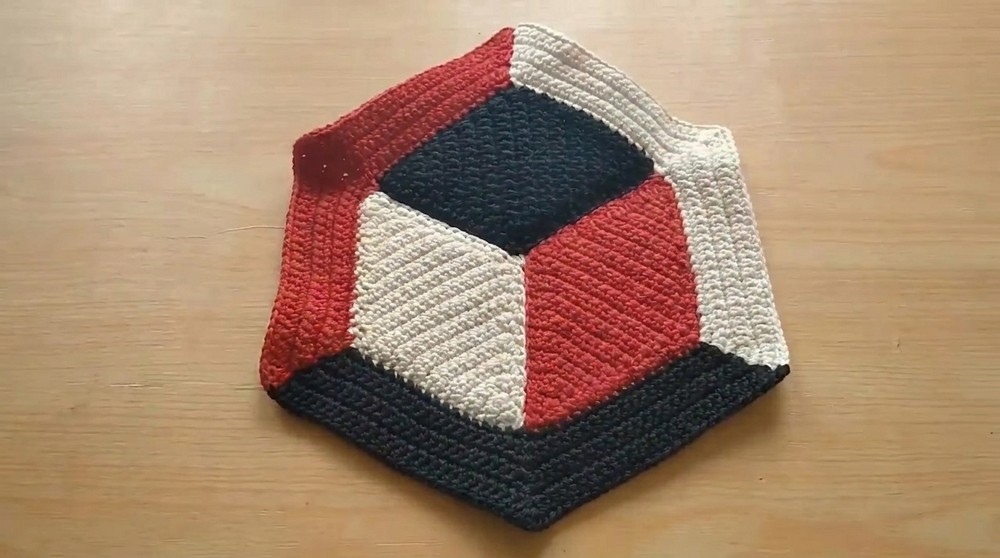
Step 6: Crochet Zipper Panels
- Crochet two rectangular strips with SC matching bag top width and zipper length.
- These will be sewn on either side of the zipper.
Step 7: Create Bag Handle
- CH desired length for handle.
- Work SC back and forth along chain for a sturdy strap.
- Fasten off and weave in ends.
Step 8: Final Assembly
- Sew zipper between the two zipper panels using needle and thread.
- Attach zipper panels securely to the top edges of the bag body.
- Sew base panel to the bottom of the bag.
- Insert foam inside the bag for structure.
- Sew fabric lining inside the bag by hand for a clean finish.
- Attach handle ends firmly to the bag body.
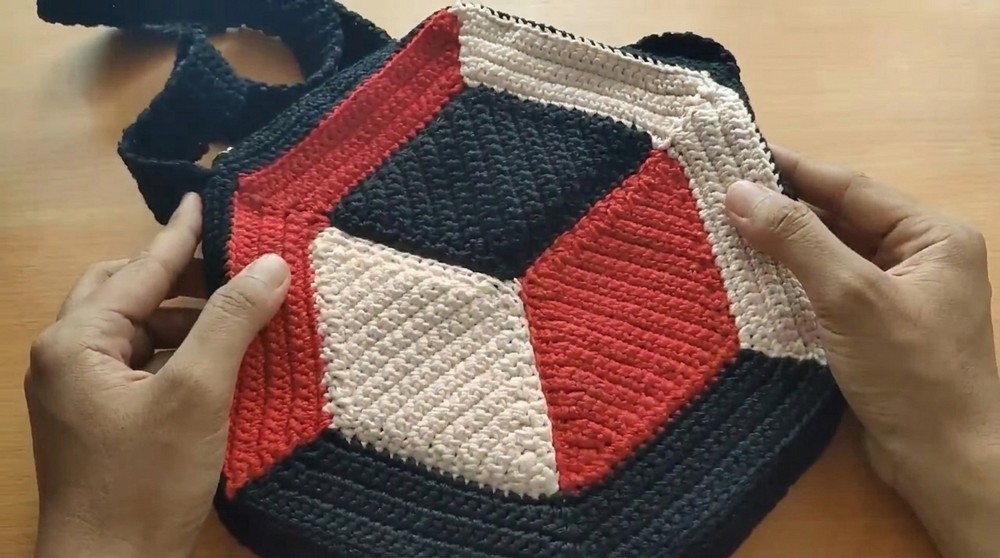
Finishing Touches
- Weave in all yarn ends securely.
- Use a lighter to carefully seal yarn tails to prevent unraveling.
- Shape the bag gently, emphasizing the 3D geometric pattern.
Final Size and Use
- The completed bag measures approximately 25 cm wide by 15 cm high, with a 4 cm base thickness.
- The foam lining ensures durability and shape retention.
- Colorful geometric rhombus panels create a uniquely stylish accessory suitable for everyday use or gifting.
Conclusion
By following these clear and simple instructions, beginners can create an elegant and structurally sound 3D crochet bag. The pattern’s combination of basic stitches, increasing rows for shaping, and color assembly provides a fantastic learning experience. Careful sewing and finishing elevate the final product into a beautiful and practical accessory.