How to Crochet A Flat Little Apple Keychain for Beginners

With a stitch-by-stitch tutorial, learn how to crochet a flat apple using milk cotton yarn and a 2.0 mm crochet hook. The project begins with creating the main body through multiple rounds of stitches, including locking, short, medium-long, and long stitches, arranged sequentially for shaping and texture.
The final row adds detail to complete the apple’s flat structure. The second part covers making leaves using locking stitches, long stitches, and decorative three-roll long stitches with dog-tooth patterns. So, follow through with us for the complete tutorial.

Crochet A Flat Little Apple Keychain
The tutorial is clearly structured, breaking down the process of creating the apple’s main body and its leaves before moving on to the finishing touches. The creator uses a variety of stitches, which are demonstrated clearly throughout the video, and provides a clear guide on how to handle the yarn and hide loose ends for a neat and professional finish.
Materials and Tools
The creator uses a minimal set of materials and tools for this project. The main material is four strands of milk cotton yarn, which is a soft and durable choice for amigurumi and small projects. The crochet hook used is a 2.0 mm hook, which is a small size that helps create a tight, dense fabric, preventing any stuffing from showing through (though no stuffing is used for this flat project).

In addition to the yarn and hook, you will also need a sewing needle to weave in the ends and a pair of scissors to cut the yarn.
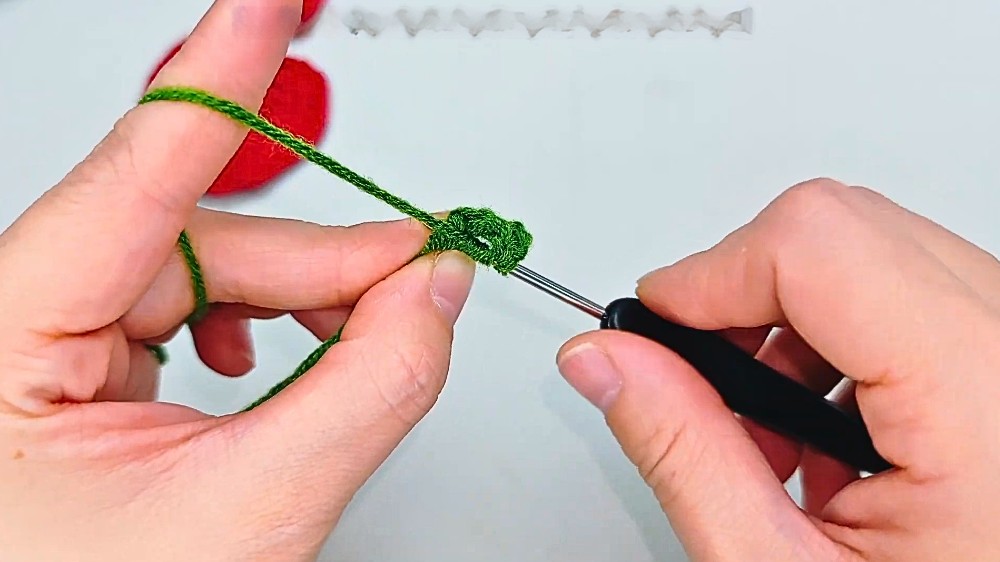
Part 1: Crocheting the Main Body of the Apple
The tutorial for the main body of the apple is divided into four distinct rounds. The creator uses a mix of stitches to create the apple’s characteristic shape, which is wider at the top and narrows slightly toward the bottom.
-
Round 1: This is the foundational round for the apple. It starts with a slip knot and a locking stitch, which secures the initial loop. The video then guides you through a series of pull stitches and long stitches to form the initial curve of the apple’s shape. The combination of these stitches is crucial for establishing the base and the initial widening of the apple.
-
Round 2: In this round, the creator continues to build on the apple’s shape. The pattern includes locking stitches, short stitches, medium-long stitches, and more long stitches. The use of these different stitch heights allows for a gradual increase in the width of the apple, creating a natural, rounded form.
-
Round 3: The third round continues the shaping process. The pattern for this round is a repetition of various stitches, including locking stitches and long stitches, to further define the apple’s form.
-
Round 4: This is the final row for the main body. It consists of locking stitches and pull stitches, which help to close the shape and prepare it for the next step.
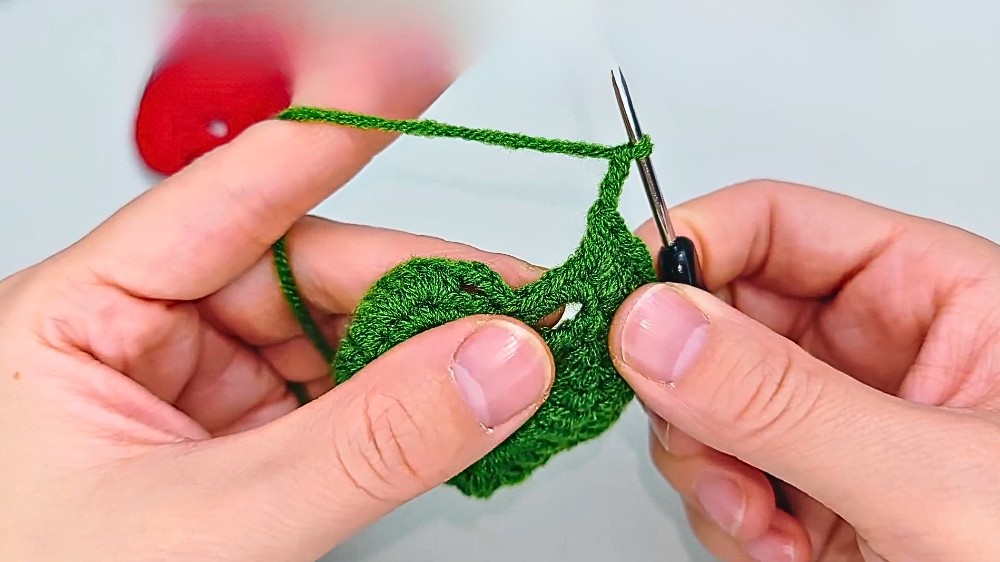
Part 2: Crocheting the Leaves
Once the main body is complete, the video moves on to creating the leaf, which adds a decorative and realistic touch to the keychain.
-
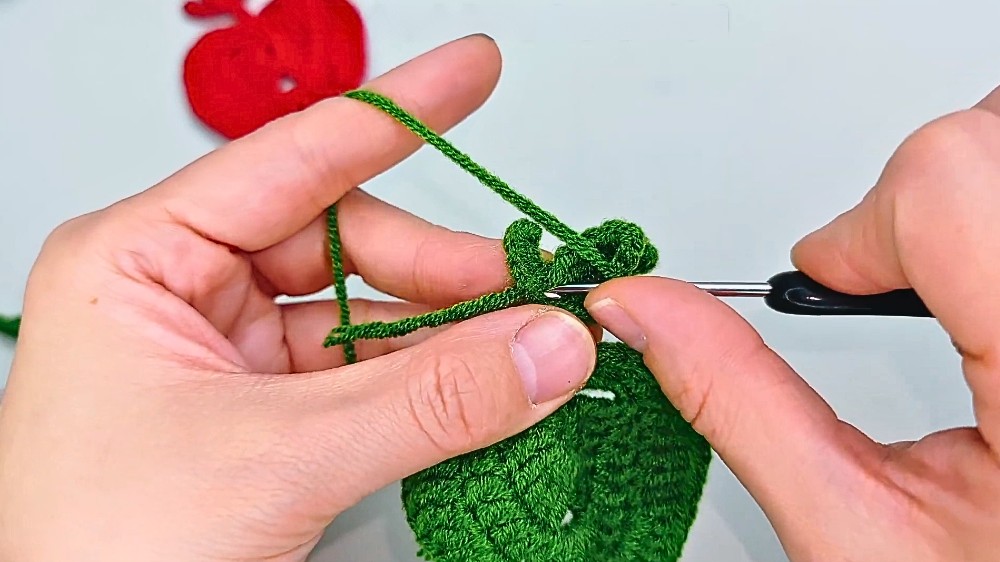
Joining the yarn: The creator shows how to seamlessly join the green yarn for the leaf by inserting the needle into the fifth stitch from the end of the apple’s body.
-
Crocheting the leaf: The leaf is made using a combination of stitches.
-
The pattern includes a series of locking stitches, long stitches, and a unique three-roll long stitch, which helps create the pointed tip of the leaf.
-
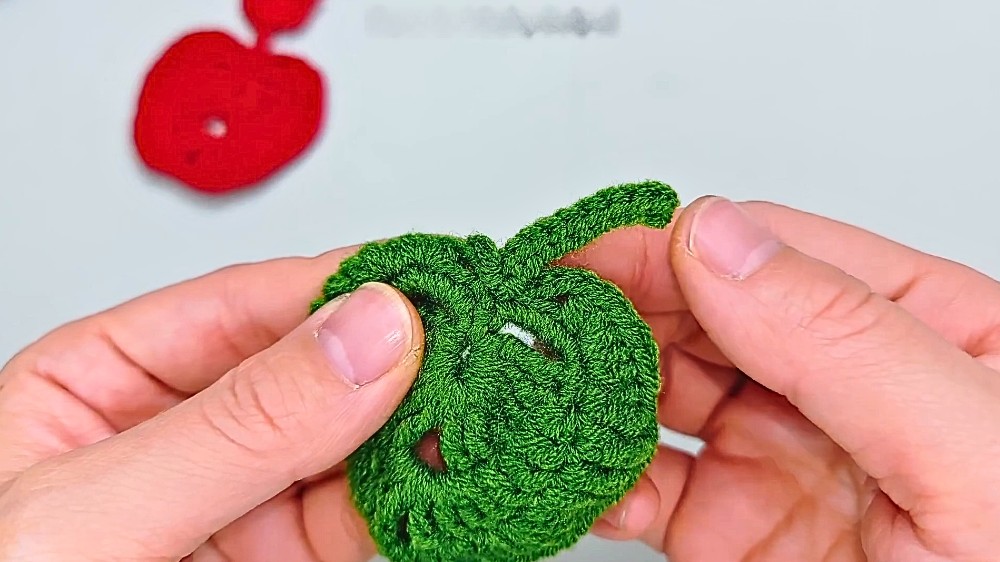
Finishing the leaf: The video shows how to make the final stitches to complete the leaf and hide the loose ends, ensuring a clean and polished look.

Part 3: Finishing and Assembly
The final part of the tutorial focuses on how to finish the project neatly, which is essential for a high-quality keychain.
-
Hiding thread ends: The creator demonstrates how to effectively hide all the loose yarn tails. This is done by weaving the ends back into the stitches on the wrong side of the work, which secures them and prevents the project from unraveling.
-
Final touches: Once all the ends are hidden, the flat apple is complete and ready to be used as a keychain. The tutorial ends with a final look at the finished product, highlighting the clean finish and the successful execution of the pattern.