How To Crochet A Granny Square Border: Easy For Beginners

With a tutorial, learn how to add a simple and elegant border to a granny square, perfect for various crochet projects. Starting with a slip knot, the process involves single crochets, treble crochets, and double crochets, all worked in a repeated pattern around the square. The creator emphasizes hiding yarn tails as you go and checking for mistakes frequently to ensure consistency.
This beginner-friendly border is quick to make, visually appealing, and an excellent finishing touch for crochet designs. So, follow through with us for the complete tutorial.

Crochet A Granny Square Border Tutorial
The video demonstrates how to add a simple and elegant border to a granny square, offering a versatile design that can be applied to various crochet projects. This tutorial is beginner-friendly, quick to complete, and ensures a polished finish for your crochet work.
Materials and Preparation
- Start with a completed granny square.
- Prepare your yarn and crochet hook.
Steps to Add the Border
-
Starting the Border
- Begin by making a slip knot.
- Insert the hook at the initial opening of the granny square and make one single crochet.
-
Creating the Treble Crochet Section
- Insert the hook into the next opening and make one treble crochet.
- Work over any short yarn tails to hide them as you crochet.

-
Building the Double Crochets
- Chain three stitches.
- Make six double crochets into the treble crochet you just created.
- After completing the double crochets, make one single crochet in the same opening.
- Repeat this sequence at the next opening of the granny square.
-
Repetition Around the Square
- Continue the pattern—treble crochet, chain three, and six double crochets—all the way around each side of the granny square.
- Regularly check your work for accuracy after completing each segment to avoid mistakes.

Adjustments and Error Checking
- If you notice any inconsistencies (e.g., skipped stitches), rectify them immediately to ensure uniformity.
- The creator emphasizes the importance of checking your work frequently to avoid errors that might require restarting the project.

Finishing Off
-
Completing the Border
- Once the border is complete, finish the last section by inserting your hook into the first single crochet you made at the beginning.
- Make a slip knot and chain one to secure the work.

-
Final Touches
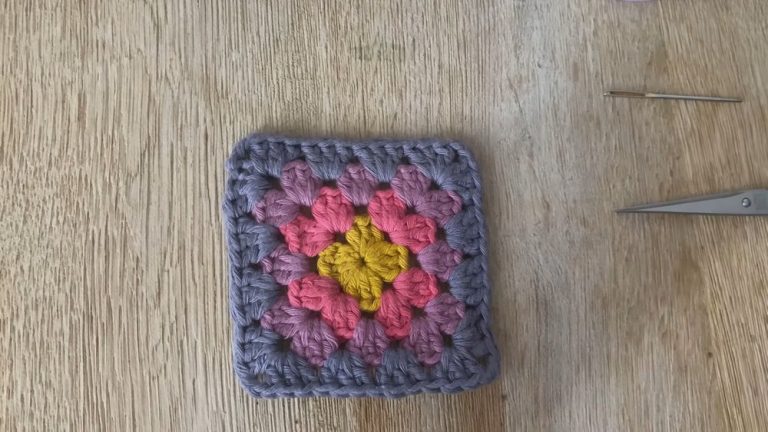
- The finished border enhances the appearance of the granny square with a decorative yet simple design.
- The result is a beautiful and polished square that can be used for pillows, blankets, or other creative projects.

Key Takeaways
- This border design is ideal for beginners because it is straightforward and does not require complex techniques.
- It adds a visually appealing finish to any granny square while remaining quick and easy to make.