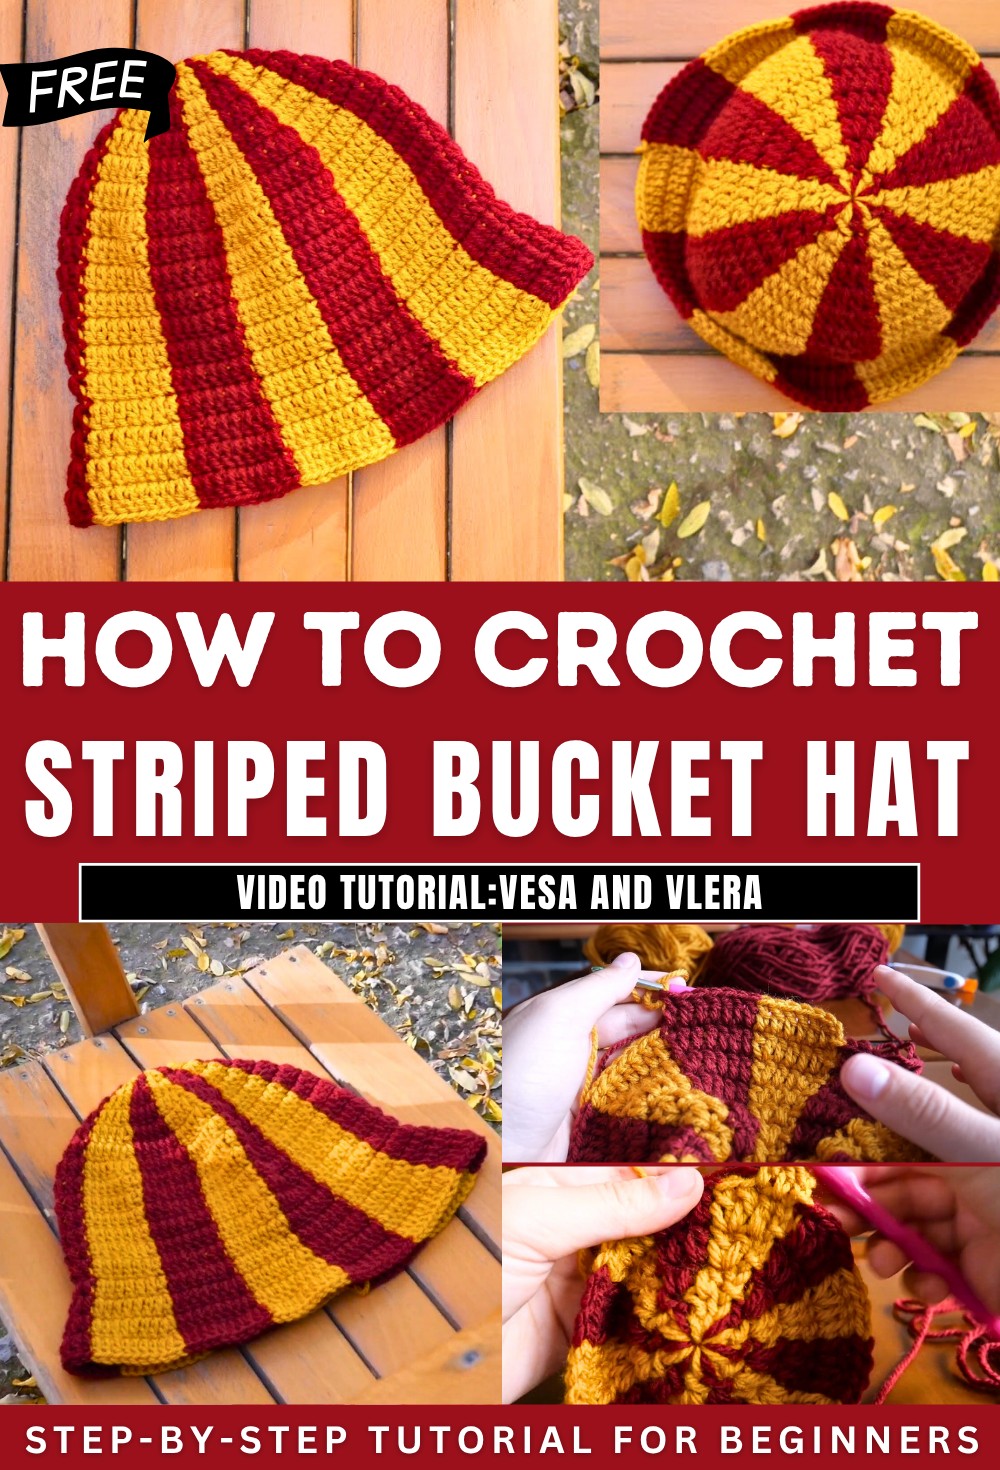
How to Crochet A Striped Bucket Hat for Summer

Learn how to crochet a checkered pattern hat inspired by Harry Potter using a magic ring technique, perfect for beginners. It provides a step-by-step tutorial, starting with selecting the correct yarn and tools. The process involves alternating colors to create the checkered design, increasing stitches across rows, and transitioning smoothly between colors. The tutorial is detailed, making it ideal for beginners!
Checkered Double Crochet Hat Pattern
Materials
- Yarn: DK or light worsted yarn, two colors (Color A: Burgundy/Red, Color B: Yellow/Gold)
- Hook: 4.5 mm crochet hook
- Yarn Needle: for weaving in ends
- Scissors
- Stitch Marker: optional
- Note: Yarn recommended for 3.5–4 mm needles or 4–5 mm hook
Abbreviations
- MR: Magic ring
- ch: Chain
- dc: Double crochet
- inc: Increase (two dc in same stitch)
- sl st: Slip stitch
- st(s): Stitch(es)
- FO: Fasten off
Special Notes
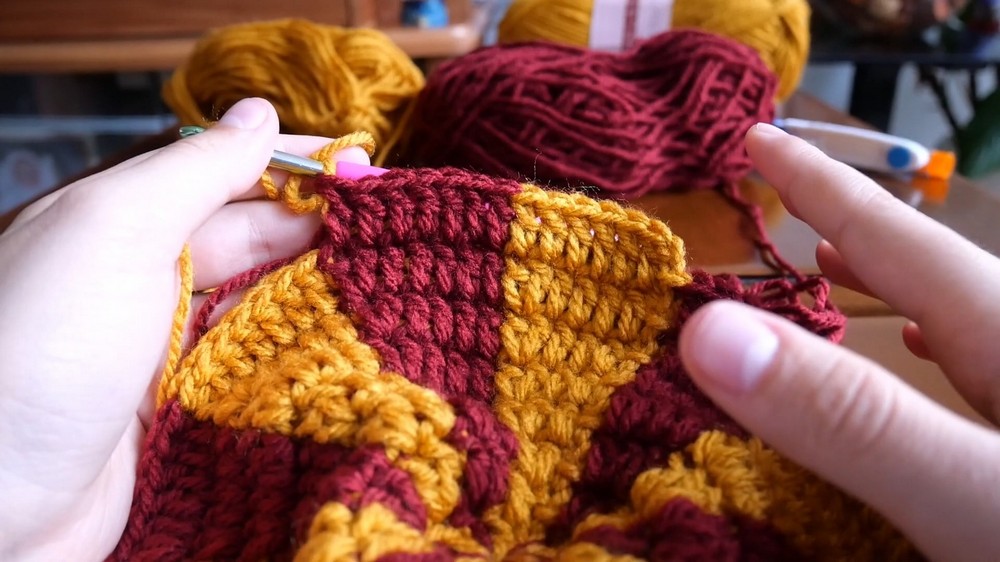
- Color Changes: Begin each double crochet using the working color; finish the stitch with the next color. This technique creates a smooth transition.
- Carry Yarn: Hold the unused yarn along the top of the previous row and crochet over it to hide and carry it.
- Counts: Pattern alternates colors every stitch; make sure color counts are correct as you increase.
- Hat Length: Finished hat measures ~23 cm (9 in) long.
Pattern Instructions
Brim/Top – Foundation
- With Color A, make a MR.
- Ch 2 (counts as first dc).
- Color Change:
- Begin first dc of Round 1 in Color A, finish stitch with Color B.
- Continue alternating colors as described below.

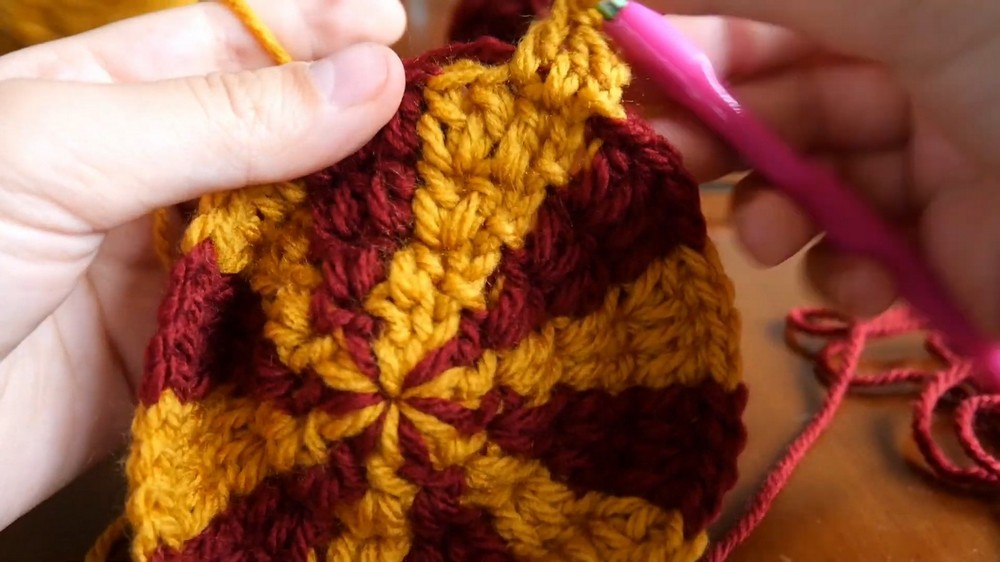
Round 1 (Increase):
- Work 12 dc into the ring, changing colors as you go:
- Start each dc with current color, finish dc with the other color.
- Aim for alternating stitches (A, B, A, B, …).
- Pull ring tight.
- Finish the last dc with Color A.
- Join to top of ch 2 with sl st.
- Ch 2 (begin next round).
Round 2 (Increase):
- In each stitch:
- First st of round: Begin with working color, finish with alternate color.
- 2 dc in each st around, alternate colors with each dc.
- Join with sl st to 2nd ch, ch 2.
Round 3 (Increase):
- Pattern: (1 dc, inc) around.
- In first stitch, 1 dc, change color when finishing dc.
- In next stitch, 2 dc (inc), alternate color on the second dc of each pair.
- Repeat entire round to achieve checkered look.
- Join, ch 2.
Round 4 (Increase):
- Pattern: (2 dc, inc) around.
- In first two stitches, 1 dc each, alternating colors as before.
- In third stitch, 2 dc (inc), alternate color.
- Repeat round, join, ch 2.
Round 5 (Increase):
- Pattern: (3 dc, inc) around.
- 1 dc in first three stitches, 2 dc (inc) in fourth, alternating colors.
- Repeat, join, ch 2.
Round 6 (Increase):
- Pattern: (4 dc, inc) around.
- Four single dc, alternate colors, inc in fifth st.
- Repeat, join, ch 2.
Round 7 (Increase):
- Pattern: (5 dc, inc) around.
- Five dc, change color each stitch, inc in sixth.
- Repeat, join, ch 2.
Check Your Work
- At this stage, you should have 7 consecutive stitches of each color per color block.
Rounds 8–13 (No Increase):
- Ch 2, 1 dc in each stitch around, alternating colors every stitch as before.
- At the end of each block (7 stitches per color section), change color to continue checkerboard pattern.
- Continue for 6 rounds without increases.
Round 14 (Front Loop Only):
- Ch 2
- Work dc in FRONT LOOP ONLY of each st for entire round, alternating colors as before.

Additional Increases (Rounds 15–17):
- After the front loop round, work three rounds with increases at the last stitch of each color block:
- Round 15: (6 dc, inc) in each color section (8 stitches per section).
- Round 16: (7 dc, inc) in each color section (9 stitches per section).
- Round 17: (8 dc, inc) in each color section (10 stitches per section).
Finishing:
- After last round, join with slip stitch to ch 2.
- Ch 1, cut yarn, leaving a tail to weave in ends.
- Secure and weave in ends with yarn needle; fasten off.

Conclusion
You have completed a striking checkered hat with two-color alternating stitches and a subtle rib effect from the front loop round. The hat is soft, vibrant, and shows off color play beautifully.
Pattern Corrections & Tips
- Color Changes: Always finish the last yarn-over of each dc with the next color.
- Yarn Carry: Carry the unused yarn inside the hat, crocheting over it to hide.
- Front Loop Round: Creates subtle ridge; use as a transition or visual marker.
- Sizing: Add or remove rounds as needed for desired hat height.
- Ensure accurate stitch counts per color block for neat checkerboard appearance.