How to Crochet Bag With Granny Square for Beginners
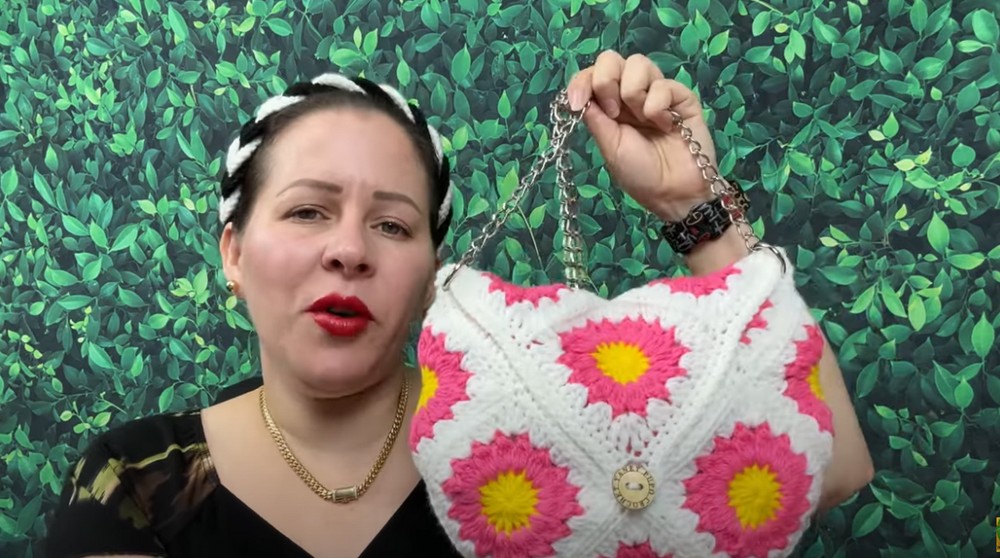
In this post, you’ll learn how to crochet a bag using square pieces, perfect for beginners looking for a square sewing technique. With 160g of number four wool, tutorial demonstrates techniques like forming magic rings, working double crochets, and joining petals to create intricate designs. The video also covers assembling the squares, sewing them together, and adding finishing touches like edges, buttons, and a strap. It is perfect for beginners and experts!
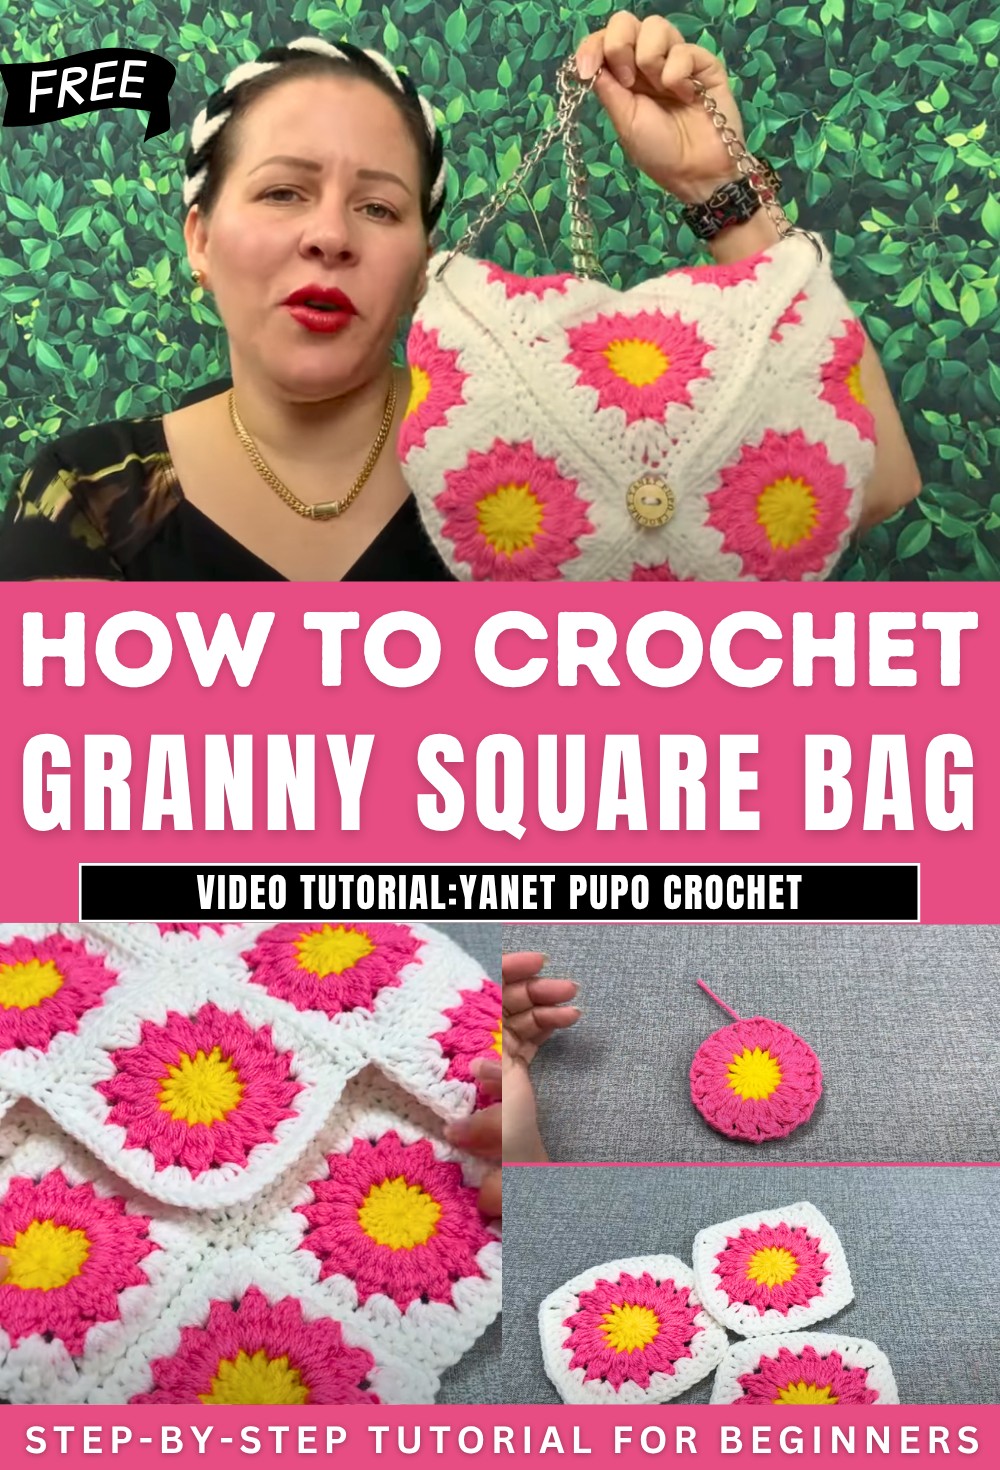
Free Crochet Square Motif Purse/Bag Pattern
Materials
- Worsted Weight Yarn (#4): approx. 160g (use at least 3 colors for motifs, border, and variety)
- Hook: 3.75 mm aluminum crochet hook (or size needed for correct gauge)
- Tapestry needle
- Scissors
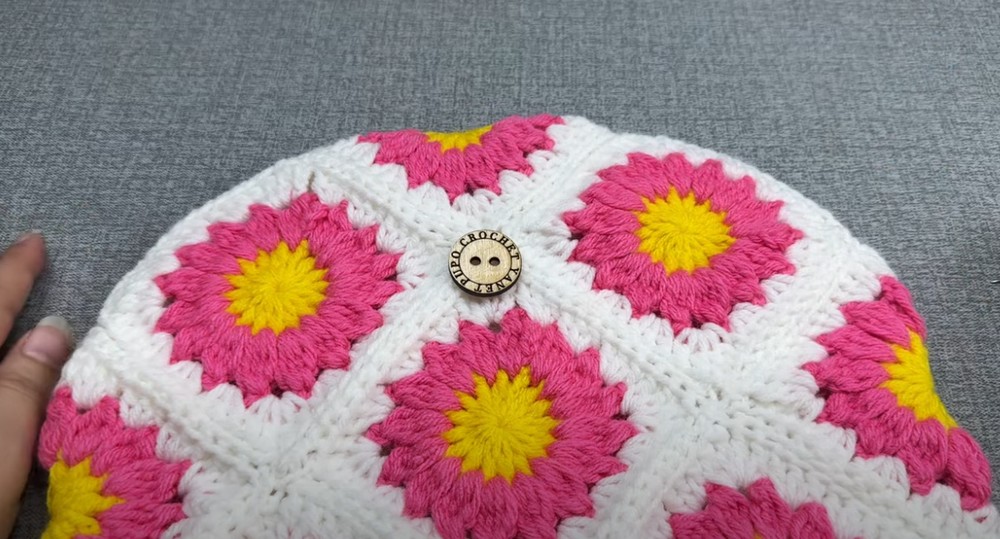
- 1 large button (for closure)
- Bag handle: Optional; use a ready-made handle with rings, or crochet your own strap (approx. 1 meter long)
- Stitch markers (optional; to help with assembly)
Key Abbreviations (US Terms)
- ch: chain
- sl st: slip stitch
- sc: single crochet
- dc: double crochet
- st(s): stitch(es)
- sp: space
Special Notes
- The motif is worked in the round for whole squares, and in rows for half-squares.
- Motifs are assembled and sewn with a tapestry needle, working through edge loops for a neat finish.
- This pattern refers to “high points,” which means double crochet stitches (dc), and “petals,” which are groups of partially completed dc, all closed together.
- You will need 12 full squares and 2 half-squares for the complete bag.
- Color changes are done every round for a more vivid effect; mix and match at will.
- Handle installation can be done with a store-bought handle, chain, or crocheted strap.
Pattern
Square Motif (Make 12)
Round 1:
- With Color A, make a magic ring.
- Ch 4 (counts as dc + ch-1), dc, ch 1 15 times into the ring (total 16 dc, 16 ch-1 sps).
- Join with sl st to 4th ch of start. Fasten off and cut yarn.
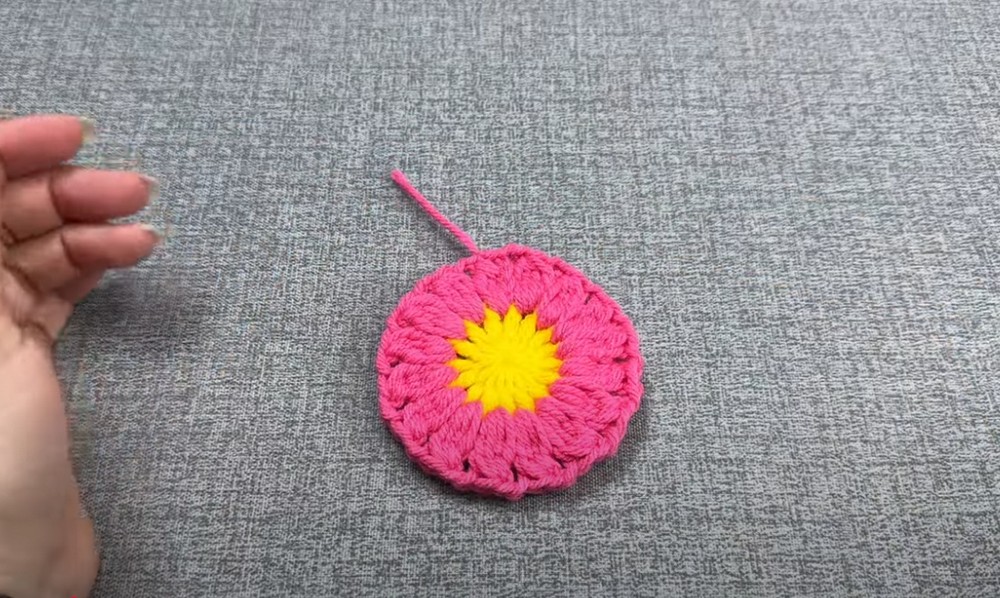
Round 2:
- With Color B, join in any ch-1 sp, ch 3 (counts as beginning of dc cluster).
- [Yarn over, insert in same sp, yo, pull through, yo, pull through 2] x 3 more (you have 4 loops on hook). Yarn over, pull through all 4 loops—cluster made.
- Ch 2, (in next ch-1 sp) cluster of 4 dc (not completed; all 4 un-finished, then close all at once), ch 2, repeat around for 16 clusters (petals).
- Join with sl st to top of first cluster. Fasten off.
Round 3: (Squaring the Motif)
- With Color C, join in any ch-2 sp (corner).
- Corners: (Ch 3 (counts as first dc), dc [using 2 draw-up method: yo, pull through 1, yo, pull through 2, close], ch 1, 2 dc [same method]) in same sp.
- Sides: In next 3 ch-2 sps, 3 dc (regular method: yo, pull through 2, yo, pull through 2) in each.
- Repeat [corner, 3 x side groups] around, ending with a corner.
- Join with sl st to 3rd ch of start. Fasten off, cut yarn.
- Each finished motif should measure about 10 cm (4 inches) square.
Half-square Motif (Make 2)
Row 1:
- With Color A, make a magic ring.
- Ch 4, 8 dc (using 2-draw method) in ring (total 9 dcs).
- Pull ring closed, fasten off.
Row 2:
- With Color B, join at edge.
- Ch 3, work cluster (as above) into each ch between dcs across, with 2 ch between each cluster.
- You will have 8 petals. Fasten off.
Row 3:
- With Color C, join at corner edge.
- As for full square, but work only halfway across foundation/row—i.e., one corner, then work three 3-dc groups, then finish with another corner (see video for placement).
- Fasten off, weave in ends.
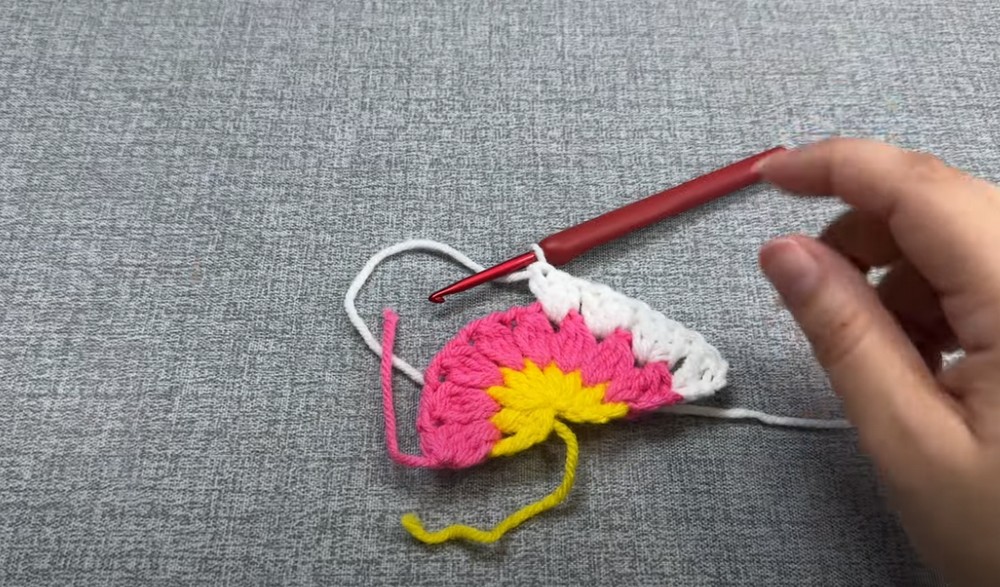
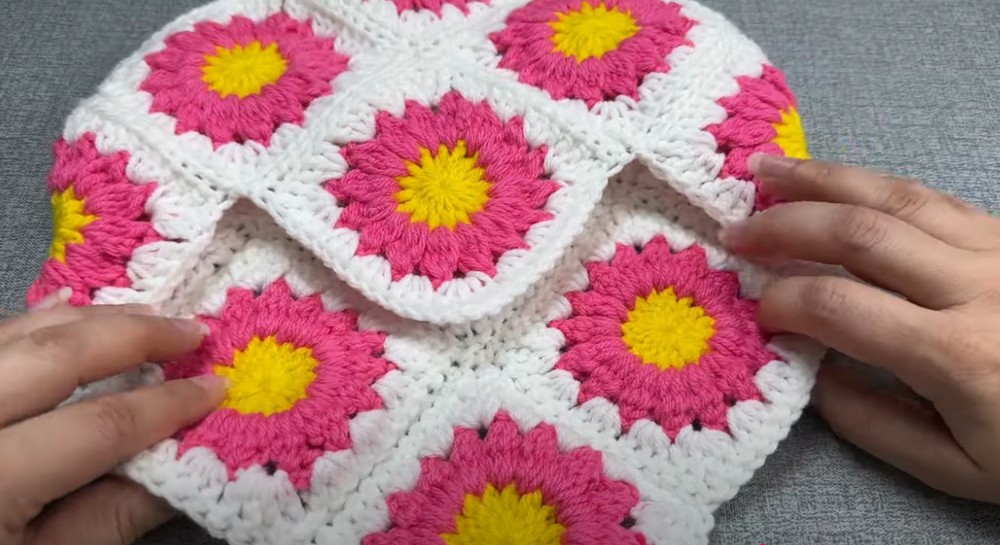
Assembly
- Lay out the 12 squares as instructed, forming two hexagonal “halves” (back and front): Each side is made with 6 squares in two rows—a set of three above and three below, joined at a “peak” (see video for visuals).
- Sew squares together: With right sides facing, use a tapestry needle and whipstitch (through outside loops only for neat seams). Sew 3 at the top, 3 at the bottom, then join clusters into a triangle.
- Repeat for the second half.
- Join top and bottom triangles, then add the two half-squares (flap sides) following the video’s structure for a purse with a lid. One triangle will become the closing flap.
- Join both halves: Sew along edges matching front and back (wrong sides in, right sides out).
- Add button loop (see below).
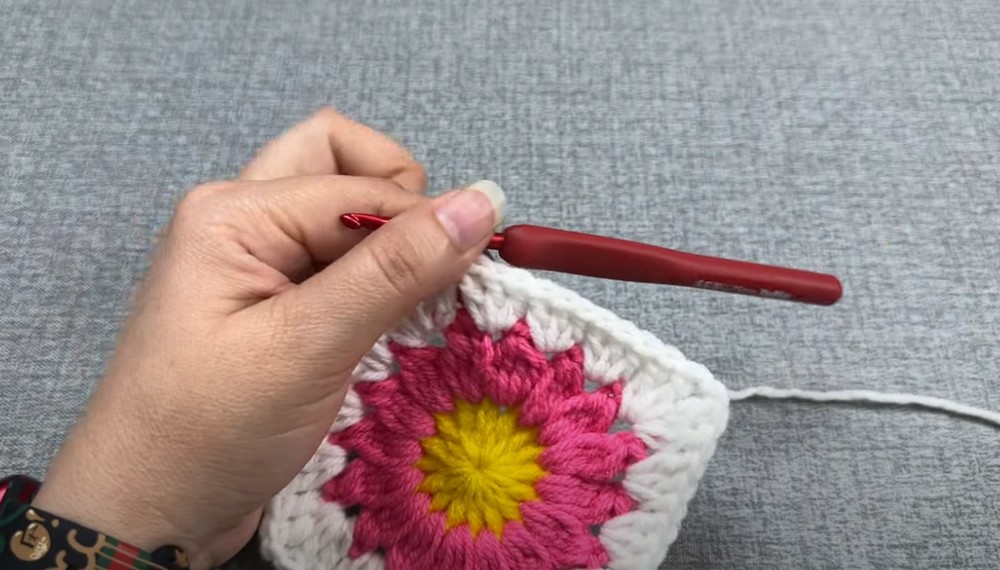
Edging and Button Loop
- With your chosen border color (usually matching or contrasting C), work sc evenly around all outside edges of the bag, flap, and lid.
- Begin at a corner, sc in each st and in each joining seam.
- Where pieces are joined, pull up one sc from each and close together with one sc.
- For straight “high point” edges, work 3 sc in each dc, 4 sc at tight inner corners if needed.
- At the flap’s edge, crochet a chain loop in the center for the button:
- When you reach the middle top of the flap, ch 6, then continue in sc along the edge, closing the loop.
- Work a second round of sc around all edges for a sturdy finish if desired.
- Fasten off, weave in all ends.
Final Steps
- Sew button to front of bag, opposite the flap’s chain loop.
- Attach handle: Use a chain, purchased bag handle, or crochet your own. Fasten securely with rings or by sewing to side seams.
- Turn bag right side out, shape gently.
Conclusion
You have completed a vibrant, practical motif bag perfect for everyday use. With its patchwork look and easy construction, it is ideal for using up leftover yarn and playing with color. This method can be adapted to any number of motifs or sizes.
Pattern Correction
- Make sure all motifs are blocked for consistent size before assembly.
- Check orientation and right side of motifs to ensure a neat final look.
Tips
- Weave in ends as you finish each motif for easier finishing.
- For a stiffer bag, line with fabric before attaching the handle.
- Button size: adjust loop length so that the button closes snugly.
- Use a soft leather strap or chain for added sophistication, or crochet a thick cord for a fully handmade piece.
Video Guide
https://youtu.be/48qiVmLzf5w