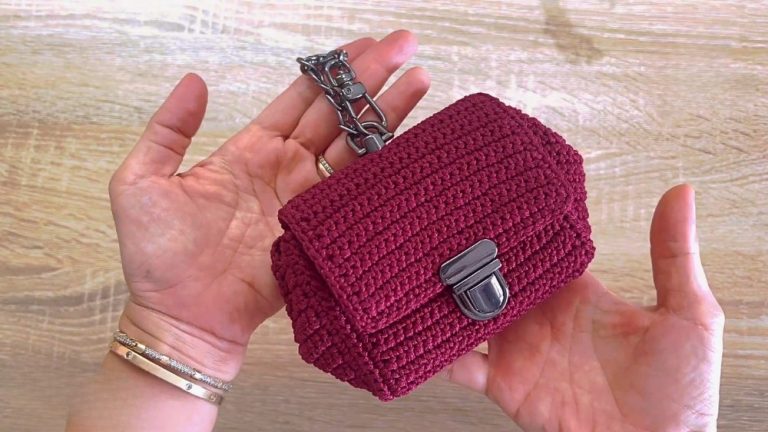
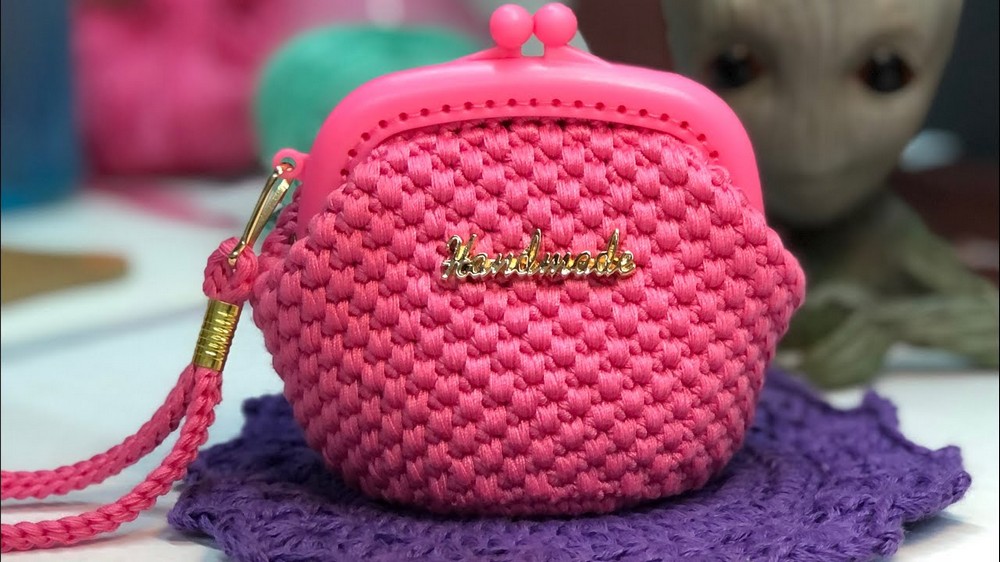
How to Crochet Cute Coin Purse With Metal Frame
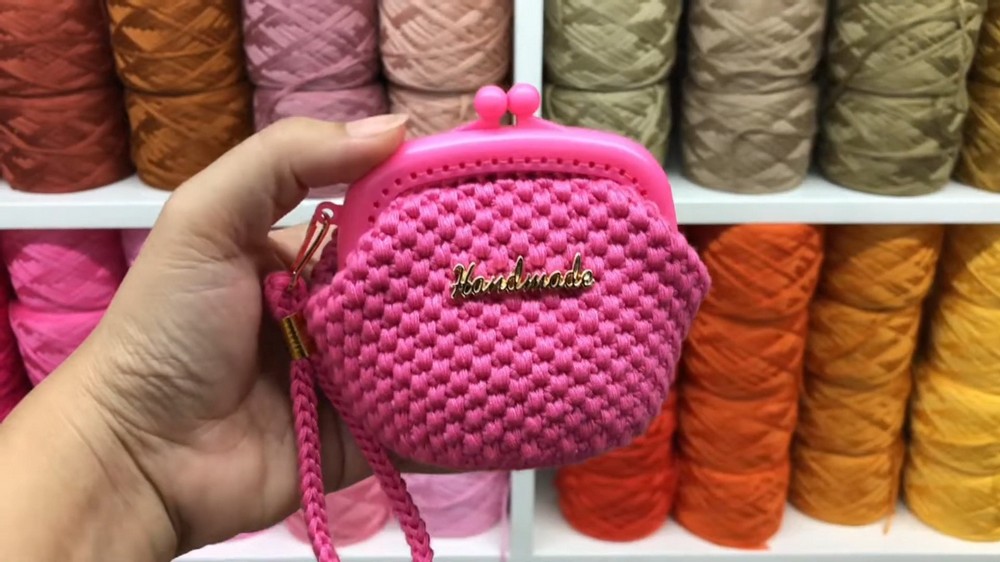
Learn how to crochet a cute, handmade T-shirt yarn coin purse using materials like a plastic frame, polyester thread, with a complete tutorial. It also offers insights on sewing the wallet onto a frame and adding a handle or keychain. Viewers can adjust sizes and use alternate materials as needed.
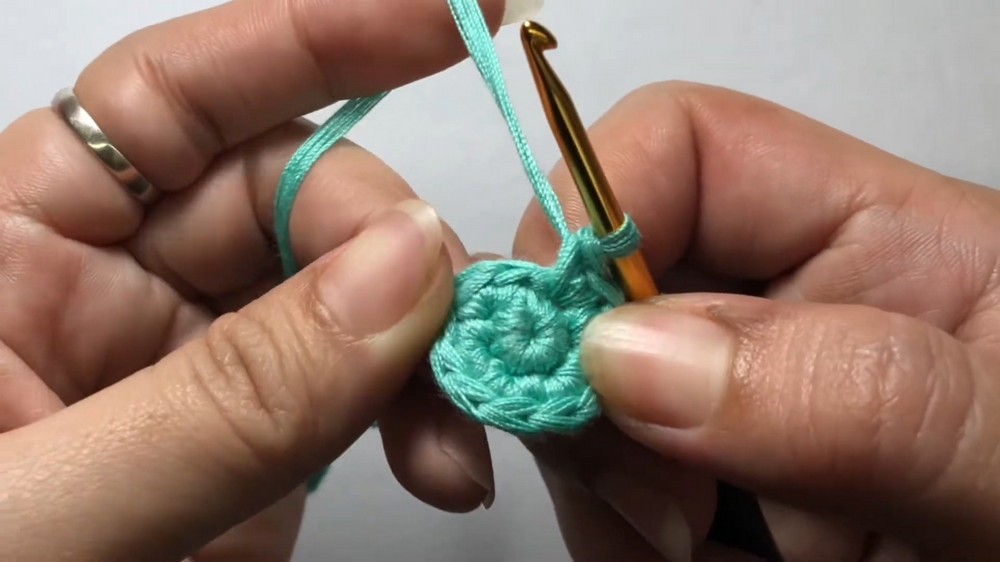
The tutorial walks through techniques such as magic rings, single crochets, increasing stitches, and spike stitches, ensuring a perfect circular base for the purse. Follow through with us for the complete tutorial!
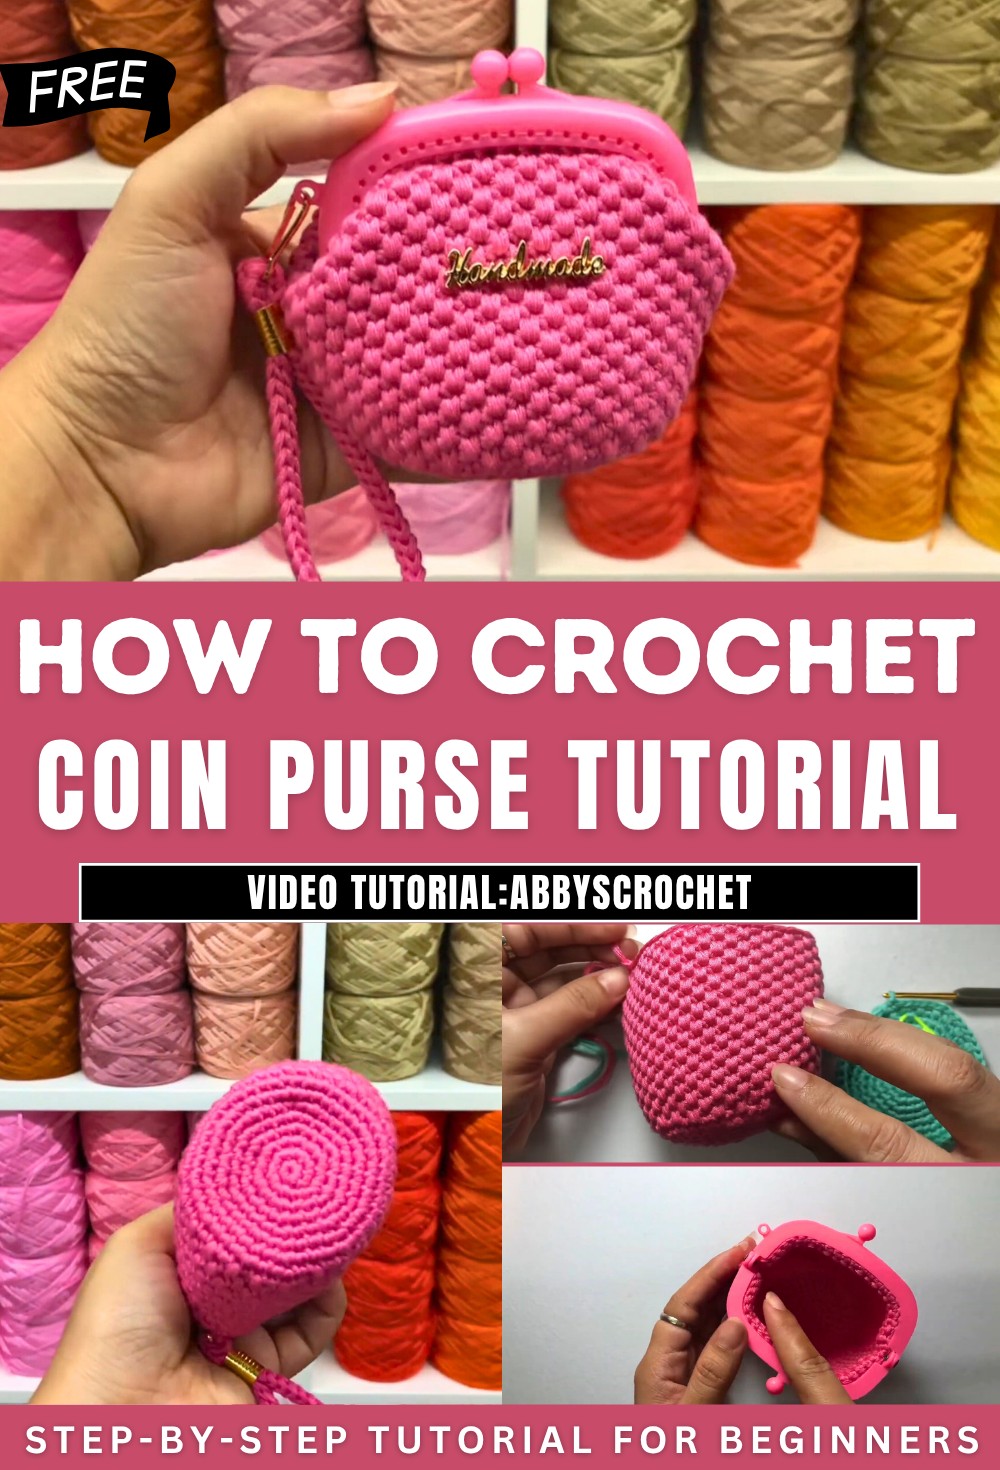
Crochet Cute Coin Purse Tutorial
The video begins with a warm greeting to viewers, both returning and new. The creator introduces the project: a cute crocheted wallet/purse made without leather beads. The tutorial promises to guide viewers through the step-by-step process of crafting the wallet.
Materials Needed
- Plastic Frame: Used to give structure and help secure the wallet during assembly.
- Handmade Tag: Optional decorative item to personalize the wallet.
- TLY Polyester Yarn: Recommended type of yarn, although other materials can be used depending on preference.
- Tools: Includes a 3mm crochet hook, stitch marker, necessary needles, scissors, and optional accessories such as a keychain ring and ID holder.
- Links for Materials: Information about where to buy the materials is available in the video description.
Tips on Selling
- The creator briefly discusses the wallet’s selling price, suggesting Php200 or higher, depending on customizations.
- Measurements for the wallet are shared for clarity: 3.5 inches in height, 4 inches in width, and a base width of about 2.3–2.5 inches.
Beginning the Crochet Work
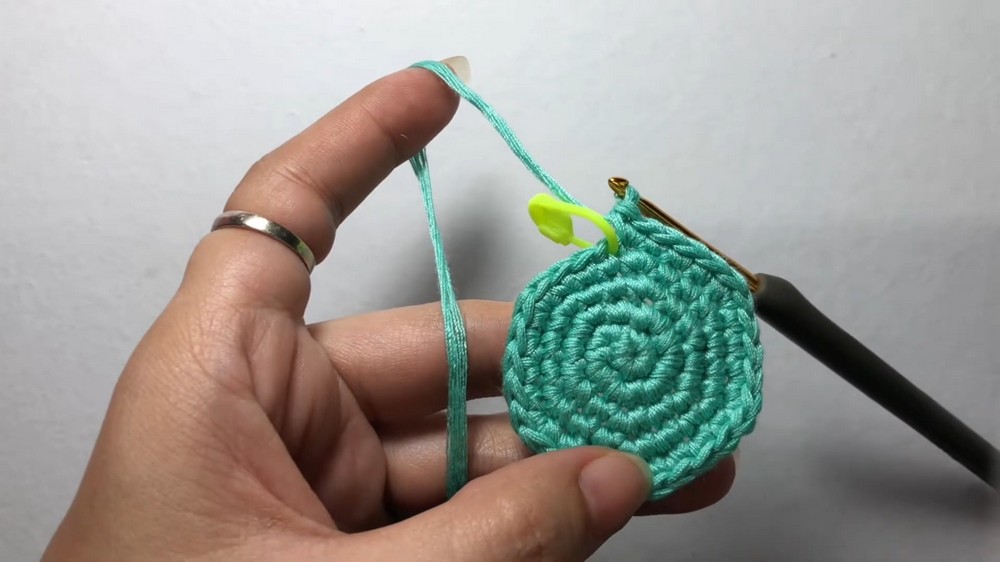
- The tutorial starts with the creation of a simple magic ring. While magic ring instructions are not taught in detail, viewers are encouraged to consult other available tutorials on magic ring techniques.
- The process proceeds to chaining and working single crochet stitches into the magic ring to form the wallet’s base, with specific rounds focusing on increasing and shaping.
- The creator discusses potential issues with the magic ring, advising alternative methods if necessary for beginners.
Building the Base
- Round Pattern Instructions: Detailed guidance is given for incremental increases to form a perfect circular base. Instructions progressively expand the circle using patterns of single crochets followed by increases in every round.
- Adjustments ensure the circle remains flat while avoiding noticeable shapes like octagons caused by repetitive increases. This is achieved by strategically altering the placement of increases in later rounds.
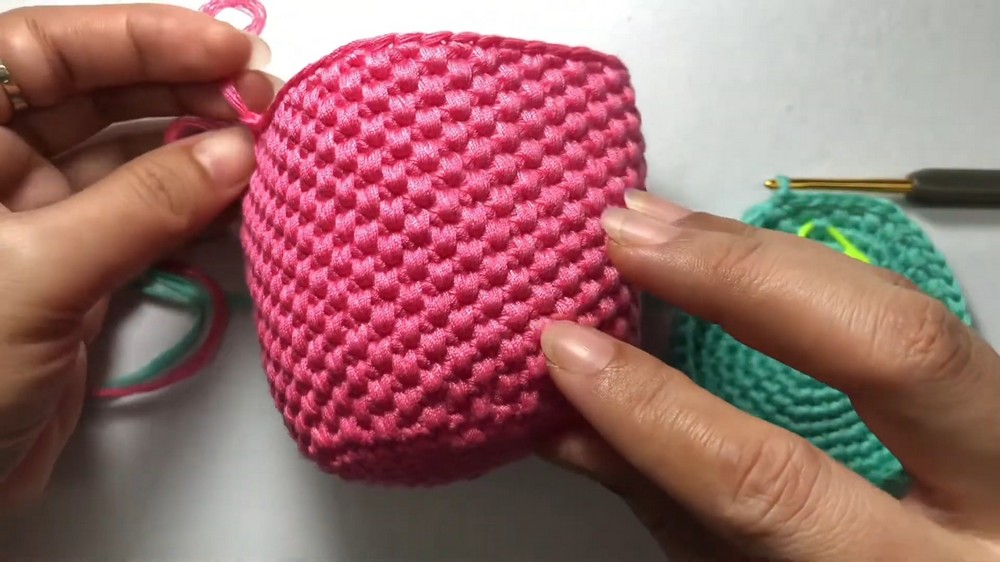
Creating the Main Body
- Spike Stitch Introduction: The body of the wallet is created using alternating “long single crochet” and “short single crochet” stitches. This spike stitch technique adds texture and uniqueness to the wallet.
- Viewers are encouraged to determine the desired height for the wallet, with suggestions for common dimensions ranging around 7–7.5 cm.
- The creator emphasizes the seamless continuation of stitches without slip stitching to ensure uniformity.
Edge Finishing
- One round of single crochet is used for the edging to provide a clean and polished look.
- After completing the round, the tail is cut long enough to allow sewing for final assembly.
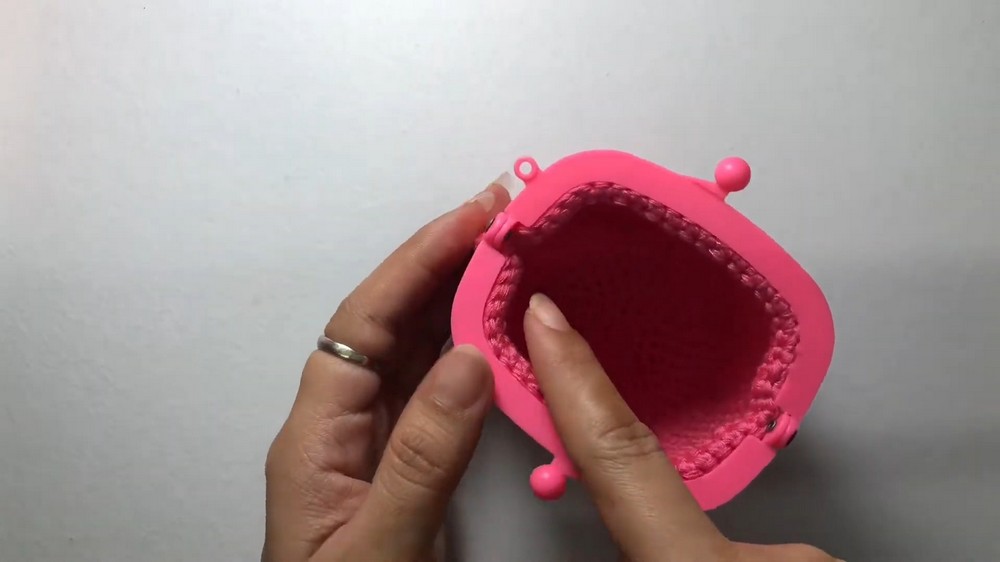
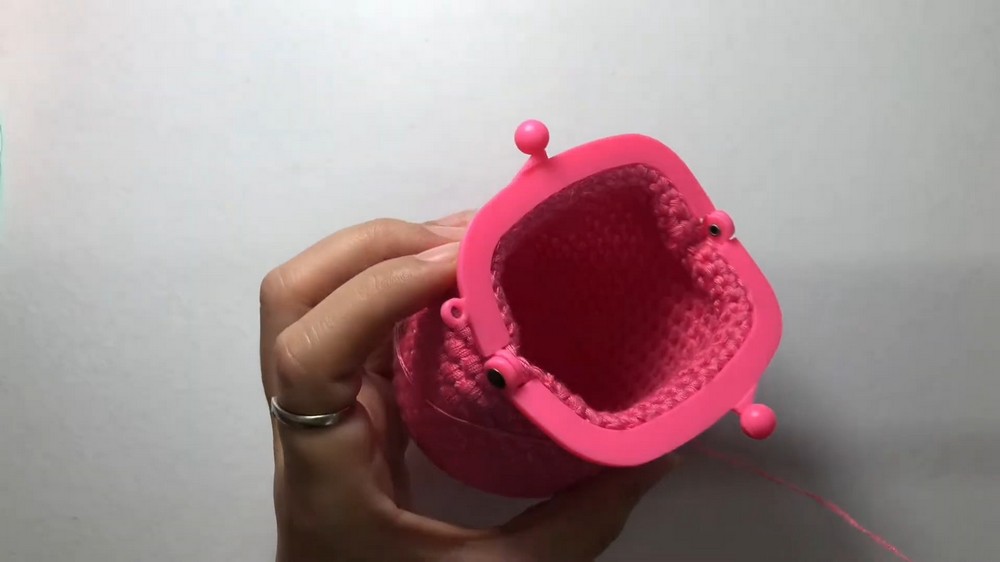
Assembling the Wallet
- Frame Attachment: The plastic frame is attached to the crocheted base, ensuring even distribution on both sides to shape the wallet correctly.
- The creator uses backstitch for sewing the wallet on the frame but does not demonstrate this step in full detail, redirecting viewers to other available tutorials.
- Excess strings are hidden or trimmed for a neat appearance.
Final Touches
- A wristlet handle or keychain ring can be added for extra functionality. The creator provides links to handle-making tutorials for those interested.
- The finished product is highlighted as a cute, sturdy, and customizable wallet.