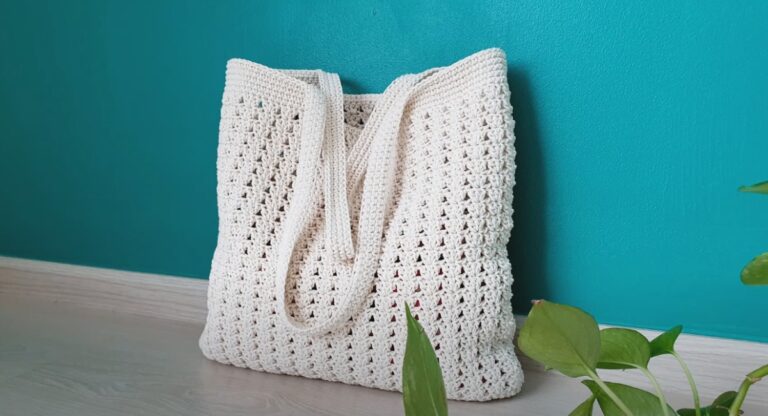
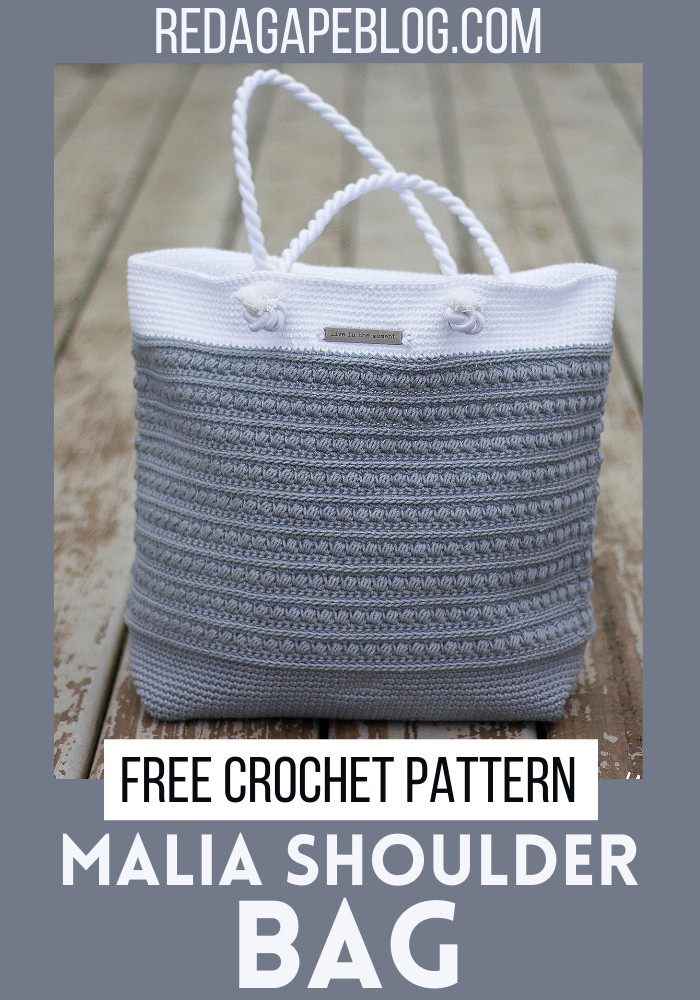
Easy Crochet Malia Shoulder Bag Pattern Step By Step
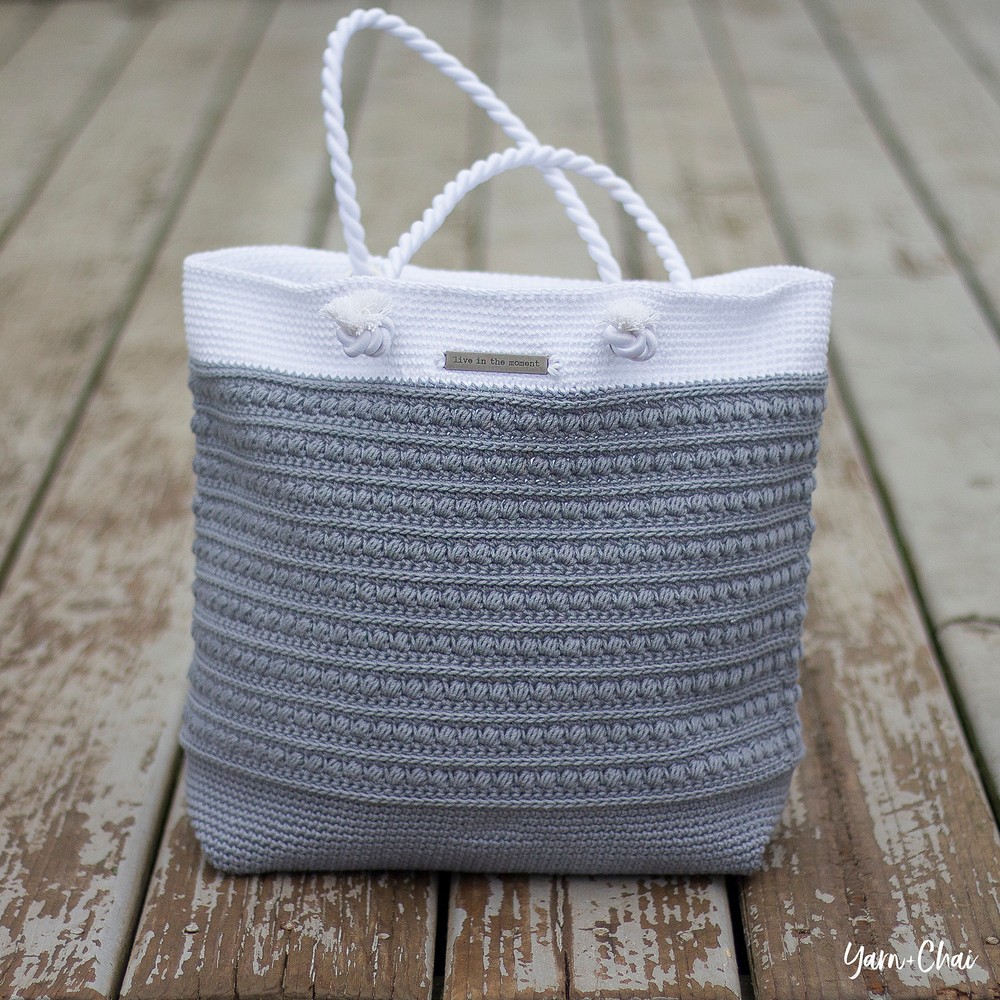
This crochet Malia Shoulder Bag pattern shows how to make beautiful things that never go out of style. It’s well-made and practical, and people will surely fall in love with it. The bag’s texture shows off the maker’s skill and hard work, and you can pick your colors to make it special. This is more than just a bag; it fits perfectly with any look, whether you’re keeping it casual or dressing up. This Shoulder Bag isn’t just about looking good but also an example of real love and effort from the person who made it.
Crochet Malia Shoulder Bag
Difficulty: Easyish
Finished Size: 15.5″ width x 12″ height x 6″ depth
Materials
Hook: E – 3.5mm
Yarn Requirements:
- Lion Brand 24/7 Cotton in 2 colors: 675 yards / 4 skeins of COLOR A (Silver) and 100 yards / 1 skein of COLOR B (White). For a single color, you’ll need 775 yards total.
Gauge: 10 rows of 10 SC = 2″ square
Additional Materials:
- Yarn needle
- Scissors
- Two 36″ lengths of 3/8″ twisted rope for handles
- Optional but recommended: grommet or eyelet kit
- Hammer
Abbreviations:
- ST/STS (stitch/stitches)
- SL ST (slip stitch)
- SK (skip)
- CH (chain)
- SC (single crochet)
- HDC (half double crochet)
- LBS (large bean stitch)
- BLO (back loop only)
- 3rd LOOP
Special Stitches:
- Large Bean Stitch (LBS): To create the stitch, follow the detailed instructions in the raw pattern data, including yarn overs and loops on hook numbers.
- 3rd Loop Only: This loop is used in HDC stitches. The raw pattern data provides instructions for identifying and working into the third loop.
Pattern Notes:
- The pattern is written in American Standard Terms.
- CH1 at the beginning of rounds does not count as a stitch.
- A seamless round technique is used starting from Round 2.
- Instructional videos are available for assistance.
Pattern Instructions:
The base of Bag:
- To Begin: With COLOR A, CH157.
- Round 1: SC in 2nd CH from hook and each remaining CH. Place a stitch marker in the final stitch, then join with an SL ST to the top of the first SC, being careful not to twist the round. (156)
- Round 2: CH1, SC in first ST and each ST around. Do not join. Place a stitch marker in the first stitch to mark the beginning of the round. (156)
Rounds 3-19:
- SC in each ST around.
- Maintain 156 STS.
- The stitch marker helps keep track of the start. Move it up each round.
Round 20:
- In BLO, SC in each ST around.
- 156 STS.
For Round 21:
- LBS in next ST, SK next ST around.
Round 22-37:
- SC in each ST around. Note: In round 22, work stitches into the CH-1 space of the bean from the previous round and NOT into the top of it. Remember to work into the full stitch (both loops).
- 156 STS.
For Rounds 38-39
- SC in each ST around.
- 156 STS.
Round 40
- LBS in next ST, SK next ST around.
Round 41-57
- SC in each ST around. Apply the same note as mentioned in round 22.
- 156 STS.
For Round 58-59
- SC in each ST around.
- 156 STS.
Finishing Off:
- Tie off, leaving a long tail.
- To end this seamlessly, thread your tail onto your yarn needle. Skip the next ST of the round (which would be the ST to the left if you’re right-handed). Insert needle into the BLO of the next ST and out the BLO of the next, pulling tight. When it’s finished, it should look like another V on top of your work that blends into the rest. Weave in the tail.