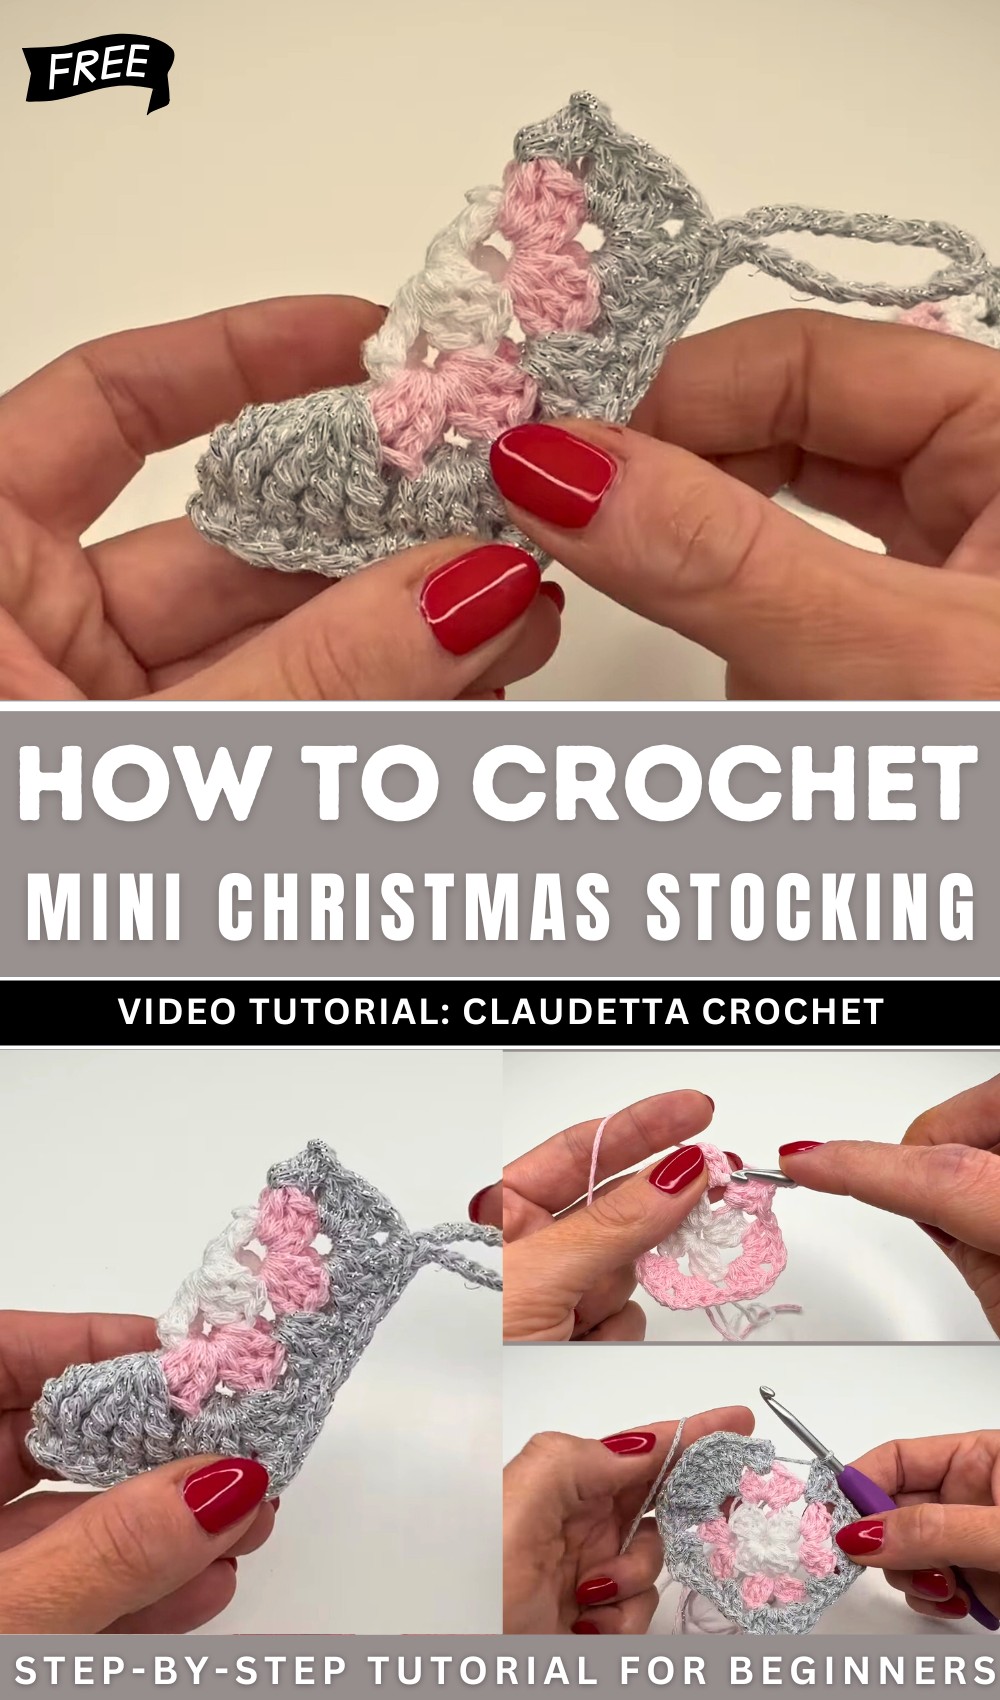
How to Crochet Mini Christmas Stocking for Decor H complete
Learn how to crochet a cute and simple Christmas stocking made from granny squares following a step-by-step tutorial for all skill levels. The stocking is ideal for decorating the Christmas tree or attaching to gifts. The stocking’s size can be adjusted by using thicker yarn for a larger version.
The tutorial covers step-by-step instructions for crochet techniques, including double crochets, slip stitches, and adding a hanging loop. It’s a quick and festive DIY project. Follow through with us for the complete tutorial to crochet this mini stocking, also great for gifting!
Free Crochet Christmas Stocking Pattern
This project is beginner-friendly and works up quickly, making it ideal for holiday decorations or as an add-on to gifts. The size of the stocking is adjustable depending on the thickness of the yarn used. Thinner yarn produces smaller stockings, while thicker or chunkier yarn results in larger stockings.
Easy Crochet Granny Square Christmas Stocking Pattern
Materials Needed
- Yarn: Sheeps Twinkle (thin yarn used in video), or any yarn of your choice (size affects stocking size)
- Hook: 4 mm crochet hook, or hook size appropriate for your yarn
- Scissors
- Darning needle (for weaving in ends and sewing pieces together)
- Optional: Yarn or ribbon for hanging loop
Abbreviations
| Abbreviation | Meaning |
|---|---|
| ch | Chain |
| sl st | Slip Stitch |
| sc | Single Crochet |
| dc | Double Crochet |
| sp | Space |
| st(s) | Stitch(es) |
Special Notes:
- Change colors at the beginning of each new round for a classic, multi-colored look.
- Stocking size can easily be altered by using different weights of yarn and corresponding hook sizes.
- Work granny squares loosely enough to easily crochet into chain spaces.
Pattern
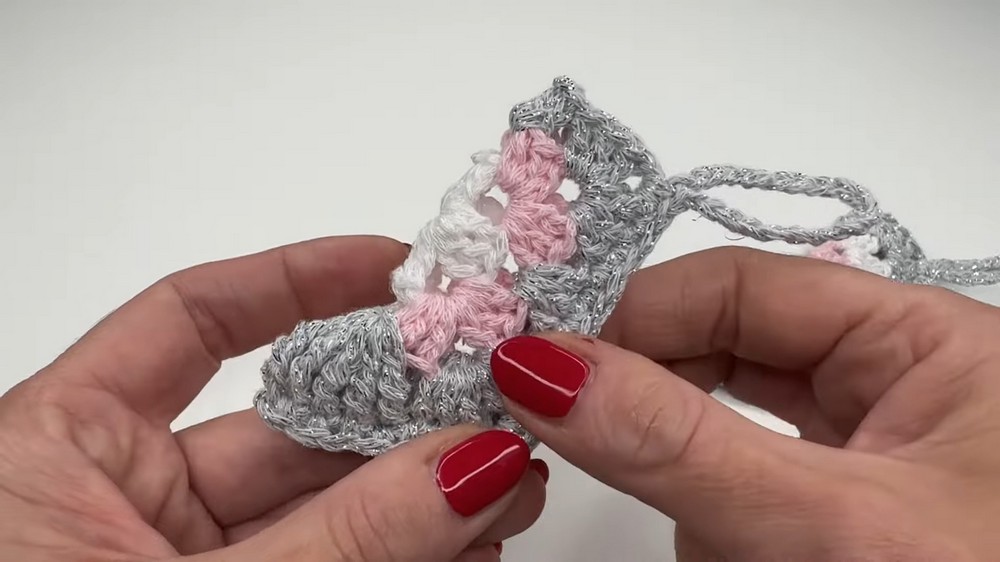
Granny Square Base
Round 1 (First Color):
- Begin with a slip knot.
- Ch 4 and join with a sl st into the first ch to form a ring. (Alternatively: use a magic ring.)
- Ch 3 (counts as first dc).
- Work 2 dc into the ring.
- Ch 2.
- Work 3 dc into the ring, ch 2 — repeat two more times (you should have four sets of 3 dc clusters, each separated by ch-2 corners).
- Join with a sl st to the top of the beginning ch-3 to close the round.
- Fasten off and pull the yarn tight.
Round 2 (Second Color):
- Attach new color to any ch-2 corner sp with a knot or by simply drawing up a loop.
- Ch 3 (counts as first dc), 2 dc in the same sp.
- In next ch-2 corner sp: 3 dc, ch 2, 3 dc (creates next corner cluster).
- In next ch-2 corner sp: 3 dc, ch 2, 3 dc.
- Repeat in the last corner sp: 3 dc, ch 2, 3 dc.
- In the first corner space, which has only ch-3 and 2 dc, finish this side by working 3 dc into same sp.
- Ch 2, join with a sl st to top of beginning ch-3.
- Fasten off and pull yarn through.

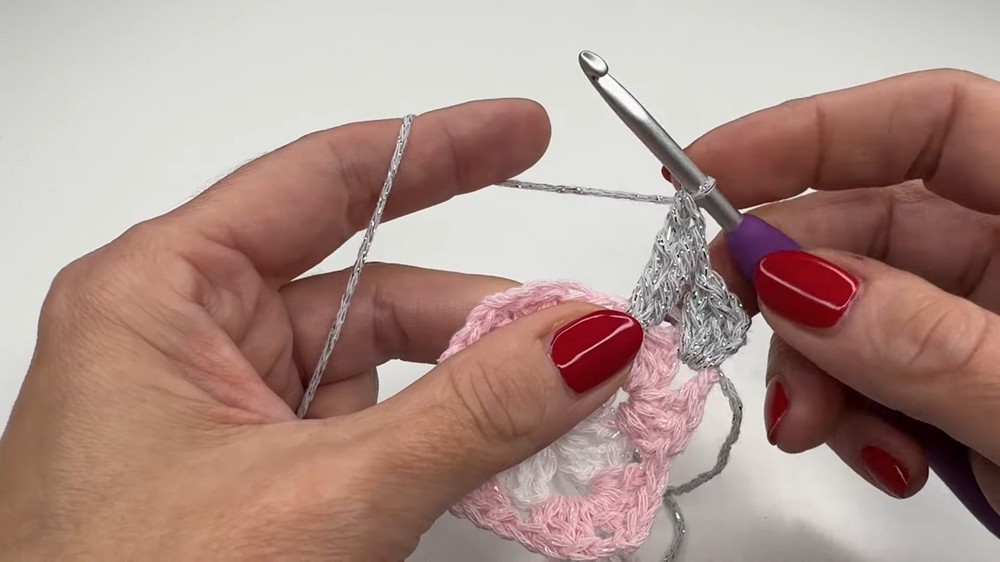
Round 3 (Third Color):
- Attach next color to any ch-2 corner sp.
- Ch 3 (counts as first dc), work 2 dc in same sp.
- In each side sp (between clusters): 3 dc; in each ch-2 corner: (3 dc, ch 2, 3 dc) — work this pattern around the square.
- When you return to the first corner (where you began), finish the cluster by adding 3 dc if needed.
- After completing the round, join with a sl st to the top of beginning ch-3.
- Fasten off and weave in all yarn ends.
Special Heel Detail (Optional):
In the video, a cluster of 10 triple crochets (yarn over 3 times, insert, yarn over and pull through two loops at a time, four times) is worked into one side space for a “heel” bump.
If desired, in one round, work 10 triple crochets into one side sp to make an accent.
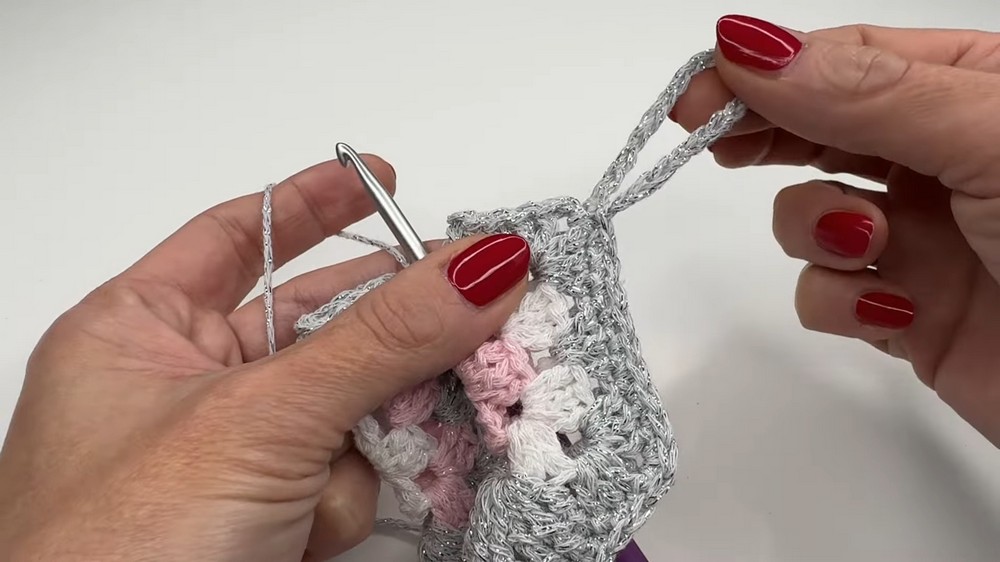
Finishing and Assembly
- Weave in all loose ends with a darning needle.
- Fold the finished square in half diagonally (so two corners meet).
- Starting at one toe corner, single crochet through both layers along the sides:
- Join yarn with a sl st at the beginning corner.
- Ch 1 and sc in each st or sp across both sides, neatly seaming the sides together.
- When you reach a corner/ch-2 sp, place 2 sc into the same sp to maintain the shape.
- Continue until you reach the top opening of the stocking.
- Hanging Loop (Optional):
- At one corner of the stocking opening, ch 20 (or as long as desired), sl st back into the same sp to form a loop.
- Fasten off, weave in the last ends.
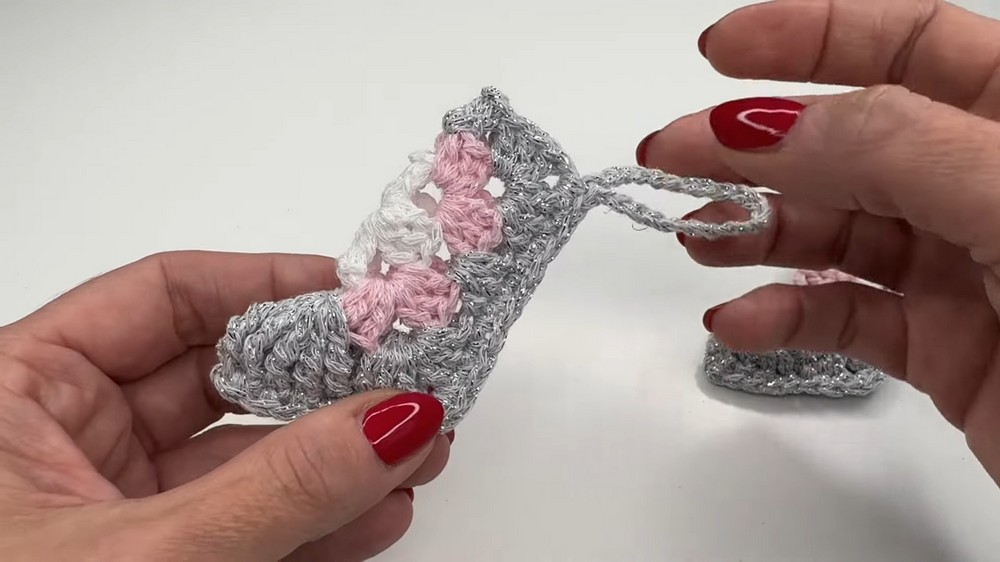
Conclusion
This project yields a charming mini stocking perfect for gifting or decorating. The construction is highly adaptable for size.
Working in multiple colors provides a traditional patchwork appearance. The classic granny square basis invites creativity with color and yarn thickness.
Pattern Correction & Tips
Corrections:
- Be sure to consistently work 3 dc clusters and ch-2 corners to keep the square neat.
- Accurately count stitches when joining at the round ends to prevent shifting clusters.
Tips:
- Sew in ends as you go to avoid a tangle at finishing.
- Slip stitches and single crochets used to join sides create a tidy seam.
- For a larger stocking, add more rounds to your granny square before folding.
- If making for small children or as an ornament, soft acrylic or cotton yarn works well.