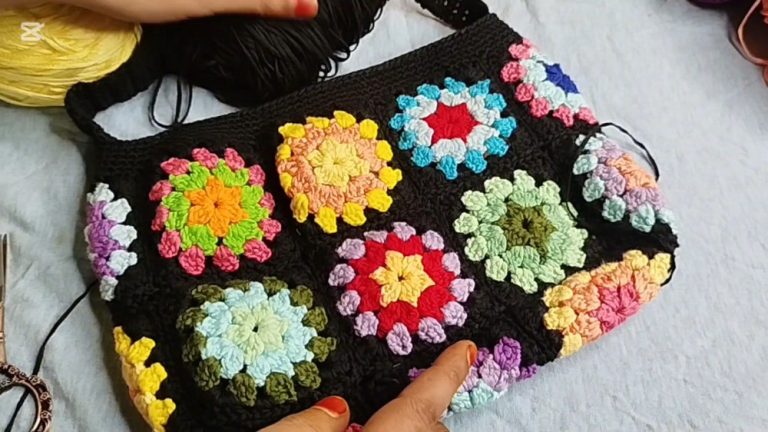
How To Crochet Moira Handbag for Beginners

Learn how to knit a simple yet elegant Moira handbag using Po Kiwi yarn and the bone herringbone stitch technique with a step-by-step tutorial for beginners. The bag, measuring 14 cm high and 23 cm wide, is crocheted step-by-step, including creating the front and back panels, adding single crochet edging, and sewing handles with a tapestry needle.
Magnetic buttons are installed for closure, completing a functional and stylish accessory. Ideal for special occasions, the bag can hold essential items like phones, cards, and sunscreen. So, follow through with us for the complete tutorial.

Materials Required
- Po Kiwi yarn (3 skeins)
- Crochet hook (Size 6 or 3.5 mm)
- Tapestry needle
- Magnetic buttons or other fasteners
Steps to Create the Bag Panels
- Initial Chains: Begin by creating an initial chain for the bag panel. This sets the foundation for the bag’s size and structure.
- Bone Herringbone Stitch:
- Work the bone herringbone stitch row by row.
- Alternate between front-facing single crochet stitches (for odd rows) and back-facing stitches (for even rows) to create texture and a neat design.
- Repeated Rows: Continue working rows using the herringbone stitch until one panel is completely finished. This results in a beautifully textured rectangular section for the bag.

Creating the Second Panel
- The same steps are repeated to create the second panel, identical to the first.
- These two panels will form the front and back of the bag structure.
Edging the Panels
- Use single crochet stitches around the perimeter of each panel to neaten the edges.
- At the corners, work additional single crochet stitches to ensure smooth, rounded edges.
Assembling the Bag
- Sewing the Panels Together:
- Use a tapestry needle to join the edges of the two panels securely.
- Stitch by stitch, sew both sides of the bag to form a finished rectangular shape.
- Handles:
- Create two straps for the bag by knitting separate sections with chain stitches and herringbone stitching.
- Attach the straps to the top of the bag using the same sewing method for durability.

Adding Magnetic Buttons
- Install magnetic buttons in the interior of the bag for secure closure.
- The process involves inserting the buttons between the knitted stitches and fastening them tightly.
Final Touches
- Ensure all edges are well-finished and symmetrical.
- Conduct a final inspection of the bag to check stitching and button placement.

Uses of the Bag
The bag is practical and stylish, perfect for special occasions such as Eid celebrations or casual outings. It’s compact yet spacious enough to hold essential items like mobile phones, cards, sunscreen, and more.