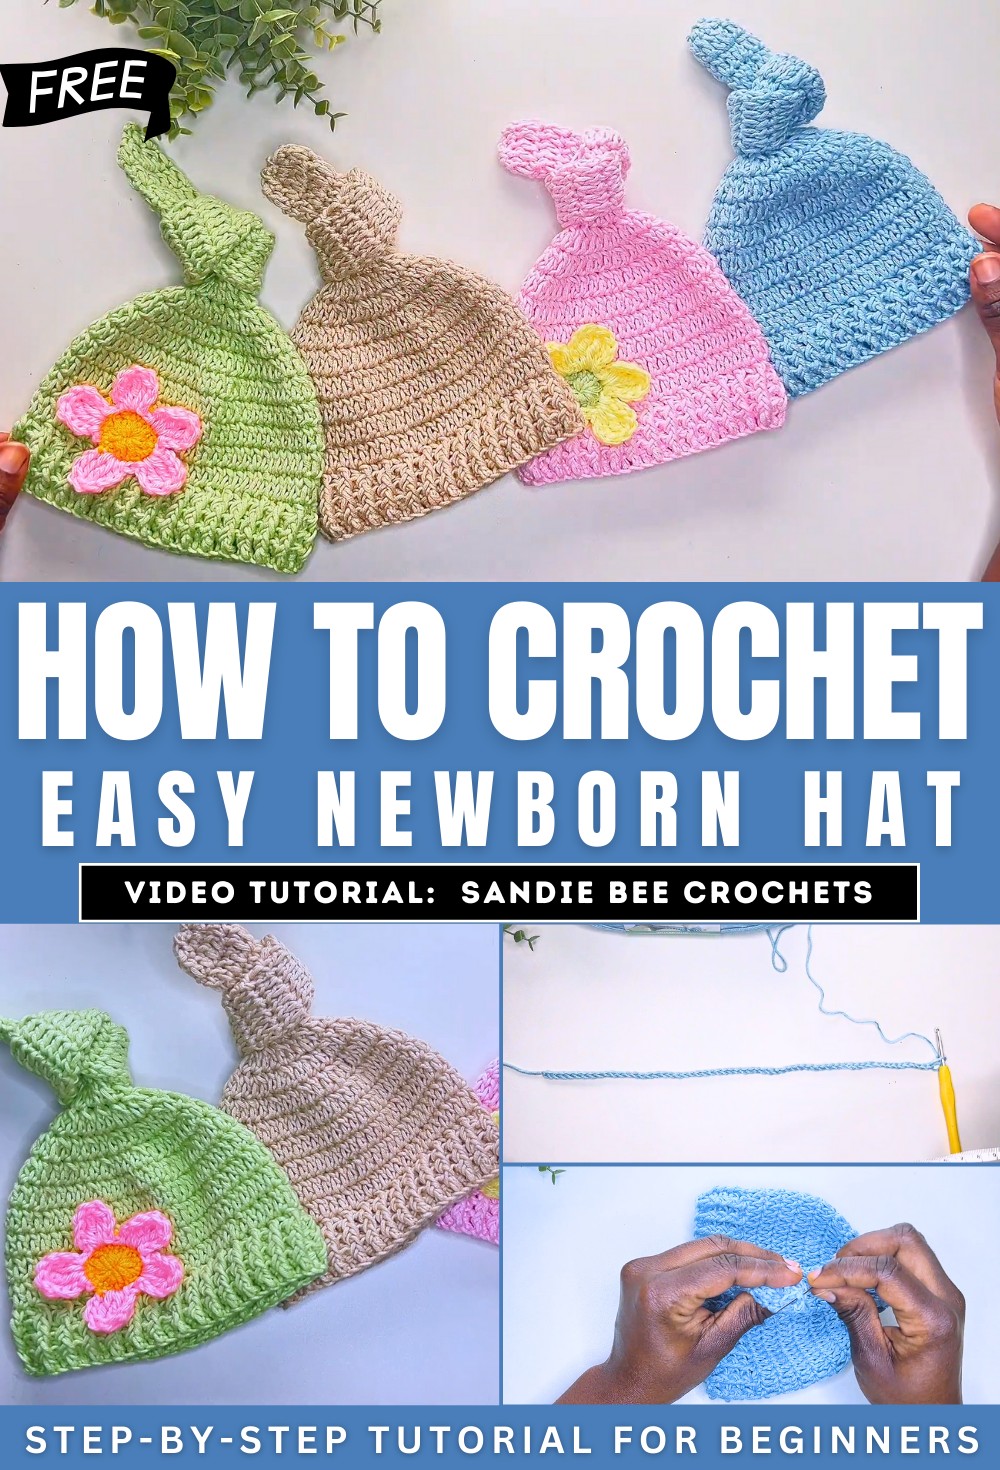
How to Crochet Newborn Top-Knot Hat For Absolute Beginners
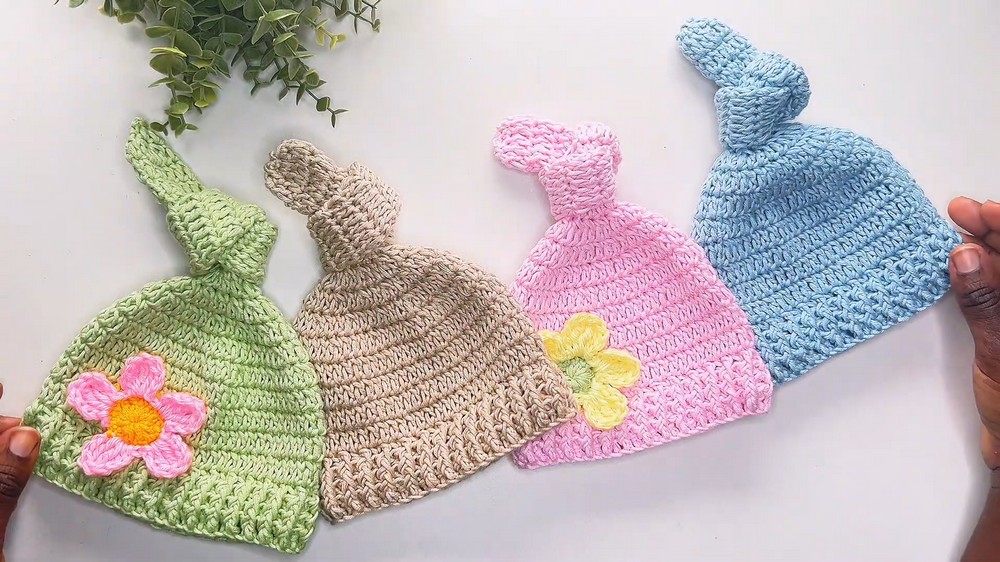
Learn how to crochet a newborn top-knot hat, perfect for beginners for gifting at the baby showers. Using Bernat Softy Baby yarn and a 3.5mm crochet hook, the video provides step-by-step instructions, starting with a foundation chain of 12.5 inches to fit a 13.5-inch newborn head circumference. The hat features a ribbed texture created with alternating front and back post double crochets and includes shaping through gradual decreases.
The top-knot section is crocheted to a length of 8 inches and then secured with a simple knot. The tutorial also covers how to sew the hat’s closure and weave in the ends for a professional finish.
Crochet Top-Knot Newborn Hat Tutorial: Step-by-Step Guide
This tutorial demonstrates how to create a crochet top-knot newborn hat, perfect for beginners. The instructor provides detailed guidance on creating the hat from start to finish, including how to achieve a professional look and adjust the pattern based on personal preferences.
Materials Needed
- Yarn: Bernat Softy Baby, a cotton and acrylic blend yarn.
- Crochet Hook: 3.5 mm hook (slightly smaller than the recommended 4 mm hook to achieve a tighter stitch).
- Additional Tools: Yarn needle and scissors.
Key Features of the Hat
- Designed for a newborn head circumference of 13.5 inches, with adjustments for crochet stretchability.
- Features a ribbed texture created using front and back post double crochets.
- A top-knot section that can be styled based on personal preference.
- Option to add appliques, buttons, or leave it plain.
Steps to Create the Hat
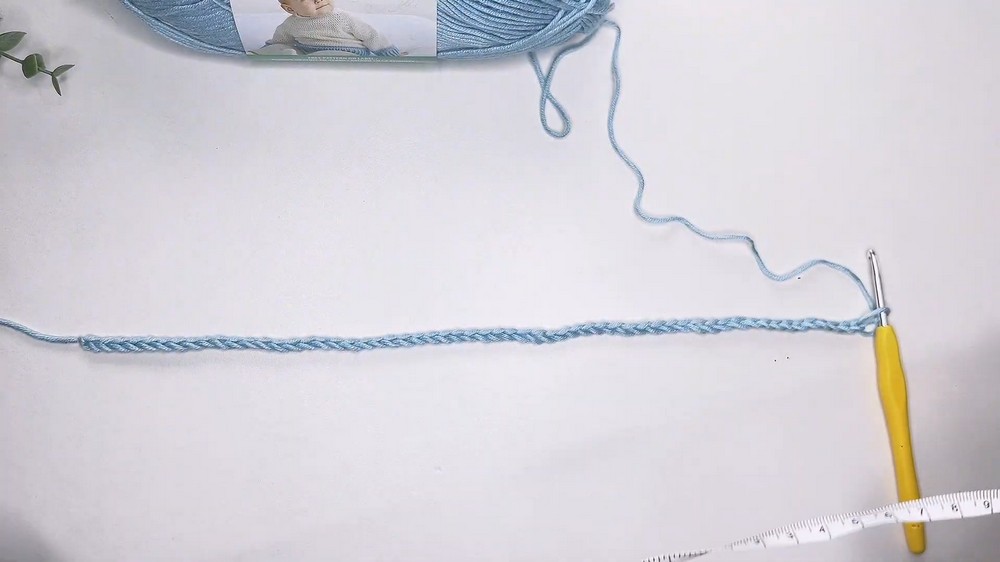
Foundation Chain
- Begin by making a slip knot.
- Chain a specific length that matches the desired circumference (12.5 inches for this tutorial), ensuring the chain is not twisted.
- Slip stitch into the first chain to form a circle.
Round 1: Double Crochets
- Chain two and work a row of double crochets into each chain.
- Complete the round by slip stitching into the first double crochet.
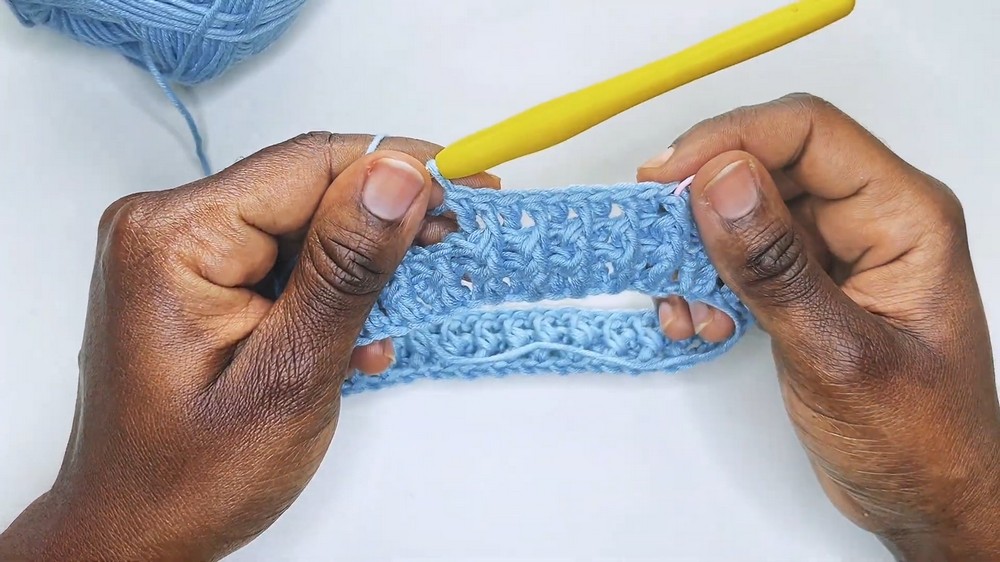
Rounds 2–4: Creating the Ribbed Texture
- Alternate front post double crochets with back post double crochets to create the ribbed pattern.
- Repeat this combination for three to four rounds.
Rounds 5–8: Adding Height
- Work rounds of double crochets to add height to the hat.
- Check the measurement to ensure the project is approximately 3 inches tall by the end of round 8.
Shaping the Hat
Round 9: Beginning Decreases
- Start reducing the stitch count by alternating double crochet decreases with regular double crochets.
- Continue until the round is complete.
Rounds 10–12: Gradual Decreases
- Gradually shape the hat by adjusting the number of double crochet decreases in each round.
- By round 12, focus solely on decreases to achieve the desired shape.
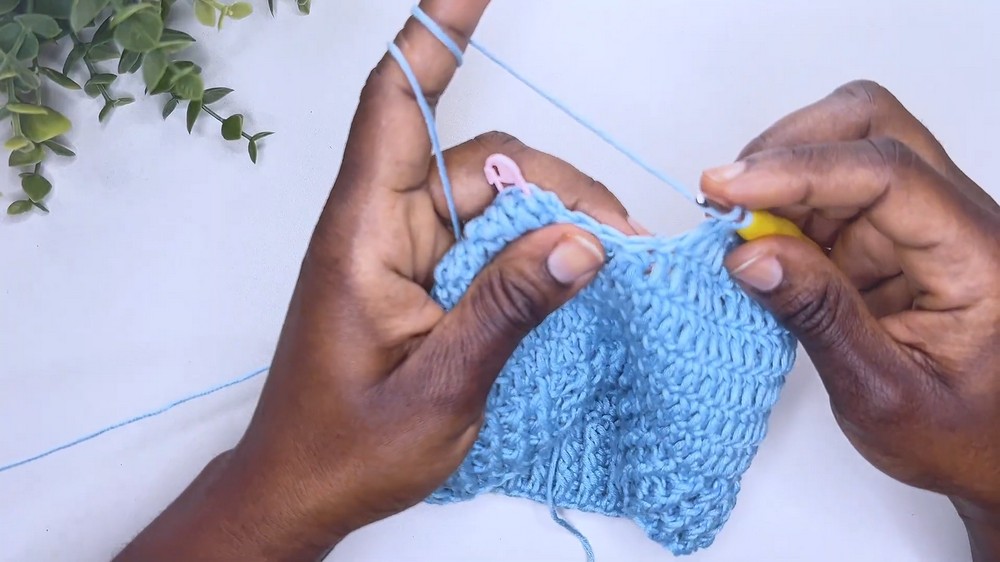
Creating the Top-Knot
Lengthening the Knot
- After completing the hat’s base, crochet additional rounds to create a long tail for the knot.
- Work double crochets until the knot section measures approximately 8 inches.
Finishing the Knot
- Use single crochet decreases to close the knot’s end.
- Secure the yarn with an extended tail, then sew the closure using a yarn needle.
- Tie the knot by looping the end over and securing it for the top-knot effect.
Finishing Touches
- Weave in all loose ends for a neat finish.
- Optional: Add appliques, buttons, or other decorative elements to personalize the hat.
Final Thoughts
The tutorial ends with encouragement to watch additional videos on the channel for more baby crochet patterns and projects. The instructor also emphasizes the importance of liking, sharing, and subscribing to support their work.