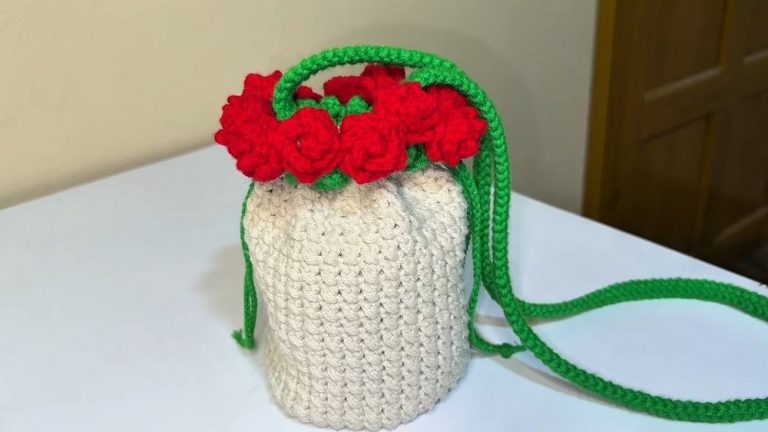
Free Crochet Ocean Waves Mobile Bag for Adults

With this step-by-step tutorial for all skill levels, learn how to crochet a stylish crossbody bag featuring an ocean wave pattern and the cute fish embellishments. The bag is ideal for carrying personal items such as a phone. Using 2m of yarn in three colors, a 3.0 mm crochet hook, and a snap hook, the tutorial provides step-by-step guidance on creating the base, body, and decorative edges of the bag. The final design combines function and elegance, perfect for everyday use. Follow through with us for the complete tutorial to crochet it!

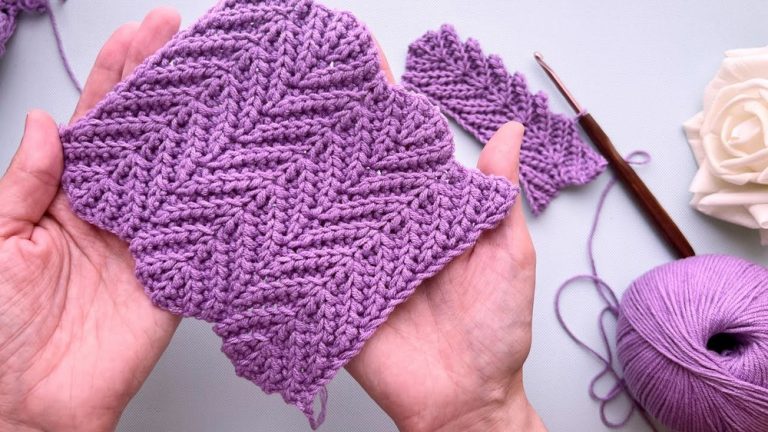
Wavy Stripes Crossbody Bag Crochet Pattern
Materials
- Yarn: Approx. 2 meters (likely means 2 skeins or ~200 g) of yarn total, in three coordinated colors (Color A, B, C for wave pattern)
- Crochet Hook: Size 3.0 mm
- Button: Magnetic or regular for closure
- Scissors
- Yarn needle
- Stitch marker (recommended)
- Optional: Decorations for embellishment
Key Abbreviations (US Terms)
- ch – chain
- sc – single crochet
- dc – double crochet
- sl st – slip stitch
- st(s) – stitch(es)
- inc – increase (2 sc in one stitch)
- rep – repeat
Special Notes
- Bag dimensions may be adjusted by adding or subtracting multiples of 4 stitches to the base and subsequent rows.
- Work single crochet stitches (sc) through both loops unless otherwise stated.
- Color changes create the wave pattern; alternate every three rows.
- Each wavy pattern repeat is 14 stitches. The base sample uses 56 stitches for four repeats.
- Always mark the first stitch of each round for even rows.
Step-by-Step Pattern
1. Bag Base (Create Rectangle)
With Color A:
- Ch 15.
- Row 1: Starting in the third ch from hook, sc in each ch across (13 sc).
- Rows 2–25: Ch 1, turn, sc in each st across (13 sc per row).
(Repeat until you have 25 rows total.)
Side Border:
- Do not fasten off.
- Rotate work. Single crochet evenly down the short edge (work 1 sc per row, ~25 sc), continue around each remaining edge; at corners, work 2 sc in the same stitch to keep edges flat.
- Continue until you complete a round along all edges.
- Sl st to join at the starting point.
This forms the bag’s bottom.

2. Wave Pattern Body
Now work in rounds along the edge (you will work in the round; join each round with sl st and start with ch 1).
Tip: Place a marker at the beginning of each round.

Set-up
- Round 1: Sc in each st around the rectangle’s edge – aim for a total of 56 sc stitches around (multiple of 14, for 4 repeats).
- If you want a larger or smaller bag, increase/decrease by multiples of 4 stitches.
Wave Round Sequence
- Wave pattern repeat = 14 stitches (repeat sequence 4 times per round).
Round 2 (Start Wave Pattern, in Color B):
- Ch 1, sc in first 3 sts, dc in next st, ch 1, sk 1 st, dc in next st, ch 1, sk 1 st, dc in next st, sc in next 3 sts; rep from * to end of round.
- Place marker in the first sc.

Round 3 (Single Crochet Row, in Color B):
- Ch 1, sc in each st and each ch-1 space around, maintaining total 56 sc.
- Join with sl st, place marker.
Round 4 (Single Crochet Row, in Color C):
- Ch 1, sc in each st around.
Round 5 (Repeat Wave, in Color C):
- Ch 1, sc in first 3 sts, dc in next st, ch 1, sk 1 st, dc in next st, ch 1, sk 1 st, dc in next st, sc in next 3 sts; rep from * around.
- Join, move marker.

Round 6 (Single Crochet Row, Color C):
- Ch 1, sc in each st and ch-sp around.
Round 7 (Single Crochet Row, switch back to Color A):
- Ch 1, sc in each st around.
Continue this color sequence: 1 round of wave pattern, followed by two rounds of single crochet in alternating colors, for the desired bag height (sample does 30 rounds).

3. Bag Mouth & Border
After final body round (approx. 30 rounds):
Top Border:
- With Color C, ch 1, sc in first 8 sts, dc in next 3 sts, sc in next 11 sts, dc in next 3 sts, sc in next 11 sts, dc in next 3 sts, sc in next 11 sts, dc in next 3 sts, sc in remaining 8 sts.
- Join with sl st.
- Next round: Ch 1, sc in each st around (total: 56 sc).
- Fasten off, weave in ends.
4. Assembly & Finishing
- Fold bag in half with right sides facing.
- Sew sides together (using whipstitch or single crochet seam) to form bag pocket.
- Turn bag right side out.
Flap/Buttonhole and Strap:
- (Optional, not fully detailed in transcript): For button flap, create a small rectangle at one edge with chs and sc and sew on a button or magnetic snap for closure.
- For strap, crochet a chain to desired length (crossbody: generally 38–48 inches), then sl st or sew ends to each side of the bag.
Add closure:
Attach the magnetic or other button to flap and corresponding bag side as shown.
Embellish as desired.

Conclusion
This shoulder bag pattern features a wavy stripe texture that highlights color changes and suits casual or dressy use. The design is easy to scale by adjusting the base and wave repeat multiples, making it highly customizable. The finished bag is roomy enough for a phone and essentials, and the magnetic snap closure makes it practical and stylish.
Pattern Correction
- Each wavy pattern repeat is 14 stitches; ensure total stitch count is a multiple of 14 for the pattern to work out.
- For a neat seam, always align corners before sewing sides.
- Adjust strap length before final attachment for personal comfort.
Tips
- Use a stitch marker to keep track of round starts.
- Change colors cleanly by completing last pull-through of final stitch in old color using the new color.
- Steam or lightly block finished bag for crisp edges and waves.
- For a stiffer bag, use a cotton blend or line the finished crochet piece with fabric.