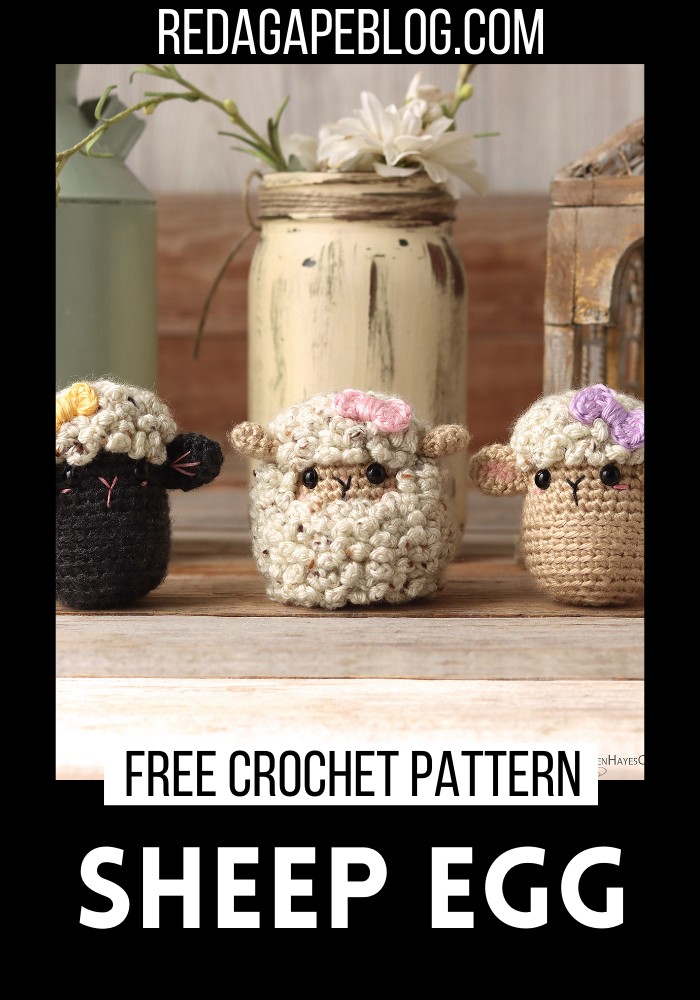
Crochet Sheep Egg Pattern For Easter Day
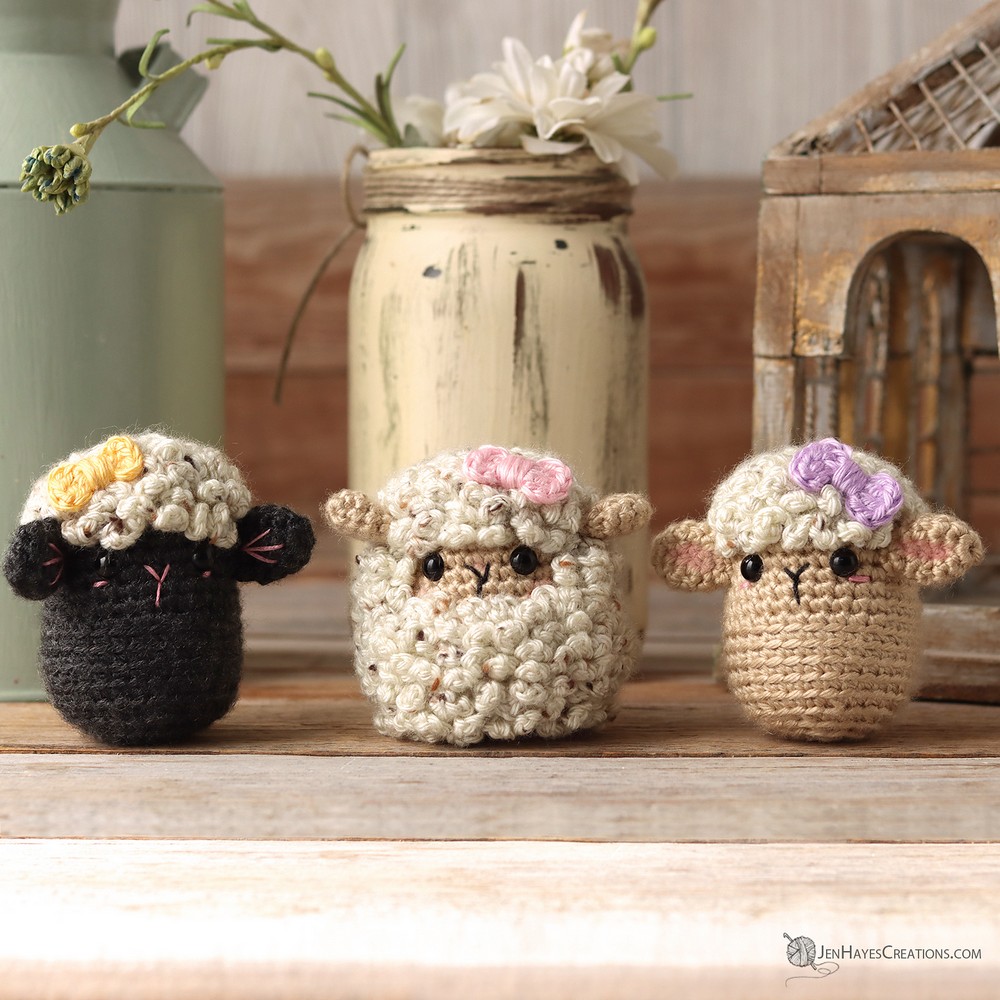
The Crochet Sheep Egg pattern is a lovely, easy-to-follow project, perfect for beginners looking to create something unique for Easter or to brighten up any room during spring. Not only does it offer a wonderful way to utilize leftover yarn, but it also introduces crafters to basic embroidery skills to add charming details to their creations. Inspired by the joy of animal-themed amigurumi and made with soft and versatile soft yarn, these adorable sheep eggs promise to be both a fun craft and a delightful addition to any seasonal decor or playtime collection. With detailed instructions, suggested yarn options, and guidance on customization, this pattern aims to inspire crocheters to bring these cute sheep eggs to life.
Crochet Sheep Egg Pattern
Making Your Crochet Sheep Egg
Abbreviations/Stitches Used
- BLO – work in the back loops only
- ch – chain
- dc – double crochet
- FLO – work in the front loop only
- MR – magic ring (aka. magic circle, adjustable ring)
- Rnd(s) – round(s)
- Row(s) – row(s)
- sc – single crochet
- sc2tog – single crochet 2 stitches together (use the invisible decrease unless directed otherwise)
- sl st – slip stitch
- st(s) – stitch(s)
- [ ] / ( ) – work instructions between brackets as many times as directed
Step by step Pattern
Ears: Make 2
Using Color (A)
- Rnd 1: 6sc in MR. (6sts)
- Rnd 1 alternative: If preferred, ch2 and then 6sc in 2nd chain from hook. (6sts)
- Rnd 2: [Sc in the next st, 2sc in the next st] 3 times. (9sts)
- Rnd 3: [Sc in the next 2sts, 2sc in the next st] 3 times. (12sts)
- Rnd 4: [Sc in the next 2sts, sc2tog] 3 times. (9sts)
- Rnd 5: Sc in each st around. (9sts)
- Rnd 6: [Sc in the next st, sc2tog] 3 times. (6sts)
- Sl st to the first st and fasten off leaving a long tail for stitching the ear to the body. Leave the ears unstuffed.
Tail
Make 1
- Using Color (A)
- Rnd 1: 6sc in MR. (6sts)
- Rnd 1 alternative: If preferred, ch2 and then 6sc in 2nd chain from hook. (6sts)
- Rnd 2: [Sc in the next st, 2sc in the next st] 3 times. (9sts)
- Rnd 3: [Sc in the next st, sc2tog] 3 times. (6sts)
- Sl st to the first st and fasten off leaving a long tail for stitching the tail to the body. Leave the tail unstuffed.
Body
Make 1
- Using Color (A)
- The body is made from the top down.
- Rnd 1: 6sc in MR. (6sts)
- Rnd 1 alternative: If preferred, ch2 and then 6sc in 2nd chain from hook. (6sts)
- Rnd 2: In BLO: 2sc in each st around. (12sts) Mark the front loop of the first st to return to later.
- Rnd 3: In BLO: [Sc in the next st, 2sc in next st] 6 times. (18sts)
- Rnd 4: In BLO: Sc in the next st, 2sc in the next st, [sc in the next 2sts, 2sc in the next st] 5 times, sc in the next st. (24sts)
- Rnds 5-6: In BLO: Sc in each st around. (24sts for 2 Rnds)
- Rnd 7: In BLO: 2sc in the next st, sc in the next 5sts, 2sc in the next st, In both loops: sc in the next 10sts, In BLO: 2sc in the next st, sc in the next 6sts. (27sts)
- Rnd 8: In BLO: 2sc in the next st, sc in the next 7sts, 2sc in the next st, In both loops: sc in the next 10sts, In BLO: 2sc in the next st, sc in the next 7sts. (30sts)
- Rnd 9: In BLO: Sc in the next 11sts, In both loops: sc in the next 10sts, In BLO: sc in the next 9sts. (30sts)
- Rnds 10-12: Repeat Rnd 9. (30sts for 3 Rnds)
Ears:
- Pin the ears vertically over about Rnds 6-9 of the body right next to the solid face portion (which will cover some of the unworked front loops), making sure to leave the front loops of Rnd 5 untouched for adding the fleece, OR place the opening of the ears horizontally with the inside edge of the ear right next to the top of the solid face portion and stitch the ear to the body along Rnd 6 (which will cover some of the unworked front loops), again making sure to leave the front loops of Rnd 5 and the Rnd of loops under the ears untouched for adding the fleece.
Covering the Top of the Head:
- Continue making loops in the continuous spiral for a total of 5 Rnds. This will be down to where the solid face portion is and there are no longer any front loops for several Rnds. Continue around the back of the body to finish the Rnd until you come to the left ear and can go no further. (>Design Note: If the ears were stitched horizontally to the body along Rnd 6 instead of vertically there may be a couple of sts under the ear at this last part that could be worked. Leave these sts under the ear unworked or the fleece will be under one ear but not the other.)
- Fasten off and weave in the ends.
Bow Made Starting With Chains:
Using Color (C)
- Ch 4, [dc in the 4th ch from the hook] 2 times, ch 3, sl st in the same st, ch 4, [dc in the 4th ch from the hook] 2 times, ch 3, sl st in the same st.
- Fasten off leaving a long tail (15+ in/38+ cm) for wrapping several times around the middle and securing the bow to the project.
- Using a tapestry needle, weave in the starting tail through the center sts of the bow on both sides (this will also tighten up the center of the bow).
- Wrap the center of the bow with part of the long tail leaving enough length to sew the bow to the body.
- Using a tapestry needle and the same yarn tail secure the wraps at the back of the bow.
- Stitch the bow on the Crochet Sheep Egg in the desired location.