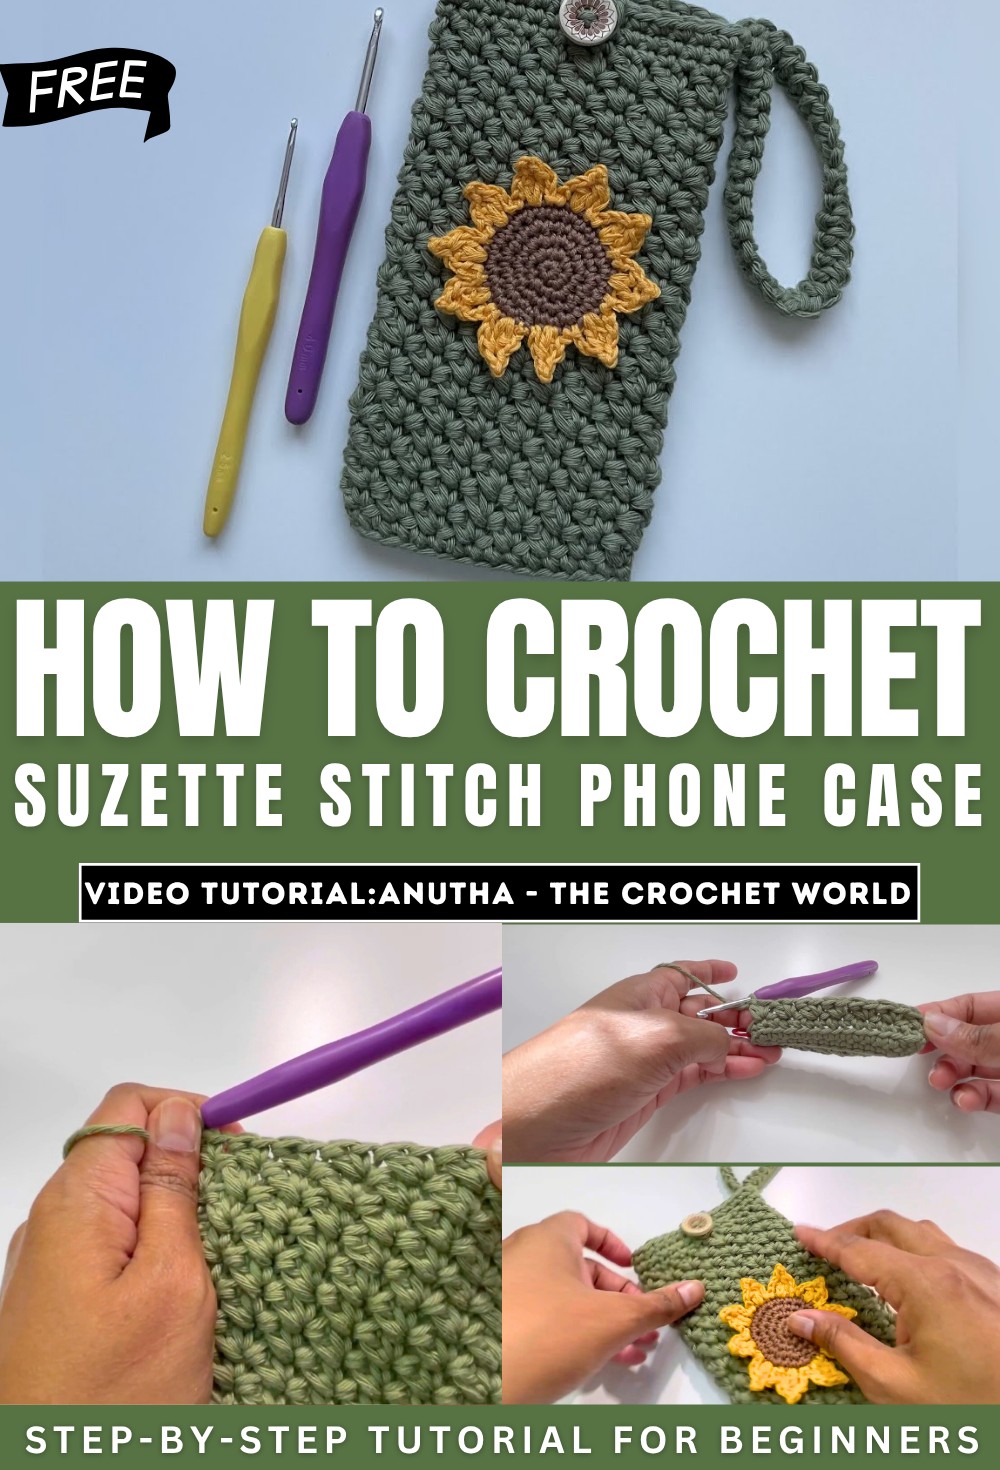
How to Crochet Suzette Stitch Phone Case for Summer
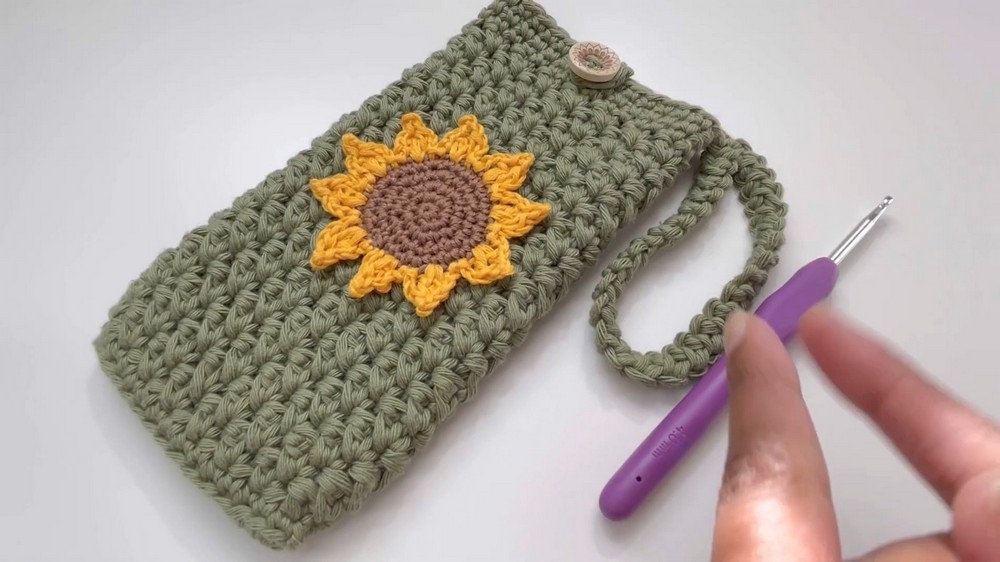
Learn how to crochet a beautiful phone cover using 100% cotton yarn and a 4mm crochet hook. The step-by-step guide covers forming a slip knot, crocheting in rounds, and adding a sunflower embellishment for a unique design. She also explains how to adjust the size and includes instructions for making a functional strap and button loop.
Perfect for beginners and enthusiasts, this project is both practical and creative! So, follow through with us for the complete tutorial.
Introduction
- The tutorial begins with a greeting from the creator, Anuta from “The Crochet World.”
- Anuta introduces the project: a beautiful crocheted phone cover.
- Materials used include 100% cotton yarn and a 4mm crochet hook.
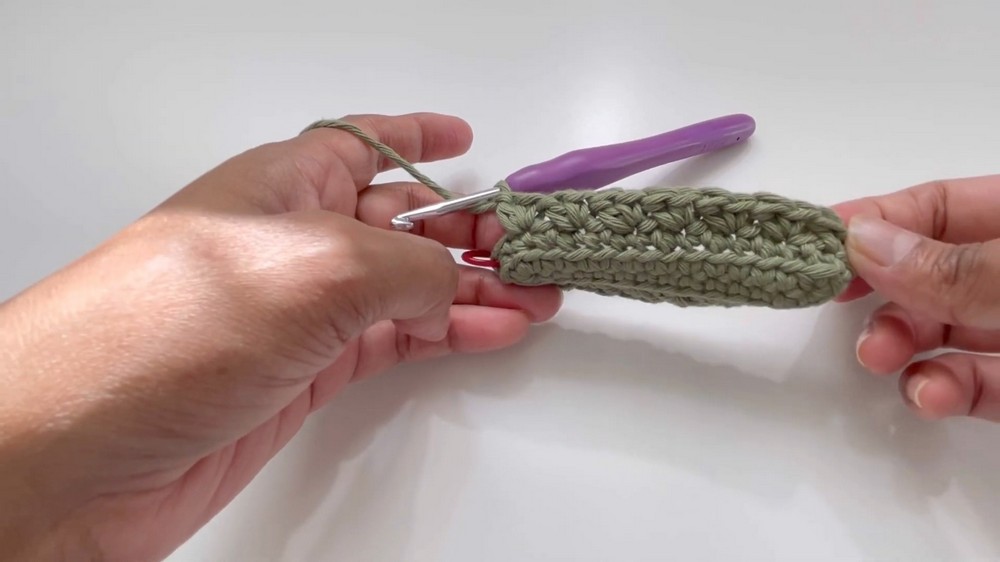
Starting the Base
- Making the Slip Knot: Begin with a slip knot.
- Chain Foundation: Create a foundation of chains.
- Single Crochets: Turn the work and crochet along the back side of the chain, starting from the second chain.
- Mark First Stitch: Place a stitch marker on the first stitch.
- Add Stitches Near the End: Add multiple single crochets into the last chain to round the edges.
Round 1: Building the Base
- Continue single crocheting into each chain along the opposite side.
- Add extra stitches into the starting chain to complete the round.
- Finish round 1 by slip-stitching into the first stitch.
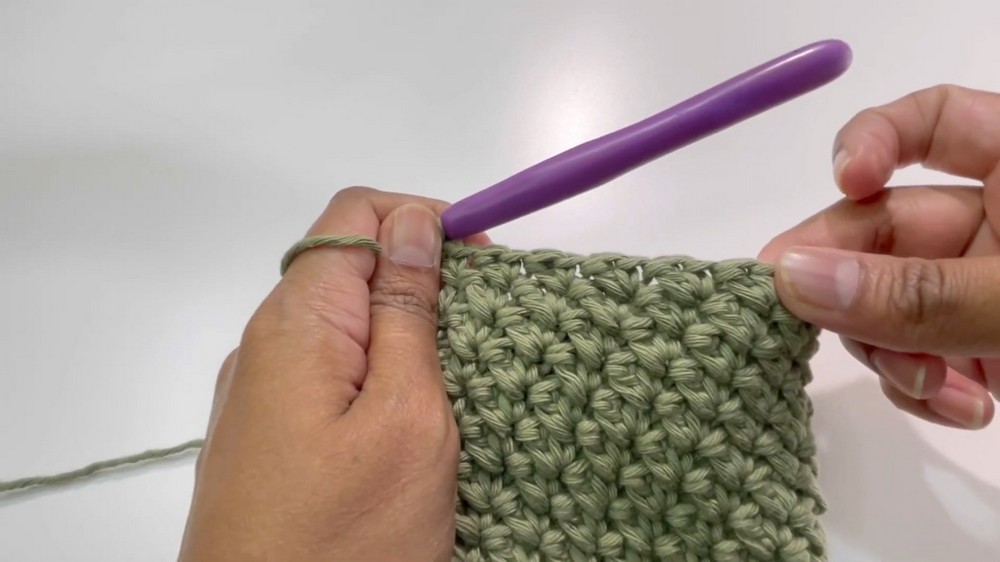
Round 2: Start Back Loop Crochets
- Chain One: Start the round with a chain to secure the section.
- Back Loop Only: Work single crochets into the back loop of every stitch.
- Finish Round: Proceed with back loop single crochets for the entire round.
Rounds 3 and 4: Establish the Pattern
- Switch to spiral crochet for subsequent rounds.
- Pattern Details:
- Perform one single crochet and one double crochet into the same stitch.
- Skip the next stitch and repeat the previous pattern into the following stitch.
- Continue until the end of each round.
Adding Length
- Repeat Pattern: Extend the phone cover by repeating the established pattern for multiple rounds until the desired length is achieved.
- Customizable Size: Adjust the number of rounds depending on the size of the phone cover – fewer rounds for a smaller cover, and more for a larger one.
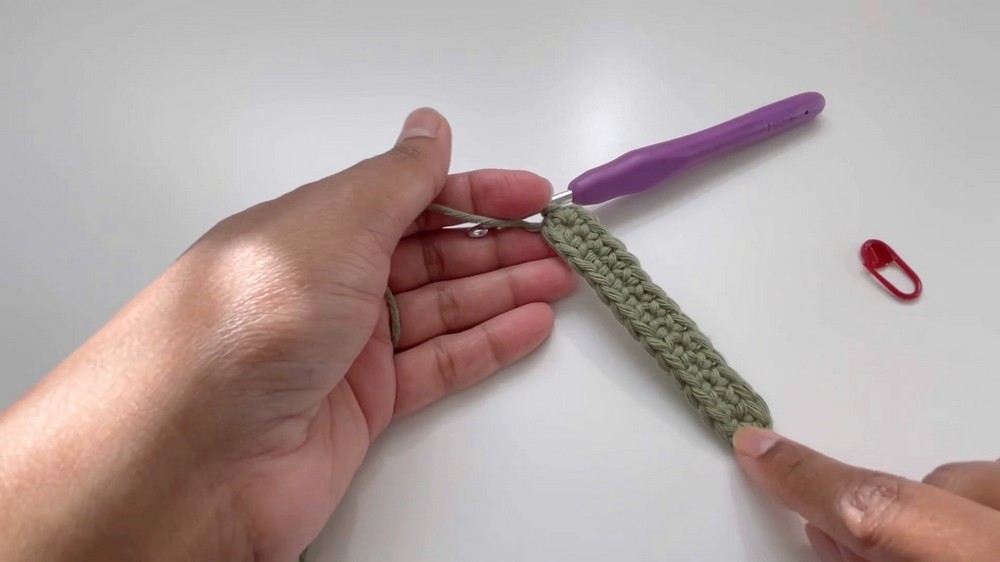
Creating the Strap
- Chain 2: Begin the strap by chaining.
- Building the Strap:
- Work single crochet stitches, looping them back into the new sections.
- Continue until the desired strap length is achieved.
- Attach the Strap: Secure the strap onto the phone cover, ensuring it isn’t twisted.
Adding the Button and Loop
- Create Button Loop:
- Make a separate loop using chains and secure it.
- The loop size will depend on the button used.
- Attach the Button: Sew or glue the button to the front of the phone cover.
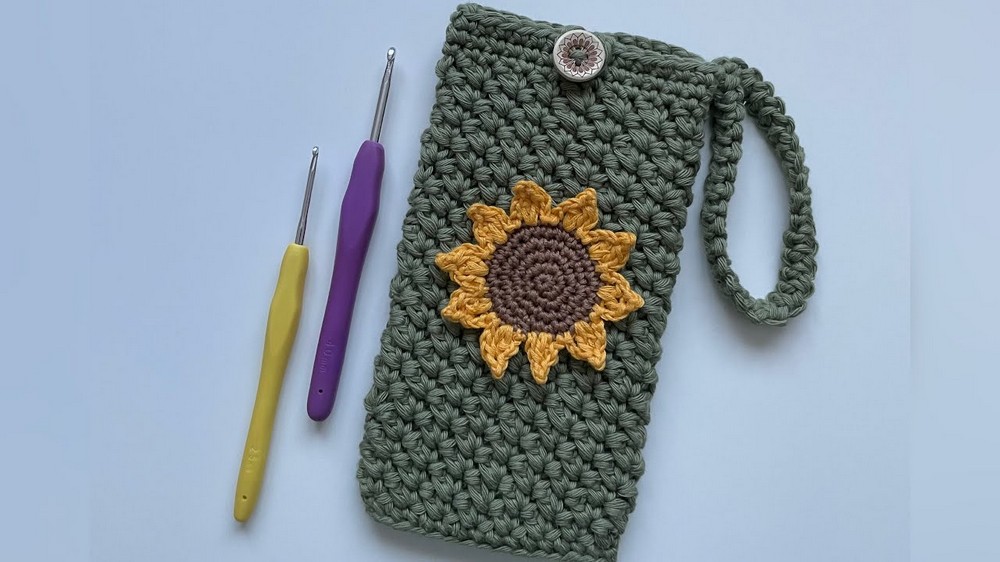
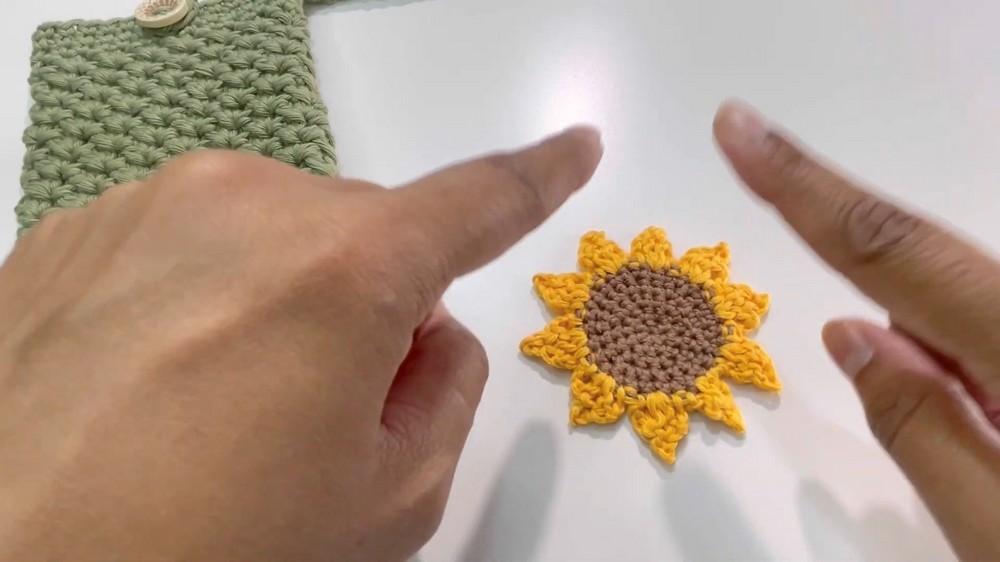
Creating the Flower Decoration
- Start with Magic Circle:
- Form the base of the flower using a magic circle.
- Work multiple single crochet stitches into the circle and close it.
- Build Inner Layers:
- Add stitches in a spiral pattern for multiple rounds to expand the flower.
- Create Petals:
- Switch yarn color and crochet each petal using a combination of double crochets, chain stitches, and picots.
- Repeat until all petals are formed.
Final Steps
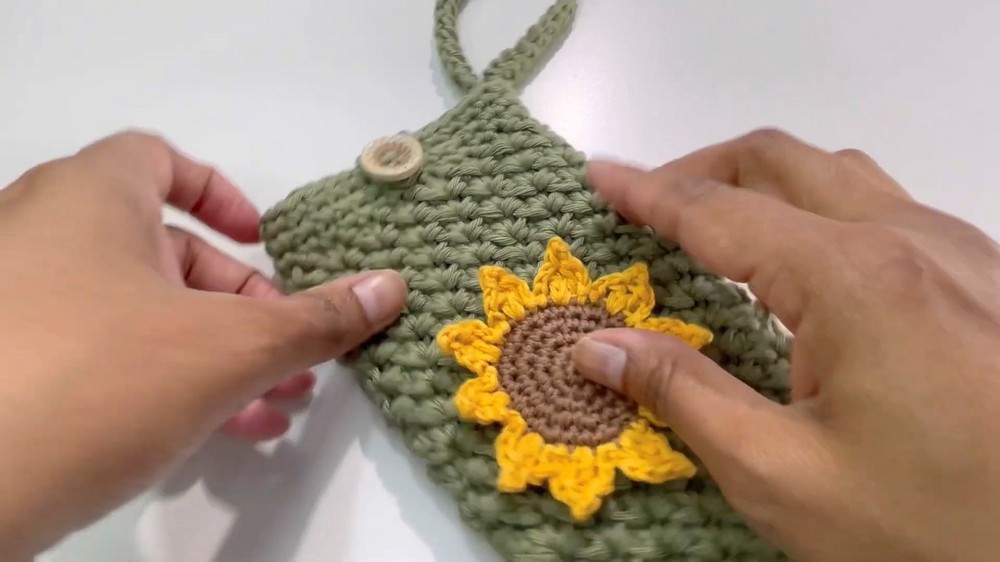
- Attach the Flower:
- Secure the flower onto the phone cover using fabric glue or yarn stitches.
- Finish the Design: Ensure all loose ends are hidden securely.
- The completed phone cover features a strap, button closure, and decorative flower.
Conclusion
- Anuta ends the tutorial by showcasing the final product and encouraging viewers to try the project.