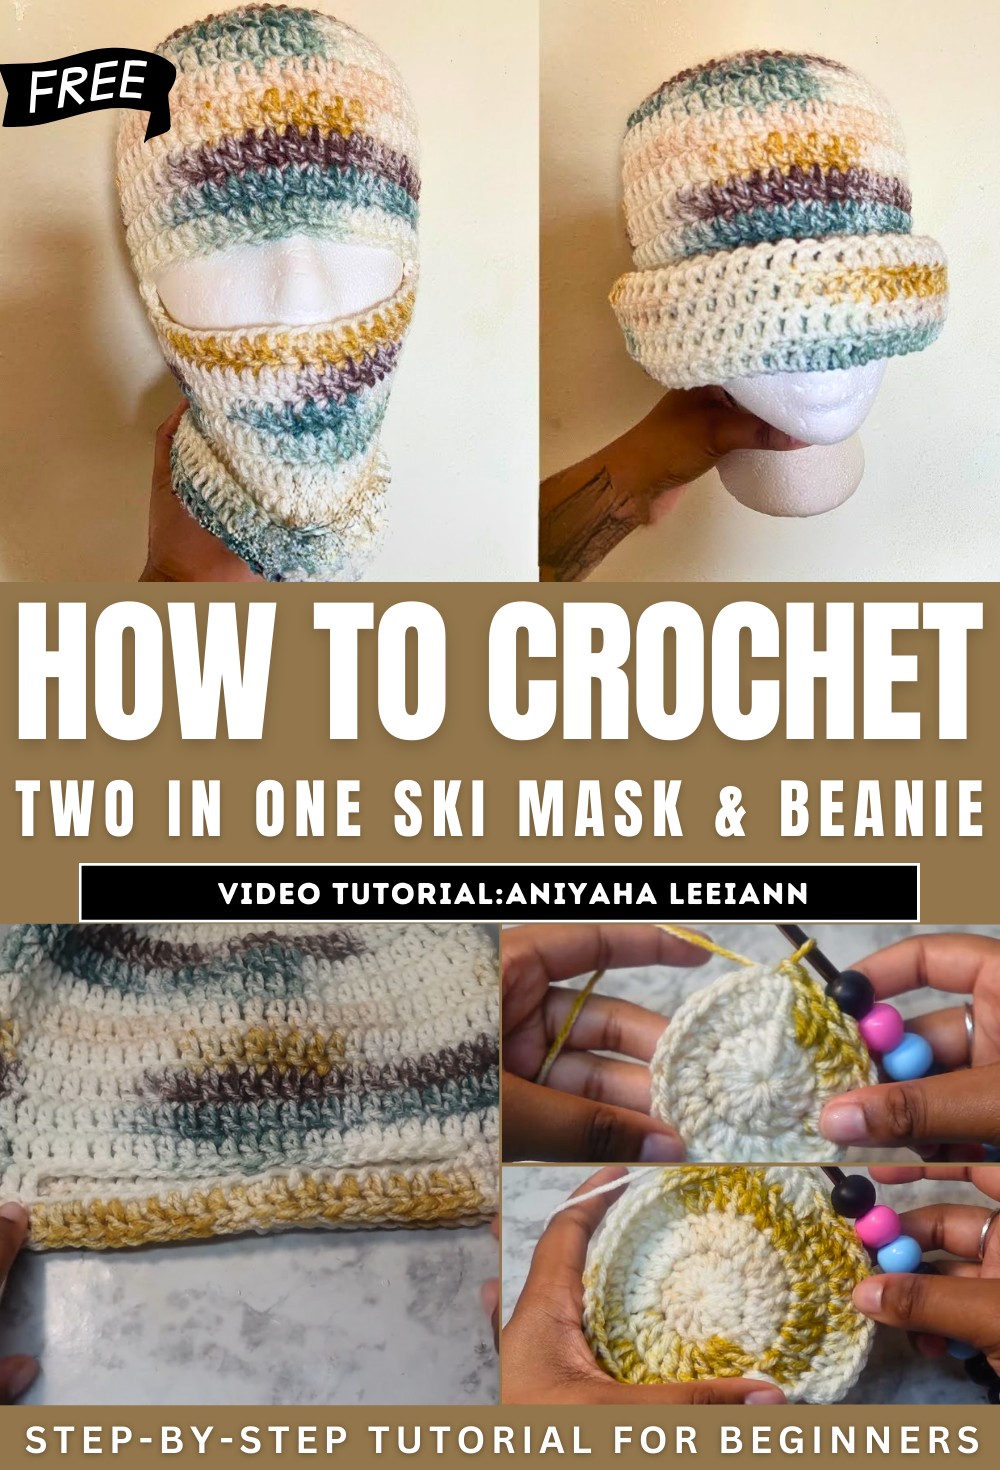
How to Crochet Two In One Ski Mask & Beanie for Beginners

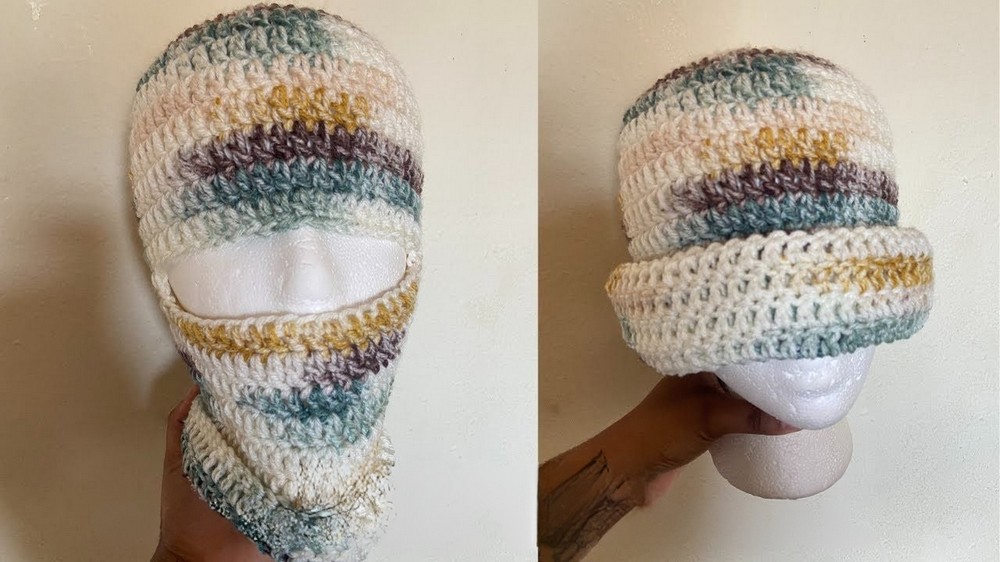
With a tutorial for beginners, learn how to crochet a versatile ski mask or beanie using Emerald Pine that features a lovely ombre texture. It includes tips on maintaining steady tension to avoid overcrowding stitches. The instructor demonstrates how to create the eyehole using chains and finishes the project with seamless weaving of ends.
Perfect for beginners and intermediate crocheters, this guide ensures a neat, customizable final product. So, follow through with us for the complete tutorial.
Making a Ski Mask or Beanie
This crochet tutorial guide walks viewers through creating a versatile ski mask that can also be used as a beanie. Using simple tools and materials, the video provides a structured, beginner-friendly explanation of each step. Below is a detailed summary of the process:
Materials Needed
The instructor begins by listing the supplies necessary for the project:
- A 5 mm crochet hook.
- Yarn (used in the tutorial: Emerald Pine).
- Scissors.
- A darting needle.
- A stitch marker (optional but recommended for counting stitches).
Creating the Base of the Ski Mask (Crown)
-
Starting with a Magic Circle:
- Viewers are advised to create a magic circle in the method they find most comfortable. This forms the foundation of the project.
-
Beginning the Initial Rows:
- Chain two to begin the first row (not counted as a double crochet).
- Form rows of double crochets, joining each row with a slip stitch.
-
Increasing Rows:
- The instructor explains how to increase stitches in each row to expand the crown of the ski mask.
- Starting with single double crochets, viewers are guided through a series of systematic increases on specific stitches (e.g., second, third, or fourth stitch).
-
Finishing the Increase Rows:
- After completing the required increase rows, the base is wide enough to fit comfortably on the head.
Building the Body of the Mask
-
Adding Standard Rows:
- Once the increased rows are completed, a number of standard rows are created using one double crochet into each stitch.
- These rows build the body length of the mask.
-
Tips for Consistency:
- The instructor emphasizes maintaining a steady tension and avoiding overcrowded stitches to ensure the mask doesn’t bulge or distort.

Creating the Eyehole Section
-
Identifying Stitch Placement:
- Using a stitch marker, viewers are instructed to count and mark the placement for the eyehole section.
-
Forming the Eyehole:
- Chain a set number of stitches to create space for the eyehole.
- Skip over the marked stitches and rejoin with a double crochet into the remaining stitches.
-
Filling in Chains:
- Double crochets are worked into the chains to complete the eyehole and ensure the design remains seamless and neat.

Finishing Touches
-
Final Rows:
- The body of the mask is extended with additional rows of double crochets, depending on the desired length.
- The instructor recommends around 25 rows for a balanced design that provides flexibility for folding into a beanie.
-
Weaving in Ends:
- Guidance is provided on weaving in loose yarn ends to create a seamless and polished look.
-
Adjustments and Styling:
- The ski mask can be styled as a snug design or folded into a beanie.

Additional Tips
- For a larger or smaller eyehole, adjust the number of chains.
- Ensure tightness in the magic circle for a professional finish at the top of the mask.

Conclusion
The tutorial concludes by encouraging viewers to share their creations and customize the project to their preferences. This easy-to-follow guide is excellent for both beginners and intermediate crochet enthusiasts. The ski mask provides both warmth and style, while the option to transform it into a beanie adds versatility to the design.