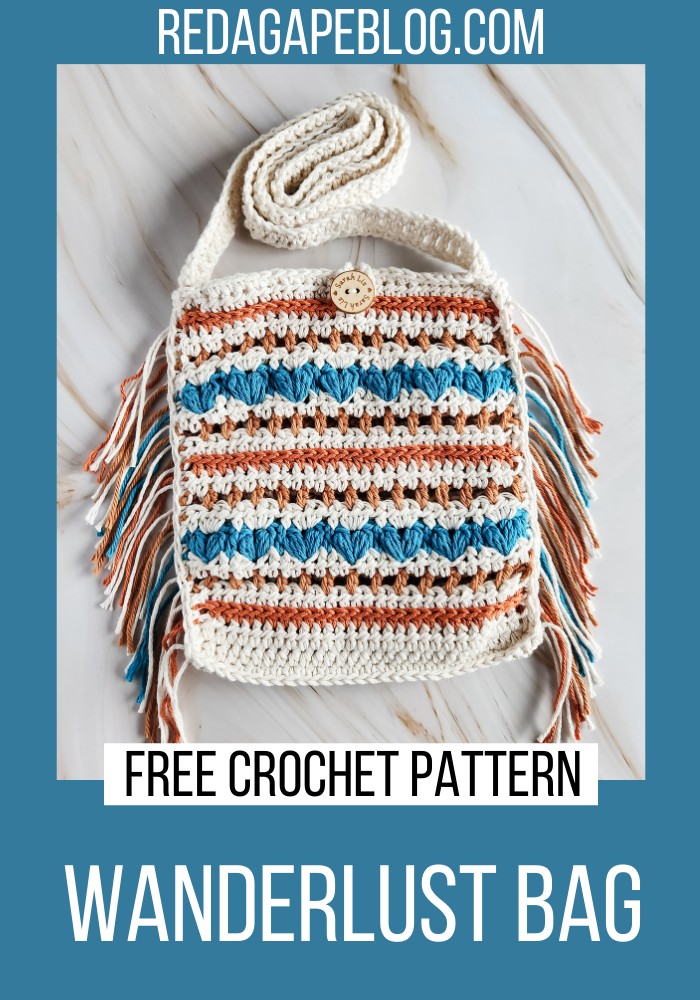
Crochet Wanderlust Bag Pattern Free

Having a good bag for daily use is essential for carrying your stuff in style and comfort. The Crochet Wanderlust Bag combines practicality with a touch of creativity, making it a fantastic choice for those who appreciate both function and fashion. This crochet bag features colorful patterns with an innovative twist instead of weaving in the yarn ends, they’re left long to form an eye-catching fringe on the bag. The free crochet pattern is designed to be accessible for crocheters of all levels, using worsted-weight cotton yarn in four vibrant colors and basic crochet stitches. Its perfect for everyday use, carrying groceries, toting beach essentials, or adding a handmade touch to your outfit.
Crochet Wanderlust Bag Pattern
Making Your Crochet Wanderlust Bag
- Size H (5 mm) hook
- Worsted Weight #4 Cotton Yarn in 4 colors (I used a combination of Crafter’s Secret Cotton and I Love This Cotton)
- Color A (white) Crafter’s Secret – Ivory
- Color B (orange) Crafter’s Secret – Papaya
- Color C (gold) I Love This Cotton – Antique Gold
- Color D (teal) Crafter’s Secret – Dark Teal
- Button
- Scissors
- Needle for weaving in ends
- CH – Chain
- Sl St – Slip Stitch
- SK – Skip
- HDC – Half Double Crochet
- DC – Double Crochet
- Hdcfront3rdloop – HDC in front 3rd loop (see special stitches)
- Puff V st – Puff V Stitch (see special stitches)
- St(s) – Stitch(es)
- RS – Right Side
- WS – Wrong Side
Step by step Pattern
Panel (Make 2)
- With Color A:
- Row 1: Ch 30. Hdc in 2nd ch from hook, and each remaining ch. (29 sts)
- Row 2: Ch 1, turn. Hdc in each st.
- Row 4: Ch 1, turn. Hdcfront3rdloop in each st.
- Row 6: Ch 1, turn. HDC in each st and ch sp.
- Row 8: Ch 1, turn. Hdc in first st. 3HDC in puff v st sp. HDC in next HDC st. Repeat across.
- Row 10: Repeat Row 6.
- Row 12: Ch 1, turn. Hdcfront3rdloop in each st.
- Row 14: Repeat Row 6.
- Row 16: Repeat Row 8.
- Row 18: Repeat Row 6.
- Row 20: Ch 1, turn. Hdcfront3rdloop in each st. Cut yarn after making the first panel, do NOT cut yarn after second panel.
- With Color B:
- Row 3: Ch 1, turn. Hdc in each st. Cut yarn.
- Row 11: Ch 1, turn. HDC in each st. Cut yarn.
- Row 19: Ch 1, turn. HDC in each st. Cut yarn.
- With Color C:
- Row 5: Ch 1, turn. HDC in first st. Ch 1, sk 1 st, HDC in next st. Repeat across. Cut yarn.
- Row 9: Repeat Row 5. Cut yarn.
- Row 13: Repeat Row 5. Cut yarn.
- Row 17: Repeat Row 5. Cut yarn.
- With Color D:
- Row 7: Ch 1, turn. HDC in first st. Sk 1 st, puff v st in next st. Sk 1 st, HDC in the next st. Repeat across. Cut yarn.
- Row 15: Repeat Row 7. Cut yarn.
Joining Panels
- Place panels with wrong sides (WS) facing each other and right sides (RS) facing out.
- SC panels together along the sides with one SC per row end.
- At each corner st, make 2 SC.
- Work along the bottom edge, SC in each ch across.
- Work up the other side making SC and at corners making 2 SC.
- SC AROUND only the top edge of the bag, do not join panels at the top.
Creating Fringe
- Knot 2 strands of yarn tails together along the sides of the bag.
- Trim the fringe to the desired length.
Strap
- Ch 151 (adjust for your height, this is for 5’8″).
- Row 1: SC in 2nd ch from hook, and each remaining ch. (150 sts)
- Row 2: Ch 2 (or standing DC), turn. DC in each st across. (150 sts)
- Row 3: Ch 1, turn. SC in each st across. (150 sts)
- Cut yarn and sew the strap onto the bag.
Remember to cut the yarn after each color change, leaving a 4-inch tail, and not to weave in ends as they will serve as the fringe.