Crochet Mini Tote Bag Pattern Free
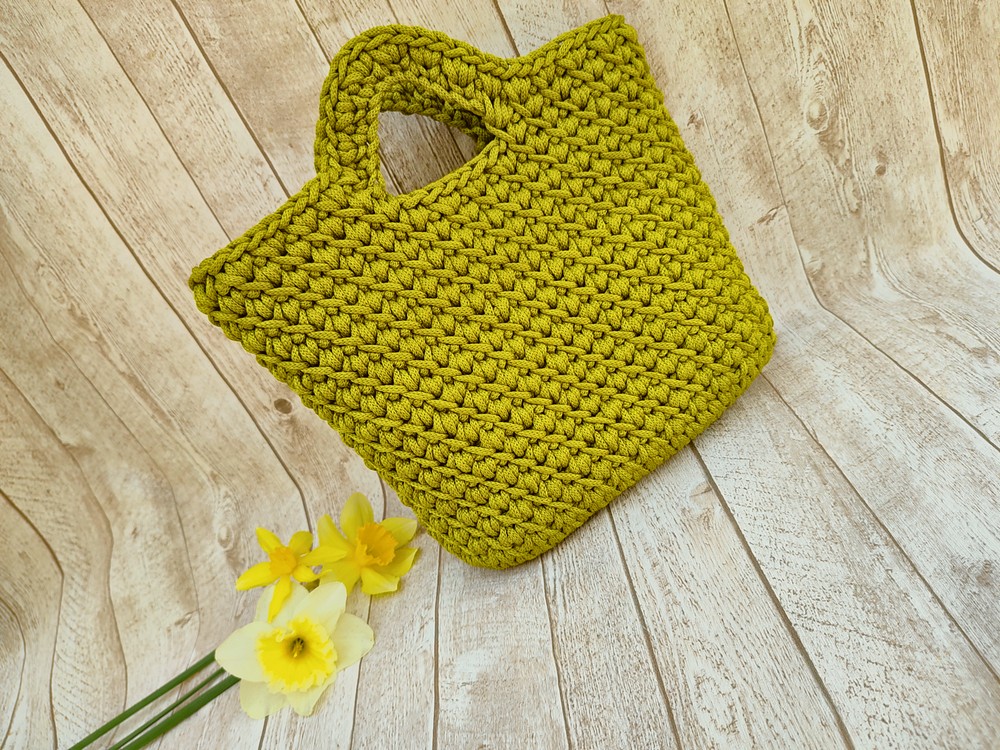
Tote bags are popular for being simple but great for carrying lots of stuff. They are like big pockets with handles. The Crochet Mini Tote Bag is a special kind of tote bag that looks robust with its stripey design. You can make this bag themselves by following the simplest pattern we are providing below. Mini Tote Bag is neat for carrying small things and has handles that make it easy to hold and take with you wherever you go. The pattern gives you the flexibility of the customizations in color and the type of yarn you choose. The Crochet Mini Tote Bag is perfect for carrying everyday essentials, small shopping trips, organizing craft supplies, or as a stylish accessory for casual outings. So, why not add the ease of this crochet bag in your daily life?
Crochet Mini Tote Bag Pattern

Making Your Crochet Mini Tote Bag
Materials:
- Yarn
- Crochet hook
- Scissors
- Note: The video did not specify the type of yarn or hook size, you can choose them according to your preference or desired bag size.
Abbreviations:
- st or stitch
- sc or single crochet
Step-by-step pattern
Base:
- Start with 56 stitches (adjust as needed for size).
Body:
- Row 1:
- Start by making a seamless join. To do this:
- Make a longer loop with your yarn.
- Insert the hook under the two top loops of the second stitch from behind.
- Grab the loop and pull it through.
- Insert hook in the middle of the last stitch from behind, grab the loop and draw it to the wrong side.
- Work a single crochet (sc) into each stitch across by inserting the hook through the V of the first sc stitch in the previous row, making sure the hook goes into the backside horizontal bar of the stitch.
- Start by making a seamless join. To do this:
- Row 2:
- Begin the row with a seamless join just like in Row 1.
- Work the 2nd sc stitch by inserting the hook through the “left leg” of the same sc.
- Then go through the 2 top loops of the next stitch.
- Skip the next sc, work a sc into the center of the next sc stitch, making sure the hook goes under “2 legs”.
- Continue to work “couples” of sc stitches in this way until the end of the row. A “couple” consists of one sc in the left leg of a stitch followed by one sc in the two top loops of the next stitch.
- Conclude the row with another seamless connection.
- Row 3:
- Repeat Row 2.
- Rows 4 to 18:
- Continue repeating the pattern established in Row 2 for each subsequent row until Row 18.
Handles:
- Row 19:
- Begin with a seamless join.
- After working a couple of sc stitches as established, chain 14 (this will create one side of the handle).
- Skip 6 stitches (for spacing of the handle), then continue with the pattern across until 9 stitches are worked after the chain.
- Chain 14 again for the second handle and then skip 6 stitches.
- Finish the row with sc stitches as before until the end.
Upper Edge:
- Row 20:
- Start with a seamless join.
- Work sc stitches across the chain from the previous row to create a solid fabric over the chain, inserting the hook into the back bar of each chain.
- Continue working the established pattern of sc stitches through the entire row.
- Make sure to work sc stitches across the second chain arch as you did with the first, ensuring handle stability.
- Row 21:
- Repeat the pattern of a seamless start and follow the established stitch pattern for the entire row.
- Work a sc into the “left leg” and then into the 2 top loops of the next sc stitch, for a total of 35 stitches or until the end.
Finishing:
- When the last stitch of Row 21 is complete:
- Cut the yarn, leaving a tail long enough for weaving in ends.
- Pull the tail through the last loop on the hook firmly to secure the end.
- Weave in all ends for a neat finish.

