Easy Free Crochet Openwork Shawl Pattern for All-Season Style
Slip into elegant style with free crochet openwork shawl pattern for a lightweight layer that adds beauty and comfort to any outfit you wear.
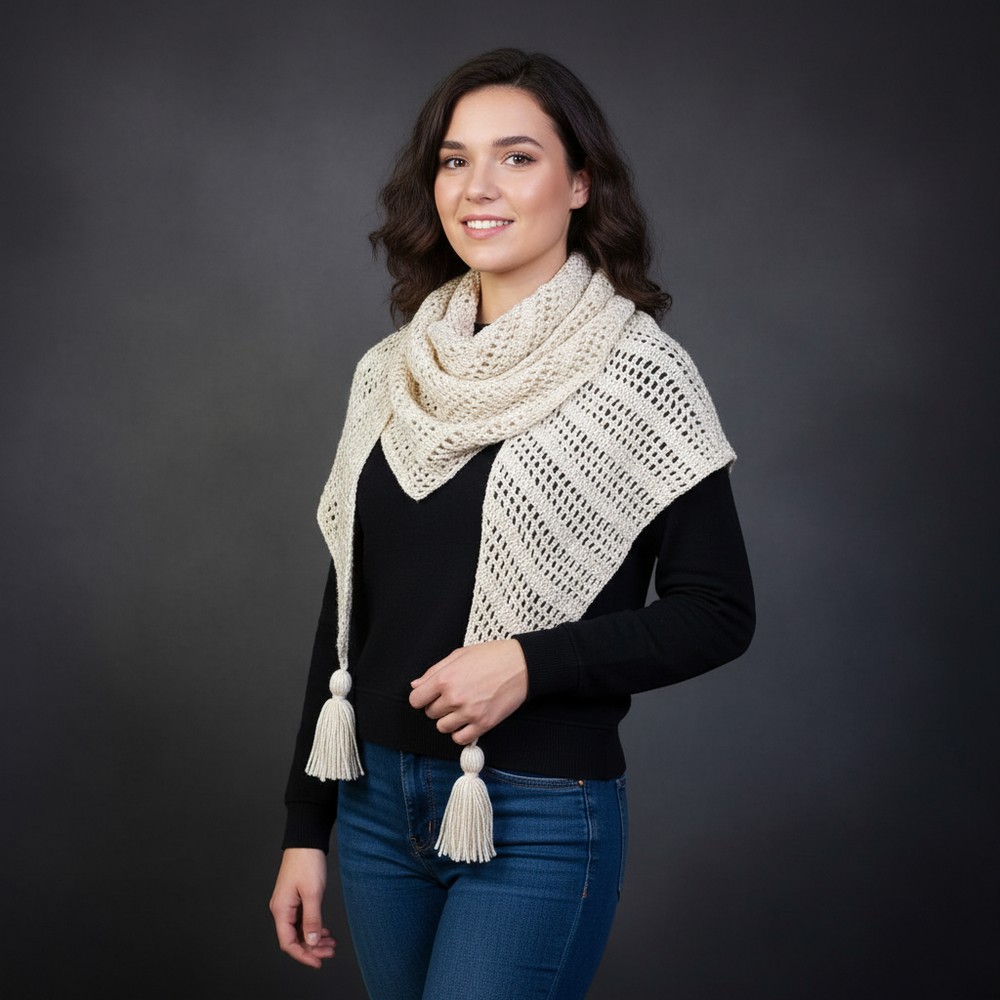
Light and airy with a touch of elegance you will notice the delicate beauty that makes every outfit feel special. With a crochet openwork shawl pattern you get a stylish layer that is as pretty as it is useful. This pattern lets you make a shawl that feels soft against your skin and looks like a piece of art with its open spaces and gentle drape. The shawl is great for adding a little bit of warmth on cool days or dressing up for a night out giving you comfort without being too heavy.
Free Crochet Openwork Shawl Pattern for Trendy Outfits

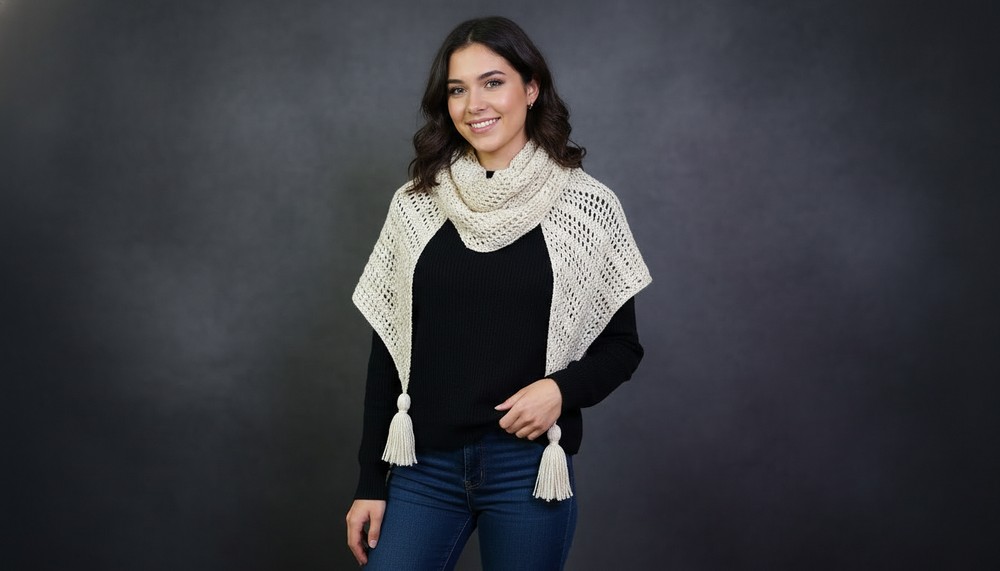
You can wear it over your shoulders wrap it around your neck or let it flow down your back for a look that is always fresh. Simple to make and easy to wear this shawl invites everyone to enjoy a timeless accessory that can be made in any color you like. It is perfect for gifting or keeping as your own everyday treasure.
Crochet Openwork Shawl Pattern
Materials
- Yarn: 195 g of light, thin yarn (about 1 mm thick; e.g., cashmelon, sport or fingering weight for summer shawls)
- Hook: 3.0 mm crochet hook (or size for desired drape)
- Notions:
- Scissors
- Tapestry needle
- Stitch marker(s)
- Measuring tape
- (Optional) 3 matching tassels
Key Abbreviations (US Terms)
| Abbreviation | Meaning |
|---|---|
| ch | chain |
| st(s) | stitch(es) |
| sp | space |
| dc | double crochet |
| ext-dc | extended double crochet (see below) |
| RS/WS | right/wrong side |
| rep | repeat |
Special Stitch
Extended Double Crochet (ext-dc):
Yarn over, insert hook in indicated stitch, yarn over and pull up a loop (3 loops on hook),
yarn over and pull through 1 loop only (as if making a ch),
yarn over and pull through 2 loops, yarn over and pull through remaining 2 loops.
Special Notes
- The shawl is worked sideways/diagonally and shaped with increases on one edge only.
- One side stays straight, the other increases—using a stitch marker helps you remember which is which.
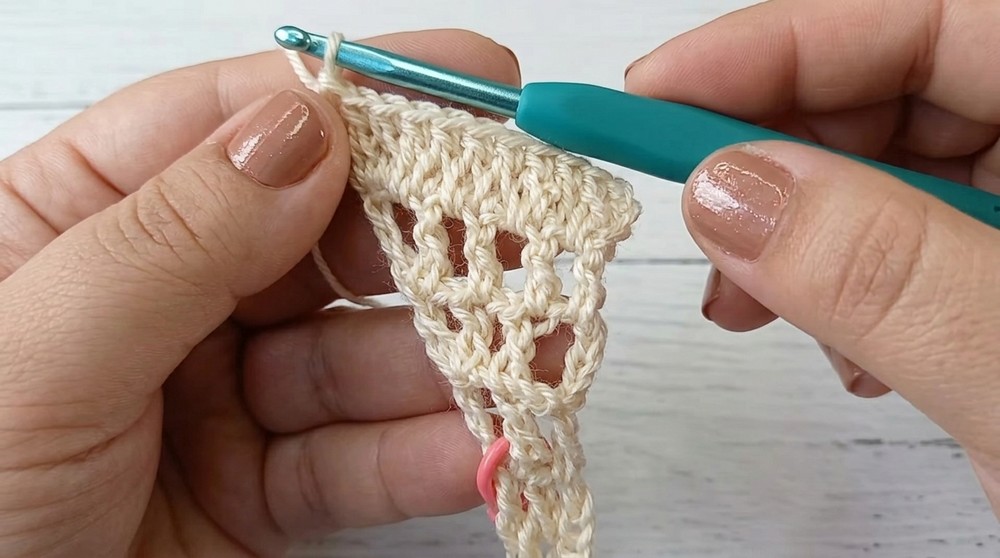
- Pattern Repeat: 1 row of solid (ext-dc), 3 rows mesh (openwork), 1 row solid, etc.
- Tassels are optional but recommended for a finished look.
Finished Measurements
- Sample: Variable; original ~one-size adult, can be customized by working more/less repeats.
- Simply stop when you reach your desired size.
Pattern
Row 1: Foundation
- Ch 5 (counts as base ch; the last 4 count as first ext-dc of row).
- Working into the first ch of foundation:
- 2 ext-dc in same ch.
(You have a total of 3 ext-dc in this first row.)
- 2 ext-dc in same ch.

Row 2: Begin Increase
- Turn. Ch 4 (counts as first ext-dc).
- Ch 1 (for mesh space/separation).
- Ext-dc in first st of previous row (forms increase—place a stitch marker at this side).
- Ch 1.
- Skip next st, ext-dc in last st (4th ch from previous row).
- (You have 3 ext-dc, one mesh space at each end).

Row 3: Mesh Section
- Turn. Ch 4 (counts as first ext-dc).
- Ch 1 (mesh separation).
- Skip next st, [ext-dc in next st, ch 1] repeat as necessary,
- At end: ext-dc in 2nd ch of turning ch from previous row.
- At “increase” (marked) side, always ext-dc in same stitch, ch 1, ext-dc at row end.
Row 4: Continue Mesh with Increase
- Turn. Ch 5 (4 for ext-dc, 1 for mesh).
- Ext-dc in first st (increase).
- [Ch 1, skip 1, ext-dc in next st] repeat to end.
- At end: skip 1, ext-dc in last ext-dc of previous row.
Row 5: Solid Row
- Turn. Ch 4 (counts as first ext-dc).
- Ext-dc in each st and in each ch-1 sp across, until last ch-4.
- In the last ch-4: 3 ext-dc (to maintain increase).
- Each solid row increases at the end with 3 ext-dc in the last turning ch.
Main Pattern Repeat
Continue as established:
- Mesh Section: Repeat the mesh/openwork row 3 more times (each mesh row begins with ch 5, continues with [ext-dc, ch 1, skip next], and increases at the designated edge), always working an increase (ext-dc, ch 1, ext-dc) at the beginning/increase edge.
- Solid Section: After three mesh rows, work 1 solid row: ext-dc in every st and ch-1 sp, and increase at end (3 ext-dc in last ch).
Repeat this 4-row sequence until you have the desired triangle shawl size.
Finishing
- For neatness, end your shawl with a solid row, mirroring the beginning of the work.
- Fasten off: Cut yarn, pull through last loop, secure with a small knot.

Hiding Ends
- Thread beginning and ending yarn tails onto tapestry needle.
- Weave ends on the WS through the “vertical” and then the “horizontal” stitches for extra hold.
- Always hide tails inside the solid ext-dc sections for best camouflaging.
Tassels (Optional)
- Make or purchase 3 tassels.
- Attach a tassel at each endpoint and one at the triangle’s point (apex).
- Use one tassel string to tie a tight square knot at the shawl’s end.
- Hide excess tassel strings by threading through the tassel head with a tapestry needle.
- Trim bottom for evenness.


Conclusion
You have now created a lightweight, lacy, diagonal crochet shawl with a lovely mesh pattern and optional tassel finish—a versatile accessory that drapes beautifully. This adaptable shawl can be made in any size and any yarn weight for year-round wear.
Pattern Corrections & Tips
- Marker Placement: Always keep a marker at the increasing edge for consistency.
- Row Counting: Alternate 1 solid row (every 4th row) with 3 mesh rows—this will keep the pattern balanced.
- Final Edge: Always finish with a solid row for symmetry.
- Blocking: Lightly block your finished shawl for the lace and triangle shaping to show at their best.
- Tassels: Make sure to securely knot and hide ends for durability.