Free Crochet Dinosaur Teeth Pattern kids will want to wear
Decorate dinosaur toys and costumes with a free crochet dinosaur teeth pattern that is simple fun and perfect for party props and kids toys.
Children love toys that look friendly and fun with big white teeth that make every dinosaur seem ready for a gentle laugh or play. These bright teeth give life and character to your soft toys so they stand out in any room and smile at everyone who sees them. Using a crochet dinosaur teeth pattern lets anyone follow simple steps to add safe and soft teeth for hugging or playtime.
Cute Free Crochet Dinosaur Teeth Pattern perfect for fun costumes
The beauty is in how these teeth can be small for a sweet look or large and silly for extra laughter making each toy different and special. These easy patterns help you change the look of every dinosaur so you can make funny friends for gifts or decorations. Each set of teeth is sturdy and smooth so every child can play easily and safely with their new dino. Soft and cute teeth turn this little creature into the best friends for every child’s play world.
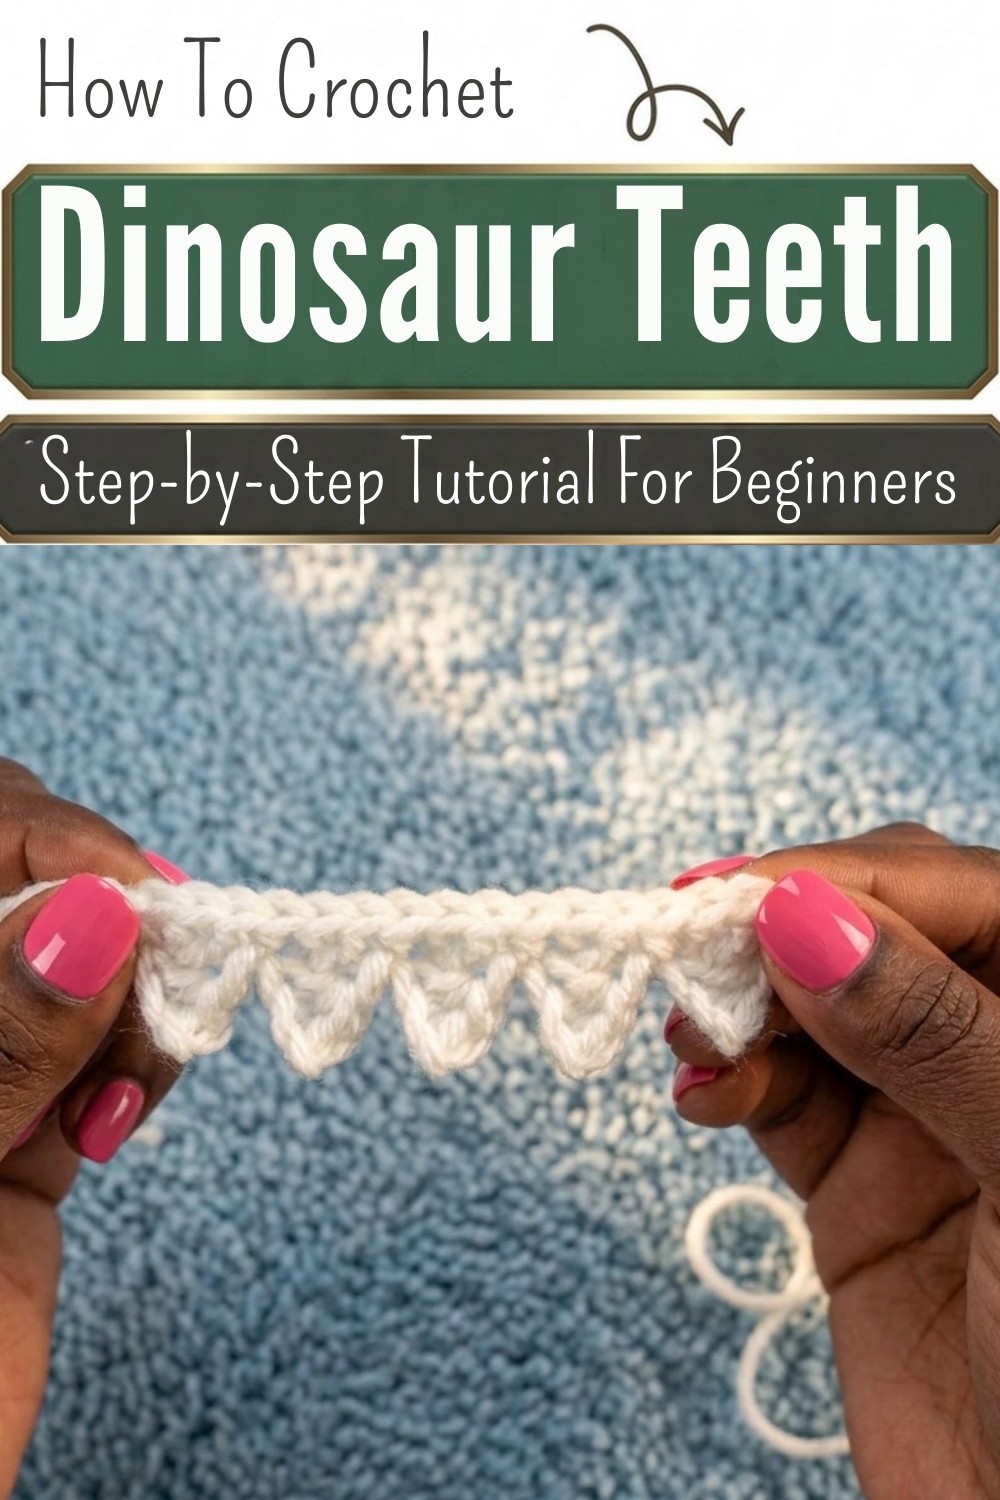
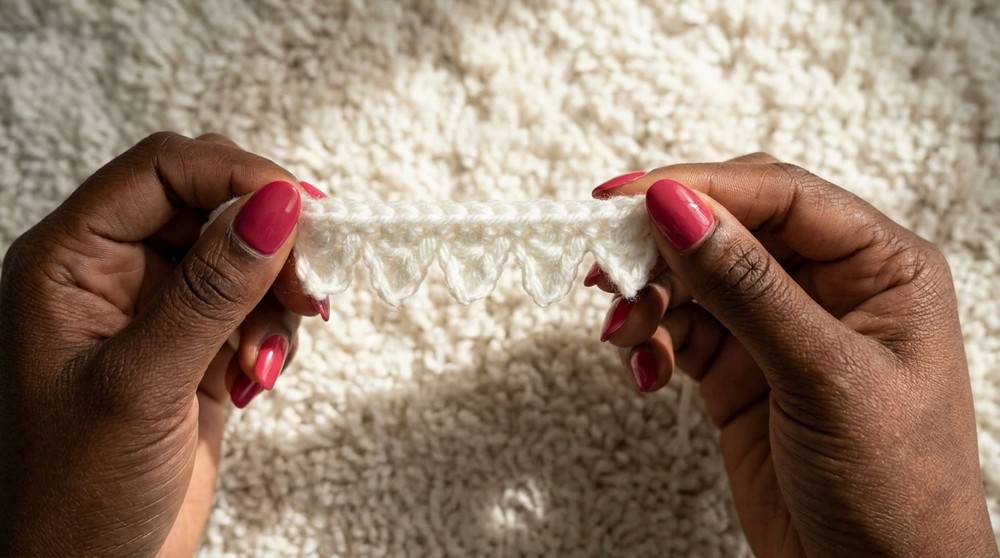
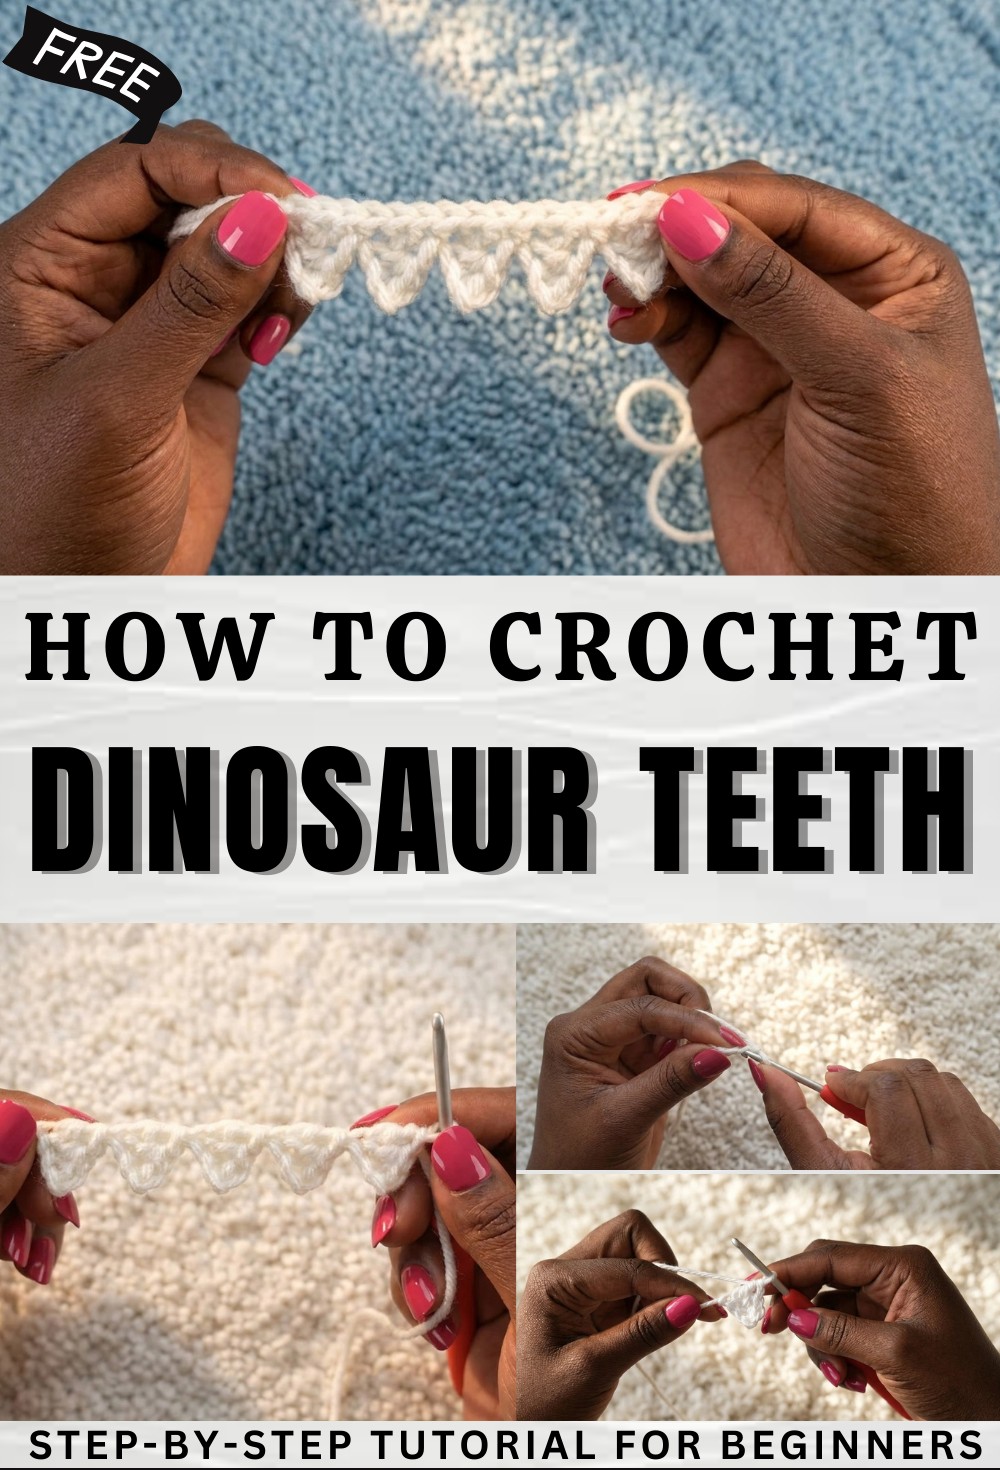
Crochet Dinosaur Teeth Pattern
Materials List
- Yarn: White worsted weight yarn (e.g., acrylic or cotton)
- Hook: Size 3.5mm (E-4) crochet hook
- Notions (Optional):
- Yarn needle (for weaving in ends)
- Scissors
Key Abbreviations (US Terminology)
- ch: chain
- sc: single crochet
- hdc: half double crochet
- dc: double crochet
- st(s): stitch(es)
- sl st: slip stitch
Special Notes
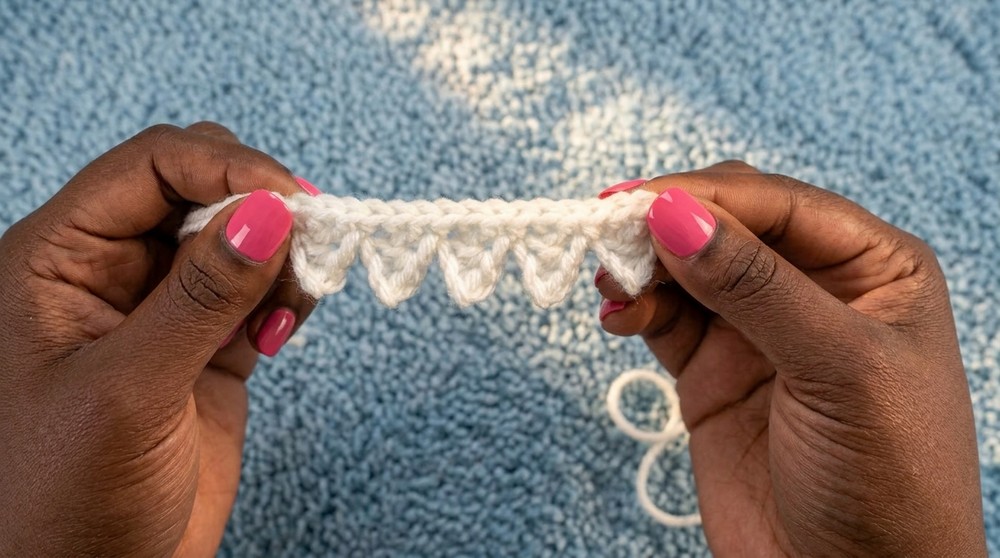
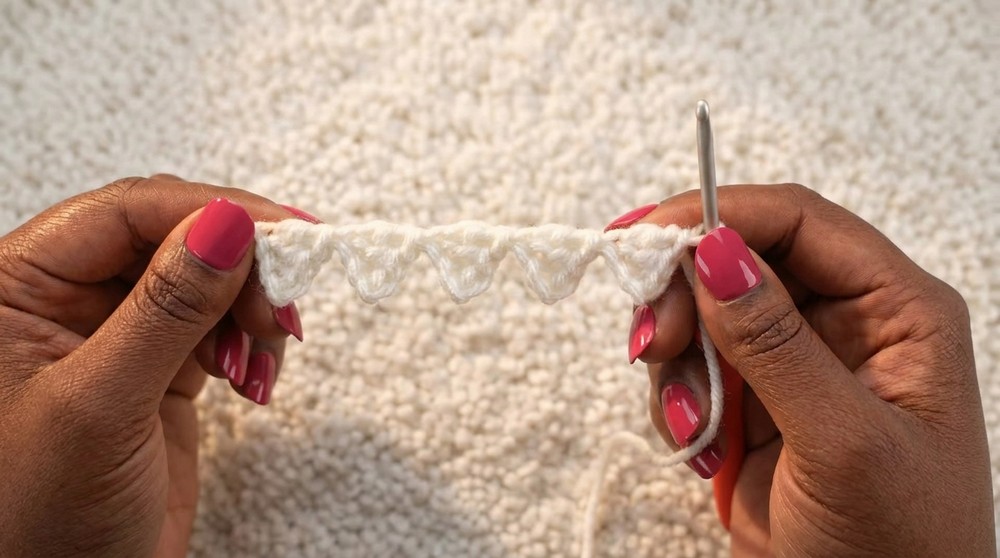
- The teeth are worked in one piece, starting from the first tooth and continuing through all five without fastening off.
- Each tooth is made up of a small row, beginning with a chain of 4.
- The finished set of teeth is sewn to the head of Dan the Dinosaur in a later step.
Pattern Instructions
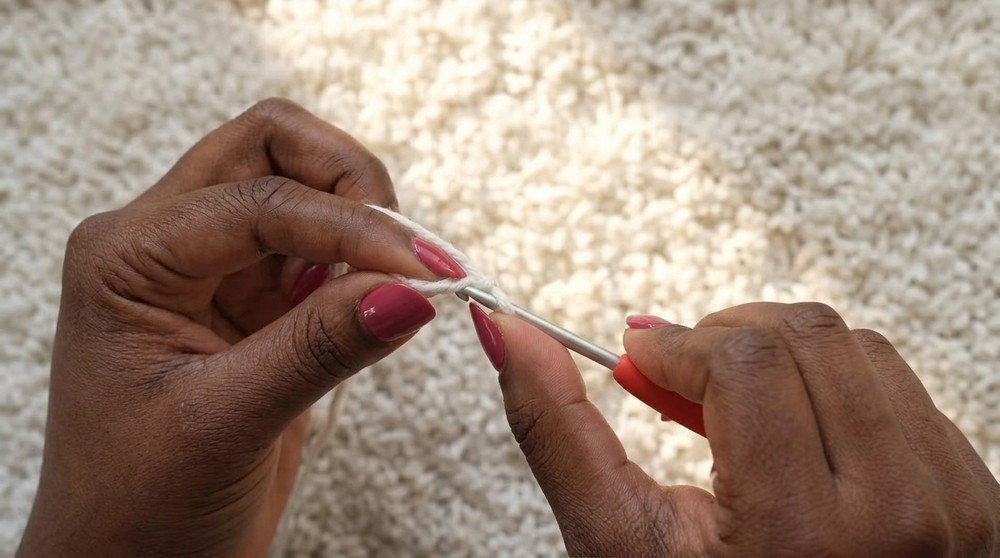
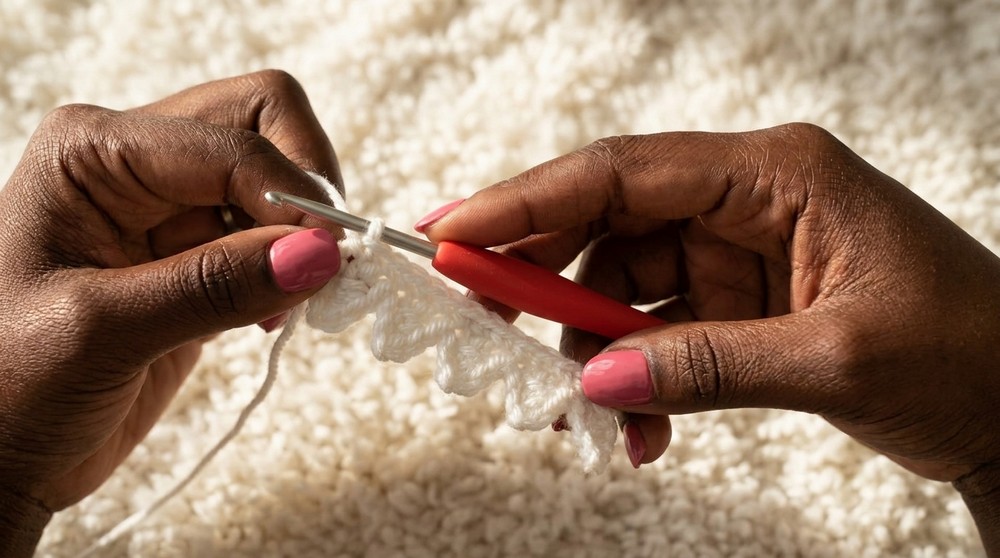
Step 1: With white yarn, create a slip knot and place it on your hook.
Step 2:
Ch 4.
Step 3:
Sc in the second ch from the hook.
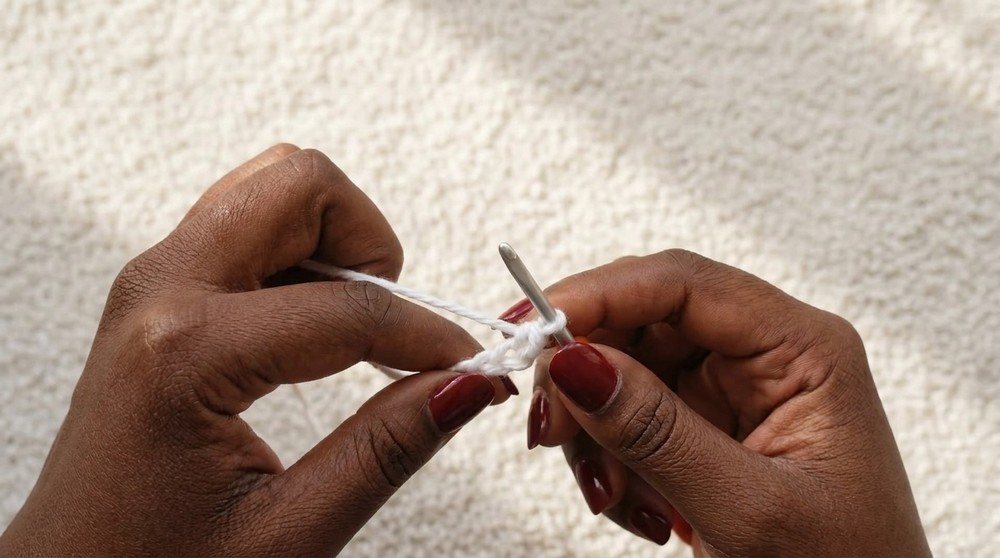
Hdc in the next ch.
Dc in the last ch.
(First “tooth” made.)
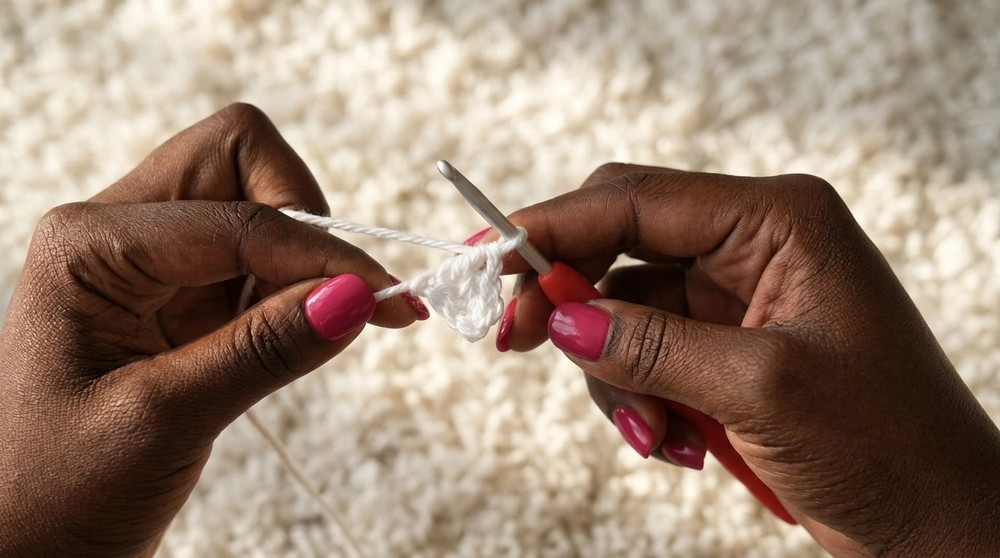
Steps 4–6 (Repeat for Additional Teeth):
Without fastening off, repeat Steps 2–3 four more times to create a total of five teeth:
- Ch 4.
- Sc in the second ch from hook.
- Hdc in next ch.
- Dc in last ch.
Step 7:
Once all five teeth are completed, ch 1 and turn your work.
Step 8:
Working across the tops of all five teeth (one after another),
sc 3 across the top of each tooth (for a total of 15 sc)—that is, do 3 sc over each “tooth” before moving to the next.
Step 9:
Fasten off and tie the yarn tails together securely.
Conclusion
You have now completed the set of amigurumi teeth for Dan the Dinosaur. Save your finished piece to attach to the dinosaur’s head in a later step.
Pattern Correction
- Ensure you make 3 sc across the top of each tooth for an even row. Double-check your stitch count (should end with 15 sc).
- Maintain consistent tension throughout for best results.
Tip
If you find your teeth curling or not sitting flat, lightly block the finished piece or gently shape it with your hands before sewing to the head. If weaving in ends, use a yarn needle to hide them within the body for a neat finish.