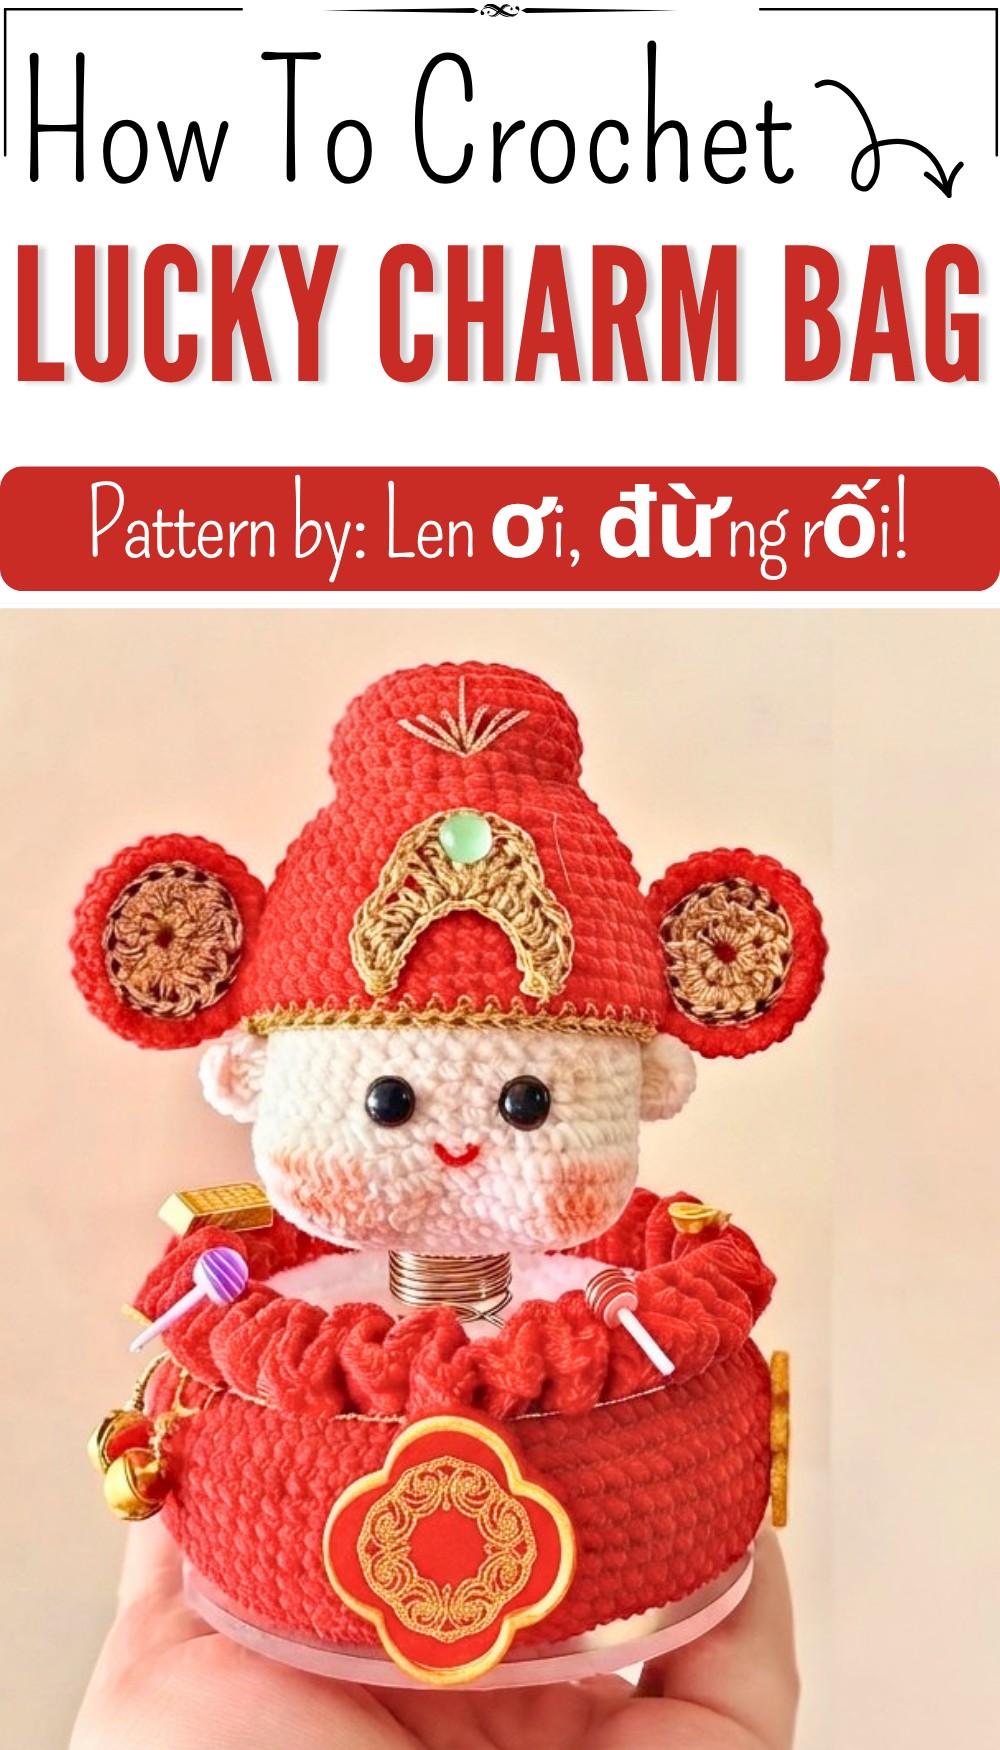
Free Crochet Lucky Charm Bag Pattern for Bag Lovers
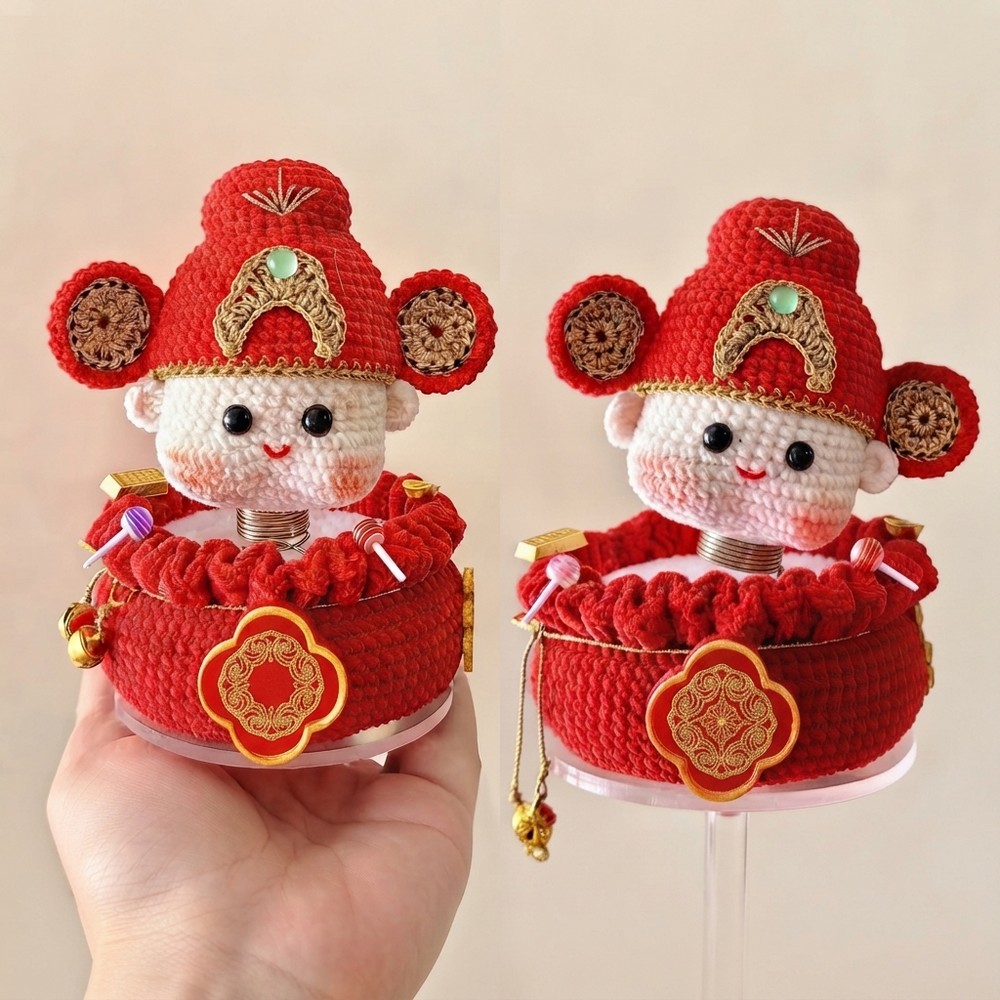
Keep lucky vibes close with Free Crochet Lucky Charm Bag Pattern featuring charming style perfect for little treasures and everyday adventures.
Bright colors and a cute little bag can make even an ordinary day feel more fun. The Free crochet Lucky Charm Bag Pattern is a delightful project for anyone who loves small crochet accessories that are both useful and beautiful. This charming idea comes from Crochet Mania, and you can also visit the Crochet Mania YouTube channel to enjoy more creative and inspiring crochet projects.
The finished lucky charm bag is small, stylish, and full of personality. It has a soft texture that feels cozy and a lovely shape that is easy to carry. Its cheerful look makes it stand out, whether you choose bright colors or soft pastel shades. This little bag is perfect for keeping coins, earbuds, tiny notes, lip balm, or other small everyday items in one place. It slips easily into a handbag or backpack and also looks beautiful hanging on a hook, resting on a bedside table, or decorating a craft corner. It is the kind of handmade piece that brings a smile every time you see it.
Beginner Friendly Lucky Charm Bag Free Crochet Guide
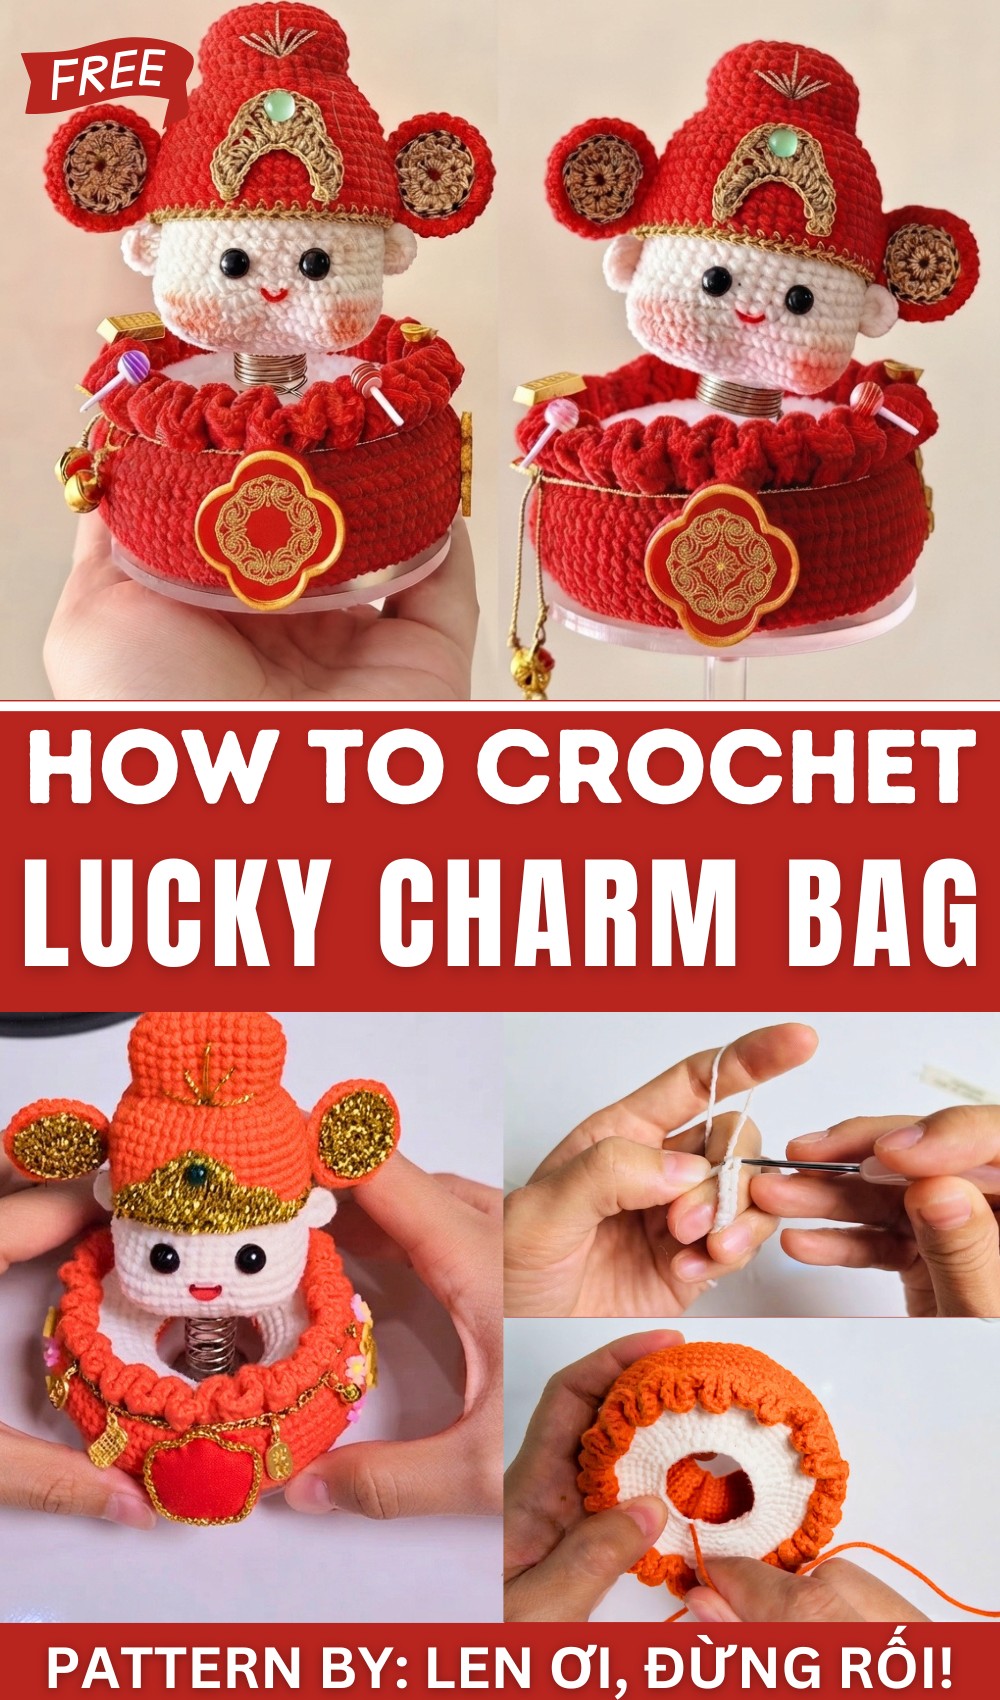
One of the nicest things about this bag is how easily it fits into everyday life. It is small enough to take almost anywhere, yet pretty enough to become a favorite accessory. Many people enjoy making several in different colors because each one has its own special look. Children love its cute size, while teens and adults enjoy carrying a handmade piece that feels different from ordinary bags. It is a simple way to add a little color and happiness to daily routines.
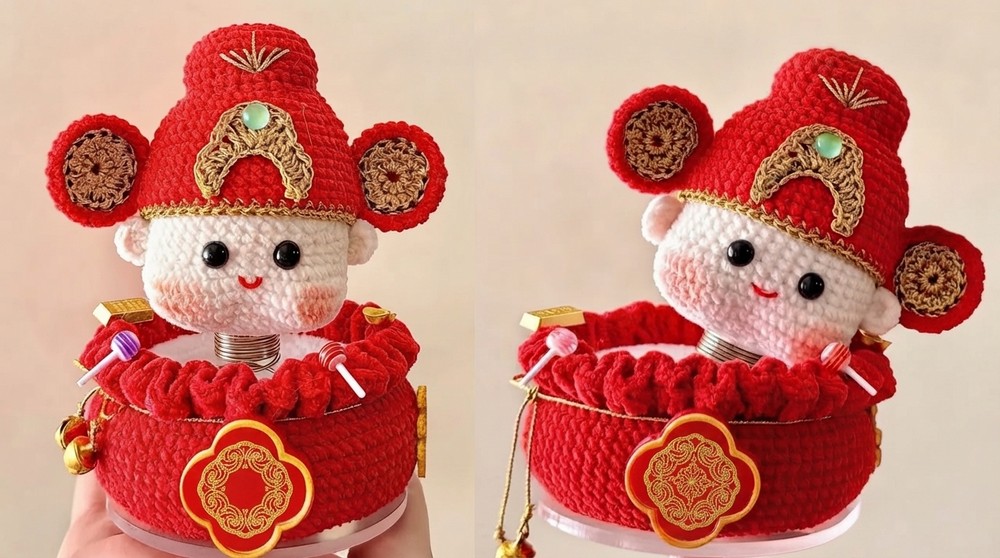
This adorable bag is also a thoughtful present for birthdays, holidays, party favors, or just because. It is a lovely keepsake that can be enjoyed for a long time and reminds people of the care behind a handmade gift. If you enjoy crochet projects that are cute, practical, and fun to use every day, the Free crochet Lucky Charm Bag Pattern is a wonderful project that is sure to become one of your favorites.
Lucky Fortune Bag (Túi Thần Tài) Crochet Pattern Part 1
This crochet pattern guides you through creating the Lucky Fortune Bag (Túi Thần Tài), a charming and symbolic piece ideal for gifting or decoration. Crafted with skin-colored, red, and gold yarns, the project features a detailed head, an elegant bag body, and ornamental accessories to complete the look.
We will use a 1.8 mm or 2.0 mm crochet hook to achieve fine stitches and detailed shaping. Throughout this pattern, you will learn increases, decreases, working in rounds, and combining different stitches to build the full figure.
Quick Overview Of Pattern
- Part 1: The Head — crocheted in skin-colored yarn with progressive shaping via increases and decreases.
- Part 2: The Body (Bag) — started with red yarn; constructed with oval base increases, working in rounds, and finishing with a gold rim.
- Part 3: Accessories — small red circular patches, gold decorative elements, ornate shapes, and skin-colored hands crochet separately and attached.
Notes
- Pattern uses UK crochet terminology.
- Work in continuous rounds or joined rounds as specified.
- Use a stitch marker to indicate the beginning of each round.
- Keep stitch counts exact to maintain shape integrity.
- Stuff the head firmly with fiberfill to preserve form during shaping (insert stuffing around round 16–28).
- Change yarn colors neatly when instructed, weaving in ends for clean color transitions.
Skill Level
Intermediate: This pattern involves shaping with increases and decreases, working magic rings, back loop only stitches, and combining multiple stitch types for decorative effects.
Materials
- Skin-colored yarn (for head and hands)
- Red yarn (for bag body and small patches)
- Gold yarn (for bag rim and golden accessories)
- Crochet hook 1.8 mm or 2.0 mm
- Fiberfill stuffing
- Stitch marker
- Yarn needle for sewing parts together and weaving in ends
- Scissors
Measurements / Sizing (Approximate)
- Final bag height: roughly 12–15 cm (4.7–6 inches)
- Head diameter about 6–7 cm (2.4–2.8 inches) depending on yarn and tension
- Bag base oval approximately 8 chains long, expanding to around 30–40 sts circumference
Gauge
The fine hook and yarn create a tight, firm fabric, crucial for detailed shaping. Gauge is not absolutely critical but consistency is essential for matching proportions.
Stitch Abbreviations (UK Terms)
- ch = chain
- sc = single crochet
- inc = increase (2 sc in same stitch)
- dec (inv dec) = decrease, invisible decrease preferred for neatness
- BLO = back loop only
Special Stitches
Magic Ring (Magic Circle)
Begin crocheting in a loop adjustable ring to start round projects without hole in the center.
Invisible Decrease
Technique to decrease stitches with a nearly invisible seam, ideal for shaping amigurumi parts.
The Crochet Pattern
Part 1: The Head (Skin-colored yarn)
Round 1: Create a magic ring, work 6 sc into the ring. (6 sc)
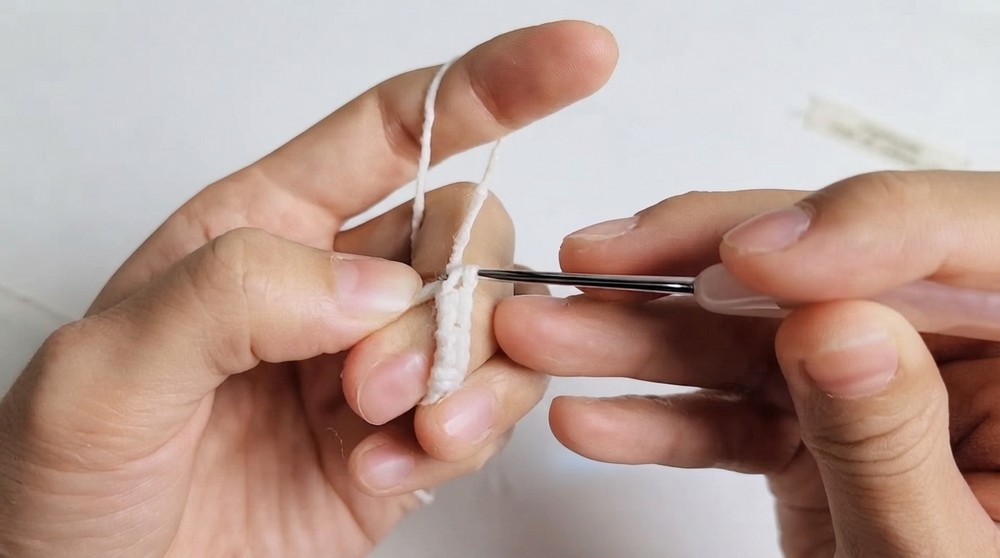
Round 2: Increase in every stitch — work 2 sc in each of 6 stitches. (12 sc)
Round 3: 1 sc, 1 inc repeat 6 times. (18 sc)
Round 4: 1 sc, 1 inc, 1 sc repeat 6 times. (24 sc)
Round 5: 3 sc, 1 inc repeat 6 times. (30 sc)
Round 6: 2 sc, 1 inc, 2 sc repeat 6 times. (36 sc)
Round 7: 5 sc, 1 inc repeat 6 times. (42 sc)
Round 8: 1 sc into each stitch around — work 9 rounds. (42 sc each)
Round 9: 1 sc into each stitch around — work 9 rounds. (42 sc each)
Round 10: 1 sc into each stitch around — work 9 rounds. (42 sc each)
Round 11: 1 sc into each stitch around — work 9 rounds. (42 sc each)
Round 12: 1 sc into each stitch around — work 9 rounds. (42 sc each)
Round 13: 1 sc into each stitch around — work 9 rounds. (42 sc each)
Round 14: 1 sc into each stitch around — work 9 rounds. (42 sc each)
Round 15: 1 sc into each stitch around — work 9 rounds. (42 sc each)
Round 16: 1 sc into each stitch around — work 9 rounds. (42 sc each)
Round 17: Shape begins with increased base sections: work 2 sc, 1 inc, repeat 6 times plus additional shaping stitches described carefully to expand and define the base. (Exact stitch counts adjusted as per shaping notes)
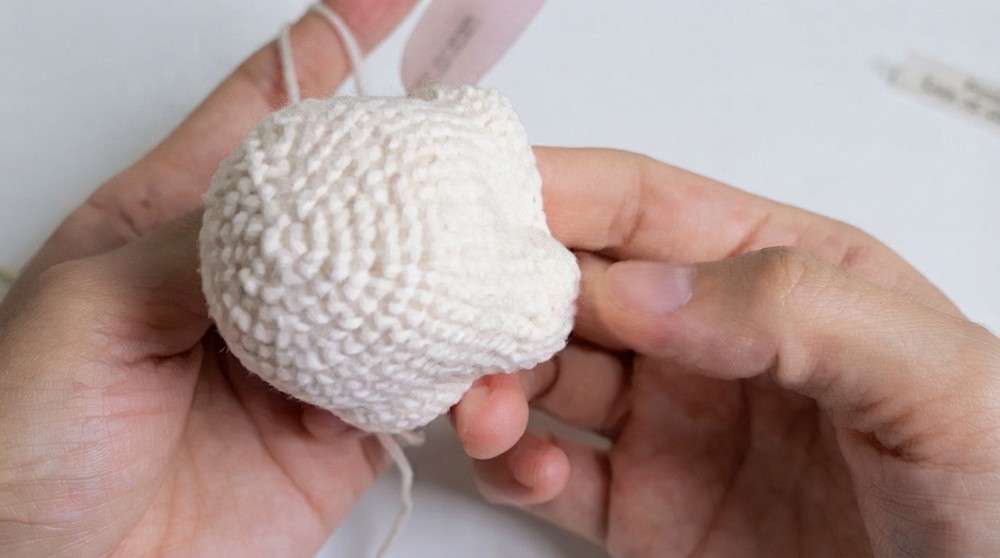
Rounds 18 to 20: 3 rounds of 1 sc in each stitch to smooth shape. (Stitch count steady)
Rounds 21 to 25: Begin decreases: work 6 invisible decreases evenly spaced per round to start tapering the head. (Decreasing stitch count appropriately)
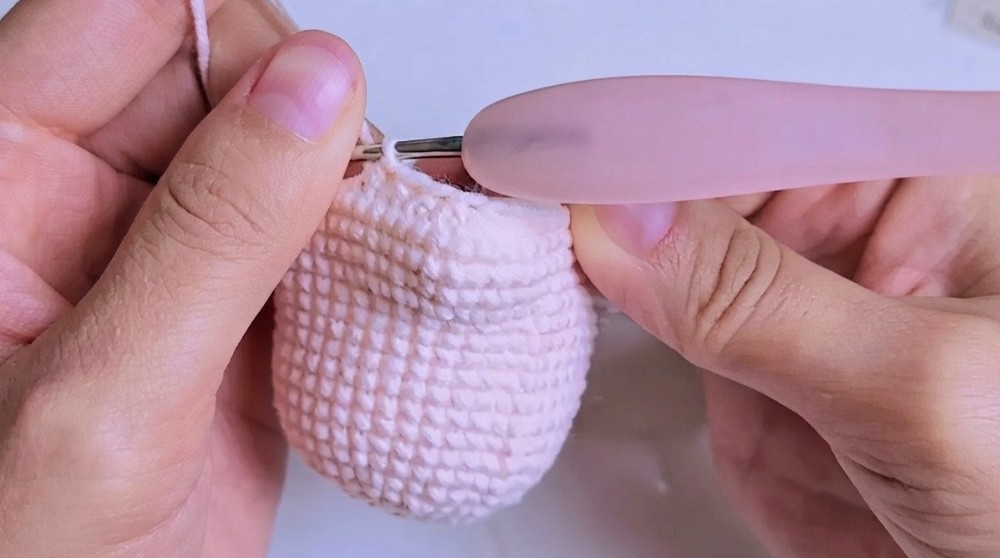
Rounds 26 to 28: Final shaping decreases continue — close fabric shape as needed.
Insert fiberfill stuffing firmly during this stage to maintain roundness and avoid lumps.
Rounds 29 to 31: Continue decreases until the opening is closed. Secure and fasten off.
Part 2: The Body (The Bag — Red yarn)
Foundation Chain: Chain 8.
Round 1: Single crochet around the chain; place 3 sc in the last chain to turn the oval base shaping.
Round 2: Increase round working intentional stitches to widen the oval shape.
Round 3: Continue increase pattern to expand the base smoothly.
Round 4: Work 5 rounds of plain single crochet stitches to build bag height.
Round 5: Work 5 rounds of plain single crochet stitches to build bag height.
Round 6: Work 5 rounds of plain single crochet stitches to build bag height.
Round 7: Work 5 rounds of plain single crochet stitches to build bag height.
Round 8: Work 5 rounds of plain single crochet stitches to build bag height.
Round 9: Crochet in back loop only (BLO) to emphasize edge definition and texture.
Rounds 10 to 18: Increase the vertical height of the bag steadily with 1 sc per stitch.
Gold Rim: Switch to gold yarn.
Work final rounds around the top of the bag with gold yarn to create a gorgeous rimmed finish.
Part 3: Accessories
Small Red Pieces (2 pieces)
- Begin with a magic ring and 6 sc inside.
- Work increase rounds to create small circular patches.
Gold Details (4 pieces)
- Start a magic ring and crochet 10 sc inside.
- Work half-double crochet increases (hdc inc) to build layered small golden accessories.
Decorative Shapes (2 pieces)
- Chain 10 forming foundational length.
- Work a mixture of sc, half double crochet (hdc), double crochet (dc), and treble crochet (tr, “kép đôi”) to form ornate decorative shapes.
Hands (2 pieces)
- Use skin-colored yarn for hands.
- Begin with a magic ring, crochet 6 sc inside.
The Crochet Pattern: Part 2
Phase 1: Base and Body — White Yarn
- Foundation:
- Create a slip knot. Chain 32 stitches, and join with a slip stitch to form a ring.
- Row 1:
- Chain 1 (does not count as stitch).
- Single crochet (sc) once in each stitch around (32 sc). Join with slip stitch.
- Row 2 (Increase):
- Chain 1.
- (1 sc in each of the next 3 stitches, 2 sc in next stitch) repeat around to increase stitches evenly.
- Total stitch count increases accordingly, approx. 40 sc. Join with slip stitch.
- Row 3 (Increase):
- Chain 1.
- (1 sc in each of next 4 stitches, 2 sc in next stitch) repeat around.
- Join with slip stitch.
- Row 4 (Increase):
- Chain 1.
- (1 sc in next 5 sts, 2 sc in next stitch) repeat all around.
- Join with slip stitch.
- Row 5 (Increase):
- Chain 1.
- (1 sc in next 6 sts, 2 sc in next stitch) repeat around.
- Join with slip stitch.
- Row 6 (Increase):
- Chain 1.
- (1 sc in next 7 sts, 2 sc in next stitch) repeat around.
- Join with slip stitch.
- Row 7 (Increase):
- Chain 1.
- (1 sc in next 8 sts, 2 sc in next stitch) repeat around.
- Join with slip stitch.
Phase 2: Transition to Red Yarn (Body Construction)
- Row 8:
- Change to red yarn.
- Work into the back loop only (BLO) of each stitch for texture.
- (9 sc in BLO, 1 inc (2 sc in next stitch)) repeat around.
- Join with slip stitch.
- Rows 9 to 18:
- Chain 1.
- Work 1 sc in each stitch around in standard single crochet (both loops).
- Maintain stitch count. Join with slip stitch after each row.
- Row 19 (Decrease):
- Chain 1.
- (9 sc, 1 dec) repeat around.
- Join with slip stitch.
- Row 20 (Decrease):
- Chain 1.
- (4 sc, 1 dec, 4 sc) repeat around.
- Join.
- Row 21 (Decrease):
- Chain 1.
- (7 sc, 1 dec) repeat around.
- Join.
- Row 22 (Decrease):
- Chain 1.
- (3 sc, 1 dec, 3 sc) repeat around.
- Join.
- Row 23 (Decrease):
- Chain 1.
- (5 sc, 1 dec) repeat around.
- Join.
- Row 24 (Decrease):
- Chain 1.
- (2 sc, 1 dec, 2 sc) repeat around.
- Join.
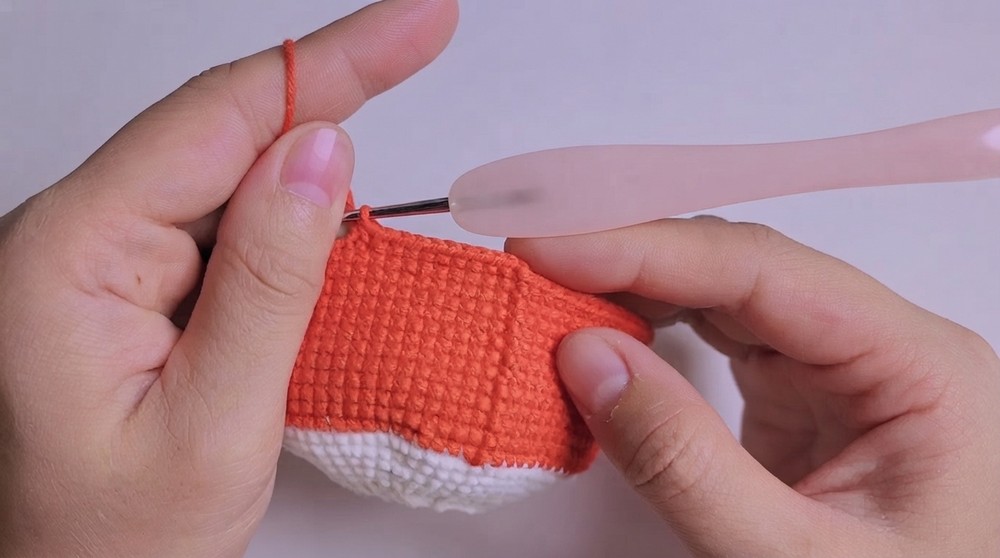
Phase 3: Finishing the Top Edge
- Row 25 – Top Edging:
- Continue with red yarn.
- Crochet into the remaining loops of the last body row for a subtle change in texture.
- Alternate between 2 double crochets in one stitch, then 3 double crochets in the next stitch around.
- This creates a ruffled edge for an elegant finish.
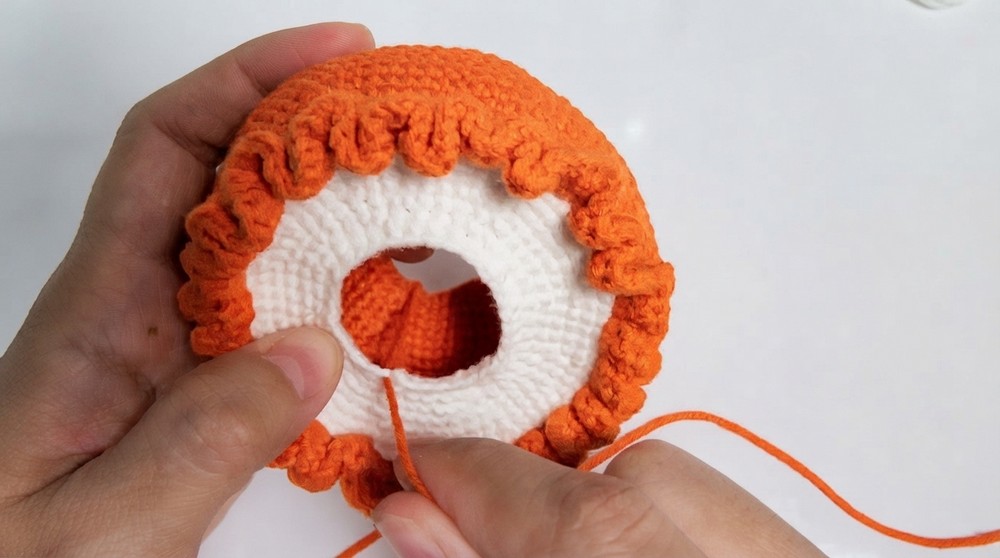
Assembly
- Stuffing:
- Fill the bag firmly but gently with fiberfill to give it shape without overstretching.
- Closing:
- Sew bag sides closed neatly using yarn needle and matching yarn for an invisible seam.
- Embroidery:
- Using yellow embroidery thread, create cross-stitch designs on both front and back of bag body for traditional decorative flair.
- Follow reference patterns for placement and stitch style.
- Decorations:
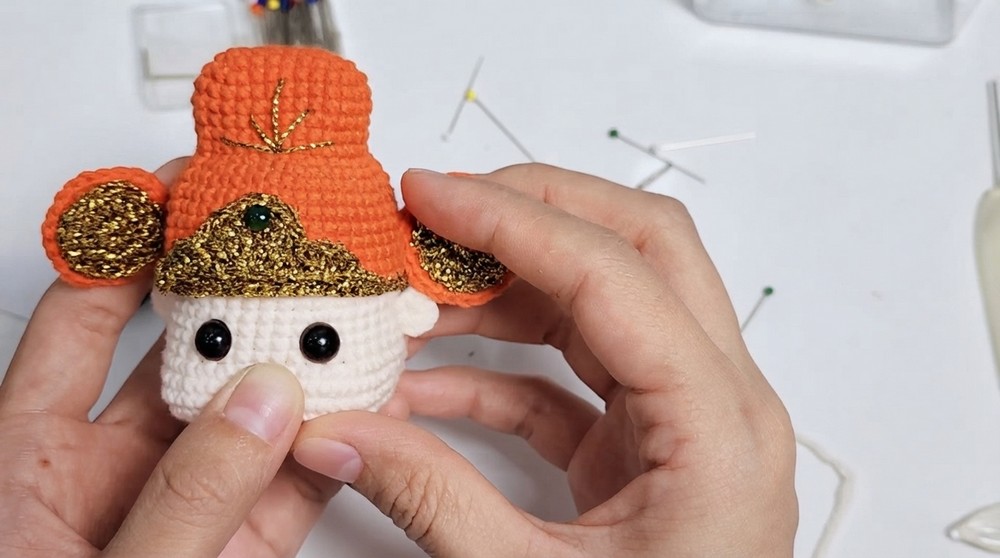
- Attach accessories such as crochet or purchased hats, eyes, and charms using craft glue or sew securely for durability.
- Arrange as shown for a balanced and decorative finish.
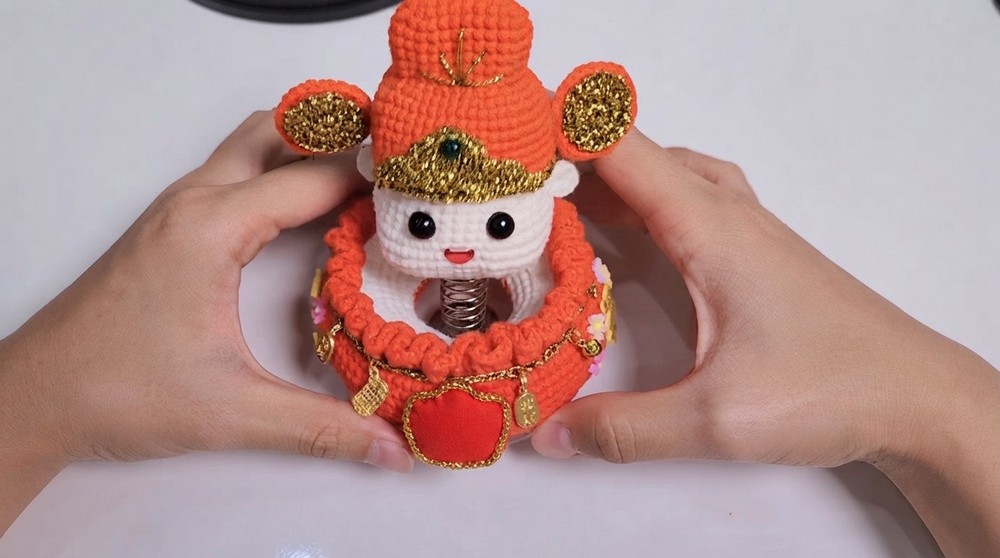
Finished Size
- Height approx. 15 cm (6 inches) before edging
- Width depends on tension but approx. 12–14 cm (4.5–5.5 inches) diameter at base
- Weight light and perfect for display or gifting
Conclusion
You have successfully crochet your own beautiful Lucky Money Bag (Túi Thần Tài), symbolizing prosperity and good fortune. This project blends basic and intermediate crochet skills with decorative techniques that make it both enjoyable and rewarding.