Free Crochet Mini Coin Purse Pattern for Small Essentials
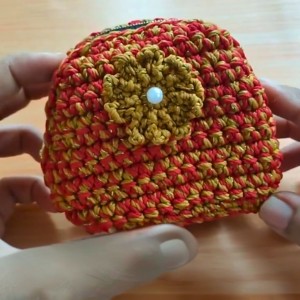
Secure your small essentials stylishly with this free crochet coin purse pattern that combines charm, durability, and functionality in a compact design.
Ever wished your loose coins had a cute little home? A tiny crochet purse is a sweet way to keep small items together while adding a handmade touch to your day. The Free Crochet Coin Purse Pattern is a lovely choice for anyone who enjoys pretty accessories that are useful, too. On YouTube, Rajutan Whita shares creative crochet projects that bring fresh ideas to people who love handmade project.
This mini purse may be small, but it has plenty of charm. Its compact shape gives it a neat look, while the soft crochet texture makes it feel cozy and special. You can imagine it in bright pink, sunny yellow, classic black, or any color you love. A little flap, a button, or a zipper can make the design stand out. These simple details give the purse a cute style without making it look too busy.
Free Crochet Round Coin Purse Pattern with a Unique Look

Where can you use this lovely little accessory? Slip it into your handbag, backpack, or pocket when you go shopping or visit friends. It is handy for holding coins, folded notes, and other tiny items you do not want to lose. Because it takes up little space, it is a useful choice for everyday trips. It can also make a thoughtful gift for a birthday, a small celebration, or a friend who loves handmade things.
The best part is how easily this little purse can show your personal style. Choose a simple look for everyday use or a colorful design that catches the eye. You can also pick a shade that matches your favorite bag.

If you enjoy cute crochet accessories, this coin purse is a lovely addition to your craft ideas. It brings together simple beauty, everyday use, and the special feeling of something handmade. Keep it for yourself or share it with someone who appreciates small, thoughtful gifts.
Beautiful Coin Purse Crochet Pattern
This tutorial introduces a charming and practical coin purse crocheted using Poly Bigley yarn and a 4.5 mm crochet hook. The pattern guides you through creating two main panels with elegant decreasing stitches, a sturdy base, and the assembly including a zipper closure for a polished finish. The step-by-step instructions ensure clarity for intermediate crocheters aspiring to create a refined, functional accessory.
Pattern Highlights
- Two identical, slightly tapered rectangular panels crocheted using single crochet (sc) with decreasing stitches for shaping.
- A rectangular base crocheted back and forth, finished with slip stitch edging for durability.
- Seamless assembly of the panels and base using tapestry needle and yarn with inside-out alignment for clean edges.
- Professional zipper insertion for secure and neat closure.
Notes
- Use consistent and balanced tension to maintain shape and fit between panels and base.
- Work slip stitches carefully during edging to maintain neatness without restricting elasticity.
- Align zipper corners precisely to avoid puckering or uneven closing.
- Seaming panels and base inside-out allows for a smooth outside finish.
- Secure loose yarn ends with a lighter cautiously to avoid damaging the yarn.
Skill Level
Intermediate: Skills required include:
- Crocheting in the back ridge of stitches.
- Performing decreases using single crochet two stitches together (sc2tog).
- Working slip stitches for edging.
- Crocheting back-and-forth rows for base creation.
- Sewing crochet pieces and zipper assembly.
Materials
- Yarn: Poly Bigley yarn in two colors (Red and Gold).
- Hook: 4.5 mm (size 8/0) crochet hook.
- Tools: Scissors, lighter (to finish yarn ends), tapestry needle.
- Other: 20 cm jeans zipper, sewing needle and thread for zipper attachment.
Measurements / Sizing
- Panel foundation chain: 22 stitches, reducing to 11 stitches by Row 12.
- Base foundation chain: 12 stitches, with 10 rows of sc.
- Zipper length: 20 cm, fitting the top opening of assembled purse.
Gauge and Stitch Pattern
- Gauge adaptable; maintain consistent tension to ensure panels taper evenly and match the base.
- Main panels use single crochet (sc) worked in back ridge only for texture and shape.
- Base uses rows of single crochet worked flat with slip stitch border for structure.
- Edging adds stability to corners and sides.
Stitch Abbreviations
- ch = chain
- sc = single crochet
- sc2tog = single crochet two stitches together (decrease)
- sl st = slip stitch
Special Stitches
- Single Crochet in Back Ridge: Insert hook in the horizontal “bump” behind the base of the stitch for a neat ribbed texture.
- Decrease (sc2tog): Insert hook through two stitches at once, yarn over, pull through both stitches, yarn over, pull through loop for single decrease stitch.
- Slip Stitch Edge: Crochet slip stitches along edges to create a firm but flexible border.
Step-by-Step Pattern
1. Creating the Main Panels (Front and Back)
Foundation Chain:
- Chain 22 (start with Red or Gold yarn).
Row 1:
- Work single crochet (sc) into the back ridge of each chain across (total 21 sc).
- Turn your work.
Row 2:
- Chain 1, turn.
- Work 1 sc into each stitch across (total 21 sc).

Rows 3–12 (Decreasing Rows):
- For each row:
- Begin with a decrease by working sc2tog (single crochet two together) at the start to reduce one stitch.
- Then continue with 1 sc into each remaining stitch.
- Repeat this decreasing process every row from Row 3 to Row 12.
- By the end of Row 12, your panel should measure 11 stitches across, creating a tapered shape.
Edging (Working on Three Sides of Each Panel):
- Along the long edge and two short edges (excluding the bottom edge):
- Work 3 sc, then 2 slip stitches (sl st), 7 sc, another 2 sl st, and finish the side edge by working slip stitches and 3 sc.
- Repeat this process to create two identical panels.

2. Creating the Base
Foundation Chain:
- Chain 12.
Rows 1–10:
- Work back and forth in rows of 11 sc (one less than foundation chain to account for turning chain).
- Continue for 10 rows to create a sturdy rectangular base.
Border:
- Work a row of 42 slip stitches (sl st) evenly spaced around the entire perimeter of the base piece.
- This border adds stability and a clean finish for joining.

3. Assembly
Sewing Panels to Base:
- Position the front and back panels with the wrong sides facing outwards (inside out).
- Use a tapestry needle and yarn to sew the panels onto the base securely.
- Ensure the edges align evenly to avoid puckering.
Sewing Panel Side Seams:
- Sew the side edges of the front and back panels together, forming the body of the purse.
- Check the seams for strength and neatness.
4. Final Touches
Attaching the Zipper:
- Align the 20 cm jeans zipper with the top opening of the assembled purse.
- Use a sewing needle and regular thread to carefully sew the zipper on.
- Make sure the corner folds are aligned correctly to achieve a neat, clean fit without bulges or gaps.
- Securely stitch the zipper ends for durability.

Assembly & Finished Size
- The coin purse’s main panels taper gently from 21 stitches at the base row to 11 stitches at the narrowing top edge, producing a rounded, tapered shape.
- The base adds firm support and shapes the bottom rectangle.
- Zipper closure ensures access with a polished finish.
- Overall size corresponds to the dimensions of the panels and base, perfect for coins and small essentials.
Conclusion
This detailed step-by-step coin purse tutorial combines fundamental crochet stitches with shaping techniques and practical assembly skills to craft a beautiful and functional accessory. From the elegant tapering panels working single crochet in the back ridge, to the firm base with slip stitch edging, every element adds to the finishing quality. The integration of a zipper and fabric lining steps into sewing enhances durability and usability. Ideal for intermediate crocheters aiming to build precision and finishing skills, this pattern nurtures creative expression and practical craftsmanship.