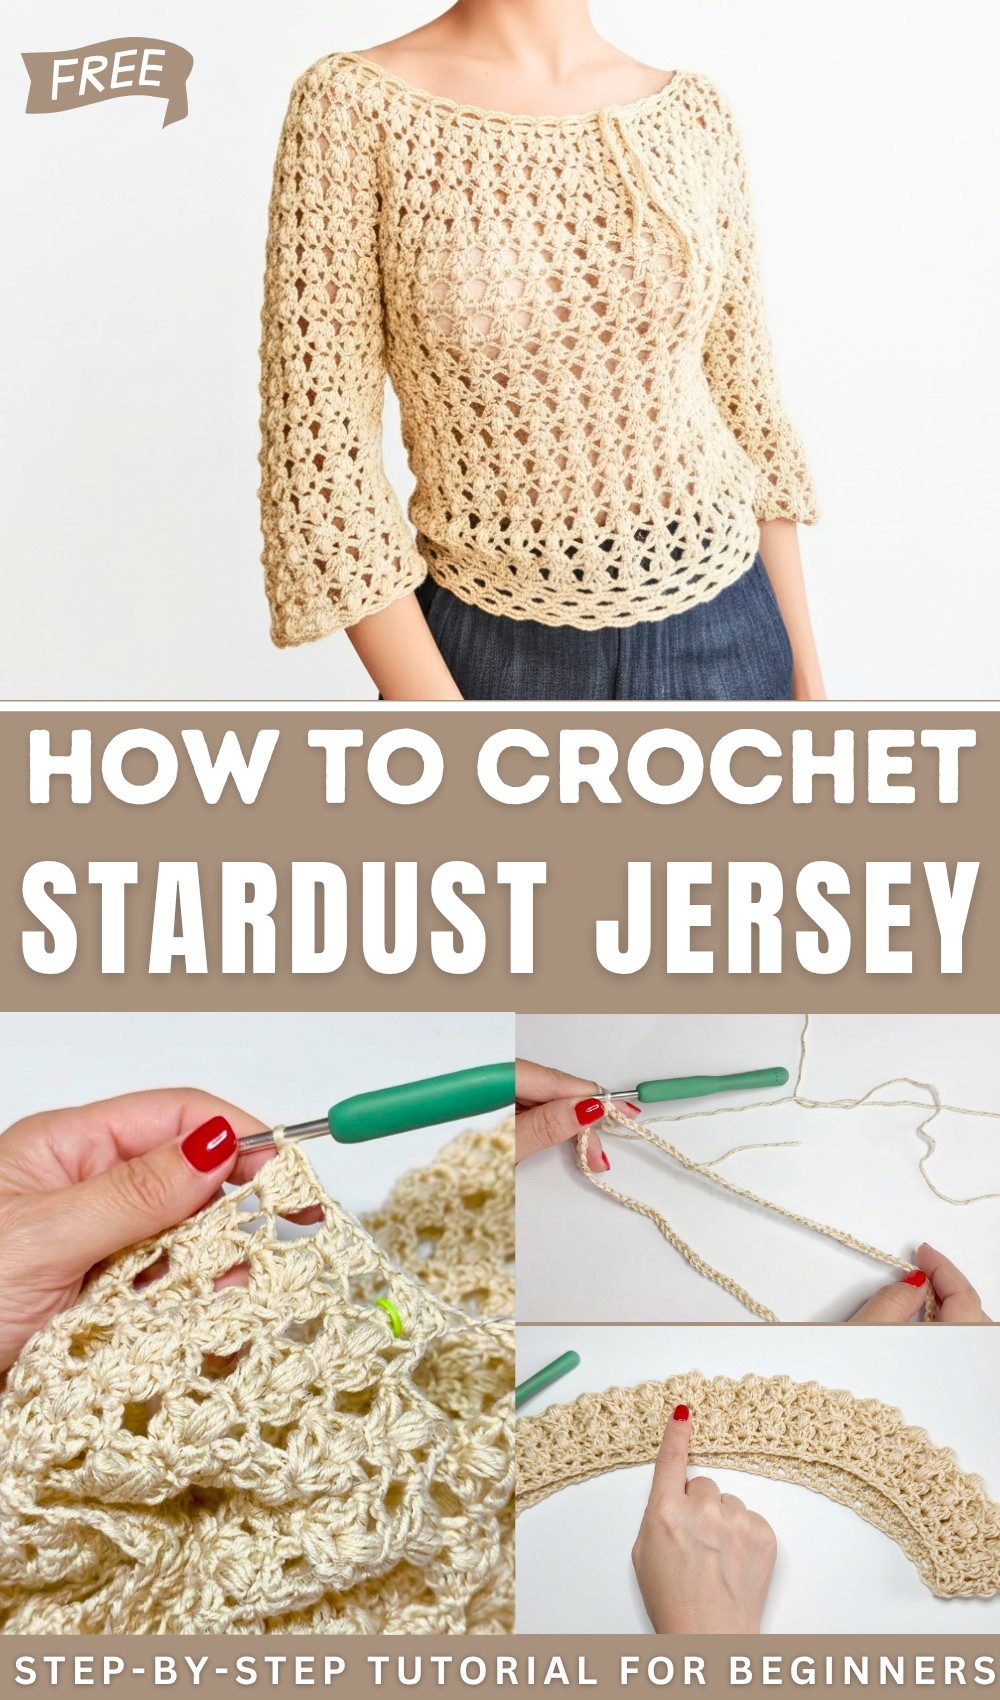
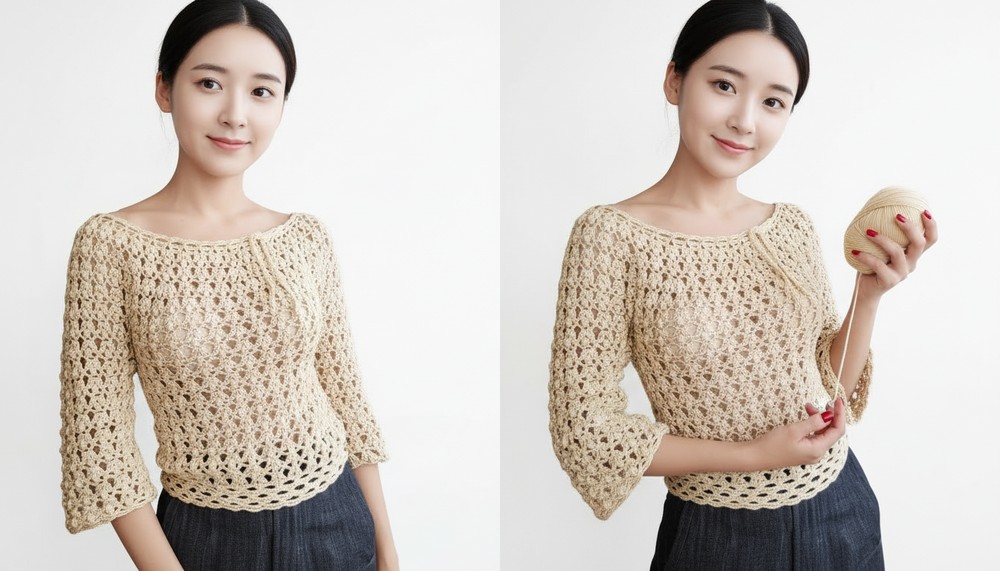
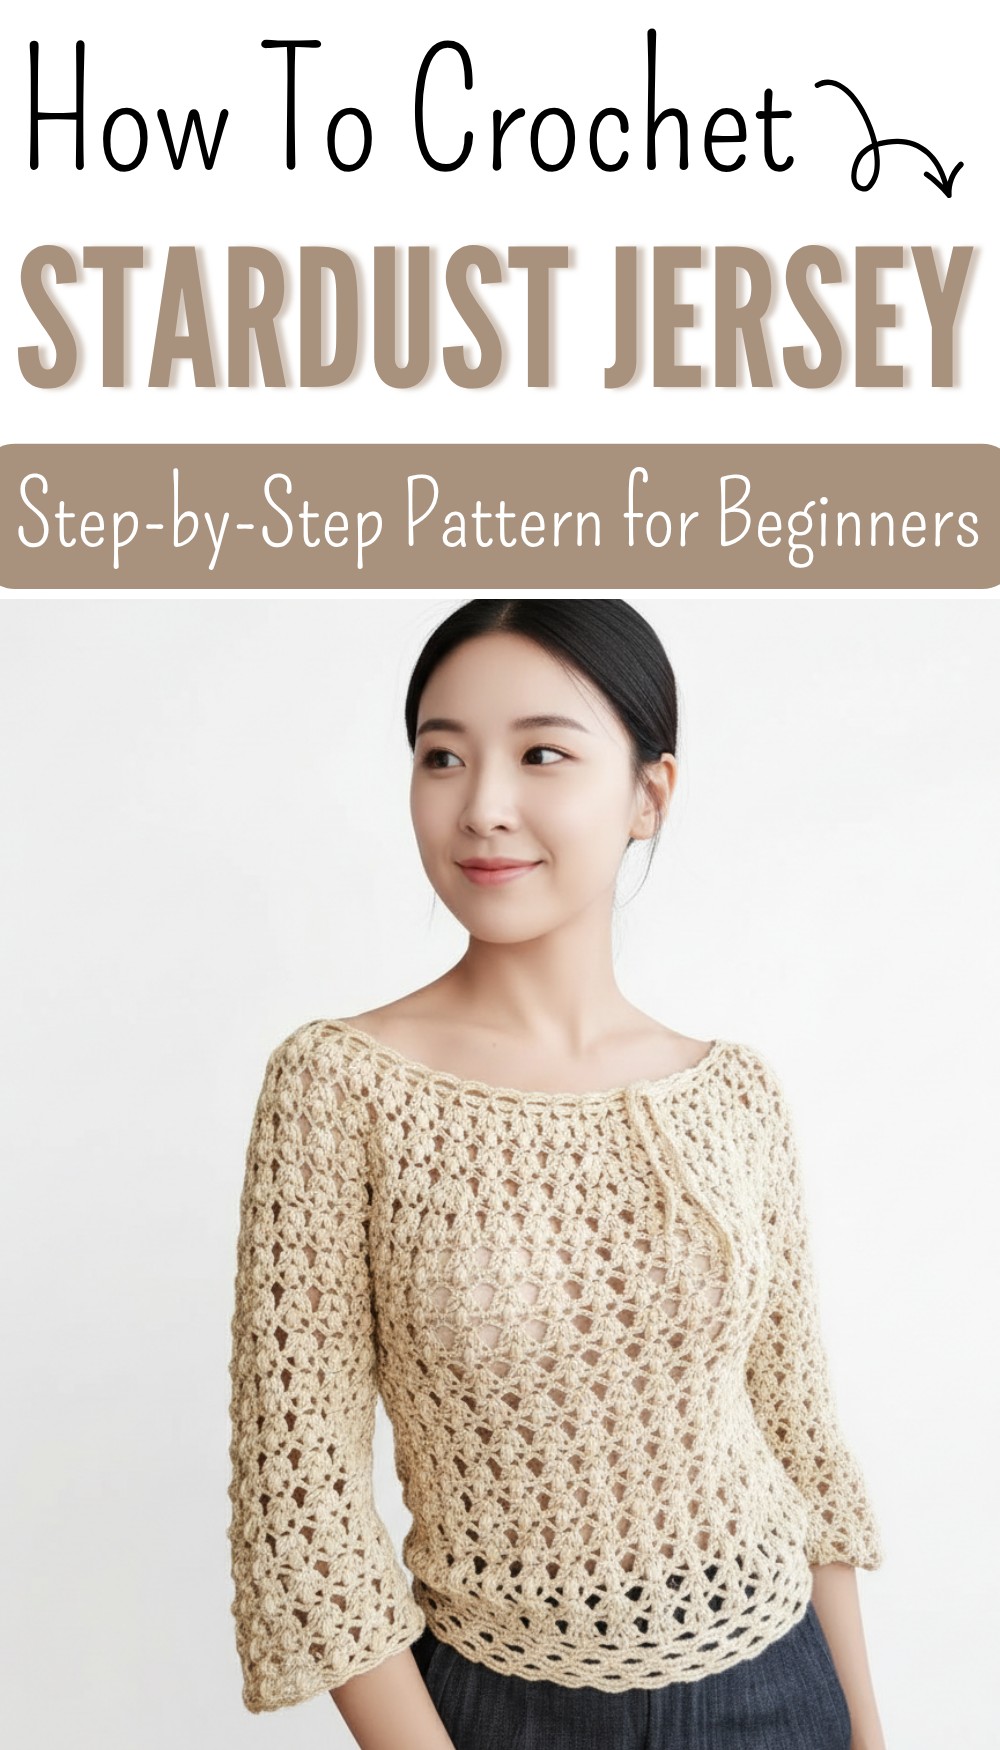
Free Crochet Stardust Jersey Pattern to Highlight Your Style
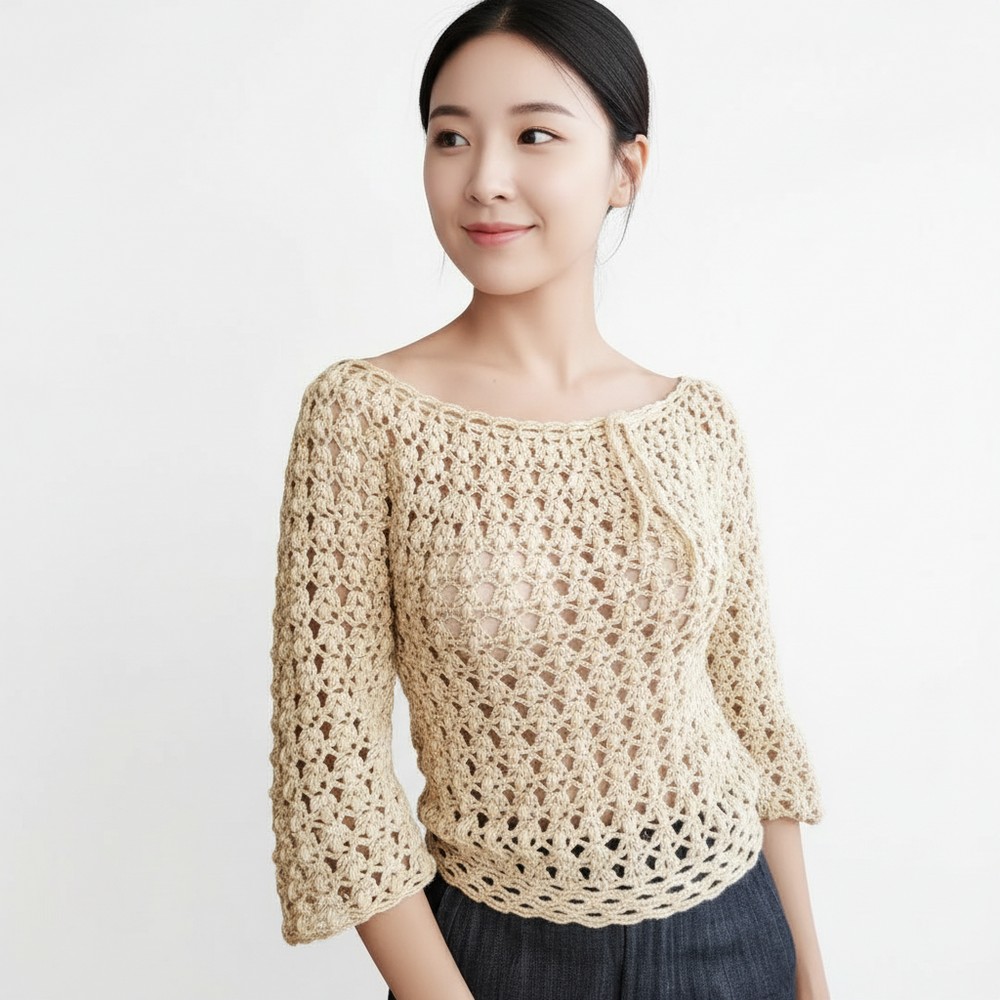
Hook your way to the Crochet Stardust Jersey, a cozy sweater full of charm and sparkle that’s as fun to stitch as it is to wear.
Soft comfort meets subtle sparkle in this timeless crochet project. Perfect for chilly days or as a stylish layering piece, it offers a wonderful balance of warmth and versatility. The delicate shimmer woven into the design gives it a unique charm, making it stand out in any wardrobe. Versatile enough to pair with anything from jeans to skirts, it allows for endless customization, whether you prefer bold, vibrant colors or subtle, earthy tones.
Crochet Stardust Jersey Pattern: Lightweight & Versatile Wear
The lightweight texture offers all-day wearability, and the relaxed fit ensures it feels as good as it looks. With approachable details and a touch of elegance, it’s a satisfying project that showcases personal style through thoughtful stitchwork. Whether for keeping cozy at home or stepping out in style, this is a lovely addition to any outfit and a perfect choice for handmade gifts that feel luxurious yet practical.
Crochet Stardust Jersey Pattern
Materials
- Yarn:
- Stolen Kisses by Mystric Yarns (50g per ball; 130m each).
- Size S: 5 balls (250g total).
- Size M: 7 balls.
- Size L: 9 balls.
- Size XL: 11 balls.
- Stolen Kisses by Mystric Yarns (50g per ball; 130m each).
- Hook:
- Size 4.5mm (US 7) for the main portion of the sweater.
- Size 4mm (US G/6) for the neckline.
- Notions:
- Scissors.
- Tapestry needle (for weaving ends).
- Stitch markers (at least 4).
- Optional: Lace for a drawstring neckline (worked with 101 chains and 100 slip stitches).
Skill Level
- Intermediate to Advanced.
Key Abbreviations
| Abbreviation | Meaning |
|---|---|
| ch | Chain |
| sl st | Slip stitch |
| sc | Single crochet |
| dc | Double crochet |
| st(s) | Stitch(es) |
| sp | Space |
| tog | Together |
| rep | Repeat |
| rnd | Round |
Special Notes
- Construction: Sweater is worked seamlessly in the round from the top down. After creating the yoke (neckline and body), the sleeves are worked directly from the armholes.
- Sizing Adjustments: The pattern includes options for adjustments. To customize the neckline, additional rounds of arches or a lace can be added. To lengthen the body or sleeves, simply continue working additional rounds.
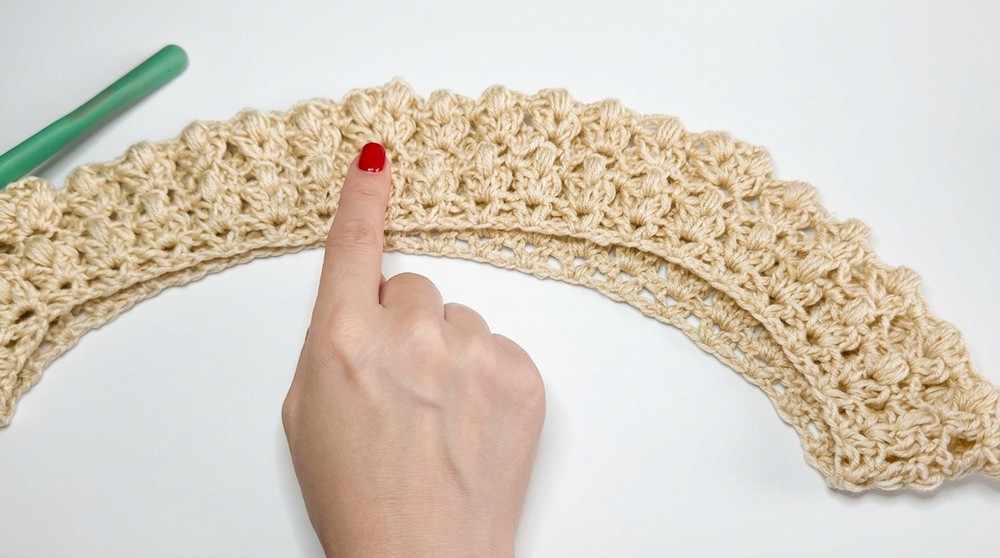
- Stitch Placement: Place all increases above the initial peanuts (clusters of elongated stitches).
- Crochet Terminology: US terms are used throughout.
Pattern Instructions
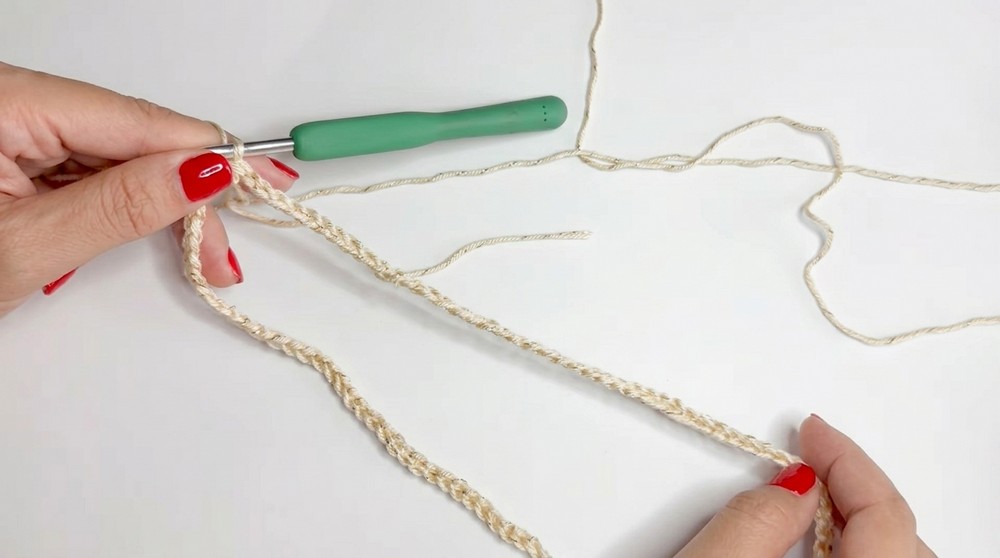
Step 1: Foundation and Round 1
Neckline Foundation:
- Foundation Chain:
- Chain 126 for Size S.
- Adjust for size: Size M: 138 chains (+12), Size L: 150 chains (+24).
- Form a circle:
- Being careful not to twist the chain, join with a slip stitch (sl st) into the first ch.
Round 1 (V-Stitch Base):
- Work into the foundation chain:
- Ch 3 (counts as the first dc).
- Skip 2 ch, then work (dc, ch 1, dc) into the next ch (this creates a
V-Stitch). - Rep the sequence: Skip 2 chs, then work (dc, ch 1, dc) into the next ch.
- Continue this sequence around.
- At the end of the round, sl st into the first dc of the first V-stitch to close.
Stitch Count: 42 V-stitches.
Step 2: Yoke Expansion
Round 2 (Increasing with Fan Clusters):
- Start with ch 2.
- Work 2 dc tog (2 dc closed together) into the first V-stitch. Ch 1, then work 2 dc tog again in the same sp.
- Ch 1, and move to the next V-st sp.
- Rep the sequence: Work (2 dc tog, ch 1, 2 dc tog) into each V-st sp.
- Sl st into the top of the first cluster to close the round.No. of Stitch Groups: Still 42 Fans.
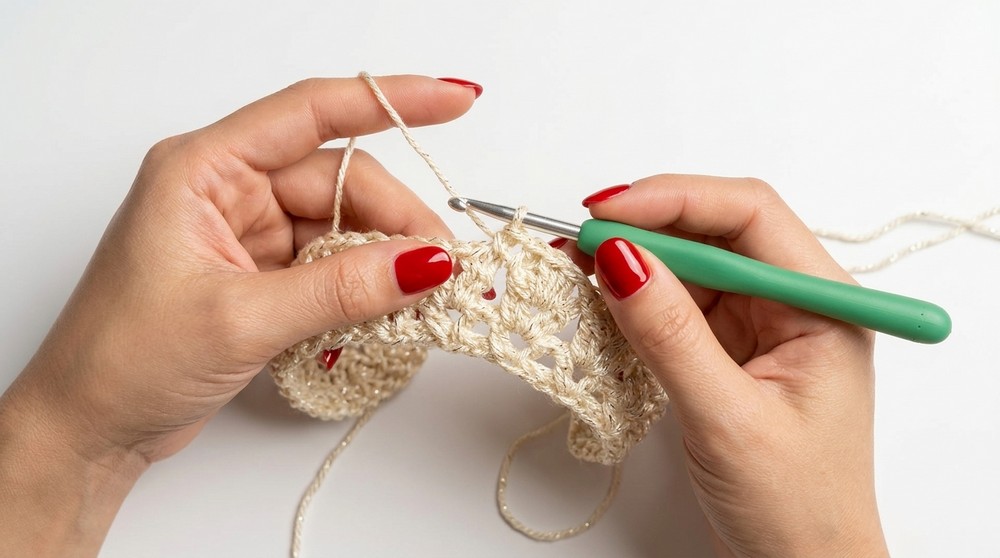
Round 3 (Peanut Stitch Round):
- Ch 1 to start. Into the first ch-1 sp of the fan cluster:
- Work 4 elongated dc, leaving the last loop of each on the hook. For the fourth stitch, pull through all loops on the hook to form the peanut.
- Ch 2, sc into the next ch-1 sp. Ch 2 again, and move to the next fan cluster.
- Rep the sequence: Work a peanut in the ch-1 sp of each fan cluster, separated by sc between groups.
- Sl st into the first sc to close.No. of Peanut Groups: 42 groups.
Round 4 (Fan Increases):
- Ch 2. In the first peanut:
- Work 2 dc tog, ch 1, 2 dc tog into the sc above each peanut.
- After every 5 nuts, add one increase fan: 3 groups of (2 dc tog, ch 1).
Final Stitch Count: 7 increases added (total groups = 49 fans).
Step 3: Continue Yoke Expansion
- Continue alternating two rounds:
- Peanut Stitch Round: No further increases.
- Fan Cluster Round: Add increases every 10 peanut groups.
- Stop increasing at desired yoke width. For Size S, 15 yoke rounds is sufficient (approx. 20cm).
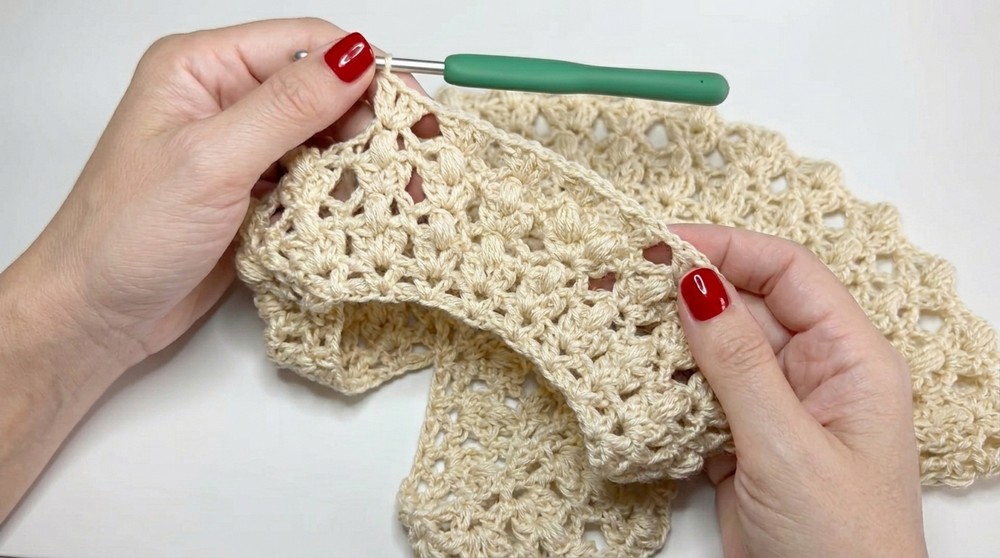
Step 4: Separate Sleeves & Body
- Use Stitch Markers: Separate the 49 motifs as follows:
- Back: 15 motifs.
- Each Sleeve: 11 motifs.
- Front: 16 motifs (to accommodate bust shaping).
- Join Sleeves: Use dc clusters to close sleeve sections as described in the tutorial. Work fans across body only (front + back motifs).
Step 5: Body
- Work in the Round: Continue alternating peanut and fan cluster rounds across the combined front and back motifs only (e.g., 31 motifs for Size S).
- Length Adjustments: Work for 17 body rounds or until desired length is achieved.
Step 6: Sleeves
- Pickup Stitches Around Armhole: Attach yarn at the underarm. Work 14 fan clusters around the armhole (join smoothly around).
- Sleeve Length: Work desired rounds of alternating peanut and fan patterns.
- Short Sleeve: 4–5 rounds.
- ¾ Sleeve: 15–18 rounds.
- Full Sleeve: Extend further as needed.

Step 7: Hemline Arches
- First Round of Arches:
- Work 1 sc into each ch-1 sp, separating each with 5 chains.
- Second Round:
- Work 5 sc in each ch-sp of prior round.
- Smoothly finish the hem.
Step 8: Neckline Finishing
- Use smaller hook (4mm): Work 1 round of arches & 5 sc into each arched sp.
- Optional: Insert a lace through every 3rd arch.
Final Touches
- Weave in Ends: Use a tapestry needle to tidy all loose ends.
- Block: Gently block the sweater to relax stitches and set the shape.
Conclusion
The Crochet Stardust Jersey is both versatile and sophisticated, thanks to its lacy peanut stitch texture. Whether left with an open neckline for a breezy look or cinched with a decorative lace, it’s a timeless addition to any wardrobe. Customize by experimenting with different sleeve lengths and hemline finishes.
Tips for Success
- Maintain Tension: Keep the stitches consistent while working peanuts to avoid pulling the fabric unevenly.
- Customize Fit: Add or reduce increases along the yoke for a closer or looser fit.
- Use Lightweight Yarn: Stolen Kisses microfiber works beautifully; alternatives must have similar drape.