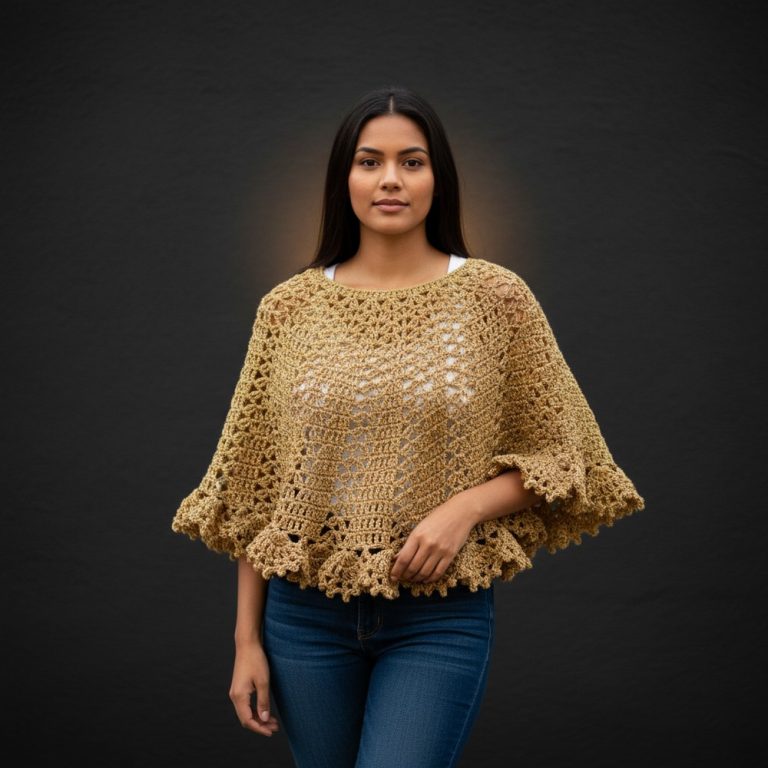
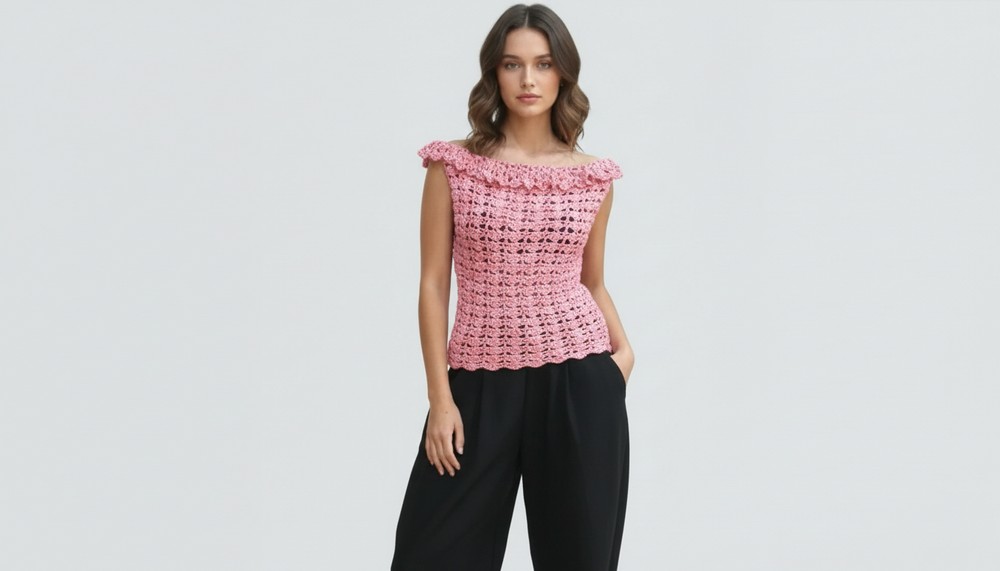
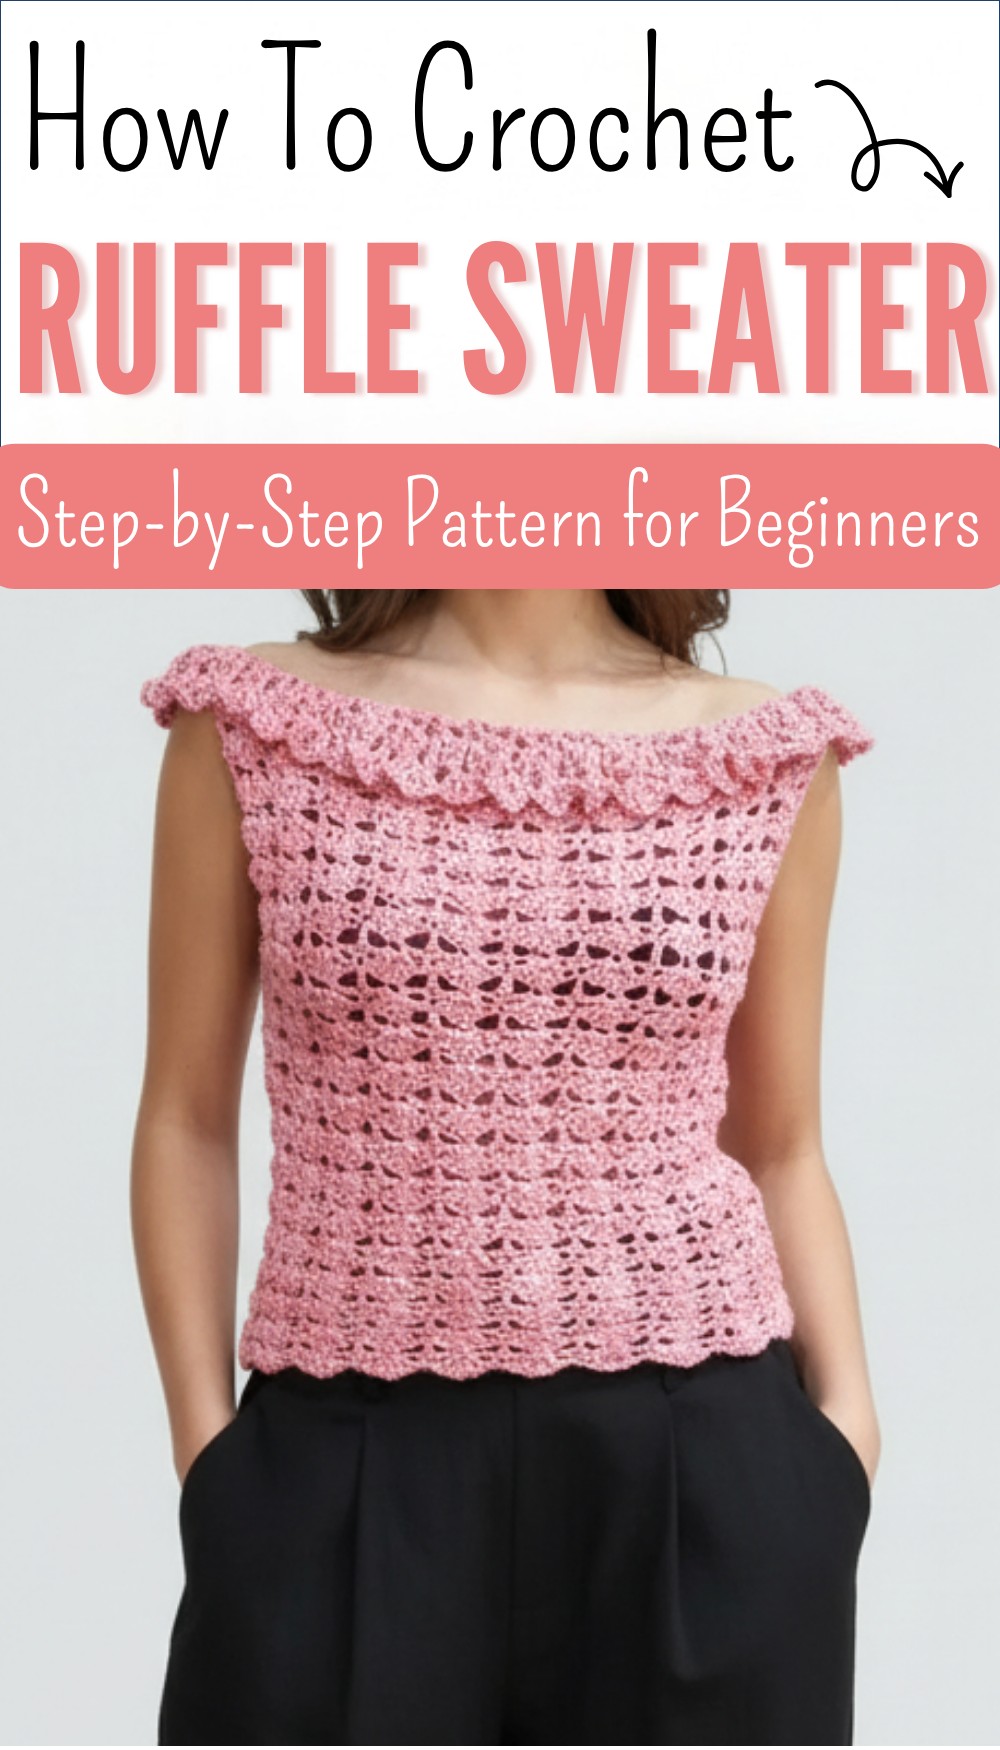
Free Crochet Ruffle Sweater Pattern
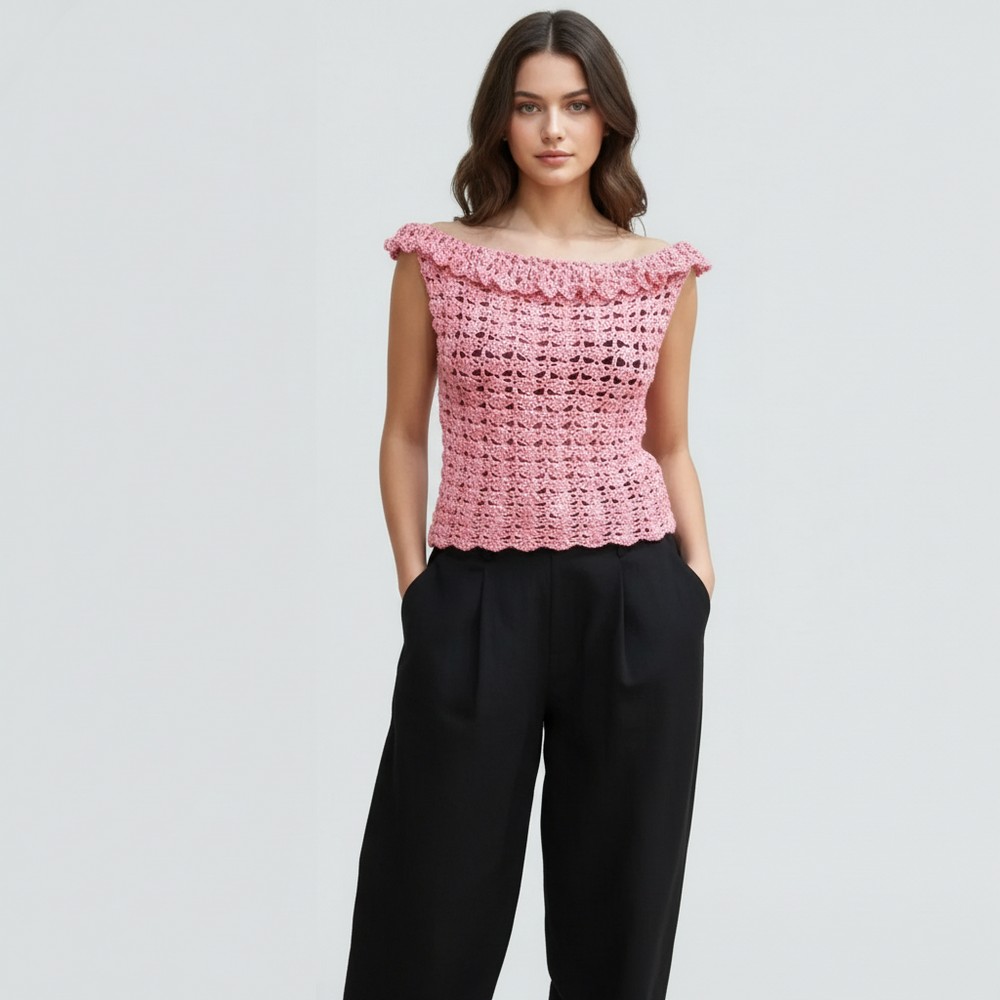
Warm your style with this free crochet ruffle sweater pattern offering comfort & charm for every occasion in soft ruffles and cozy elegance.
A soft sweater with gentle ruffles brings a beautiful look that moves gracefully with every step, making you feel special and stylish at the same time. Using just a few balls of yarn and your caring hands, you can create a warm and light piece that brightens any outfit. The crochet ruffle sweater pattern gives you simple steps to follow, so you do not need to be an expert to make something lovely. With its pretty waves along the sleeves or the edges, this sweater adds a touch of fashion to your wardrobe without much effort.
Instantly Free Crochet Ruffle Sweater Pattern
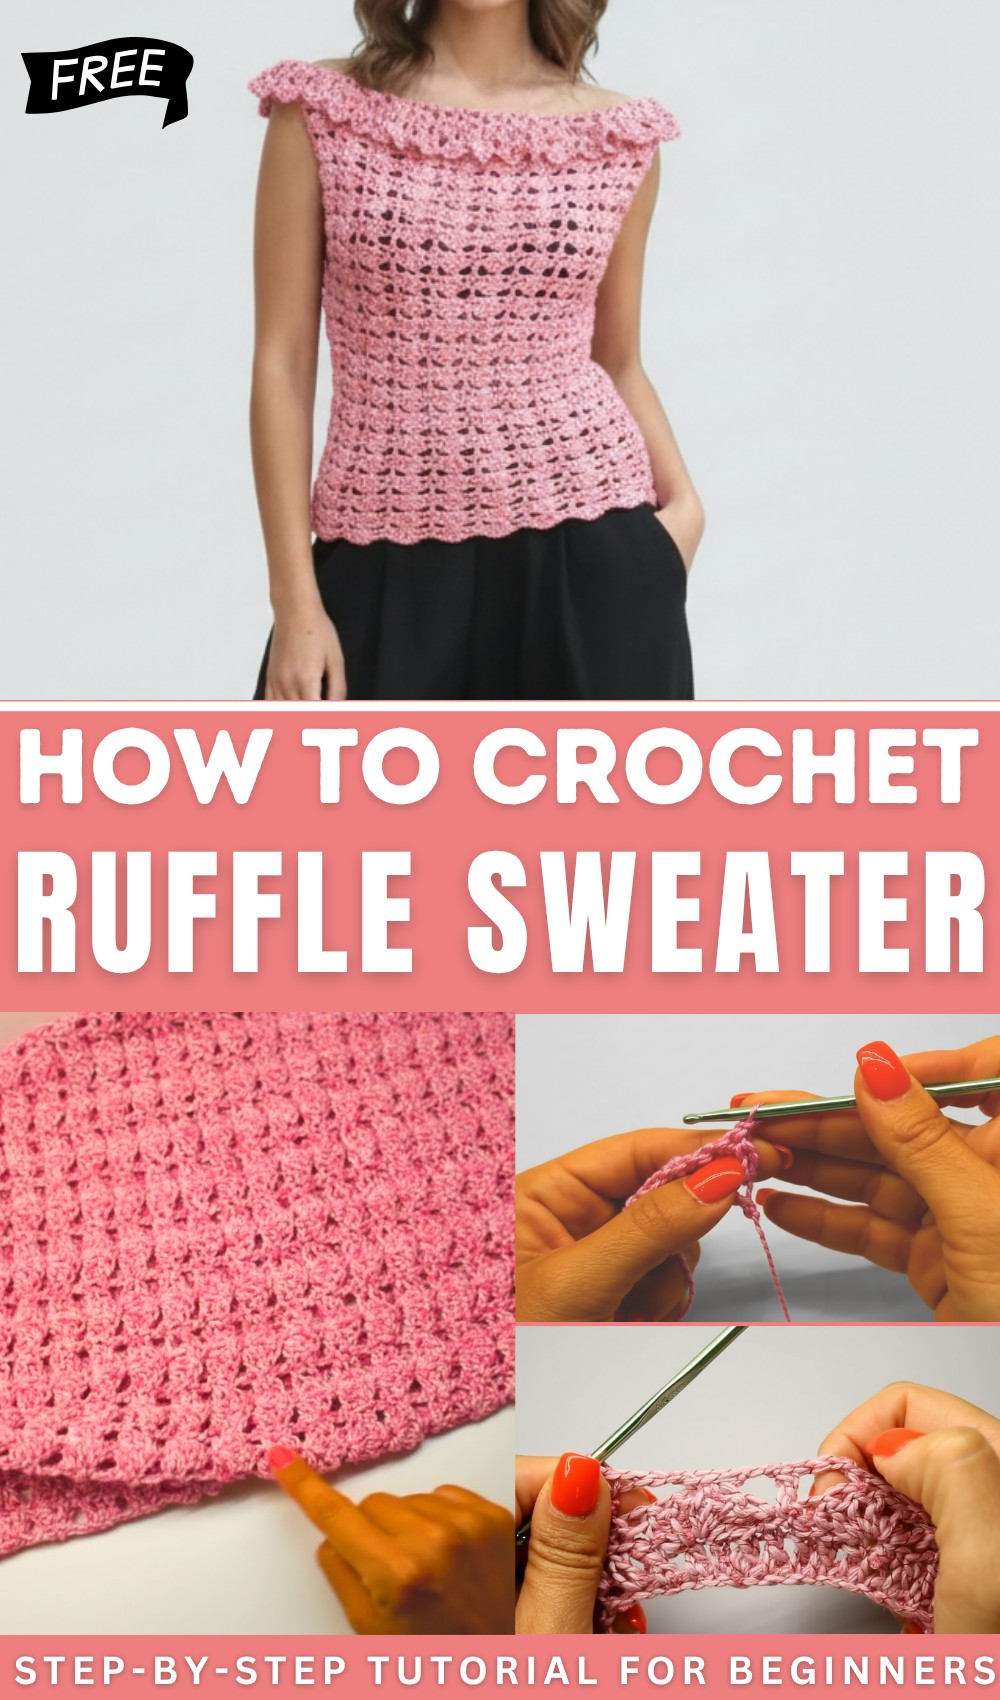
The ruffles are not only pretty but also give a cozy feel, making the sweater perfect for keeping you warm and comfortable. This unique design lets you choose your favorite colors and fit, so you create something just for you. With the crochet ruffle sweater pattern, you get a soft and beautiful layer to wear proudly, showing off your own handmade style.
Simple Crochet Sweater Pattern
Materials
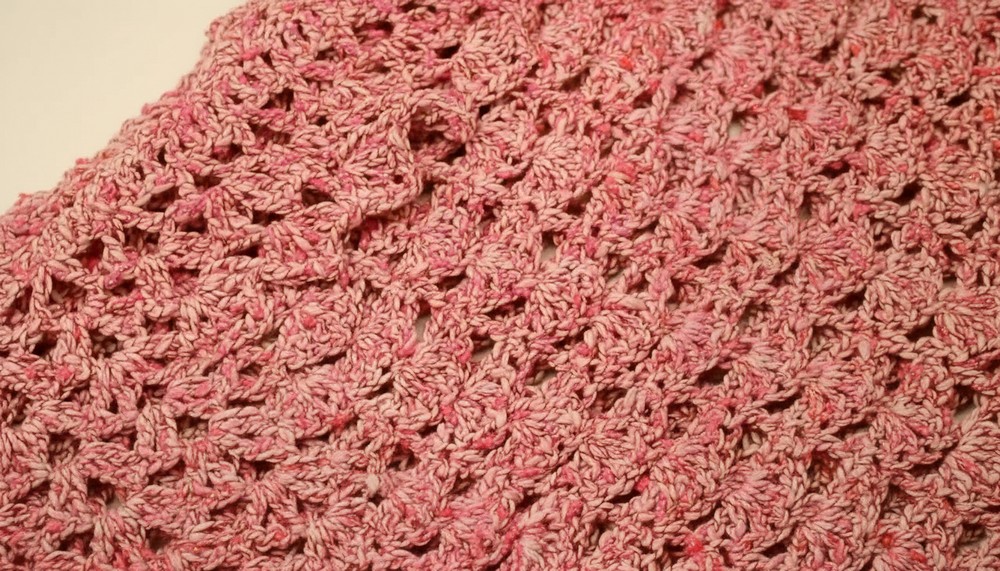
- Yarn: ~280 g DK-weight (light #3) or similar yarn. (Sample: “Janis” slipped yarn, 68% cotton, with a slight lurex effect.)
- Hook: 4.0 mm (G-6)
- Yarn needle: for sewing panels
- Stitch markers (optional, for marking armholes, neckline)
- Scissors
- Measuring tape
Key Abbreviations (US Terms)
- ch = chain
- sl st = slip stitch
- sc = single crochet
- dc = double crochet
- st(s) = stitch(es)
- sk = skip
- sp = space
Special Notes
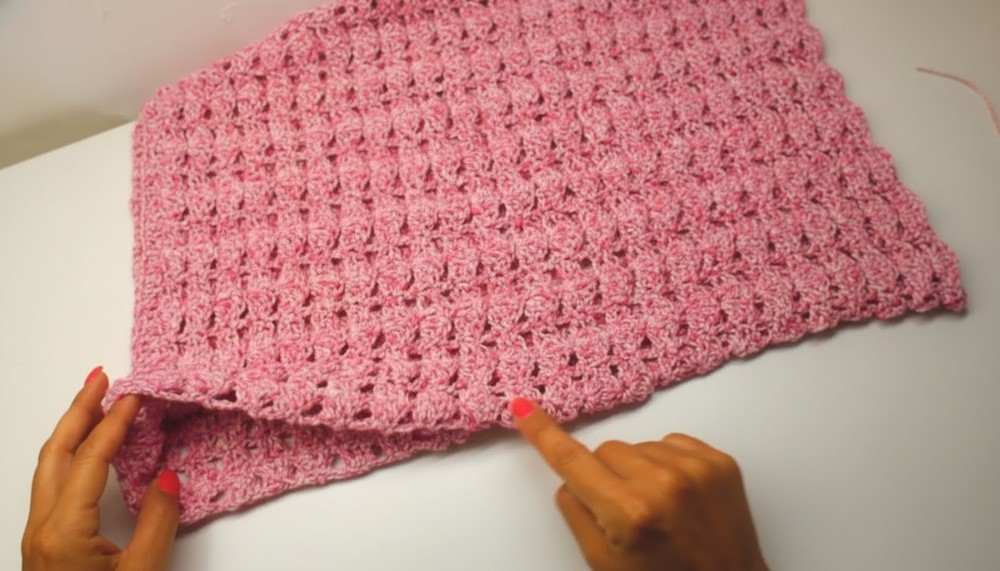
- The sweater is made from two equal rectangular panels.
- Each panel measures 44 cm x 50 cm for size S (adjust for desired size).
- The pattern is a variation of the fan (shell) stitch and is comprised of two alternating row types.
- The decorative v-stitch collar is optional and can be extended for a flowy effect.
- You may change armhole depth for a different fit.
Step-by-Step Pattern
1. Make the Panels (Make 2)
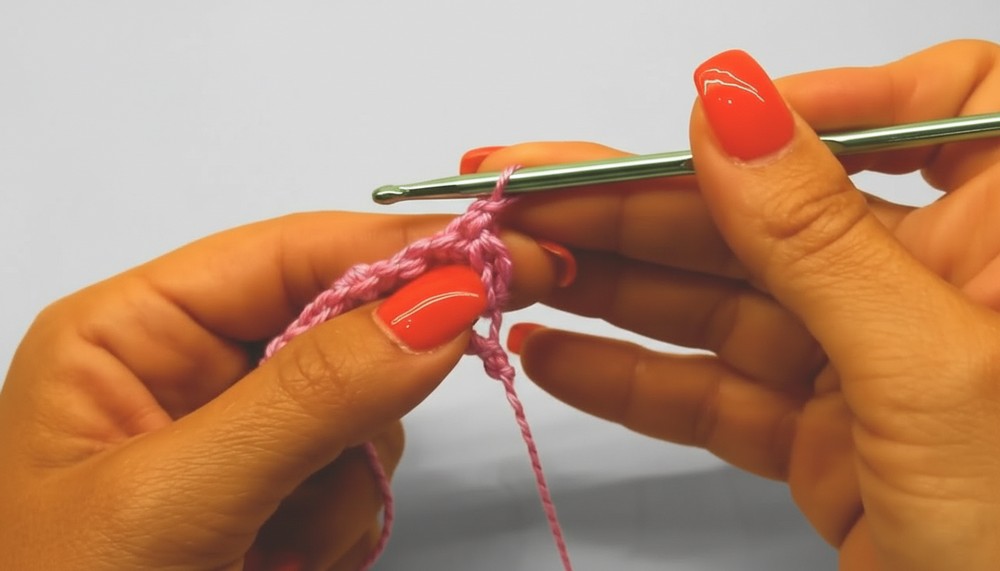
Foundation Chain
- Ch 61. (This is a multiple of 6 + 1. To make the panel wider, add by 6s.)
- Mark your last chain for reference.
Row 1 (Base Row – All dc)
- Add 3 more ch (acts as turning chain = 1st dc).
- Dc into 4th ch from hook (or the chain marked).
- Dc into each ch across.
- You should have 61 dc. (Adjust to your foundation count.)
Row 2 (Establish Fan Pattern)
- Ch 1, turn.
- Sc in first st (the dc in the row below).
- Sk next 2 sts, 5 dc in next st, sk next 2 sts, sc in next st; repeat from * to * across.
- End with sc in last st.
Row 3 (Offset Rows)
- Ch 5 (counts as dc + ch-2).
- Dc in center (3rd dc) of first fan, ch 2, dc in next sc, ch 2, dc in center of next fan; repeat from * to * across to end.
- Continue pattern: Alternate two ch for separation as needed.
- End with dc in last sc.
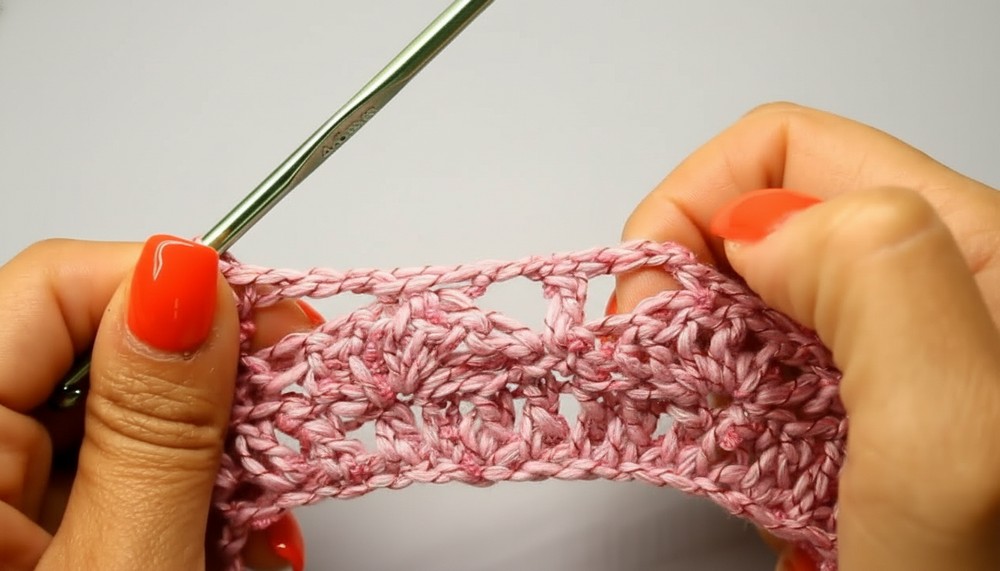
Row 4
- Ch 1, turn.
- Sc in first st.
- Sk next ch-2 sp, 5 dc in next dc, sk next ch-2 sp, sc in next dc; repeat across.
- End with sc in last dc.
Repeat Row 3 and Row 4
- Continue alternating Row 3 (dc + ch-2*) and Row 4 (sc, 5-dc fans) until the panel measures 50 cm in height (about 23 fans vertically, from base to top).
2. Panel Assembly
- When both panels are complete, place them right sides together.
- Use stitch markers to mark shoulder and side seams.
- Shoulders: Sew together at the top edge, joining only three stitches on each side for a wide, draped neckline (adjust for desired fit).
- Sides: Leave the scalloped (fan) edge as the bottom. Sew sides up from the bottom, leaving 18 cm (or 15 cm for a more fitted armhole) unsewn for armholes.
- Use whip stitch, mattress stitch, or slip stitch through both layers for neat seams.
- Turn sweater right side out.
3. Optional Collar/Neckline Edging (Flywheel/V-Stitch Ruffle)
Repeat after assembling the panels.
Round 1 (V-Stitch Round):
- Attach yarn to the back neckline edge, ch 3 (counts as dc), ch 3 more, dc in same st (V-stitch made).
- Sk 2 sts, V-stitch (dc, ch 3, dc) in next st; repeat around the neckline.
- Sl st to the starting ch-3 to join.
Round 2:
- Sl st into ch-3 sp of first V-stitch, ch 3 (counts as dc), dc in same sp, ch 3, 2 dc in same sp (2 dc, ch 3, 2 dc) in each V-stitch around.
- Sl st to join.
Round 3 (optional – for a more dramatic collar):
- Work (3 dc, ch 3, 3 dc) in each ch-3 sp around, sl st to join.
- Add more rounds as desired for added drape.
4. Weaving in Ends & Blocking
- Weave in all ends with yarn needle.
- Block gently to shape and even up fabric if desired.
Conclusion
This simple two-panel sweater is versatile and beginner-friendly, using only double crochet, single crochet, and basic increases. The result is a lightweight, broad-neck sweater with an optional, elegant ruffled collar. It can be dressed up or down according to yarn choice and fit.
Pattern Correction & Tips
Correction:
- Always check that your stitch count matches at the start and finish of each row, especially after fans.
- Be sure both panels are precisely even for neat seaming.
Tips:
- Use a soft cotton or cotton blend for drape.
- For a more fitted look, decrease armhole depth in seaming.
- Adjust panel width for your preferred fit; add or subtract multiples of 6 from the base chain.
- You can make the neckline/collar as ruffled or simple as you wish with extra rounds.
- For longer coverage, simply add more rows before shaping armholes and seaming.