How To Crochet A Bat Face Mask for Beginners

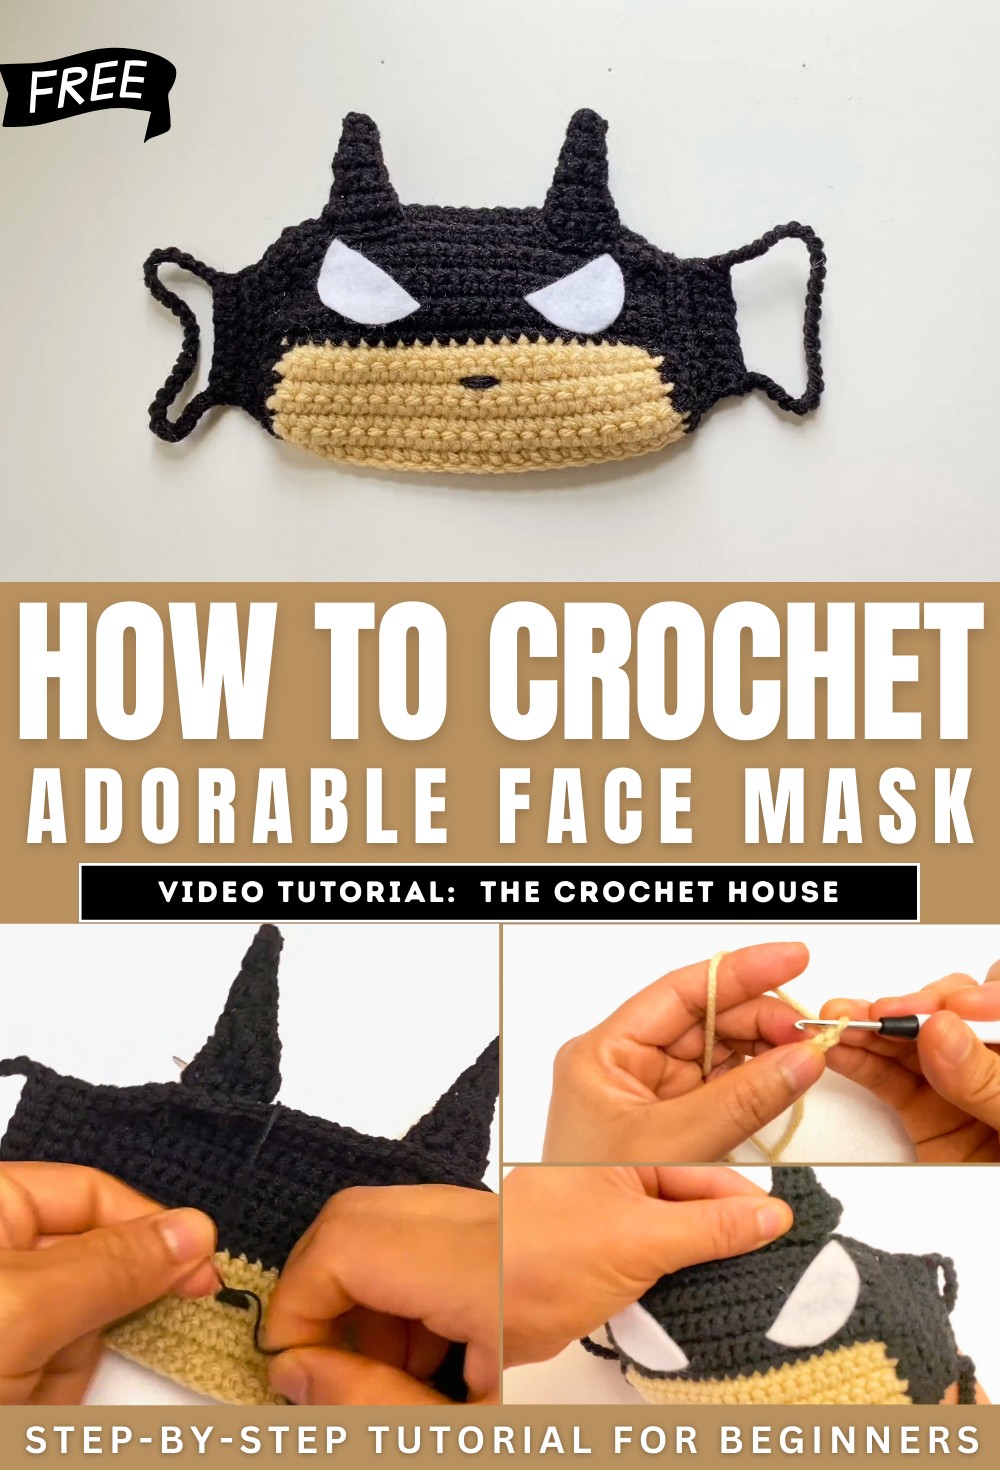
With a step-by-step tutorial, learn how to crochet a fun and creative face mask designed for kids aged 7 to 10. Using two yarn colors, a 3.5mm crochet hook, scissors, a needle, hot glue, and white felt, the project is built step by step. The face mask includes single crochet stitches for the base, as well as small details like ears and eyes made from yarn and felt to enhance the design.
Clear instructions are provided for assembling the mask and adding finishing touches. This playful and practical craft is perfect for children, combining functionality with creativity. So, follow through with us for the complete tutorial.
Crochet Kids Face Mask Tutorial
This tutorial provides a detailed, step-by-step guide to crocheting a playful face mask designed for children aged 7 to 10. The mask features vibrant materials, creative patterns, and customizable details like ears and eyes to create a fun and practical accessory. Below is an organized summary of the tutorial:
Introduction to the Project
- The instructor introduces the project, highlighting that the mask is suitable for kids aged 7–10.

Materials Needed
- Two colors of yarn.
- 3.5 mm crochet hook.
- Scissors, needle, and hot glue.
- White felt for decorative details.
- A pre-cut felt circle measuring approximately 3.5 cm for the eyes.
Creating the Base of the Mask
Step 1: Starting the Base
- The base of the face mask begins with a chain foundation using the first color of yarn.
- The instructor demonstrates how to create a slip knot and the starting chain.

Step 2: Building Rows
- Rows of single crochet stitches are worked across the chain foundation to form the main rectangular base.
- The piece is turned at the end of each row, with the edges kept smooth and neat.
- This process continues over several rows to create the body of the mask in one color.
Step 3: Adding the Second Color
- After completing the initial section, the second color is added using a slip knot.
- Additional rows of single crochets are created using the new color, building onto the first section.

Step 4: Shaping the Sides
- The sides of the mask are shaped by crocheting single stitches along the edges.
- The instructor demonstrates how to create decreases to taper and shape each side of the mask.
- A set number of rows are completed for the sides, and strap chains are added to secure the mask around the ears.

Creating and Attaching the Decorative Ears
Step 1: Crocheting the Ears
- The ears are crocheted separately and then attached to the mask. The instructor explains how to:
- Create a small base using chain stitches.
- Work single crochet stitches in rows, with gradual decreases to form the pointed ear shape.

Step 2: Finishing and Attaching the Ears
- The ears are made in black yarn (or another color of choice).
- Loose ends are hidden, and the ears are attached to the main mask using the yarn needle.
Adding the Eyes
- White felt circles are cut in half to create the eyes.
- Hot glue is used to attach the felt eye details to the mask.
- Additional optional accents, like expressions using yarn or felt, can be added for extra character.

Final Assembly and Tips
- The instructor assembles all the crocheted pieces and felt decorations onto the face mask.
- The finished face mask is showcased, with the instructor highlighting the playfulness and functionality of the design.
Conclusion
- The mask is presented as a fun project for kids, combining creativity and practicality.