How to Crochet Doggy Bandana for Gifting
Learn how to crochet a beginner-friendly mesh doggy bandana with classic granny stitch, perfect for summer, with this step-by-step tutorial for beginners. It also explains how to make durable i-cords to tie the bandana securely around your dog’s neck. With clear instructions, slow pacing, and visual guidance, this project is perfect for crochet novices wanting to crochet adorable accessories for their pets.

The creator mentions going slow throughout the tutorial to accommodate beginners, while intermediate or advanced crocheters may grasp the pattern sooner. Grace emphasizes that this project is easy and suited for all skill levels.
Dog Bandana Crochet Pattern
Materials List
- Yarn: Worsted weight (#4) yarn, cotton or acrylic, in any color of choice
- Hook: 5.0 mm (H-8) crochet hook (or size needed for drape/fit)
- Scissors
- Tapestry needle: For weaving in ends
- Measuring tape (optional, for custom sizing)
Abbreviations (US Terms)
- ch: chain
- sl st: slip stitch
- dc: double crochet
- st(s): stitch(es)
Special Notes
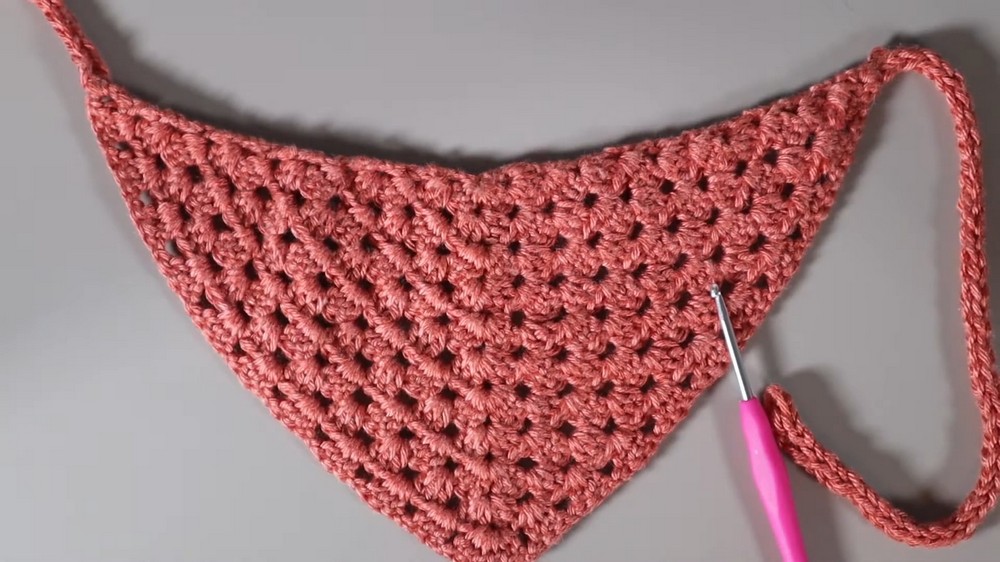
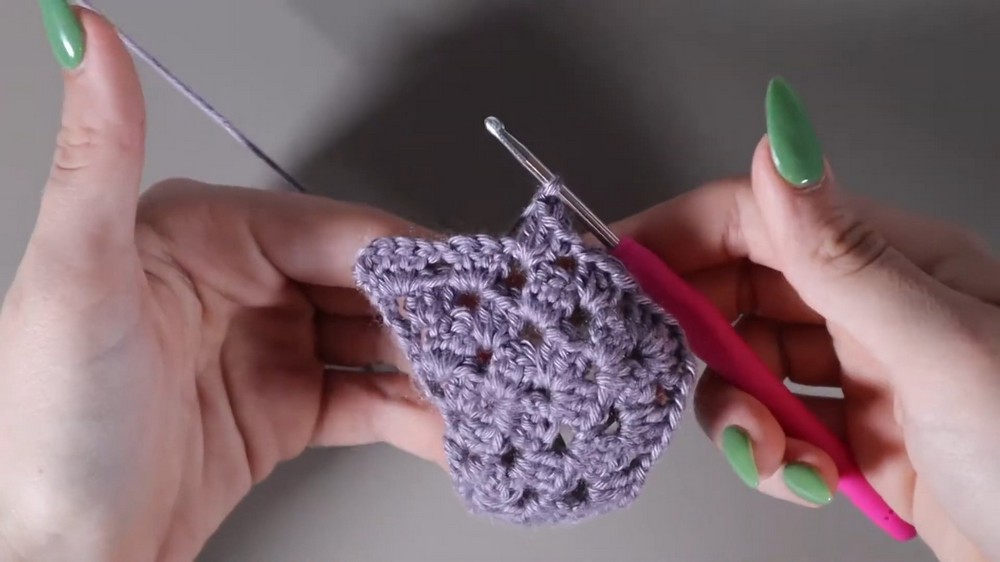
- The bandana is worked from the point up, increasing in triangle shape.
- Each row will increase the size, so you can make a custom fit for any pet.
- The beginning and end of every row are always 1 dc, ch 1 and last 1 dc.
- The apex (center point) of the triangle always features the special “apex pattern.”
- The pattern creates side eyelets for adding i-cord or ties.
Pattern
Bandana Body
Row 1:
- Make a magic ring (or ch 4, sl st to first ch to form a ring if preferred).
- Ch 1 (does not count as a st).
- 1 dc in ring, ch 1, 3 dc in ring, ch 1, 3 dc in ring, ch 1, 1 dc in ring.
- Pull the ring tight to close the center. (Triangle should have 3 sides/corners with ch-1 spaces.)
Row 2:
- Turn. (Each row is worked from the previous row’s end.)
- Either ch 2 (counts as a dc) or use your preferred dc start (as described in the transcript).
- 1 dc in the first st, ch 1.
- 3 dc in next ch-1 space, ch 1.
- 3 dc in next ch-1 space (this is the apex, or tip: see below), ch 1, 3 dc in same ch-1 space, ch 1.
- 3 dc in next ch-1 space, ch 1.
- 1 dc in last dc.
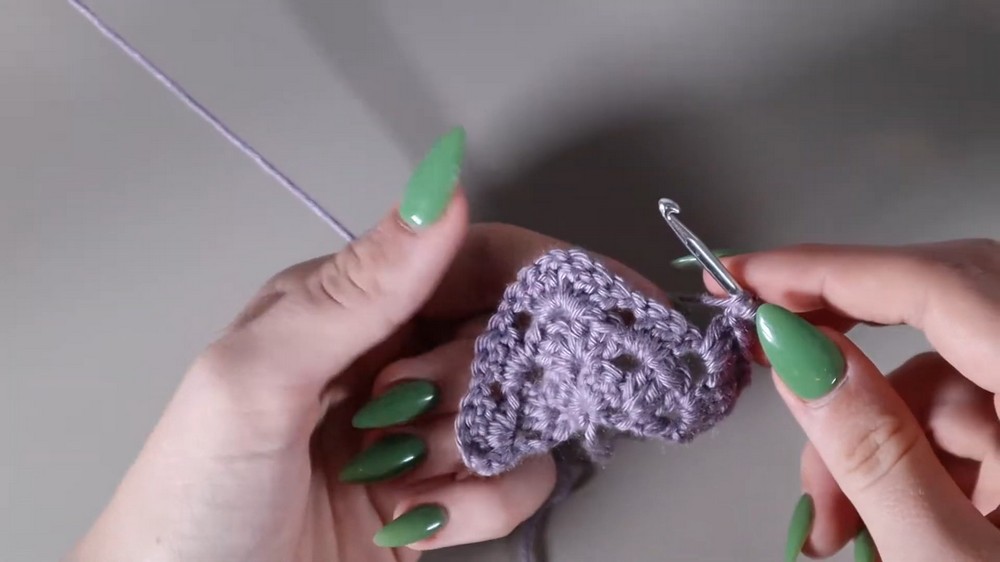
Row 3 and onward (Repeat Row):
- Turn, dc in first st, ch 1.
- [3 dc in each ch-1 space, ch 1] down the side.
- At the apex (center ch-1 space):
- [3 dc, ch 1, 3 dc] in the same space.
- Continue [3 dc in each ch-1 space, ch 1] to the last ch-1 space.
- 1 dc in last dc (or top of turning chain).
Continue in this manner, repeating the steps above and increasing on each side and at the apex, until the bandana is the desired size for your dog.
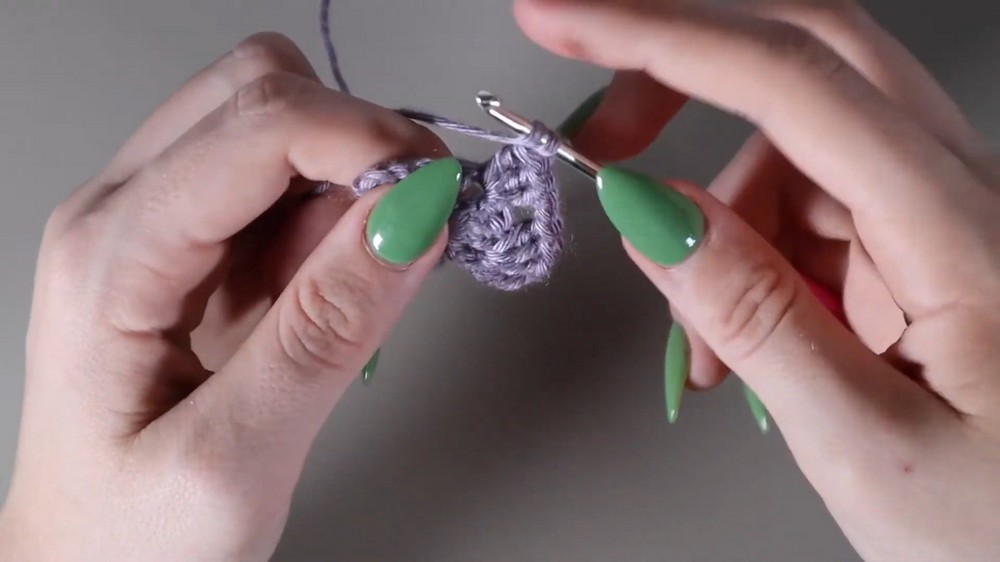
Apex Pattern (for center tip of triangle, every row):
- In the center ch-1 space (apex), work:
- 3 dc, ch 1, 3 dc all in the same space.
Finishing Row
- After reaching your desired size, fasten off yarn, and weave in ends.
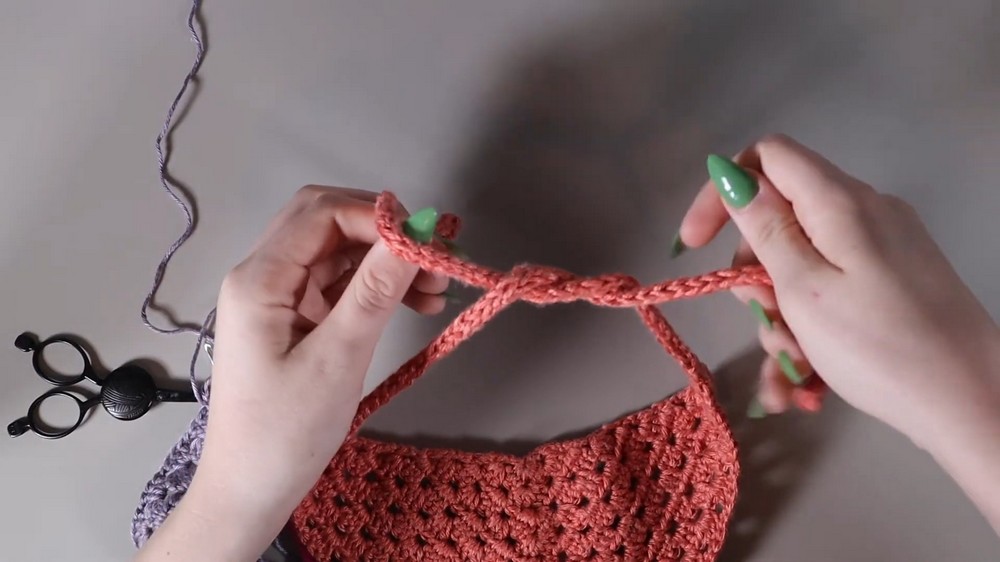
I-Cords / Ties
(Repeat on both triangle ends.)
- Insert hook into the ch-1 space at the tip/edge of the bandana.
- Attach yarn and ch 1.
- Set up i-cord: Insert hook into same space; pull up loop (2 loops on hook). Repeat for 3 total loops.
- To make the i-cord:
- Pull working loop out of first 2 loops, leaving remaining loop on hook.
- Yarn over, pull through that loop.
- Reinsert hook into the first loop, yarn over, pull through loop.
- Repeat for third loop as well.
- You will always have 3 loops on your hook.
- Repeat process: each time, pull working loop from 2 loops, yarn over and pull through, reinsert hook, yarn over/pull through, until i-cord is desired length (long enough to tie around your dog’s neck with a bow).
- To finish i-cord, yarn over and pull through all 3 loops, ch 1, fasten off.
- Repeat i-cord on the other corner for the second tie.
Conclusion
This classic, modern bandana is easy to size up or down for any pup. The triangle shape makes it comfy and the i-cord ties are secure and cute. Experiment with different yarn colors or add surface patterns for added flair!
Pattern Correction & Tips
- Sizing: Check the fit by wrapping the piece around your pet’s neck before making the ties.
- Apex: Always remember the “3 dc, ch 1, 3 dc” apex pattern to keep the triangle growing evenly.
- Finishing corners: Make sure your first and last dc of every row are clear and not skipped; this forms neat edges.
- I-cord ties: If i-cords are too tricky, you may also attach chains and slip stitch back for a simple alternative.
- Blocking: Wet block the finished bandana if it curls at the edges.