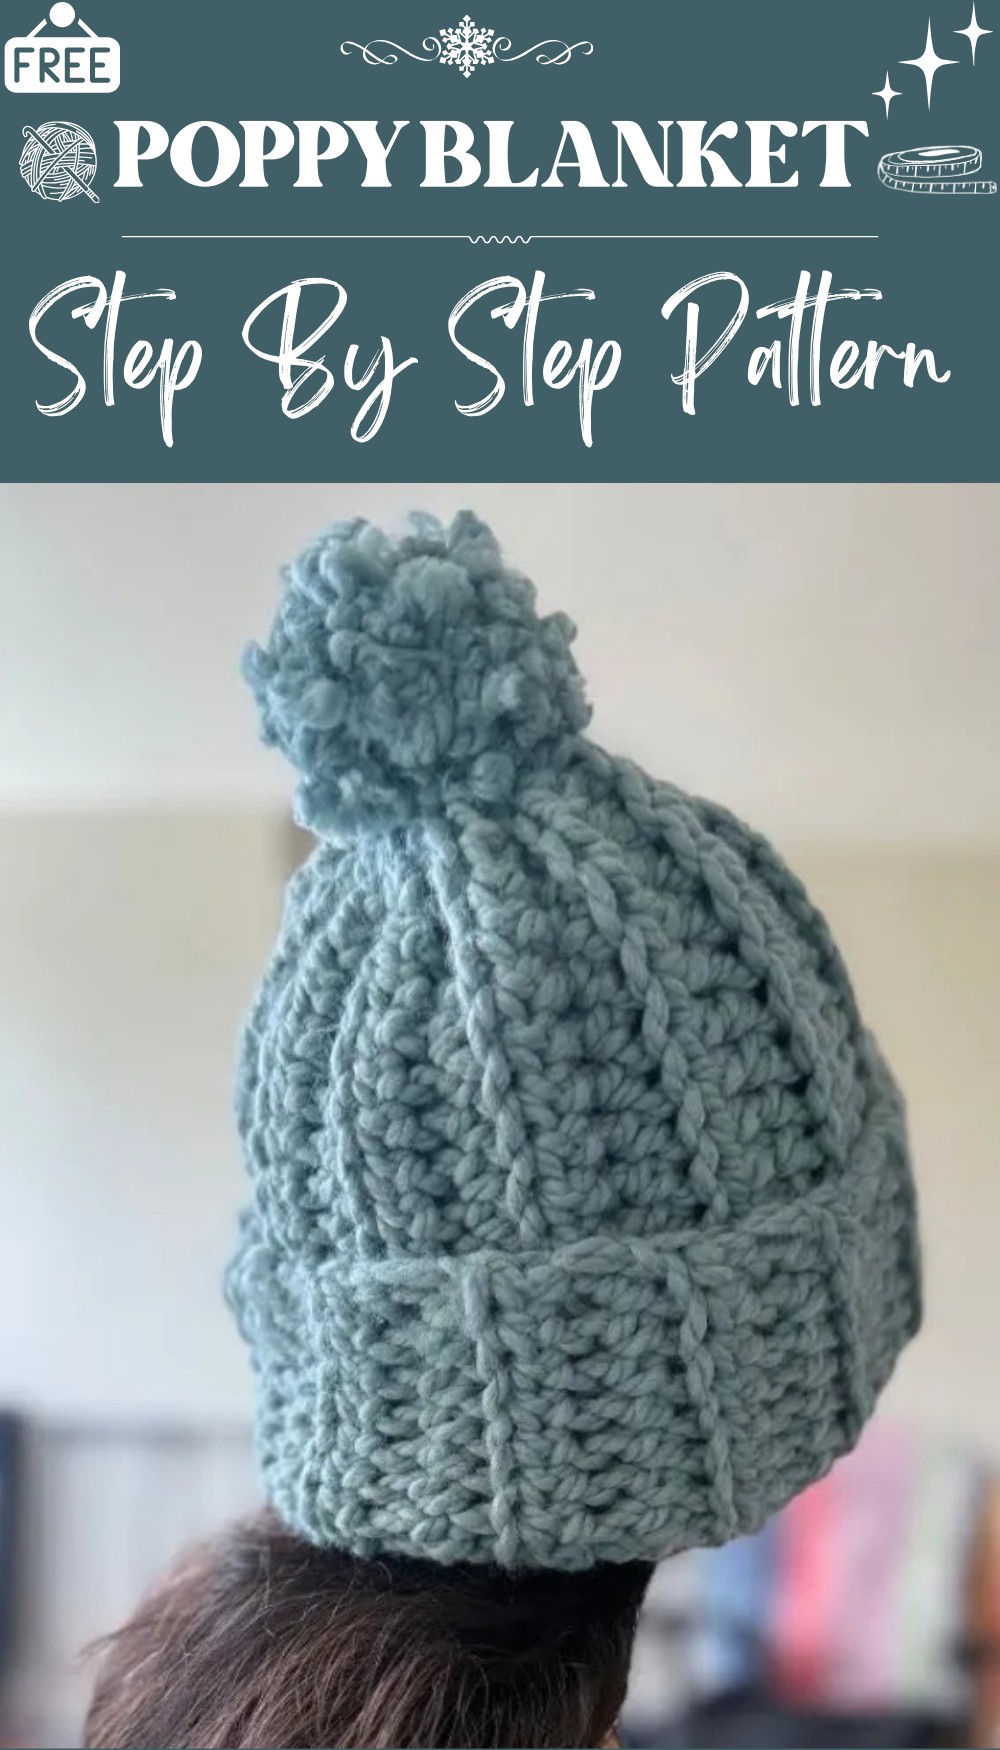
Winter Hat Free Crochet Pattern — Step-by-Step Guide

Warm your head in style with easy instructions from free crochet winter hat pattern so anyone can feel cozy & express their favorite colors.
Staying warm in winter becomes a lot more fun with a hat that you make yourself. A handmade hat brings together beautiful colors, interesting textures, and eye-catching designs that look great on everyone. By following a crochet winter hat pattern, you get to use soft yarns that feel gentle on your head and ears. This hat are easy to wear, and match with all kinds of clothes, making them a perfect choice for any outfit.
Free Crochet Pattern: Classic Winter Beanie for All Ages
The pattern helps you create hats in different sizes, shapes, and styles, so each one is unique. Not only does a cozy hat keep you safe from cold winds, it also gives you a sense of pride every time you wear your handmade piece. With every stitch, you can add love and care, turning a simple yarn into a warm and useful item. Crochet winter hat are also wonderful gifts, showing your thoughtfulness and spreading warmth all season long.
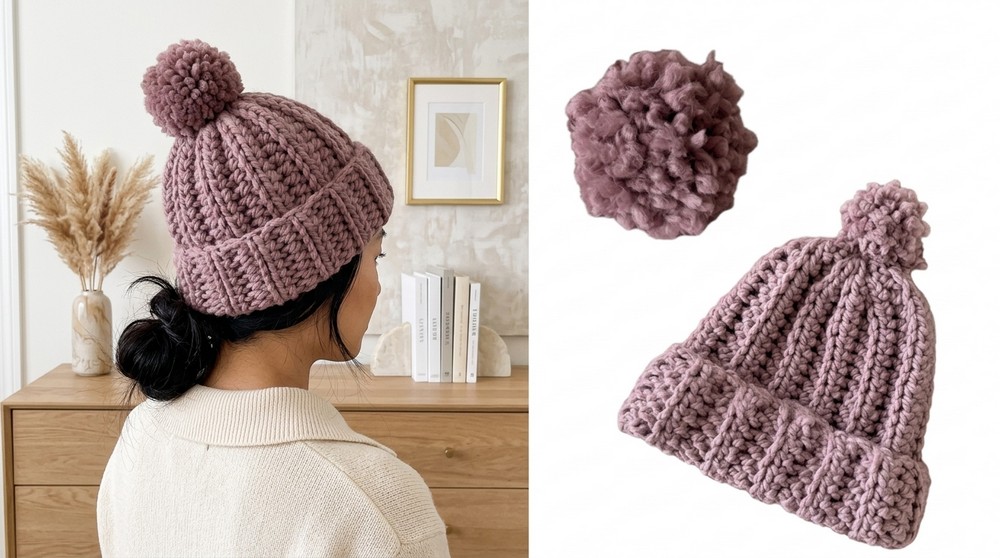
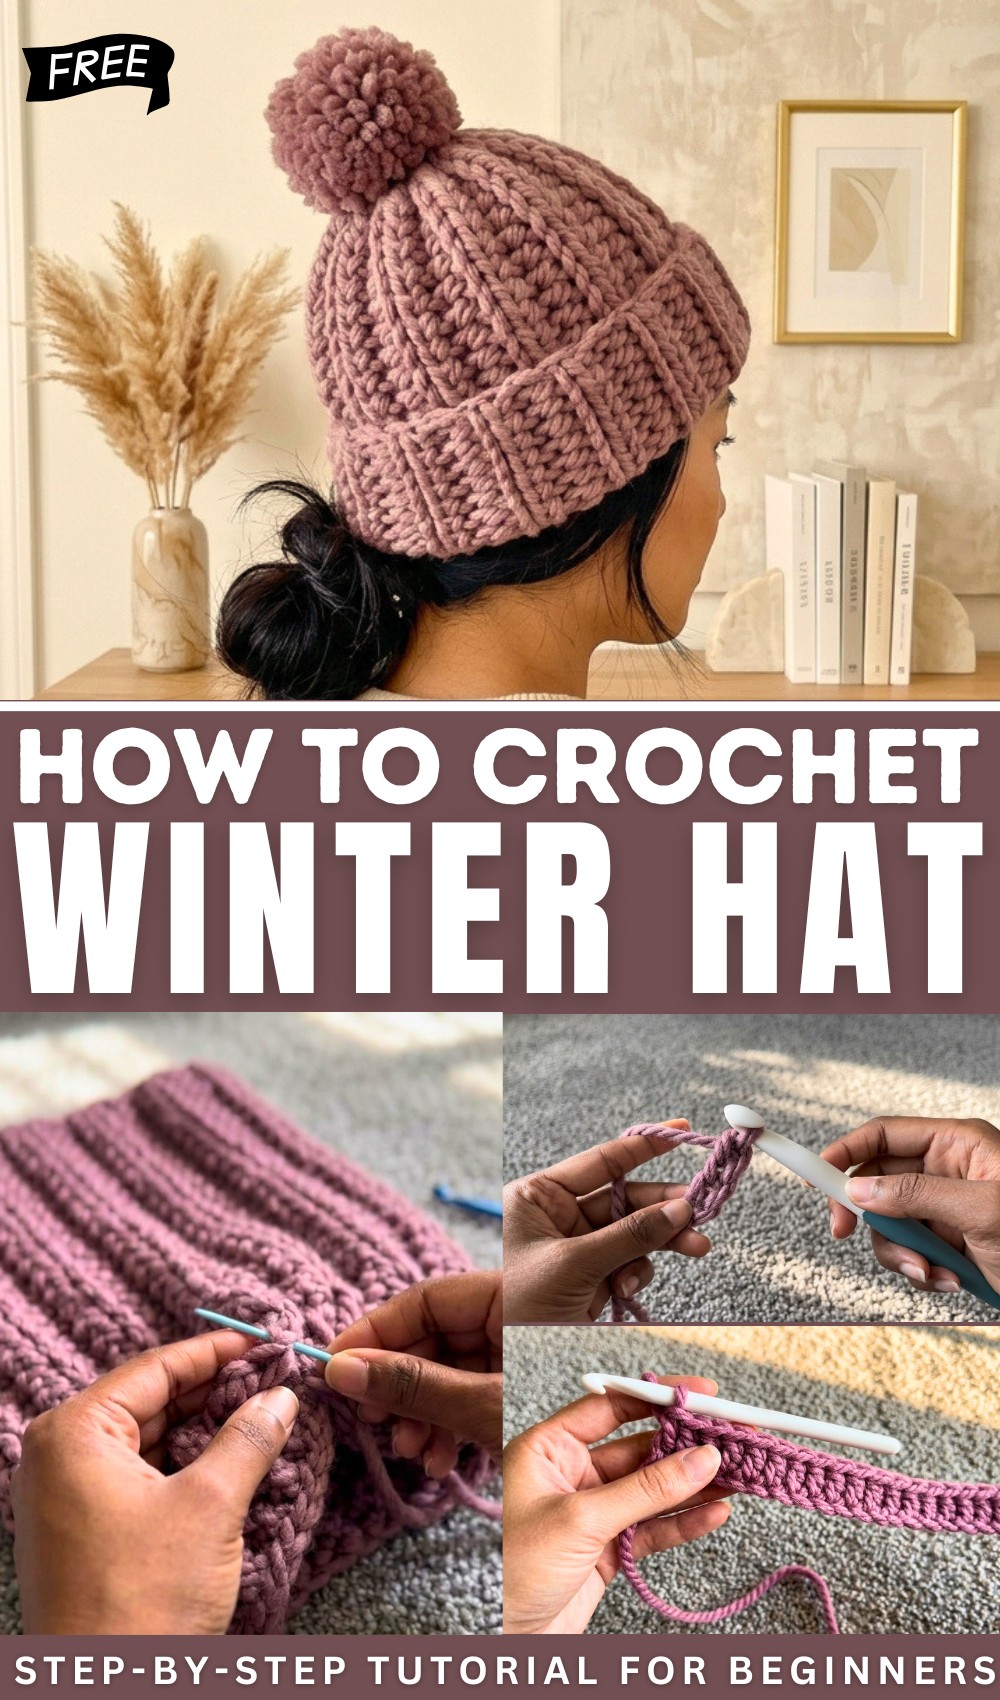
Crochet thick Winter Hat Pattern (With Pom Pom)
Materials
- Yarn: Super Bulky/Weight 6 yarn (Lion Brand Wool Ease Thick and Quick, recommended, 2 skeins for small or larger hats)
- Hook: 12 mm crochet hook
- Scissors
- Yarn (Tapestry) Needle: For seaming and sewing in ends
- Paper towel roll (or envelope): For pom pom making
- Measuring Tape: (Optional, for customizing hat length/width)
Key Abbreviations
- ch = chain
- hdc = half double crochet
- blo = back loop only
- sl st = slip stitch
- st(s) = stitch(es)
- rep = repeat
Special Notes
- The length of your starting chain determines the height of your hat (including brim for folding, if desired).
- The number of rows determines the circumference; add more rows for a larger size.
- Worked flat in rows, side-to-side, then seamed into a tube and cinched at the top.
- The back loop only half double crochet stitch creates a thick, stretchy ribbing.
- All instructions use US crochet terminology.
Instructions
1. Hat Body
Foundation
- Leave a 16–20 inch tail (to sew the hat later).
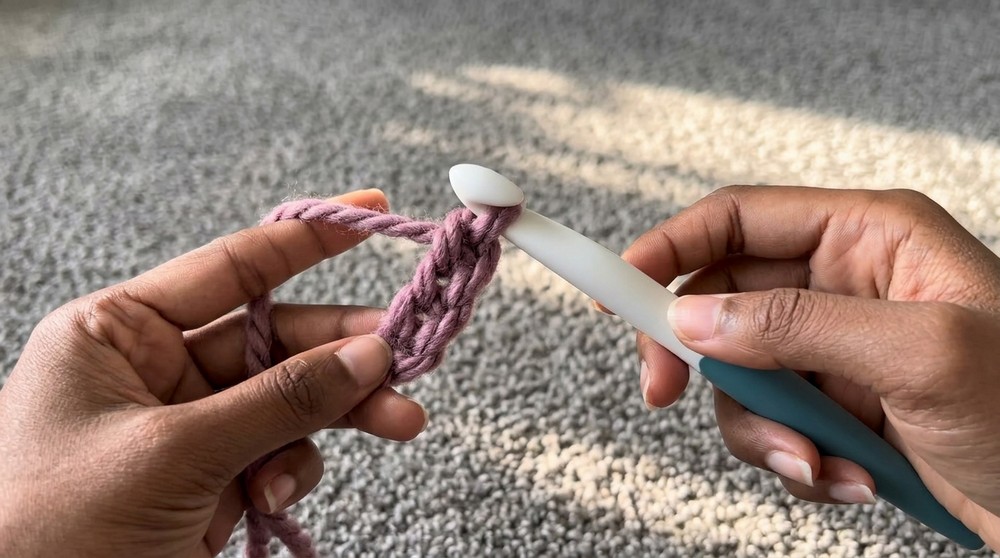
- Make a slip knot and place on hook.
- Ch 25.
- For a longer hat (with fold-over brim), chain more.
Row 1
- Hdc in 2nd ch from hook and in each ch across (24 hdc).
- At end, turn your work.
Row 2
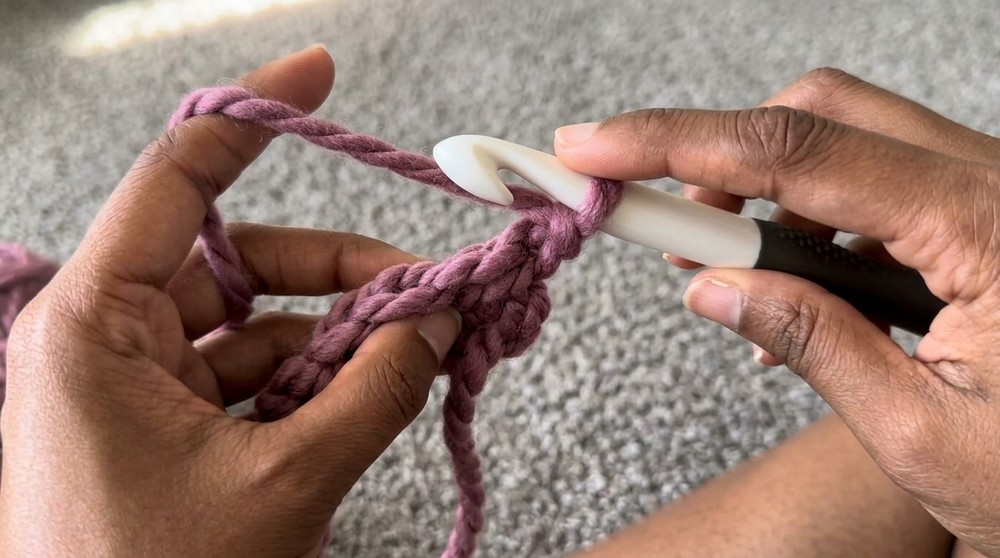
- Ch 1 (does not count as a stitch), turn.
- Blo hdc (half double crochet in back loop only) in each st across except the last stitch.
- In the last stitch: work a regular hdc through both loops.
- Turn your work.
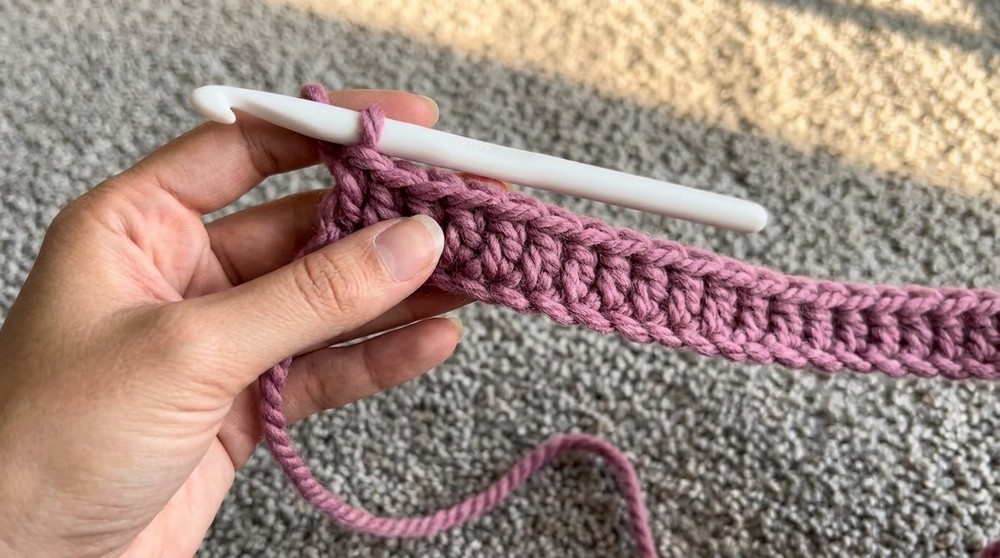
Row 3 – Row 24
- Repeat Row 2: ch 1, turn, work blo hdc in each st except last st (regular hdc in both loops).
- Continue until you have 24 rows, or until the rectangle fits comfortably around your head when stretched.
Finishing the hat body
- Ch 1 and fasten off, leaving a long tail for seaming.
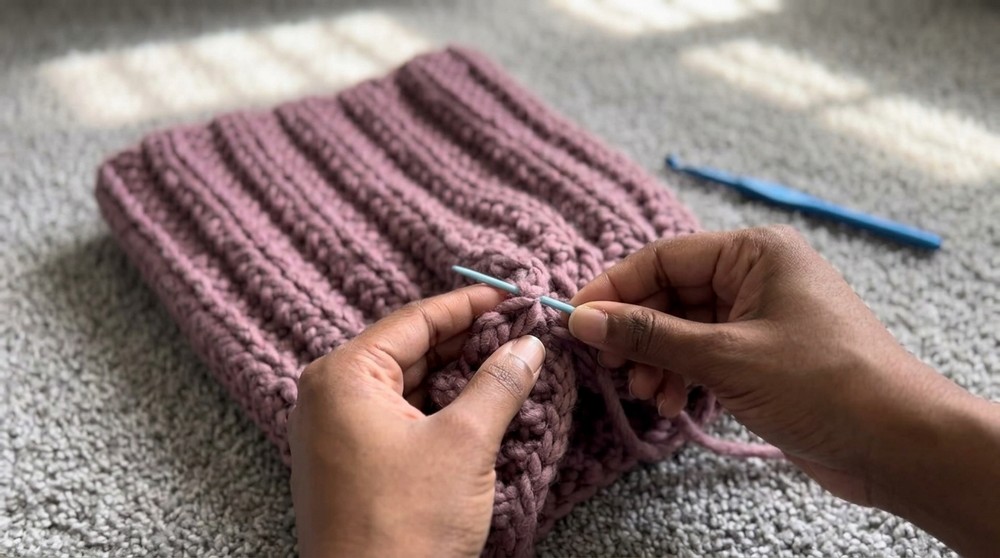
2. Seaming the Hat
- Align both short ends of the rectangle together.
- Thread the tail onto a yarn needle.
- Sew the sides closed (short-end to short-end) using whip stitch or preferred method, working in and out through both edges until you reach the top.
- Weave in the tail and secure at the seam.
3. Closing the Crown
- Thread the remaining yarn onto the needle.
- Along the top (open end), weave the needle in and out (running stitch) around the edge, skipping every 2–3 stitches for an even gather.
- Lightly pull on the tail to cinch the top closed.
- If a small hole remains, sew back and forth across the opening to close it, then pull the needle to the inside and fasten off.
- Weave in and hide all loose ends on the inside of the hat.
4. (Optional) Pom Pom Attachment
Making the Pom Pom
- Cut a paper towel roll in half (or use an envelope/cardboard for wrapping).
- Wrap yarn around the roll 60–70 times (for a big, chunky pom pom).
- Snip the end of the wrapped yarn.
- Gently slide the wrapped bundle off the roll, holding tightly in the center.
- Cut a long piece of yarn and tie it tightly around the center of the bundle. Make a very tight double knot.
- With scissors, snip all the loops to make a fluffy pom pom.
- Trim and shape the pom pom for a round, tidy look.
Attaching the Pom Pom
- Thread a yarn needle with the long ties from the pom pom.
- Insert needle through the top center of the hat, pulling to the inside.
- Sew back and forth several times to secure.
- Knot and weave in the ends inside the hat.
Conclusion
This quick and easy chunky crochet hat is the perfect project for beginners or anyone needing a stylish, warm winter accessory in a hurry. The ribbed design is both fashionable and practical for keeping warm, while the handmade pom pom adds a fun, personalized touch. Adjust the size to suit any wearer by simply changing the length of the starting chain and the number of rows.
Pattern Correction & Tips
Corrections:
- The tutorial refers to “rounds,” but the hat is constructed in rows and then seamed.
- Always hdc into both loops of the last stitch in each row for a neater seam.
Tips:
- For a larger/smaller hat, adjust row count (circumference) and/or starting chain (hat height).
- Use a tight tie on the pom pom so it does not unravel.
- Match the hat and pom pom colors for a coordinated look or use scraps for a playful mix.
- Try on before final seaming for a custom fit.