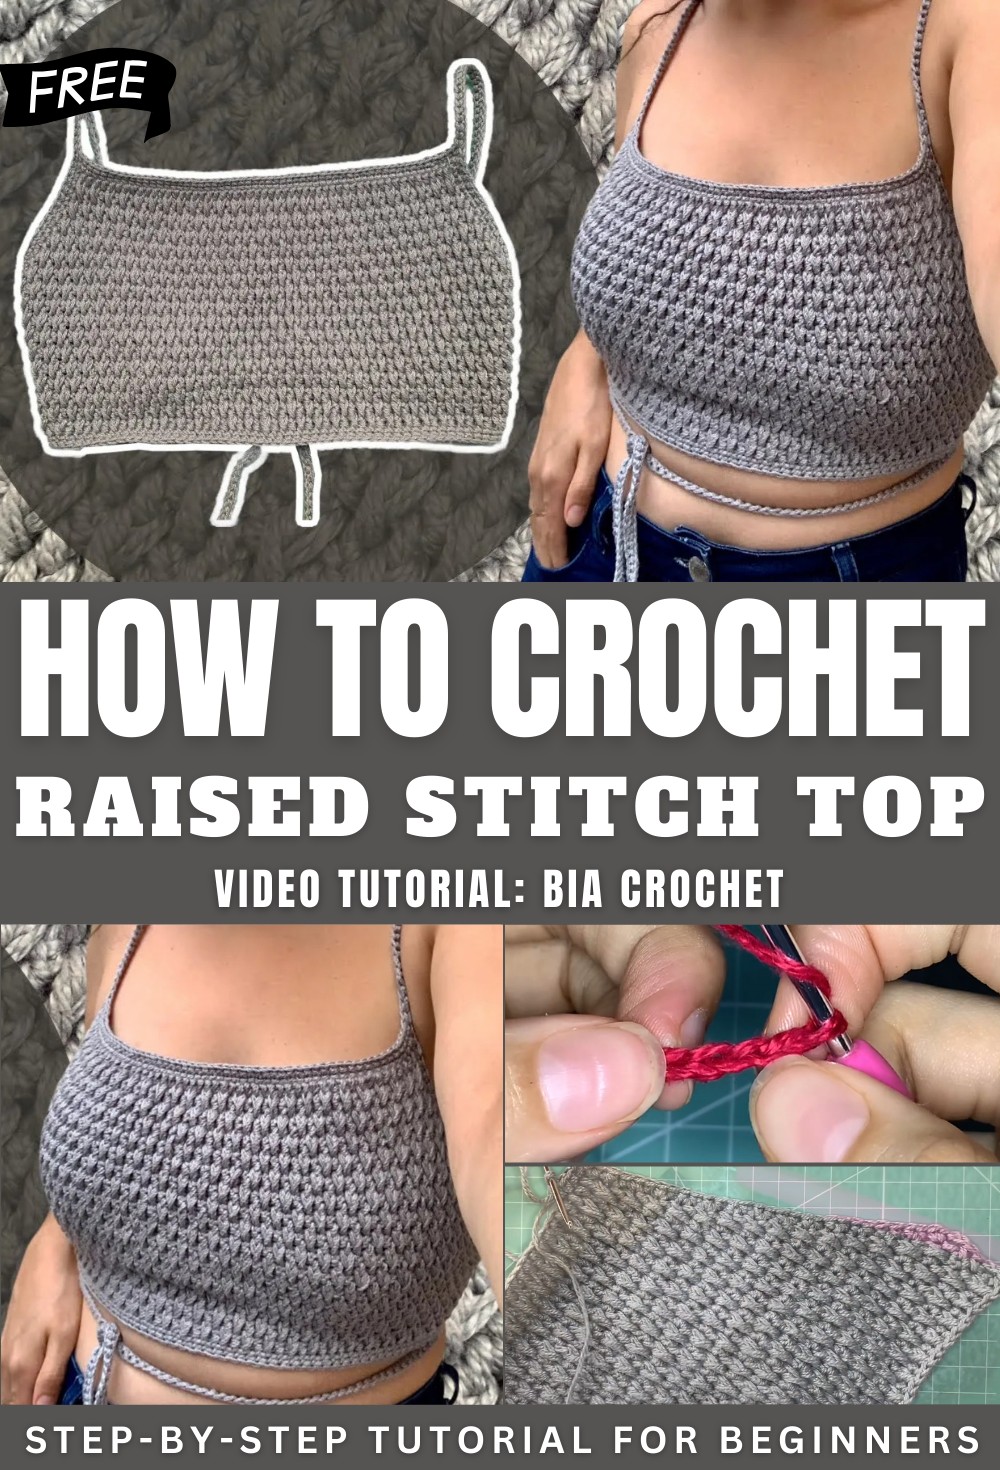
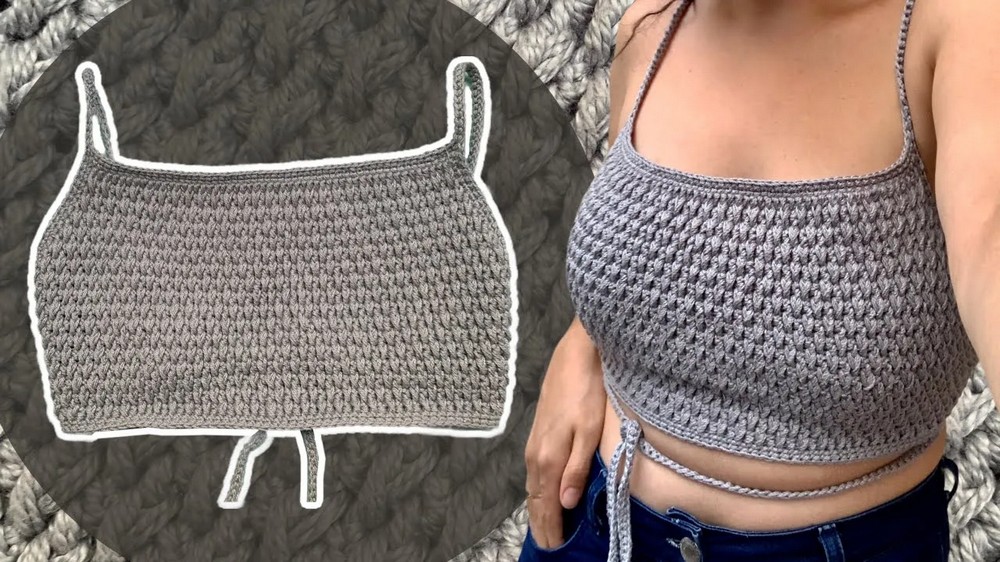
Chic Crochet raised stitch top Pattern to Style Your Look
Feel cozy and chic with Crochet raised stitch top Pattern that builds a textured, stylish piece ideal for layering, cool days, and casual elegance.
A modern wardrobe often needs pieces that feel unique, comfortable, and stylish. A raised stitch top pattern in crochet gives you a textured, sculpted look while keeping the fabric soft and breathable. We use it because the raised stitch adds dimension, strength, and structure, making the top more durable and visually interesting than plain crochet. This pattern also allows easy customization for different sizes, fits, and style preferences, so it becomes a personal wardrobe staple.
Modern Crochet raised stitch top Pattern for Daily Style
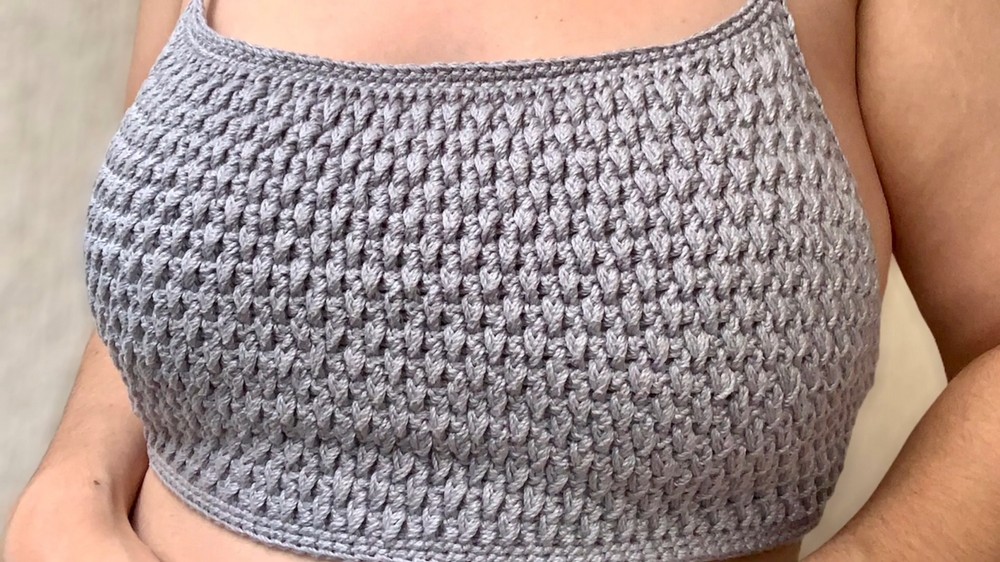
Its beauty lies in the 3D effect created by the raised stitches, which catch light and create a rich, elegant texture that looks handmade and premium. This top works perfectly for casual outings, summer events, beach days, or layered under a jacket for a trendy look. It also suits creative photoshoots and cozy indoor gatherings. Overall, it offers a blend of style and practicality, helping you wear something that feels both fashionable and thoughtfully crafted.
Materials
-
Yarn: Anne yarn used with a double strand (two threads held together). [01:11]
-
Hook: 3.0 mm crochet hook. [01:11]
-
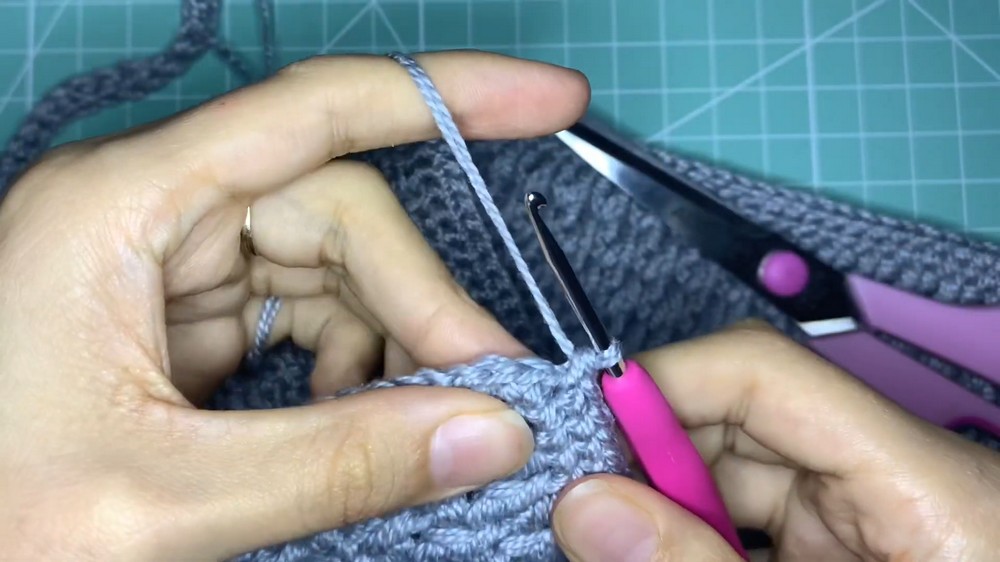
General Tools: Scissors and a tapestry needle for weaving in ends. [14:03]
Special Features
-
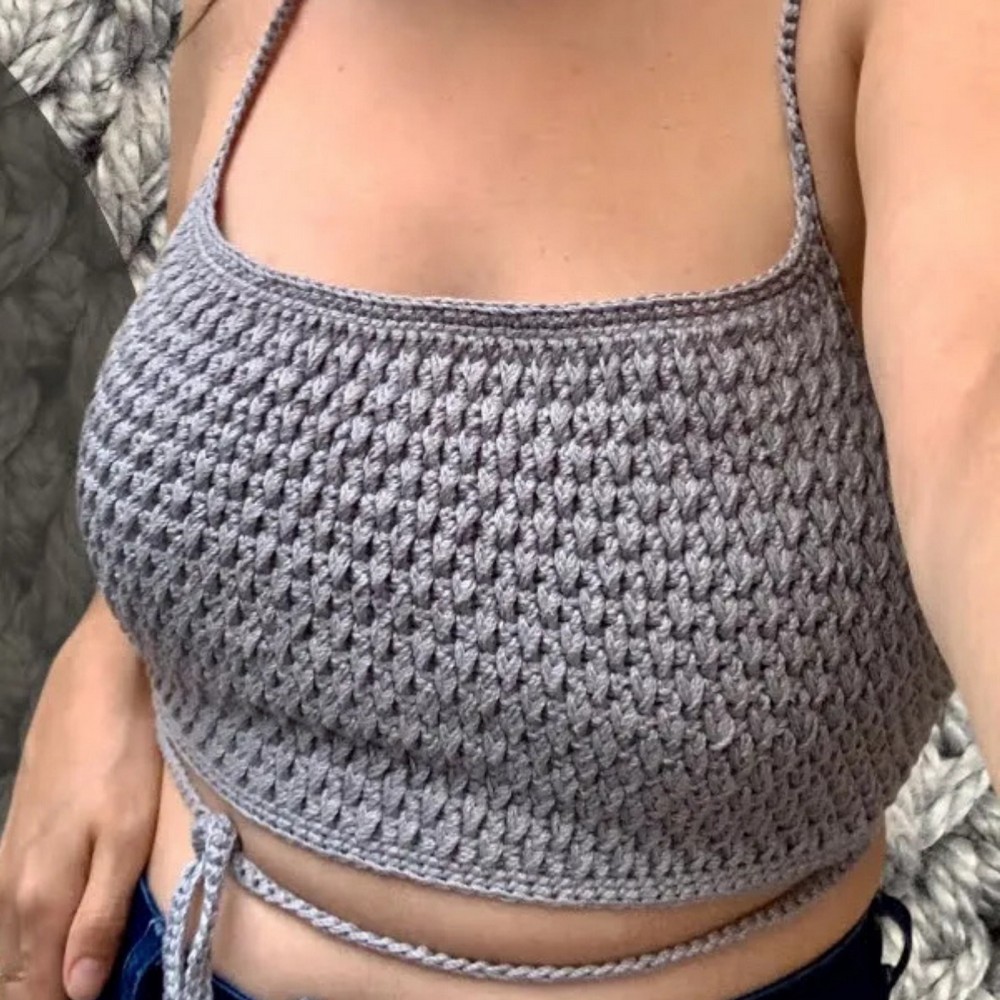
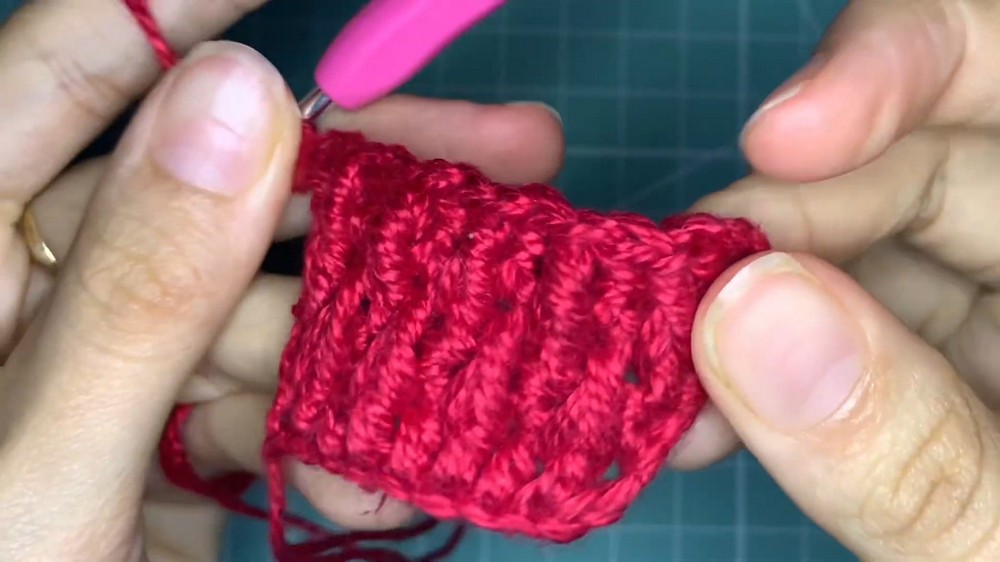
Textured Relief (Waffle/Ribbed effect): The top uses alternating half double crochets in relief to create a “bumpy” and sophisticated texture. [08:37]
-
Dense Fabric: Because it alternates relief stitches with single crochets, the fabric is very closed, meaning it usually does not require a lining. [22:05]
-
Cross-Back Straps: The design features long straps that cross over the back and thread through integrated loops at the waist, ensuring a secure and adjustable fit. [18:27]
Level of Difficulty
Intermediate. While the stitches themselves (half double crochet and relief stitches) are manageable, the project requires alternating between two different types of rows and managing increases at the edges. [11:48]
Detailed Pattern & Stitches
1. Starting the Base
-
Begin with an odd number of chains. For the sample, the tutor uses 9 chains, but you should adjust for your size (the video description usually contains specific counts for P/M/G). [01:28]
-
Row 1 (Foundation): Work one Half Double Crochet (HDC) in each chain across. [01:50]
-
Row 2 (Stability): Chain 1, turn. Work one Single Crochet (SC) in every stitch. This row acts as a base to prevent the relief stitches from warping the fabric. [03:00]

2. The Relief Rows (Increases)
-
Row 3: Chain 2 (counts as 1 HDC). Work an HDC increase (2 HDC in the same first stitch). [03:41]
-
The Pattern: Alternate between one Relief HDC (insert hook around the post of the HDC from two rows below) and one normal HDC in the SC base. [04:47]
-
End of Row: Finish with an increase (2 HDC in the last stitch). [05:42]
-
Row 4: Repeat the SC row (no increases unless specified for sizing). [06:00]
3. Alternating for Texture
-
To get the “staggered” relief look, in every new relief row, what was previously a “normal” stitch should now be a “relief” stitch, and vice-versa. [07:41]
-
Continue alternating between a Relief HDC row (with edge increases) and a flat SC row until the piece reaches the desired width across the chest. [01:04]
-
Finishing the Shape: Finish with 3 rows without increases to straighten the edges under the arms. [00:33]
4. Border and Loops
-
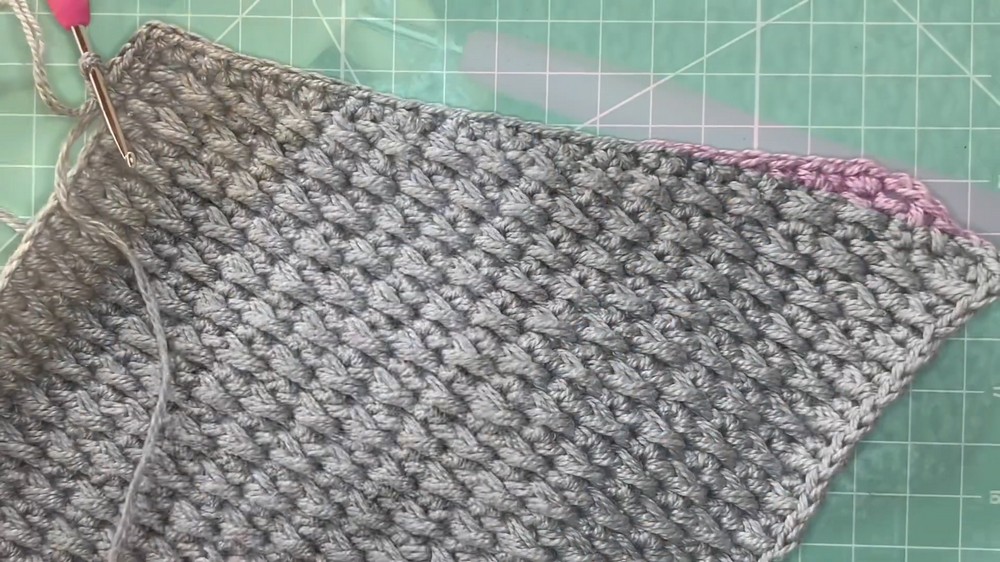
Contouring: Work SC around the entire piece. [16:37]
-
Eyelets: On the side edges, create loops for the straps by chaining 2 and skipping stitches. These will be used to lace the top like a corset. [15:06]
-
Corners: In the top corners (where the straps will go), work 3 SC in the same stitch to create a smooth curve. [16:08]
5. The Straps
-
At the top corners, chain a long cord (approx. 1.2m to 1.5m). [18:11]
-
Work one SC back into every chain to make the strap thicker and more comfortable. [18:52]
-
Tie the straps by crossing them over the back and threading them through the side eyelets. [18:36]
Tutor’s Suggestions
-
Stitch Tension: When working the relief HDC, pull the yarn up slightly to give the stitch height. If you pull too tight, the fabric will bunch up and become stiff. [04:07]
-
Counting: Always count your stitches at the end of the SC rows to ensure your increases are symmetrical. [13:28]
-
Alternative Stitches: While the tutor uses HDC for a faster result, you can use full Double Crochets for a more pronounced texture, though it will be less dense. [02:12]
Uses
-
Summer Wear: Great for festivals, beach days, or casual outings.
-
Layering: Can be worn under an open button-down shirt for a chic look.
Conclusion
The Relief Stitch Cropped Top is a masterclass in how texture can elevate a simple garment. By mastering the “alternating relief” technique, you create a piece that looks store-bought but carries the heart of handmade craft. It is supportive, adjustable, and timeless.
Tip:
When working the final SC border, if you notice the edges are “wavy,” use a slightly smaller hook (like a 2.5 mm) for the border only. This will “pull in” the edges and give the top a professional, crisp finish! [21:51]