How To Crochet A Daisy Bum Bag for Beginners
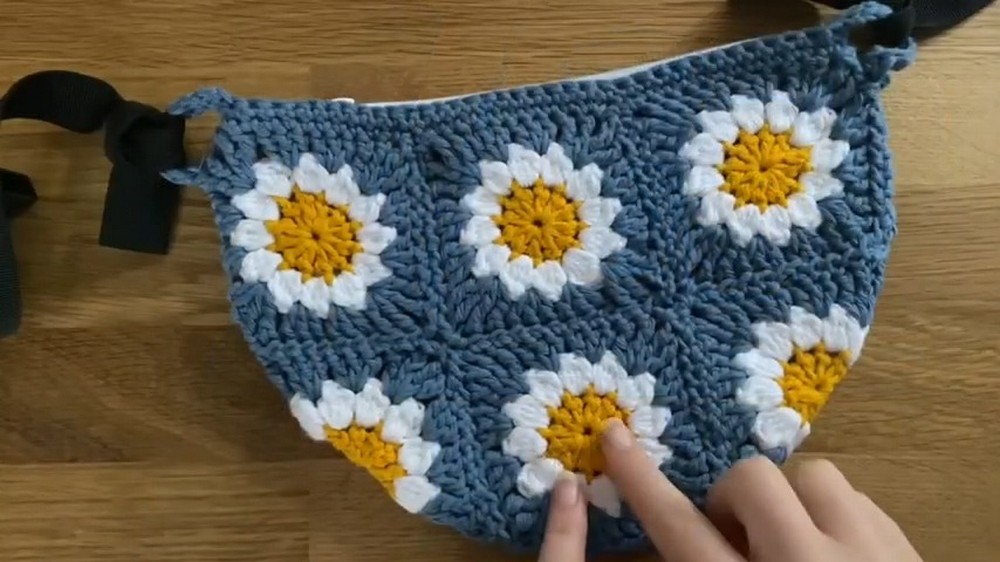
Learn how to crochet a beautiful granny square bag using three colors of cotton yarn, a 22 cm zip, and optional bag straps. The step-by-step process includes making 10 granny squares, blocking them for durability, and sewing them together to form the bag. The tutorial also covers adding a zip, creating sturdy loops for straps, and finishing the bag with clean crochet borders.
Perfect for beginners, this project combines creativity and practical sewing techniques. Follow through with us for the complete tutorial!
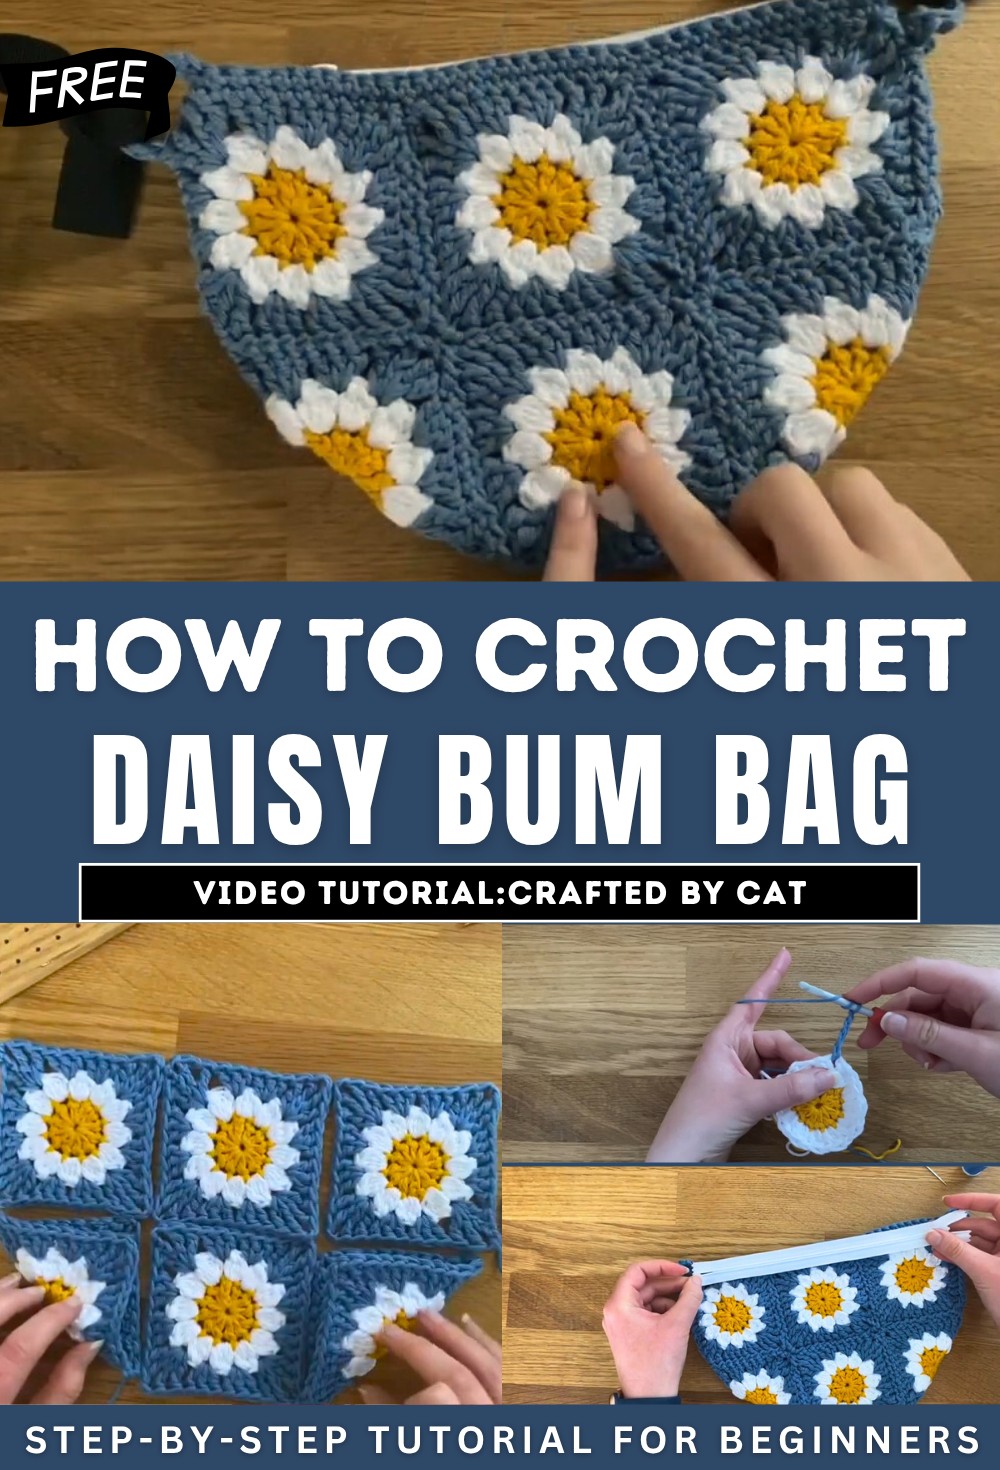
Make A Daisy Crochet Bum Bag
Cotton Yarn: Use three different colors of cotton yarn in aran weight (recommended for the pattern). Adjusting the weight will impact the size of the bag.
- 22 cm Zip: Purchased from Amazon; ideal for completing the top closure of the bag. Alternative closures like buttons are also an option.
- Crochet Hook: A 5 mm crochet hook is used for the granny square pattern and bag assembly.
- Needles: A darning needle for weaving in ends and a sewing needle for attaching the zip to the bag.
- Other Supplies: Sewing thread, scissors, and optional bag straps (alternative: make crochet straps).
Overview of the Bag Design
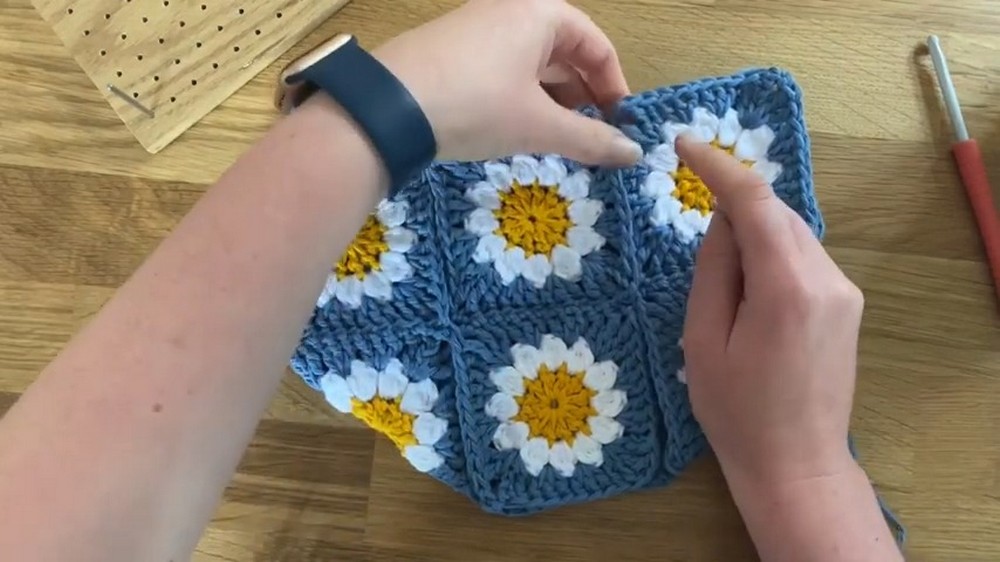
- Granny Squares: The bag is composed of 10 granny squares arranged and sewn into position.
- Size and Dimensions: Measures approximately 10.5 inches across and 7 inches long, depending on the yarn used.
- Structure: The zip attaches to the top, while straps are fixed to the sides of the bag.

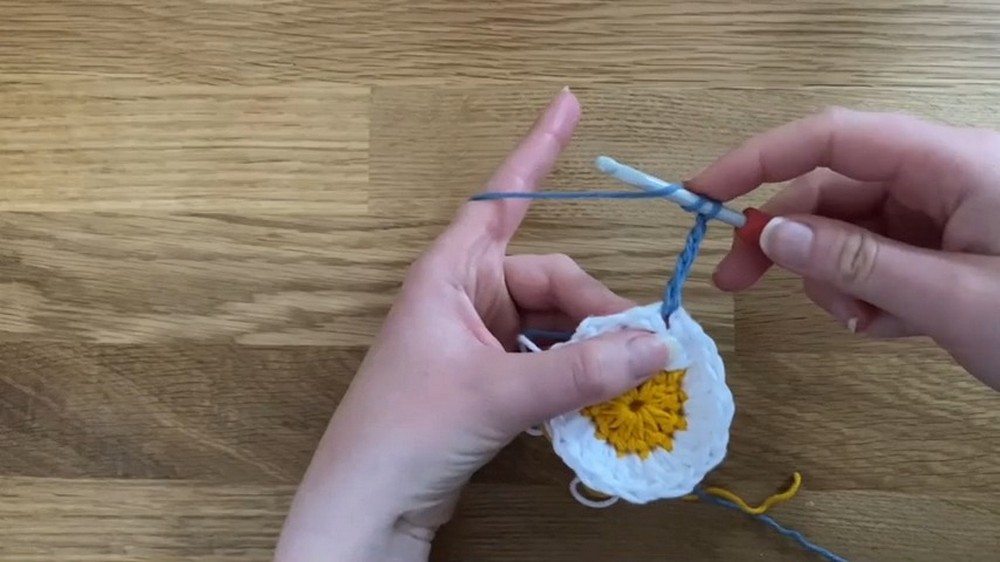
Creating Granny Squares
- Begin with a Magic Circle: Wrap yarn around two fingers to form the base ring.
- Insert the hook into the crosshair, pull through, and chain to secure.
- First Round: Chain and work double crochets into the magic circle to form the center foundation.
- Close with a slip stitch.
- Second Round: Add the second yarn color.
- Create petals using a combination of yarn overs and pull-throughs for a textured look.

- Third Round: Join the outer color yarn.
- Create corners by working treble crochets, double crochets, and chain spaces.
- Repeat the pattern for four corners, ensuring symmetry.
- Finishing: Complete the square and fasten off.
- Blocking: Spray the squares with water and pin them on a blocking board (alternatively use a yoga mat) to help maintain shape.
Bag Assembly
- Sewing Squares: Layout squares as per the desired design and sew them together.
- Work along the front edge first, followed by other sides to form the basic structure.
- Edges and Corners: Fold certain squares to shape the bag, and sew along these corners.
- After assembly, sew up loose edges to create a polished final structure.
- Final Sewlines: Stitch the top, sides, and bottom of the bag.

Adding Finishing Touches
- Crochet Border: Add two rounds of single crochets around the top edge for reinforcement and neatness.
- Strap Loops: Crochet chain loops on both sides of the bag.
- Sew securely to ensure durability.
Attaching the Zip
- Positioning: Align the zip so it fits evenly at the opening of the bag.
- Ensure the zip slider sits near the strap loops.
- Sewing: Carefully stitch the zip onto the inner edges of the bag.
- Fold the fabric around the zip and sew close to the edge. Pinning can help ensure alignment.

Adding Straps
- Loop Placement: Feed the purchased or crocheted straps through the loops.
- Adjustment: Once threaded, pull through and adjust for desired tightness.
Final Notes
The completed bag is functional, stylish, and includes both a zip and strap. The hand-sewing and assembly process allows for personalization based on preferences.