How to Crochet Bow Keychain for Accessories
In this post, you’ll learn how to crochet a charming crochet bow keychain, complete with beading details. The creator shares step-by-step instructions, from crocheting the bow using blanket yarn to assembling decorative beads and charms. Partnering with Temu, an affordable online shopping platform, they showcase beginner-friendly tools and materials, emphasizing free shipping and returns.
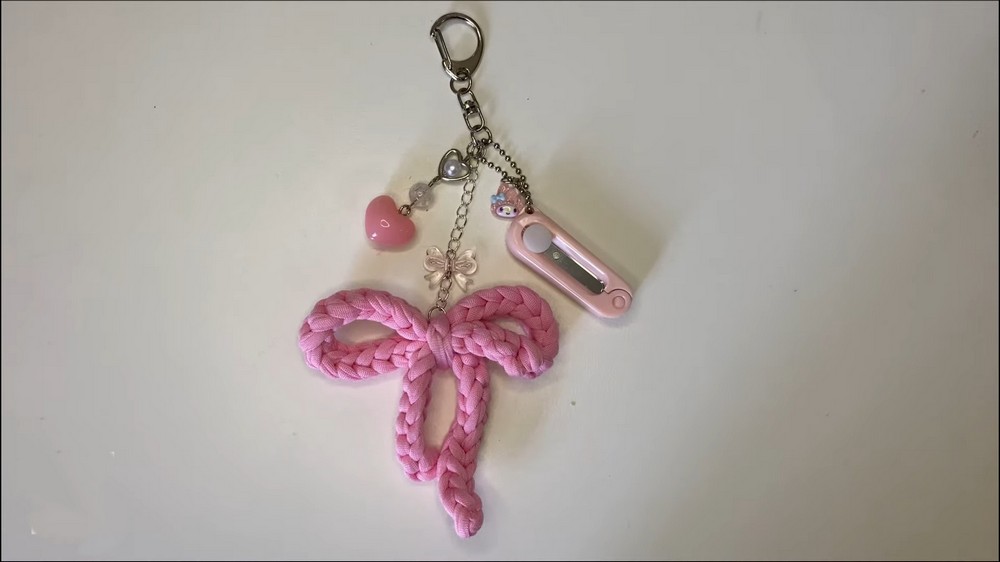
The finished keychain, featuring adorable accents like mini scissors and decorative charms, makes a perfect accessory for crochet enthusiasts or a cute gift idea. Continue reading until the end of this post.
Crochet Bow Keychain Tutorial

In this tutorial, the creator demonstrates how to make a crochet bow keychain with charming beading details. The video is sponsored by Temu, an affordable online shopping platform. Temu provides all the materials for this project, from blanket yarn to tools like crochet hooks, beads, and decorative charms.
Materials Needed
To complete the project, the following materials are used:
- Blanket Yarn: Three balls of stretchy blanket yarn in pink, white, and yellow for making the bow portion of the keychain.
- Crochet Hook Set: A beginner-friendly set with multiple hook sizes, stitch counters, needles, measuring tape, and scissors. The 5mm crochet hook size is recommended for this project.
- Beads and Charms: A variety of adorable beads and charms, including hearts, stars, pearls, and mini scissors, are used to decorate the bow keychain.
- Jewelry-Making Supplies: Eye pins, link chains, ring loops, and pliers are critical tools for assembling the charms and attaching them to the bow.
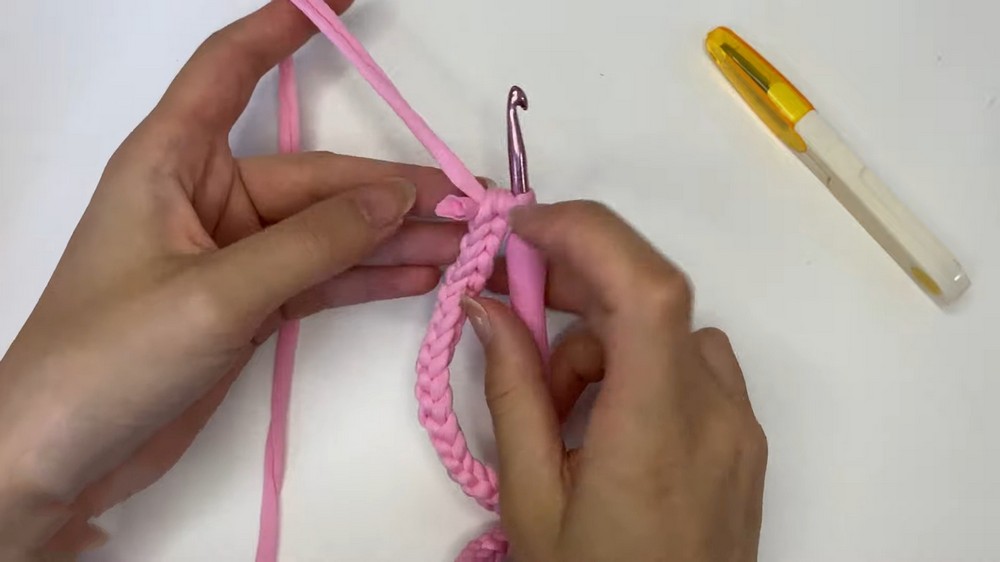
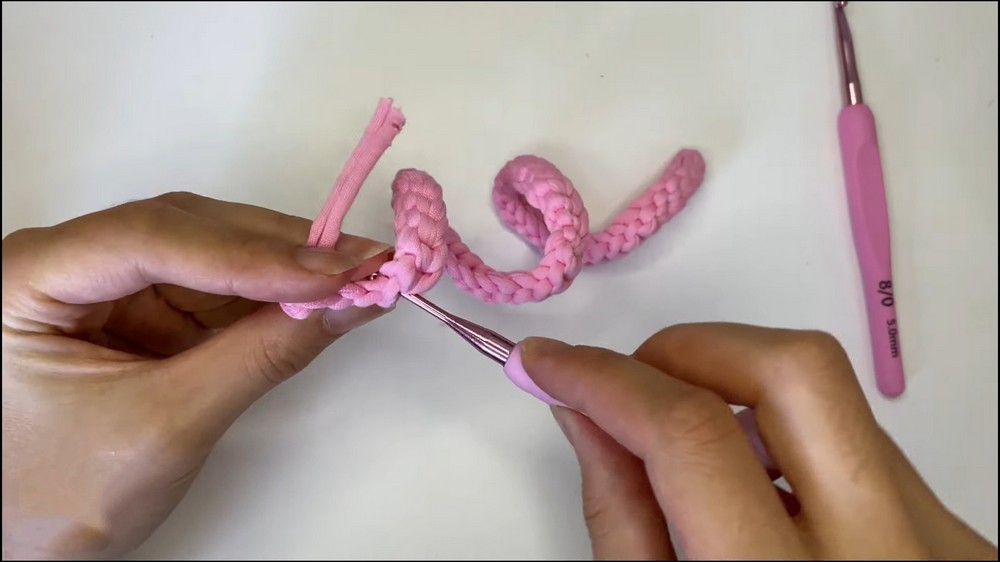
Steps to Make the Crochet Bow
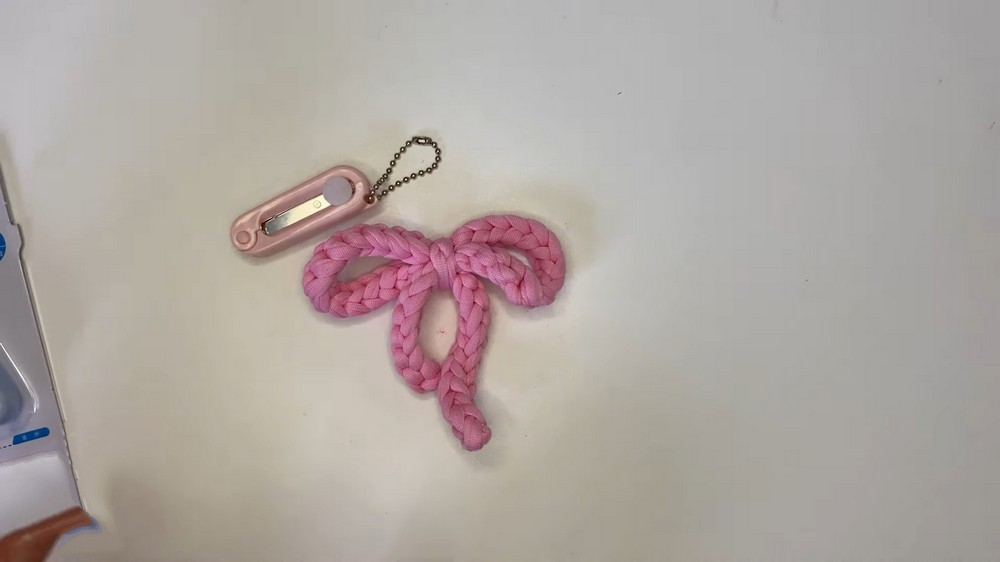
- Creating the Cord: Using the blanket yarn, a cord is crocheted using a simple stitch pattern until it reaches the desired length.
- Forming the Bow: The cord is shaped into a bow by weaving and wrapping the yarn into the desired bow structure. Adjustments are made to ensure symmetry and even tension.
- Securing Loose Ends: Loose yarn ends are hidden by weaving them into the crochet work using a smaller crochet hook for a polished finish.
Adding the Beading Details
- Choosing Beads and Charms: From the collection of beads and charms, the creator selects adorable pieces, including mini scissors, jelly stars, bunnies, roses, and pearls, to create unique accents for the bow keychain.
- Assembling Charms:
- Using eye pins and pliers, charms are looped together securely.
- Rings and chains are connected to give the keychain dimension and movement, creating a fun and whimsical design.
- Adjustments: The creator ensures the charms and beads are balanced and cuts excess wire for clean finishes.
Final Assembly
- The bow is attached to the keyring loop using chains and additional charms.
- Adjustments are made to the position of the charms, ensuring the keychain looks cohesive and balanced.
- The finished design features a playful, functional accessory perfect for crochet enthusiasts or as a thoughtful handmade gift.
Conclusion
This tutorial combines simple crocheting techniques with jewelry-making skills to create a personalized keychain adorned with adorable beading details. The creator emphasizes how easy and fun the process can be, while highlighting the affordable tools and materials from Temu.