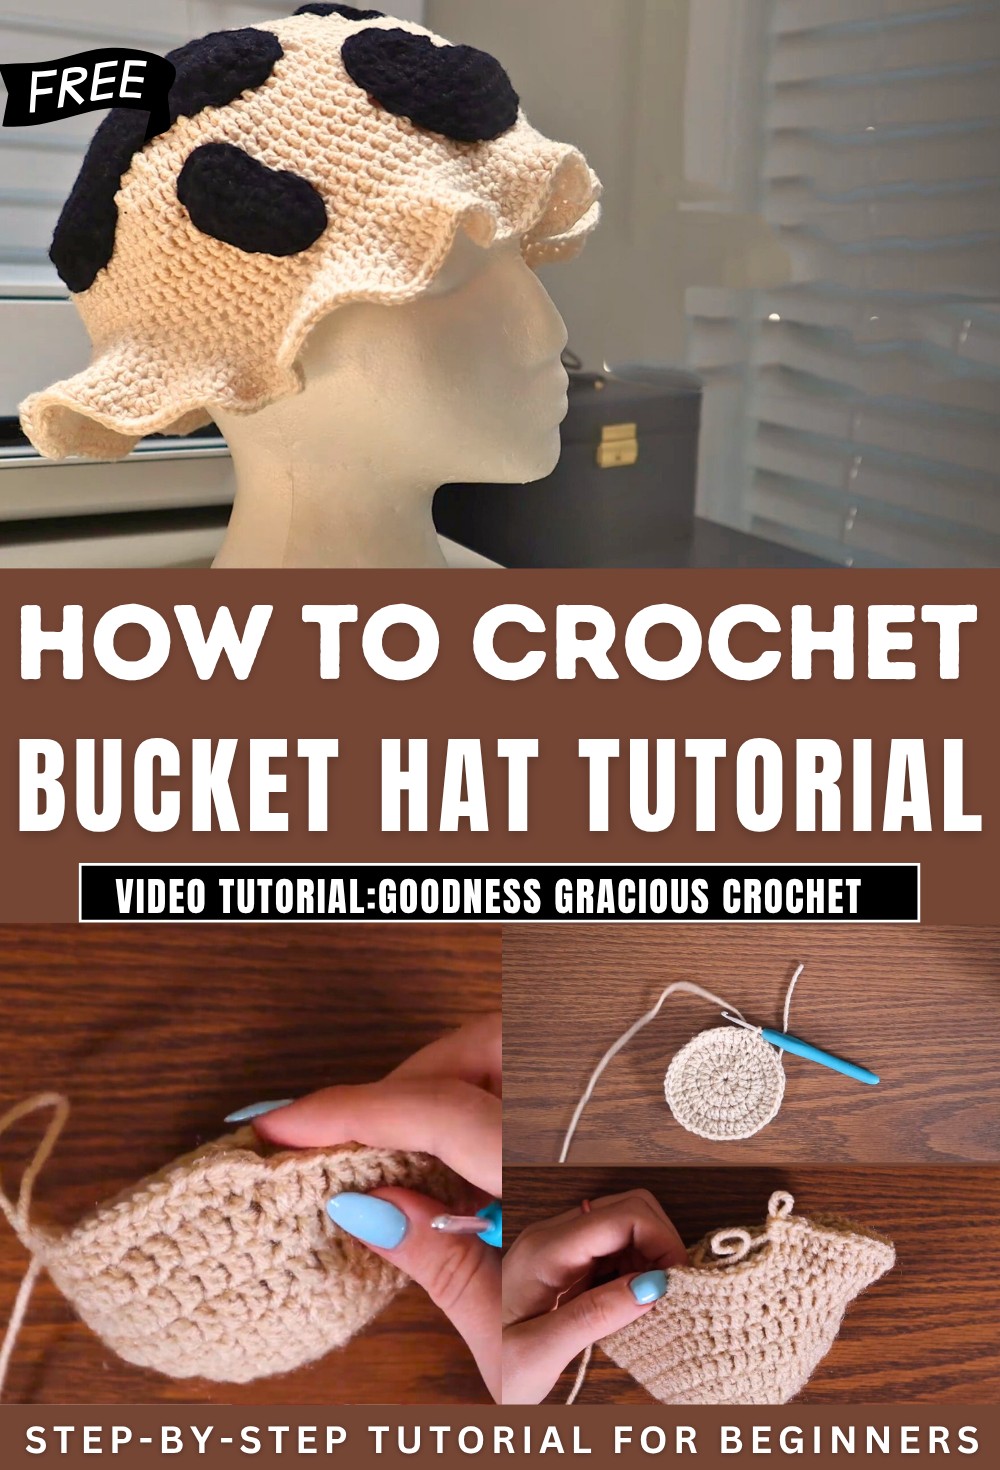
How to Crochet Bucket Hat for Baby Shower

Learn how to crochet an adorable cow-print bucket hat from scratch following a step-by-step tutorial for beginners and experts. The tutorial also explains how to crochet and attach uneven spots to enhance the design. Lightweight yet sun-blocking, the hat combines practicality and charm, making it a perfect accessory for everyday wear. The tutorial is beginner-friendly and engaging!
Crochet Bucket Hat Tutorial
The video begins with Grace showcasing her handmade bucket hat inspired by a cow print design. She highlights the hat’s lightweight nature, noting it blocks sunlight effectively and remains cute and stylish.
Grace admits the hat is unfinished, with some black dots missing, but shares a full 360-degree view of the progress so far. She invites viewers to follow along with her process as she demonstrates how to create the design step by step.
Creating the Magic Circle
- Grace starts the project by demonstrating how to create a magic circle, which forms the base of the hat.
- She explains how to wrap the yarn around her fingers, insert the crochet hook, and secure using a chain stitch to begin.
- Once the magic circle is set up, Grace works with double crochets to start forming the first row.
Expanding the Circle
Row 1: Double Crochets
- The first row consists entirely of double crochets within the magic circle.
- Grace illustrates the process of yarn overs and pulling loops to complete the double crochet stitches.
Row 2: Adding Increases
- On the second row, Grace demonstrates how to increase the circle’s size by adding more stitches.
- She places two double crochets in each stitch to double the stitch count.

Rows 3–10: Gradual Expansion
- Following row two, Grace explains a consistent pattern of alternating increases with regular double crochets.
- Each subsequent row involves progressively fewer increases, ensuring the hat’s top expands evenly. For example:
- Row 3 alternates between increases and single double crochets.
- Row 4 alternates between increases and two single double crochets.
- This pattern continues until reaching the desired size for the top of the hat.

Forming the Body of the Hat
- Once the top of the hat reaches its desired size (approximately 10 rows for Grace’s design), the body is formed.
- Grace transitions to working rows of double crochets without increases.
- She explains how these rows create the sides of the hat, gradually shaping it into the bucket hat design.
Adding the Frilly Edge
- Grace moves on to crocheting the frilly edges of the bucket hat, switching from double crochets to half-double crochets for stiffness.

- She demonstrates a pattern with half-double crochet increases to form the ruffled effect.
- For some rows, she alternates between increases, single half-double crochets, and other variations to achieve the desired look.
- Grace emphasizes that perfection isn’t required during this process, as the frilly edges look better with slight imperfections.
Making the Cow Print Spots
- The spots are made separately as small crochet circles.
- Grace uses a mix of double crochets and single crochets to modify the sizes and achieve a more irregular, lopsided shape for the cow print.

- She explains how to create the circles, with options for smaller or uniquely shaped spots.
Final Assembly
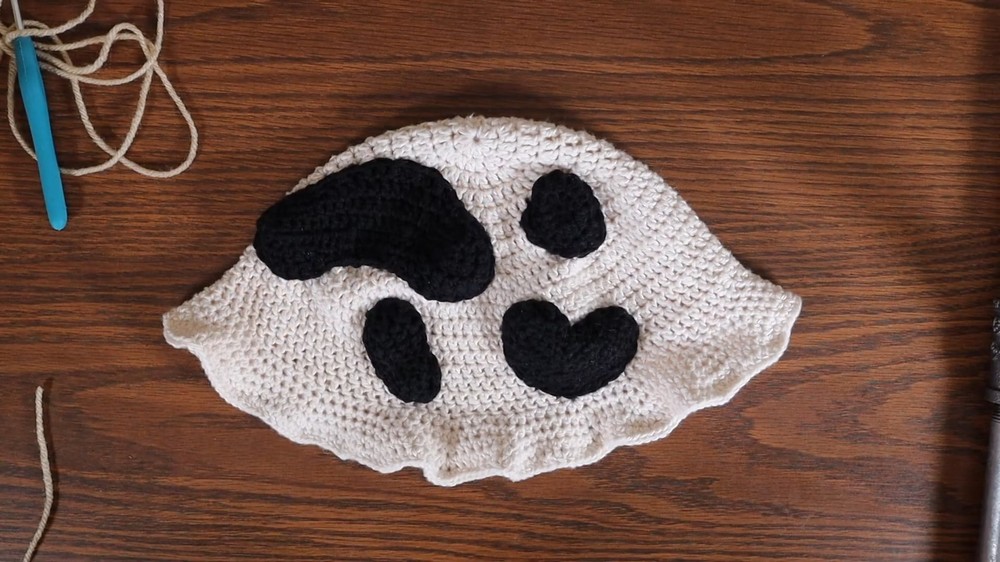
- Grace attaches the completed spots to the hat using yarn and either a hook or craft needle.
- She recommends weaving the spots onto random areas of the hat for a natural cow print look.

- Grace notes the hat’s versatility for customization and encourages creativity with placement.
Conclusion
- Grace wraps up the tutorial by showcasing the completed (or in-progress) hat design.
- She mentions how she wears the unfinished hat regularly, appreciating its aesthetic and functionality.