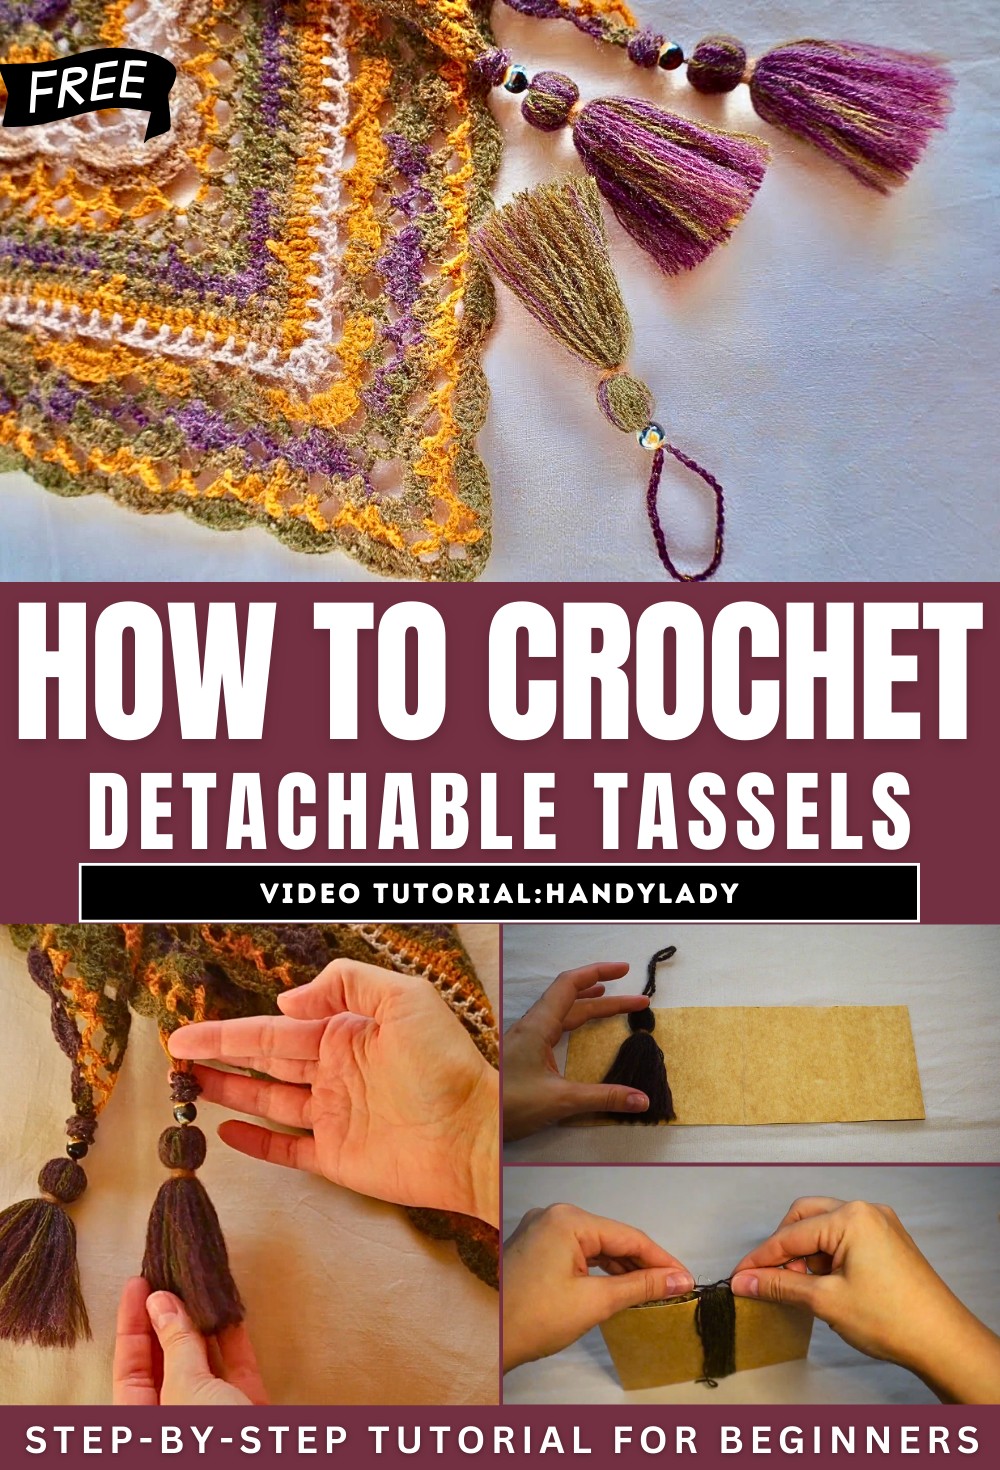
How to Crochet Detachable Tassels for Beginners

In this post, you’ll learn how to make detachable tassels that can add a stylish touch to your projects. Using yarn (acrylic and angora blend), polymer thread, a bead, scissors, a crochet hook, a needle threader, and a piece of cardboard, she walks through the step-by-step process. The tassel is created by wrapping yarn around folded cardboard, securing it with knots, inserting a bead, and carefully trimming and shaping the ends.
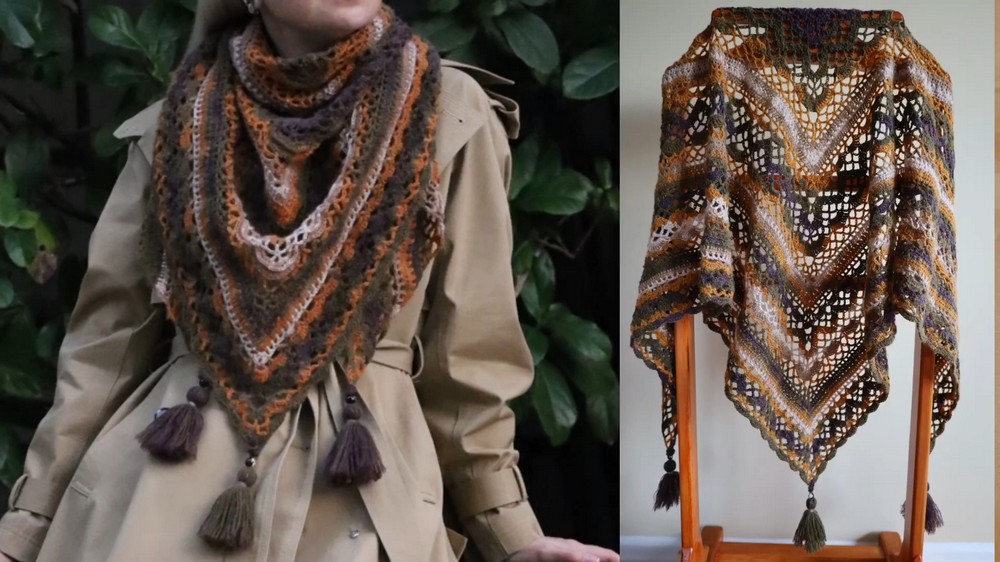
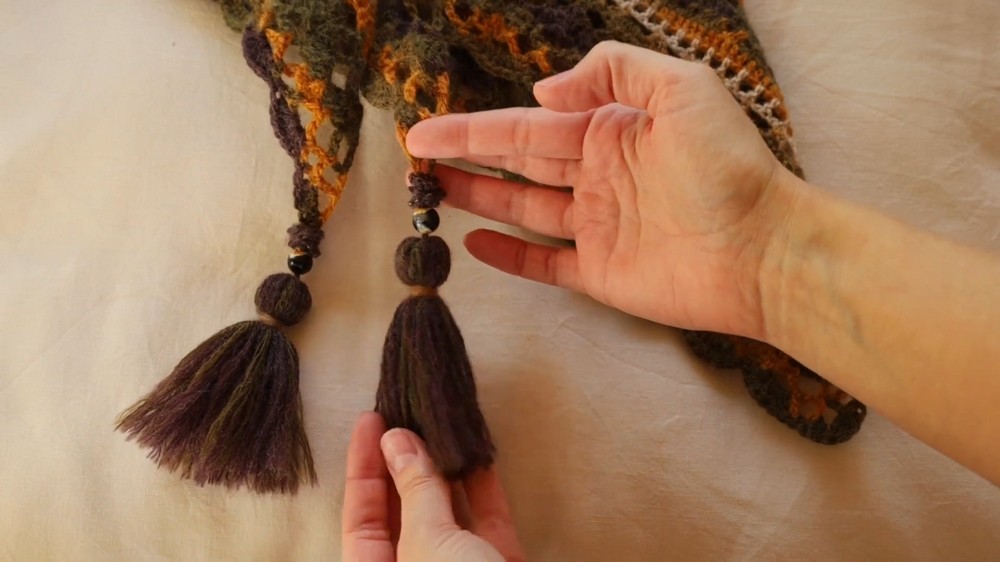
Victoria also provides tips on making the tassel fluffier and ensuring a neat finish. Perfect for embellishing shawls or accessories, this guide is beginner-friendly and easy to follow.
How to Make Detachable Tassels
This tutorial, hosted by Victoria, provides a detailed, step-by-step guide to creating detachable tassels that can be used to embellish items like shawls, bags, or other craft projects. The video walks viewers through the materials needed, preparation process, and techniques for crafting a professional tassel. It is beginner-friendly and includes practical tips for a neat and durable finish
Materials Needed
- Yarn: Acrylic and Angora blend yarn is used in the tutorial, but other types may work based on preference.
- Polyamide Thread: To reinforce the yarn and prevent fraying.
- Bead: A bead with a small hole, used for decoration.
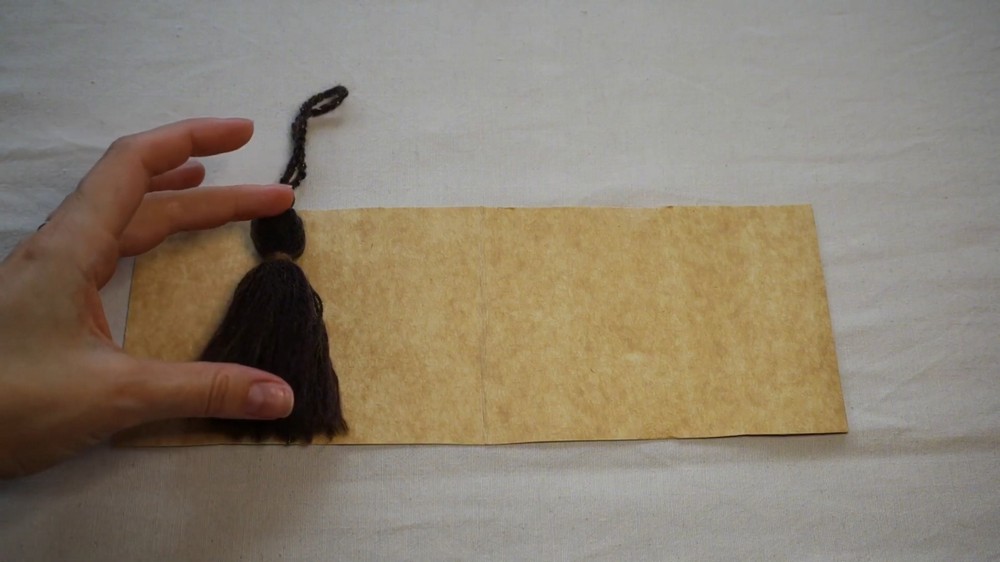
- Cardboard: A piece measuring 10 cm (or preferred width) to determine the tassel’s length.
- Tools: Scissors, a crochet hook, a needle threader, and a needle.
Preparing the Tassel Base
- Setting Up the Yarn and Thread:
To reinforce the base, polyamide thread is combined with yarn to prevent fraying under the bead. - Crocheting the Base Loop:
- A base loop is made by crocheting a chain of stitches to create a string that will hold the bead and tassel.
- Leave a tail of yarn at both ends, ensuring it is slightly longer than the planned tassel length.
- Inserting the Bead:
Using a needle threader, the crocheted string and yarn ends are threaded through the bead’s small hole. A knot is tied at the end to secure the bead in place.
Creating the Tassel
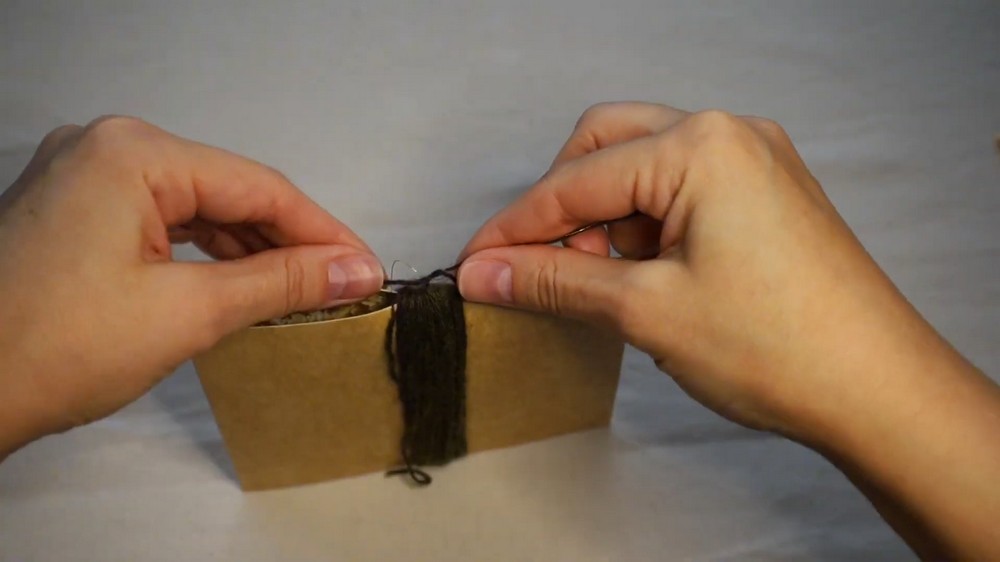
- Wrapping Yarn Around Cardboard:
- The cardboard is folded in half, and the looped yarn is placed inside, ensuring the bead rests in the middle.
- New yarn is wrapped around the cardboard several times (30 wraps in the example), with more wraps resulting in a fluffier tassel.
- Cutting the Yarn:
Tie off the wrapped yarn at the top (near the bead) with tight knots. Scissors are then used to cut through the yarn at the opposite end of the cardboard. The cardboard is removed, leaving the yarn strands loose but secured at the top.
Securing and Shaping the Tassel
- Forming the Tassel Head:
- The yarn ends near the bead are wrapped around the top of the tassel several times, forming a “head” for the tassel. These are tied tightly and secured with additional knots.
- For added detail, a second color of yarn can be wrapped around the tassel head.
- Inserting and Trimming:
- A needle is used to insert the remaining yarn ends into the tassel for a neat finish.
- The tassel edges are brushed and trimmed to ensure evenness and a polished look.
Final Tips and Finishing Touches
- Adjustment: Brush through the tassel strands and trim repeatedly for a neat and uniform appearance.
- Customization: Experiment with different yarn types, colors, and bead designs for diverse looks.
- Applications: These detachable tassels are ideal for accessorizing shawls, bags, or other crochet projects.