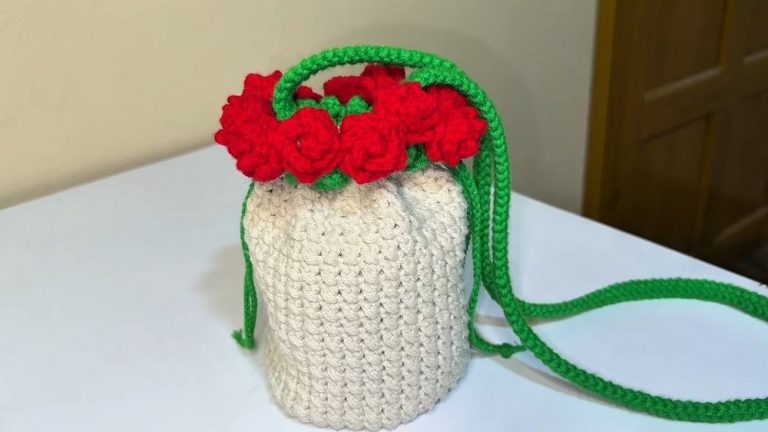
How to Crochet Drawstring Junimo Pouch (Tutorial for Beginners)

Learn how to crochet a cute drawstring Junimo pouch inspired by a green apple from the popular game “Stardew Valley”. You can fill it with your everyday makeup or even as a gift bag. The construction of this bag is the same as Amigurumi Junimo except that you will not stuff it and add strings and string holes. Both kids and adults will love this drawstring Junimo pouch.
The complete video guide for crocheting this Junimo pouch will be available at the end of this post. Below, learn more about this drawstring pouch!

Skills Used: Skills include creating a slip knot, chaining, double crochet, increasing in the round to form a base and assembling small pieces like arms and legs. Additionally, it covers sewing facial features, making a functional drawstring closure, and securing attachments for durability.
Guide Span: 28 Minutes Only
Personalization Tips: The Junimo pouch can be customized by using different colors to represent different Junimos from Stardew Valley, such as blue, red apple, or yellow. Additional features, like embroidered stars, tiny hats, or facial expressions, can make each pouch unique.
This step-by-step tutorial provides a detailed guide for crocheting a Junimo-inspired drawstring pouch, perfect for fans of Stardew Valley. The tutorial explains how to create a circular base, build the pouch with structured stitches, add arms and legs, and assemble facial features for a cute and functional result. Here is a quick overview of this tutorial:
Free Crochet Junimo Pouch Pouch
Materials
- Yarn: Double knit (DK) acrylic yarn
- Main color: Green (2 strands held together for pouch, arms & legs)
- Small amount of Black (for eyes, use 1 strand)
- Optional: Pink (for cheeks, use 1 strand)
- Hook: 4 mm crochet hook
- Yarn Needle: For sewing on features and weaving in ends
- Stitch Markers: Optional, for marking rounds
- Scissors
- Pins: Optional, for assembling
Key Abbreviations
| Abbreviation | Meaning |
|---|---|
| ch | chain |
| sl st | slip stitch |
| sc | single crochet |
| dc | double crochet |
| st(s) | stitch(es) |
| rnd | round |
| MC | magic circle/magic loop |
Special Notes
- Pattern is worked in joined rounds, NOT a spiral.
- Two strands of green yarn are held together throughout the body and limbs for extra thickness and structure.
- One strand of black or pink used for small details.
- Adjust the length of the drawstring to suit your needs (pouch handle or shoulder bag).
- When counting stitches, do NOT count the initial chain-up/turning chains as a dc.
- Finished size: Approximately 7 in/17 cm tall.
Pattern

Pouch Body
With two strands of green:
- Start:
- Make a slip knot
- Ch 3
- Rnd 1: In first ch, work 12 dc. (Instead, you may begin with a magic circle and work 12 dc into it.)
- Join with a sl st to first dc. (12 sts)
- Rnd 2:
- Ch 3 (does not count as st), 2 dc in each st around.
- Join with a sl st to first dc. (24 sts)
- Rnd 3:
- Ch 3 (does not count as st). [1 dc in first st, 2 dc in next st]—repeat around.
- Join with sl st to first dc. (36 sts)
- Rnd 4:
- Ch 3 (does not count as st). Dc in each st around.
- Join with sl st to first dc. (36 sts)
- Rnds 5–10:
- Repeat Rnd 4 (dc in each st around).
- At the end of each round, join with sl st to first dc. (36 sts per round)
- After 10 rounds, the pouch measures about 7″/17 cm tall. Adjust number of rounds for desired pouch depth/height.
Arms & Legs (Make 4)
With 2 strands green:
- Ch 13
- Starting in 2nd ch from hook, sc in each ch across. (12 sts)
- Ch 1, cut yarn, leave a tail for sewing (2-3″)
- Weave in starting tail if desired.
Eyes (Make 2)
With 1 strand black (or color of choice):
- Magic Circle:
- Make a magic circle (see notes below if unfamiliar).
- Ch 1, work 6 sc in magic circle
- Pull tight, join with sl st to first sc.
- Ch 1, cut yarn, leave tail for sewing.
Cheeks (Optional, Make 2)
With 1 strand pink:
- Embroider small ovals or circles with simple stitches, or make tiny circles as for eyes and attach as cheeks.
Drawstring/Handle
With 2 strands green (or as desired):
- Ch 75 (or desired length for handle/shoulder strap)
- Fasten off, leave ends for threading through pouch.
Assembly
- Arms & Legs:
- Pin in place (legs at bottom, arms at sides ~3 rows from top).
- Use yarn tails to sew the ends of each limb to pouch, passing yarn ends inside and knotting securely, then hiding tails within pouch.
- Eyes:
- Sew onto pouch, spacing evenly on front/top third, using the yarn tail.
- Knot & weave in tails on inside.
- Cheeks:
- Embroider or sew optional cheeks below eyes.
- Drawstring:
- Weave chain through top row of dc sts, going in and out every 2–3 stitches, all the way around.
- Tie ends into a knot for a loop or handles; leave as two ends for a drawstring closure.

Magic Circle Instructions
- Wrap yarn around two fingers to form a loop.
- Insert hook through loop, yarn over and pull up a loop.
- Ch 1 to secure, then work sc or dc directly into the ring.
- When finished, pull the tail to close the circle tightly.
Conclusion
This Stardew-inspired pouch is a fun, quick, and functional project—ideal for carrying small essentials, plushies, or gifts! Personalize with cheeks, color, or extra-long drawstrings to use as a shoulder bag or purse.
Pattern Correction & Tips
- Common Issue: The last slip stitch/join and chain-3 at the start can be mistaken for a stitch; always count your dc sts to avoid accidental increases or decreases.
- For a Tighter Drawstring Closure: Weave the drawstring through every stitch rather than every 2–3.
- For a Different Size: Add/remove increase rounds for width. Work fewer/more straight rounds for a shorter/taller pouch.
- Strap Option: Leave chains longer for a crossbody or shoulder bag, or make two shorter and sew both sides for a backpack style.
- Sturdy Limbs: Leave tails long enough for secure sewing. Hide all ends well to prevent unraveling.