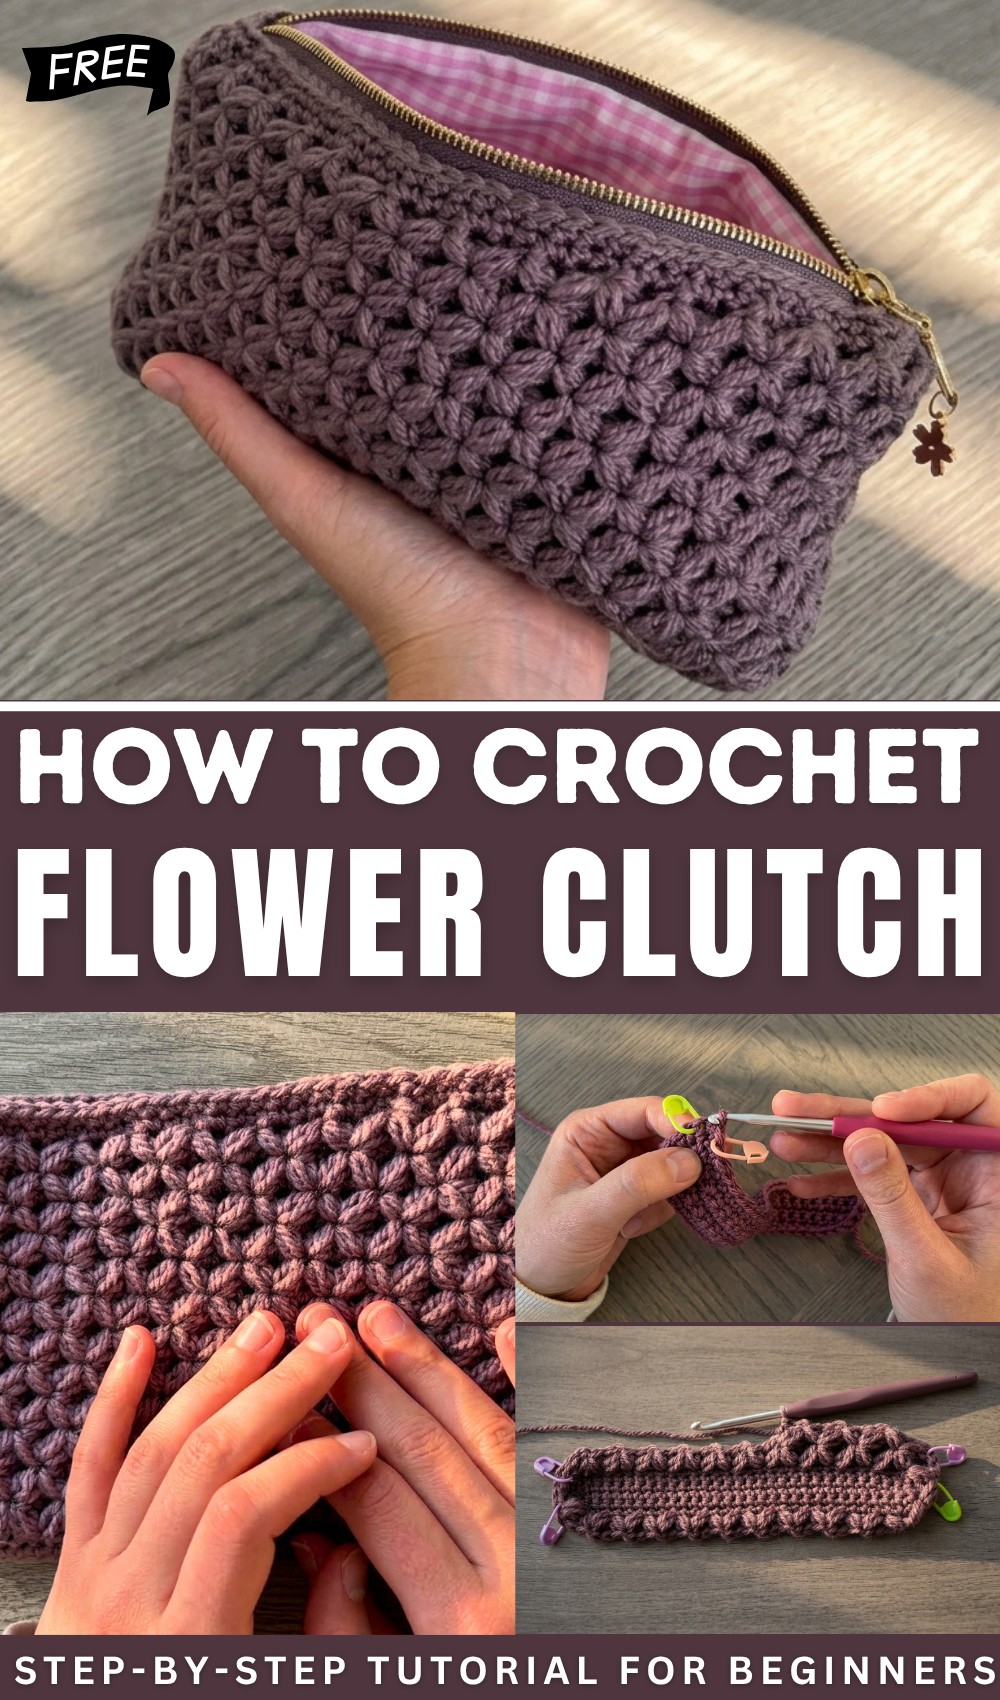
Crochet Flower Clutch Pattern Free Guide
Stitch your way to a burst of color with a free crochet flower clutch pattern that’s perfect for storing treasures and brightening every day.
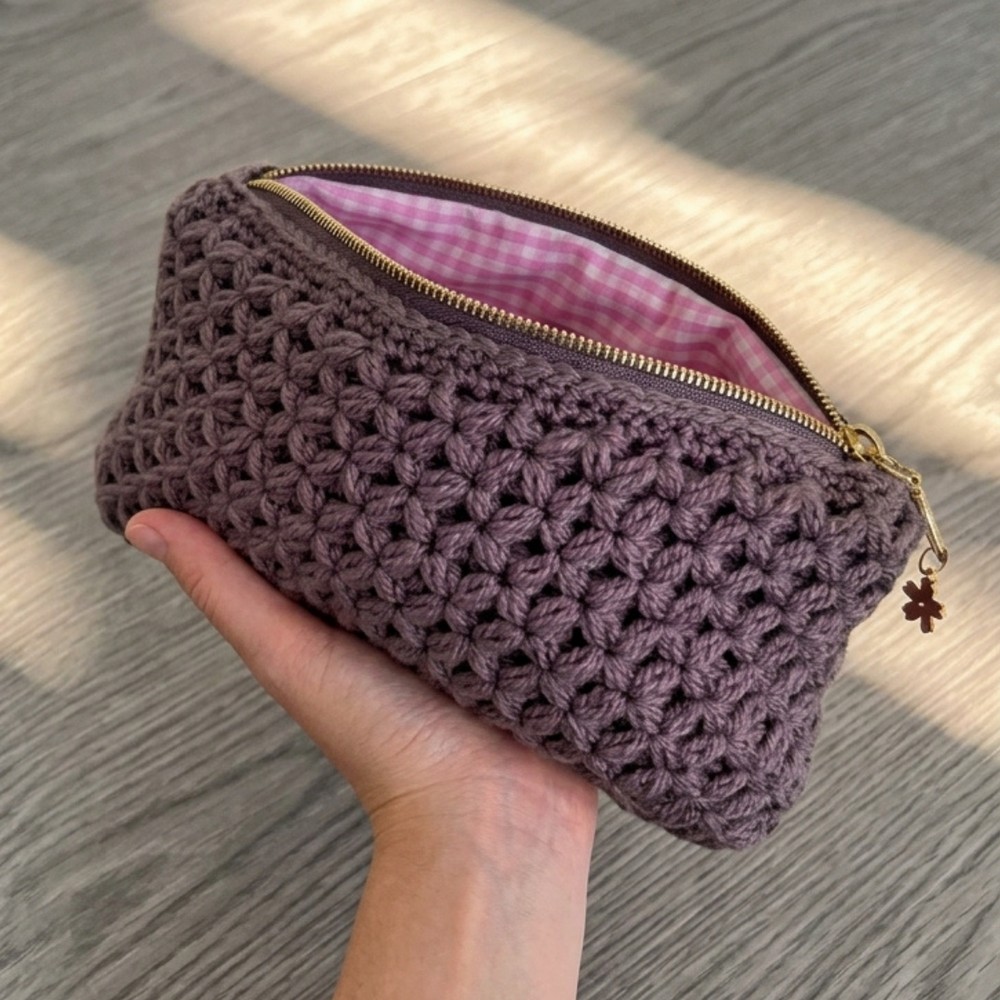
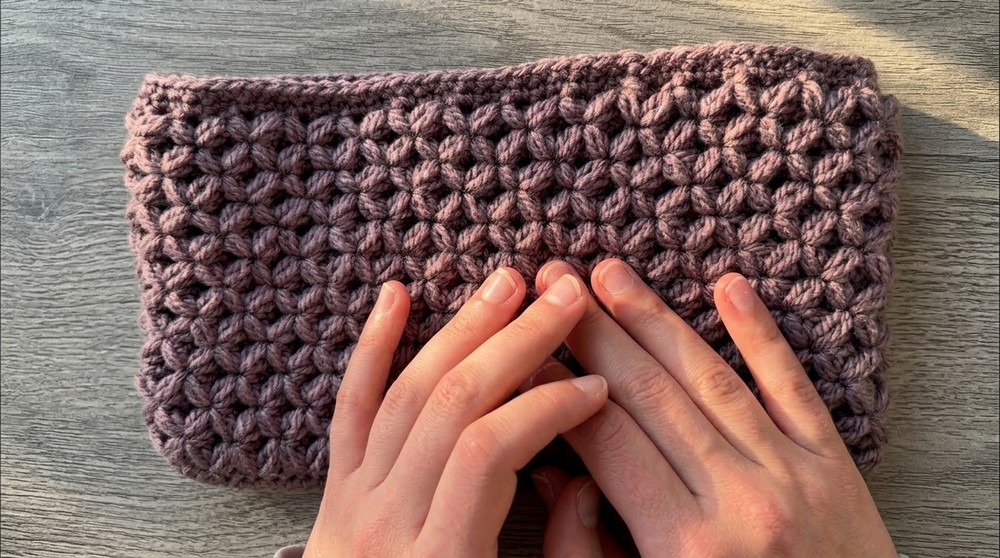
Soft petals bloom across a clutch, turning something simple into a work of art in your own hands. Each flower smiles with bright colors, bringing joy and cheer wherever it goes. Using the crochet flower clutch pattern, everyone gets a chance to make a small, lovely bag that catches all eyes. The look is gentle and sweet, while the feel is soft to hold. Carry it to weddings, parties, or when you meet friends—this special bag fits all moments, big or small. Its clever shape makes space for coins, cards, or little things you want to keep safe.
Free Crochet Flower Clutch Pattern for Handmade Style
Choosing yarn colors is a chance to let your personality shine bright and mix your favorite shades. Even for someone new, step-by-step pictures give clear help, making the project enjoyable and simple. Holding a finished flower clutch brings pride—beauty made by your own hands with the crochet flower clutch pattern bringing a fresh burst of happiness everywhere you go.

Flower Stitch Crochet Clutch Bag Pattern
Materials
- Yarn: Weight 3 (DK/Light Worsted) acrylic yarn (approx. 50-100g depending on clutch size)
You may use any yarn weight; adjust hook size accordingly - Hook: US G/6 (4.0 mm) or size recommended for your chosen yarn
- Notions:
- 2 stitch markers
- Darning/tapestry needle (for sewing ends)
- Scissors
- Optional: 1 zipper, piece of fabric for lining
Abbreviations (US Crochet Terminology)
| Abbreviation | Stitch |
|---|---|
| ch | chain |
| sc | single crochet |
| dc | double crochet |
| sl st | slip stitch |
| YO | yarn over |
| st(s) | stitch(es) |
Special Stitch:
Flower Stitch (described in detail in the instructions)
Special Notes
- Foundation chain should be a multiple of 3 + 1 (e.g., 40, 31, 34, etc.).
- The clutch is worked in rows for the base, then in rounds for the body.
- The bag’s length is determined by the initial chain, and the height by the number of rounds.
- The pattern is easy to adjust for size.
- Lining and zipper installation is not covered.
- Stitches are worked in the back bar of the foundation chain for a neater edge.
Instructions
1. Foundation & Base
Foundation Chain
- Make a slip knot, place on hook.
- Ch a multiple of 3 + 1 (Sample: Ch 40 for a pouch approx. 9″ / 23 cm wide with weight 3 yarn and 4 mm hook).
Row 1
- Turn the chain to access the back humps/bars.
- Skip the first back bar, sc in the second back bar from the hook.
- Sc in each back bar across. (Total: same count as your chain)
- Turn work.
Rows 2–4
- Ch 1, turn. Sk ch, sc in first st and in each st across.
- Repeat for a total of 4 rows of sc.
2. Working in Rounds (Forming the Base Perimeter)
- Place a stitch marker in the last sc worked.
- Ch 1, do NOT turn.
- Short edge: Make 3 sc evenly along the side edge (insert hook in visible edge holes).
- Long edge: Sc in each stitch across the bottom of the foundation chain (the unworked loops).
- Opposite short edge: Make 3 sc evenly along the other short edge.
- Final long edge: Sc in each st across to stitch marker.
- Join with sl st to first sc of the round.
- Adjust stitch marker as needed.
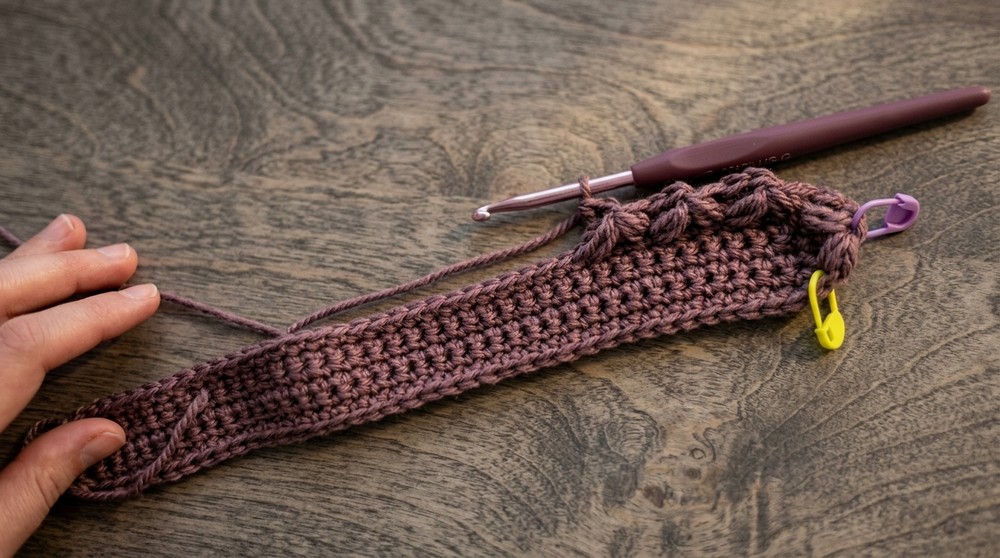
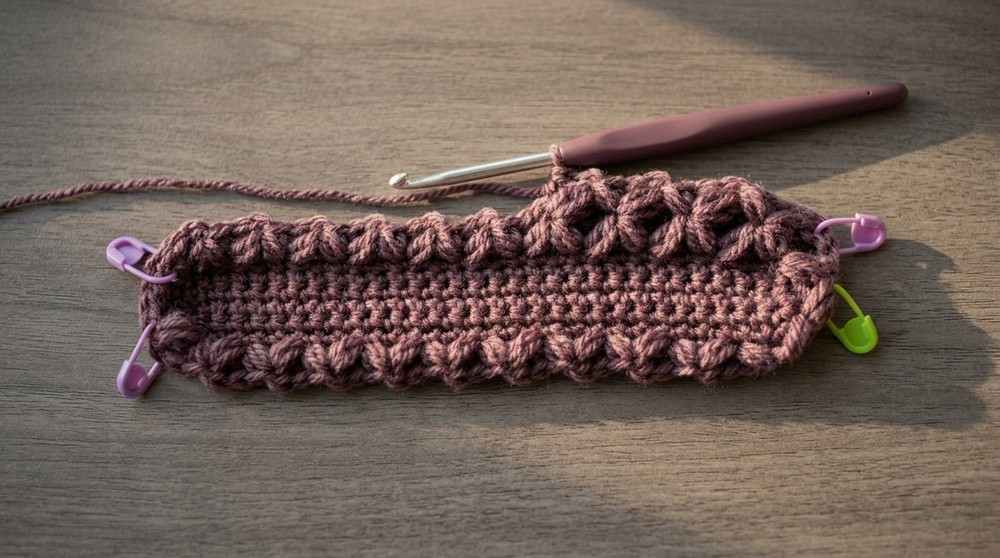
3. Flower Stitch Rounds (Body of the Clutch)
Flower Stitch (in-the-round):
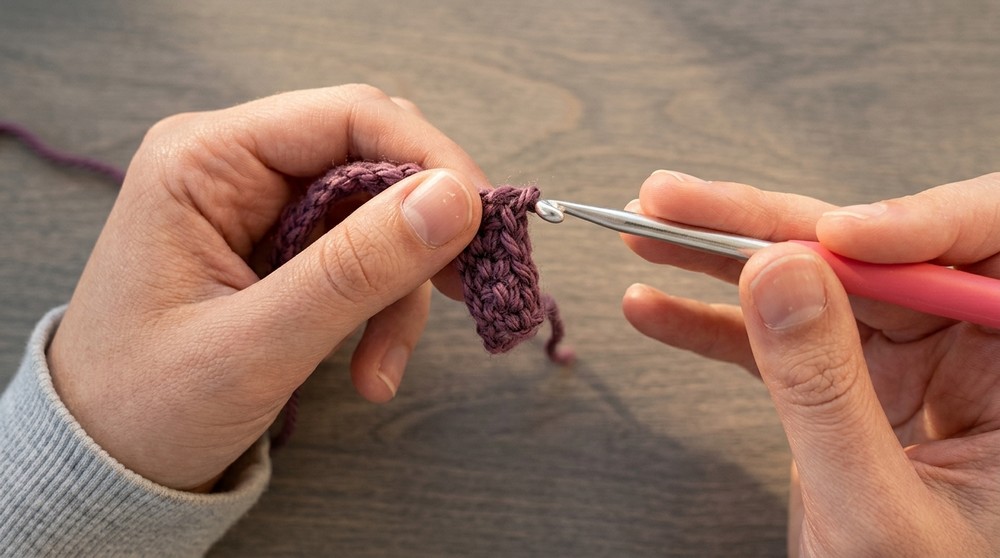
A. Starting Flower Petal (First Petal of Round)
- Ch 1 to begin the round.
- In the first st:
- Insert hook in first st, YO, pull up a loop (pull tall for an even petal; repeat once) (now 3 loops on hook).
- YO, insert hook in same st, YO, pull up a loop (again pull tall) (now 5 loops).
- YO, insert hook in same st again, YO, pull up a loop (now 7 loops).
- YO, pull through all 7 loops.
- Ch 1 to secure.
- This forms the center of the first flower.
B. Complete the Flower: Cross-Over Petals
- Skip 2 sts (after the starting flower), in the next st:
- Repeat the same sequence as above, pulling up tall loops 3 times for 7 loops on the hook.
- YO, pull through all loops, ch 1.
- Using YO, make 2 dc in the skipped sts behind (crossed petals):
- Spread the petals to expose the two unworked, skipped stitches.
- YO, insert hook behind the petals into the first skipped st, pull up a loop, YO, pull through 2, YO, pull through 2 (dc made).
- Repeat for the second skipped st.
Continue working flower units all the way around. When reaching the round end, to avoid gaps, work the final petals into the base of the first flower, overlapping as necessary.
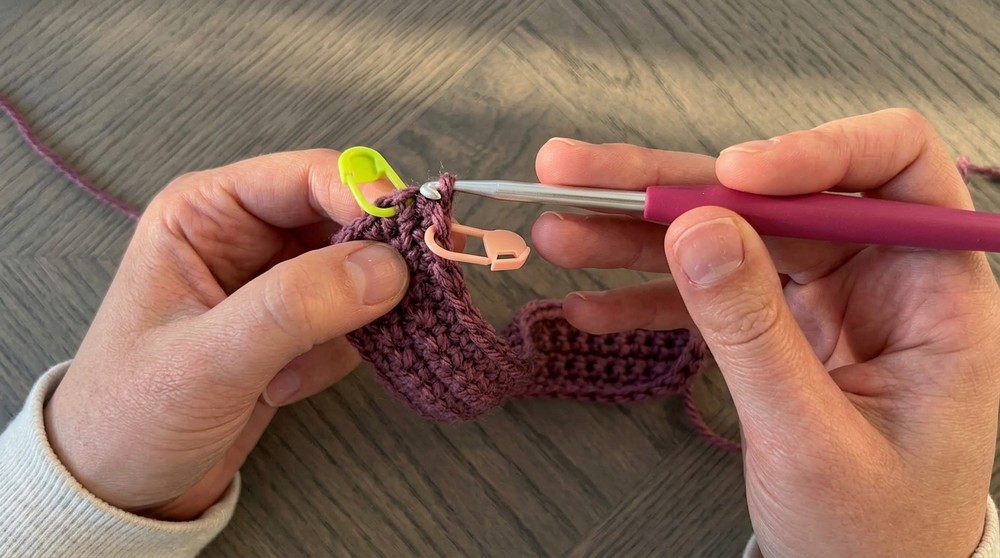
C. Subsequent Rounds (Repeat Pattern)
- Ch 1 to start each new round.
- Begin with a single petal flower as above in the first petal hole (space between two petals).
- Continue all the way around, always working into the chain-1 space between petals and crossing over as before.
- Place stitch markers as needed at the start of the round and where motif crosses over to keep rounds even. Move stitch markers up each round.
- Repeat this Flower Stitch Round as many times as desired for desired bag height.
Sample: 13 rounds (approx. 5″/12.5cm tall).
4. Top Edging
- Single Crochet Edging:
- After reaching your desired height with the flower stitch, switch to sc.
- Sc in every stitch around the opening. Slip stitch to join.
- Repeat for a second round of single crochet.
- Finishing:
- Cut yarn, leaving a long enough tail to sew in.
- Weave the end into the stitches with a darning needle for a neat finish, duplicate stitch as shown for extra neatness.
- Remove stitch markers.
5. (Optional) Lining & Zipper
- Sew in a fabric lining and/or zipper if desired.
- Follow a dedicated tutorial for best results.
Pattern Correction
- The original flower stitch is a combination of elongated clusters and crossed double crochets; instructions have been clarified and stepwise details ensured.
- Check your stitch count to ensure the petals are evenly spaced; adjust by removing or adding another chain in the starting count as needed.
Tips
- Always make sure your starting chain is loose enough to avoid puckering.
- Use stitch markers to mark the start (and optionally, midpoint) of rounds for easier, seamless joins.
- When working crossed petals into skipped stitches, spread the petals gently to find the skipped stitch easily.
- Feel free to experiment with different yarn textures and colors for unique results.
- If the opening of your pouch is too tight or loose, adjust the number of sc in the top two finishing rounds.
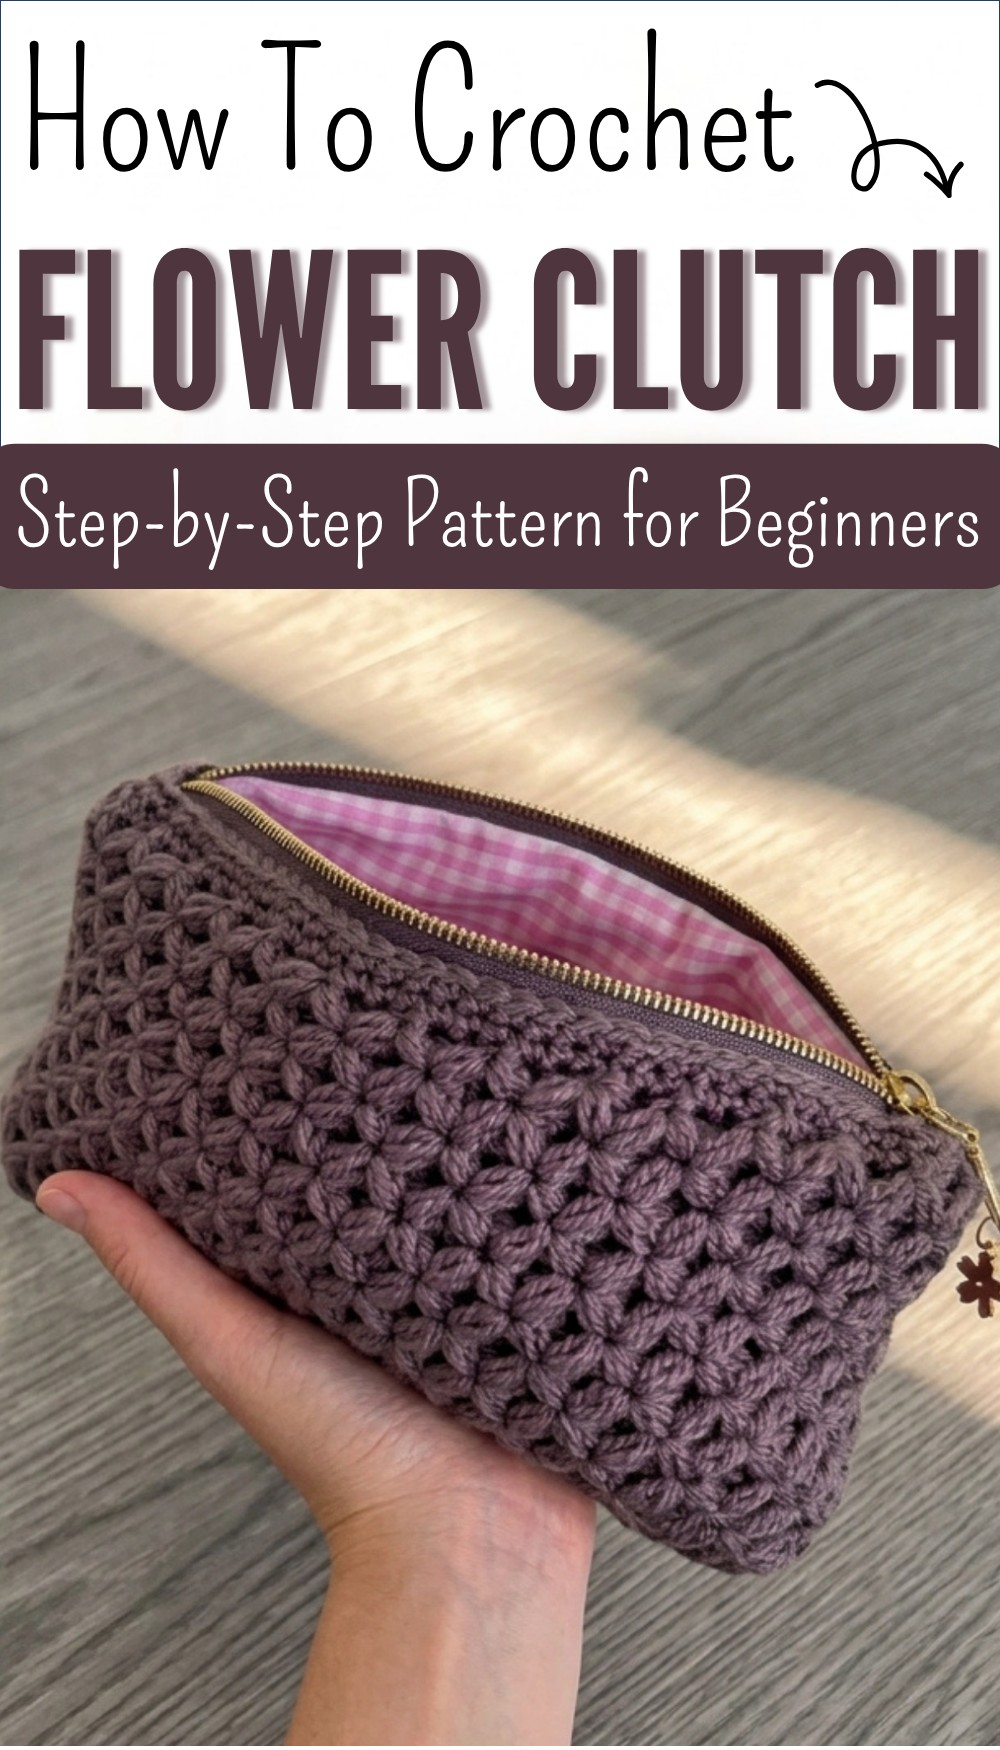
Conclusion
You have created a beautiful, textured crochet clutch bag with a stunning flower stitch design, fully customizable in length and height. With a simple yet striking look, your new pouch will serve as a functional and eye-catching accessory for your everyday life or as a cherished handmade gift. For a polished finish, consider sewing in a lining and zipper as desired.