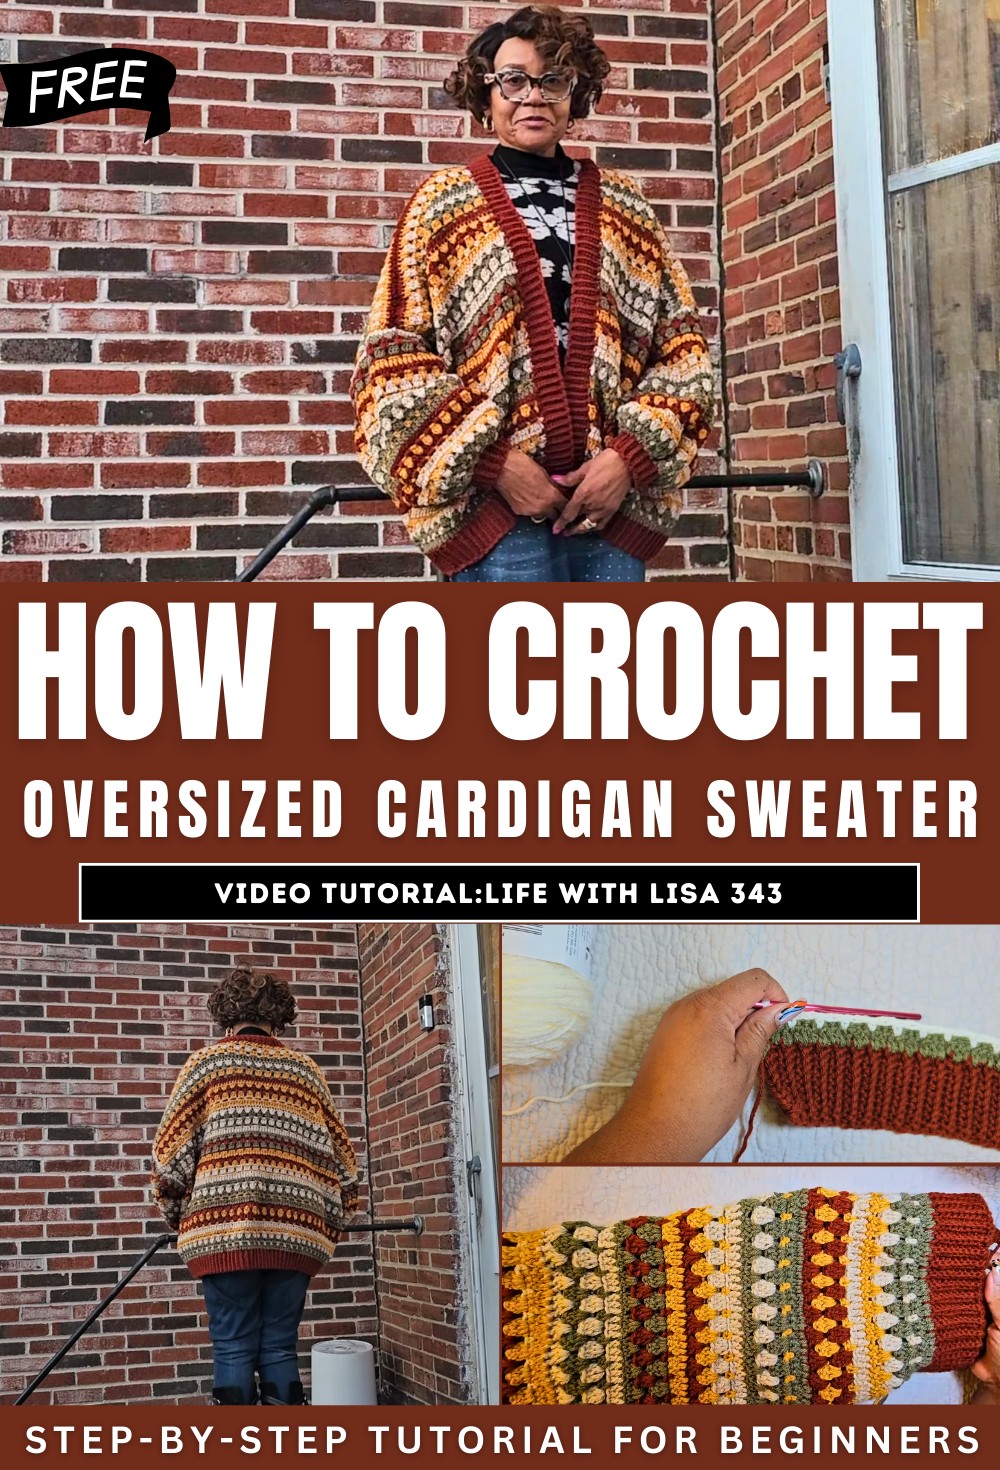
How to Crochet Oversized Cardigan Sweater for Beginners

With a step-by-step guide, learn how to crochet an oversized cardigan that beautifully blends practicality with style, perfect for beginners. Using a pattern from CJ Designs, the creator shares tips on tools, yarn selection, and assembling the five main pieces of the project: the back panel, front panels, and sleeves. The video is perfect for beginners and intermediate crocheters, demonstrating techniques like single and double crochet, working in back loops, and creating ribbing
The tutorial also emphasizes the importance of measurements, counting stitches, and personalizing size preferences. Follow along and crochet a cozy, versatile cardigan to your taste!
Beginner Friendly Cardigan Tutorial
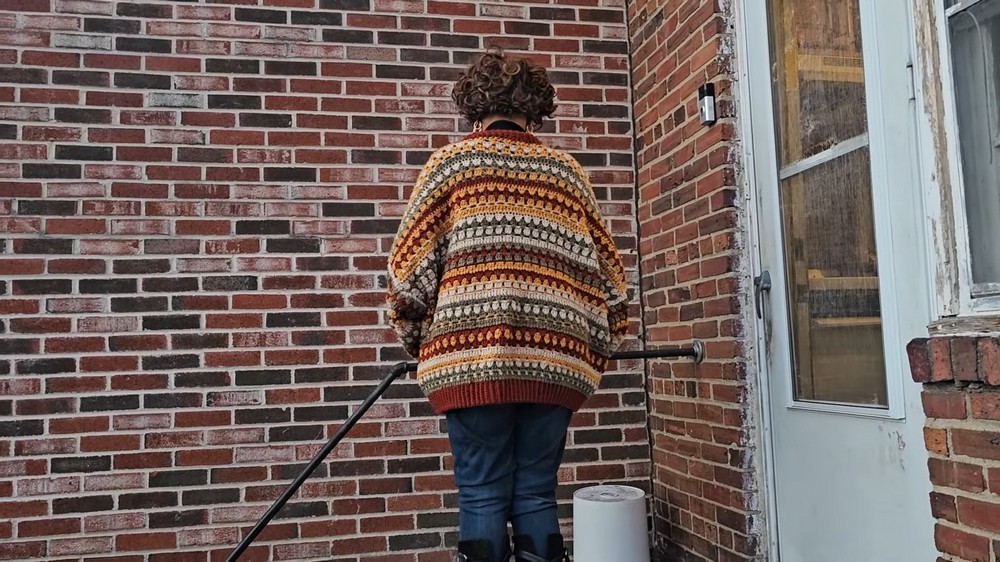
The video tutorial demonstrates how to create an oversized cardigan using a pattern from CJ Designs. The cardigan is versatile, fits multiple sizes, and employs a variety of colors and crochet techniques. While this is not a step-by-step beginner’s tutorial, it’s suitable for those with basic crochet knowledge.
Materials Needed
- Yarn: Four colors were used in the tutorial, but personalization is encouraged.
- Hook: A 5.5 mm (I) crochet hook was used.
- Additional Tools: Scissors and stitch markers.
Cardigan Construction
The cardigan consists of five separate pieces:
- Back Panel
- Two Front Panels
- Two Sleeves
Creating the Panels
Back Panel
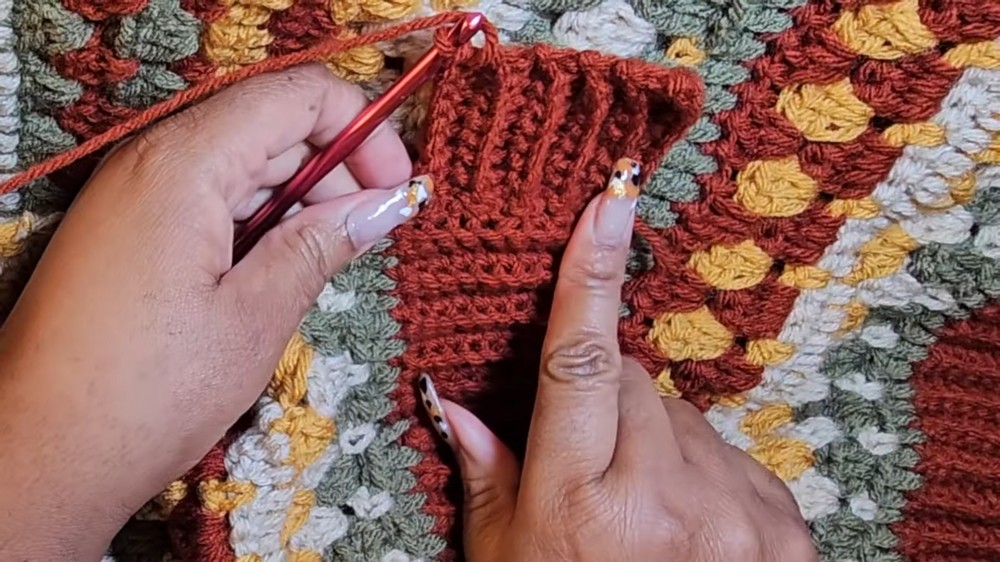
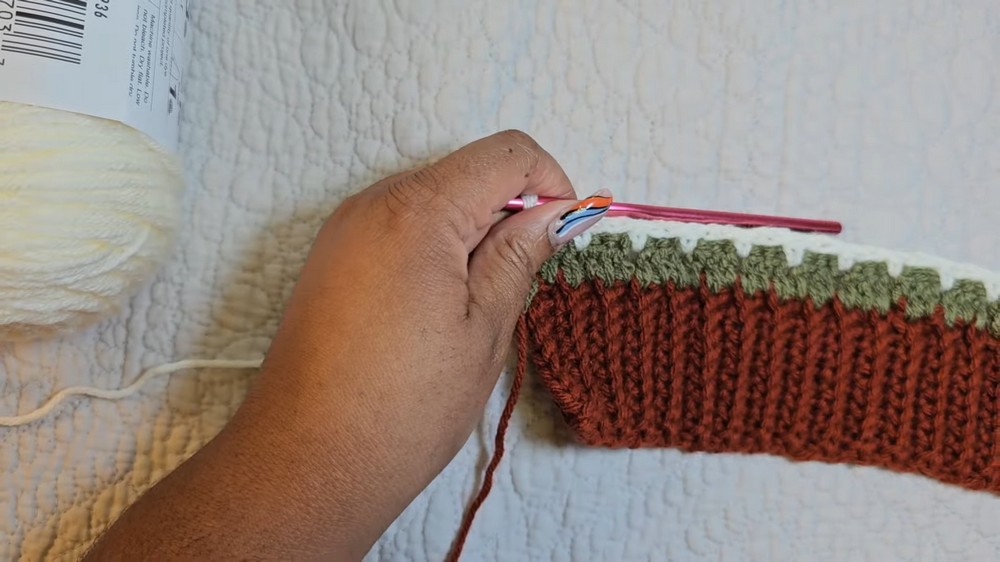
- Start with a foundation ribbing row using single crochets.
- Work subsequent rows of single crochets in the back loops only to maintain texture.
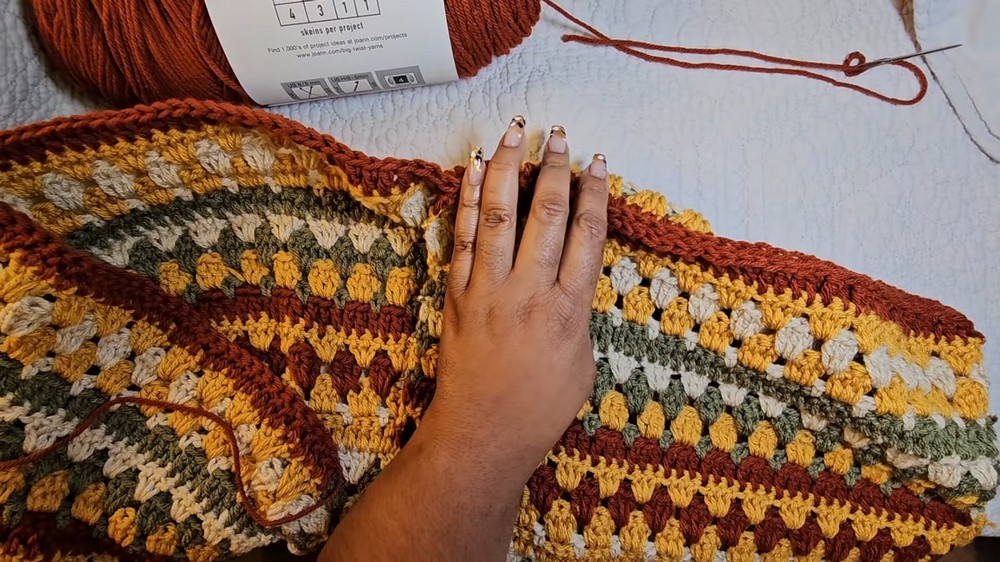
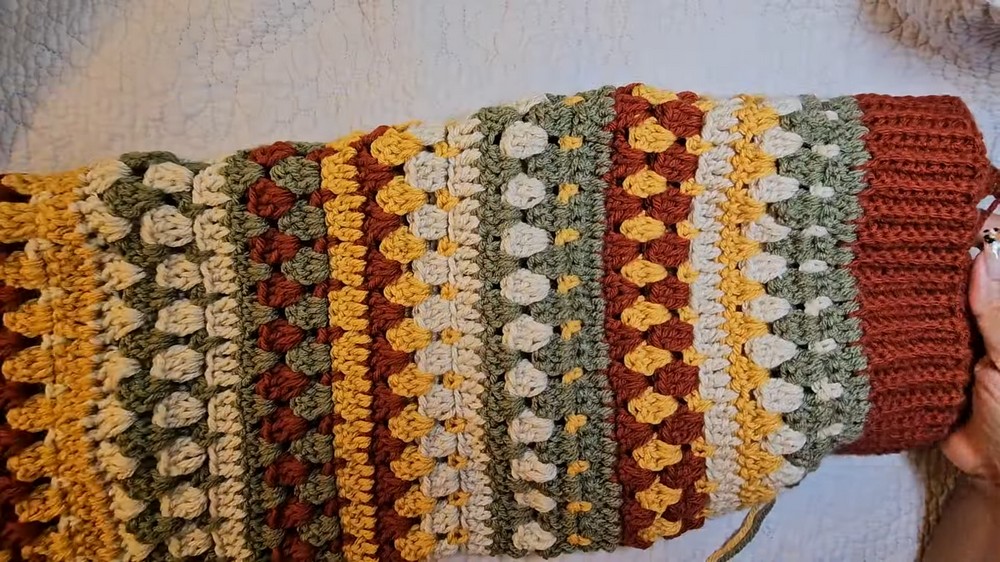
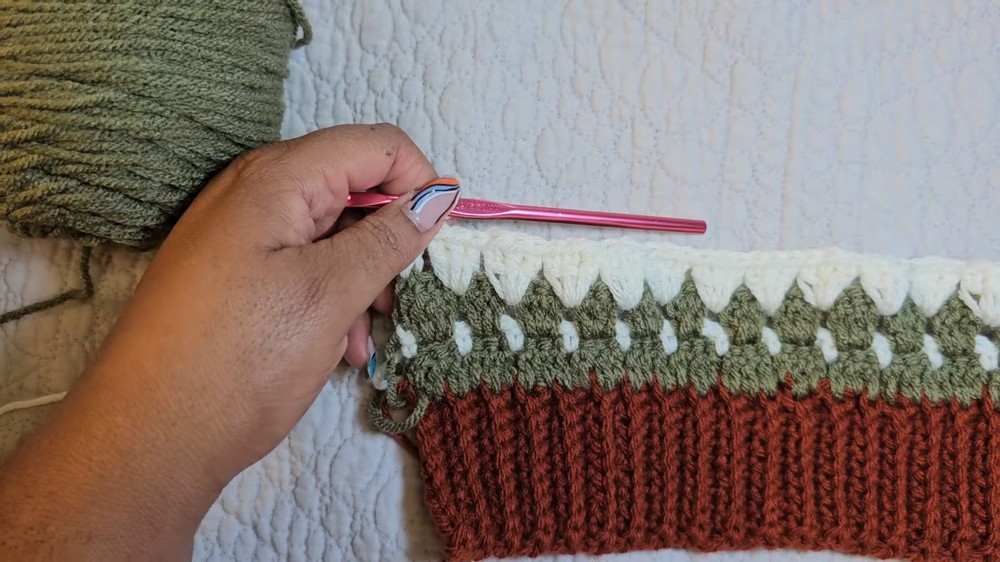
- Attach a new color to begin the body of the panel.
- Alternate rows with double crochets and a mesh-like pattern of chain spaces and single crochets.
- Continue repeating the pattern for the desired length.
Front Panels
- Replicate the back panel process for symmetry.
- Reduce the number of rows for the smaller dimensions of the front panels.
- Create two identical pieces.
Creating the Sleeves
- Begin with ribbing as done for the panels.
- Increase stitches to create a flared, ruffled effect.
- Alternate double crochet and mesh-style rows for a cohesive design with the panels.
Connecting the Pieces
- Lay out the completed back and front panels.
- Pin and seam the front panels to the back, ensuring alignment at the shoulders.
- Attach the sleeves precisely in the middle of each armhole.
- Securely sew all pieces together for proper assembly.
Adding the Collar and Ribbing
- Attach yarn at the base of the front panel to begin the collar and edging.
- Work ribbing using single crochets and slip stitches around the entire cardigan opening.
- Ensure an even finish by repeating rows until the desired width is achieved.
Sizing Adjustments
- The pattern results in an oversized fit.
- The creator recommends adjusting the size by working fewer rows or downsizing based on personal preference.
- It’s suggested to consult the video and written pattern for specific variations.
Final Thoughts
- The cardigan boasts a comfy, oversized fit with a customizable color pattern. The creator modeled the same cardigan on both herself and her mother to demonstrate its versatility.
- Attention to stitch count and detailed assembly is critical to achieving a professional finish.
- The tutorial reminds viewers that patience and practice are key when working on larger projects like this.
Additional Tips
- Feel free to experiment with colors and make the pattern unique to your style.
- Counting stitches accurately is essential to avoid uneven sections.
This tutorial encourages creativity while imparting useful techniques for making a truly customizable garment.
Video Guide
https://youtu.be/60PbCBsFwqQ