Crochet Scarf with Flower Motif Free Pattern

Spread color and cheer every day with this free crochet scarf with flower pattern that adds charming blossoms and cozy warmth to your style.
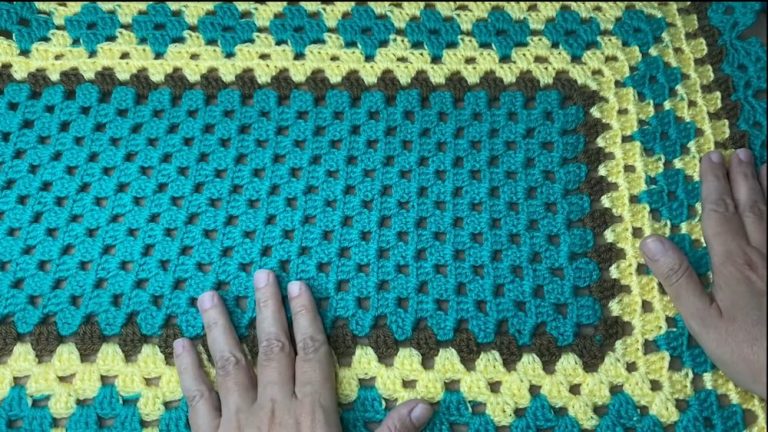
Bright blossoms line up across the scarf turning a simple accessory into something cheerful and special. Gentle petals made with yarn bring smiles and a bit of color to each day. The Crochet Scarf with Flower pattern brings warmth and style whether wrapped for chilly weather or added as a lively touch to plain clothes. Delicate flowers rest side by side along the length of the scarf making every piece unique and full of charm.
Free Crochet Scarf with Flower Pattern for Every Occasion

Lightweight and comfortable this scarf can be used for daily errands or given as a thoughtful gift to someone special. The flower pattern truly stands out offering both beauty and a touch of playfulness. With the Crochet Scarf with Flower pattern everyone can enjoy wearing a piece that shows love for nature and a bit of joy wherever you go.

Lacy Mile-a-Minute Flower Scarf Pattern
Materials
- Yarn: Worsted weight, soft acrylic or similar (example shown in Caron Simply Soft, 1 skein for a 4-strip scarf of approx. 59″ × 9″)
- Hook: Size G / 4.25 mm crochet hook
- Notions: Yarn needle, scissors, optional stitch markers, smaller hook for weaving ends or tidy finishing
- Fringe (optional): Additional yarn if fringe is desired
Key Abbreviations
| Abbreviation | Description |
|---|---|
| ch | chain |
| sc | single crochet |
| dc | double crochet |
| sl st | slip stitch |
| st(s) | stitch(es) |
| rep | repeat |
| tog | together (for cluster/decrease stitches) |
- Cluster: As used here, a cluster is 2 or 3 double crochets closed together in the same space.
Special Notes
- The scarf is constructed in strips, joined together as you go.
- Odd strips and even strips are made the same way, but joined on one edge as you work additional strips.
- For an even color change, cut yarn after each strip, or change colors as desired.
- Count clusters regularly to avoid alternating errors: you must always have a pattern of [chain & 1 dc], [chain & cluster], [chain & 1 dc], etc., along the initial foundation.
- Adjust strip length for desired finished scarf size.
- Each new strip is joined to the previous strip with single crochet and chain in corresponding chain spaces.
Pattern Instructions
1. First Strip
Foundation
- Ch 3.
- In third chain from hook (first chain made), work 1 dc.
- Ch 3.
- In the two loops formed by the ch-3 and the dc just worked:
- (Yarn over, insert hook under both loops, pull up a loop, yo, pull through 2; repeat for total of 2 unfinished dc; yo, pull through all 3 loops on hook) to form a 2-dc cluster tog.
- Ch 3.
- Work 1 dc in two loops at base of previous cluster/dc combination (the same spot as before).
- Continue alternating:
- [ch 3, 2 dc tog cluster] in previous space;
- [ch 3, 1 dc] in next space;
- Repeat until scarf is desired length (standard = ~58-60″ or as many clusters as wanted, e.g., 82 for 59″ long).
- Important: You must start with [ch 3, 1 dc] and end with [ch 3, 2 dc cluster].
- Check: Alternating pattern (dc, cluster, dc, cluster) (a 3, 2, 3, 2, … pattern) must be maintained.


2. First Side-Edge (Turn and Work Along One Edge)
- Rotate strip.
- Ch 6.
- In the space between ch and dc at row end, work a 3-dc cluster (all in same space, unfinished, close together).
- Skip the next chain + cluster end and work a 3-dc cluster in the next [ch, dc] space.
- Ch 6, repeat [cluster, ch 6, cluster] in same space, joining in each [ch, dc] space along the edge.
- Continue to the end of the strip.
- After the last cluster section, ch 6, sl st to top of first cluster to close.
- Fasten off, leave a tail to weave in.

3. Second and Subsequent Strips
- Make foundation as for first strip (must match clusters count of previous strip).
- Work side-edge clusters/chains on one side identical to the first strip’s first edge.
- When turning to work the next edge (to join to previous strip):
- Instead of working [ch 6], work [ch 3, sc in corresponding ch-6 space of previous strip, ch 3] as the connection.
- Continue: [cluster in current strip, ch 3, sc in previous strip’s ch-6 space, ch 3, cluster in same space].
- Alternate [cluster, join] and [cluster, ch 6, cluster] as in the previous strip.
4. End Edge
- After the last cluster at end of strip, ch 6, join with sl st to the top of the first cluster as before. Fasten off and weave in ends.
5. Adding More Width
- Repeat instructions for adding strips, always joining new strips on one edge to the previous strip as above, for as many strips wide as you want your scarf to be.
6. Finishing & Optional Fringe
- Weave in all tails.
- You may add fringe to the chain spaces at scarf ends if desired.

Conclusion
This mile-a-minute lacy scarf pattern is endlessly adaptable in width and length. The joining-as-you-go method makes it satisfyingly fast, and the openwork flower motif creates a beautiful, delicate effect, even in worsted weight yarn. Play with colors, or add fringe for extra style.

Pattern Corrections & Tips
- Correction: Always double-check that you maintain the [dc, cluster, dc, cluster] alternation so joining will work properly.
- Tip: Place stitch markers or use scrap yarn to mark the right side and end of each row, especially on your first strip.
- Tip: For a neater finish, use a smaller hook to weave in ends, and block your finished scarf for best effect.
- Tip: The chain-6 spaces are ideal for adding fringe if you want a decorative finish.