Free Crochet String Bag with Drawstring Pattern – Great for Beach

Want a unique bag that’s both cute and functional This free crochet string bag with drawstring pattern is perfect for adding a personal touch to your daily routine.
A stylish and practical accessory perfect for everyday use, this project captures the essence of versatility and charm. The free crochet string bag with drawstring pattern invites makers to create a lightweight yet sturdy bag that blends function with an attractive design. The tutorial by Hook. Вязание крючком и спицами thoughtfully guides you through each step, highlighting details that make this bag truly special.
How to Crochet a String Bag with Drawstring | Free Easy Pattern
The bag’s open mesh structure, formed by neat chains and slip stitches, gives it an airy texture ideal for carrying groceries, books, or beach essentials. Its shape is cleverly constructed in a circular fashion, preventing twisting and ensuring balanced symmetry. The standout feature is the drawstring closure, which adds both security and a stylish touch, allowing easy adjustment and neat compactness when closed.
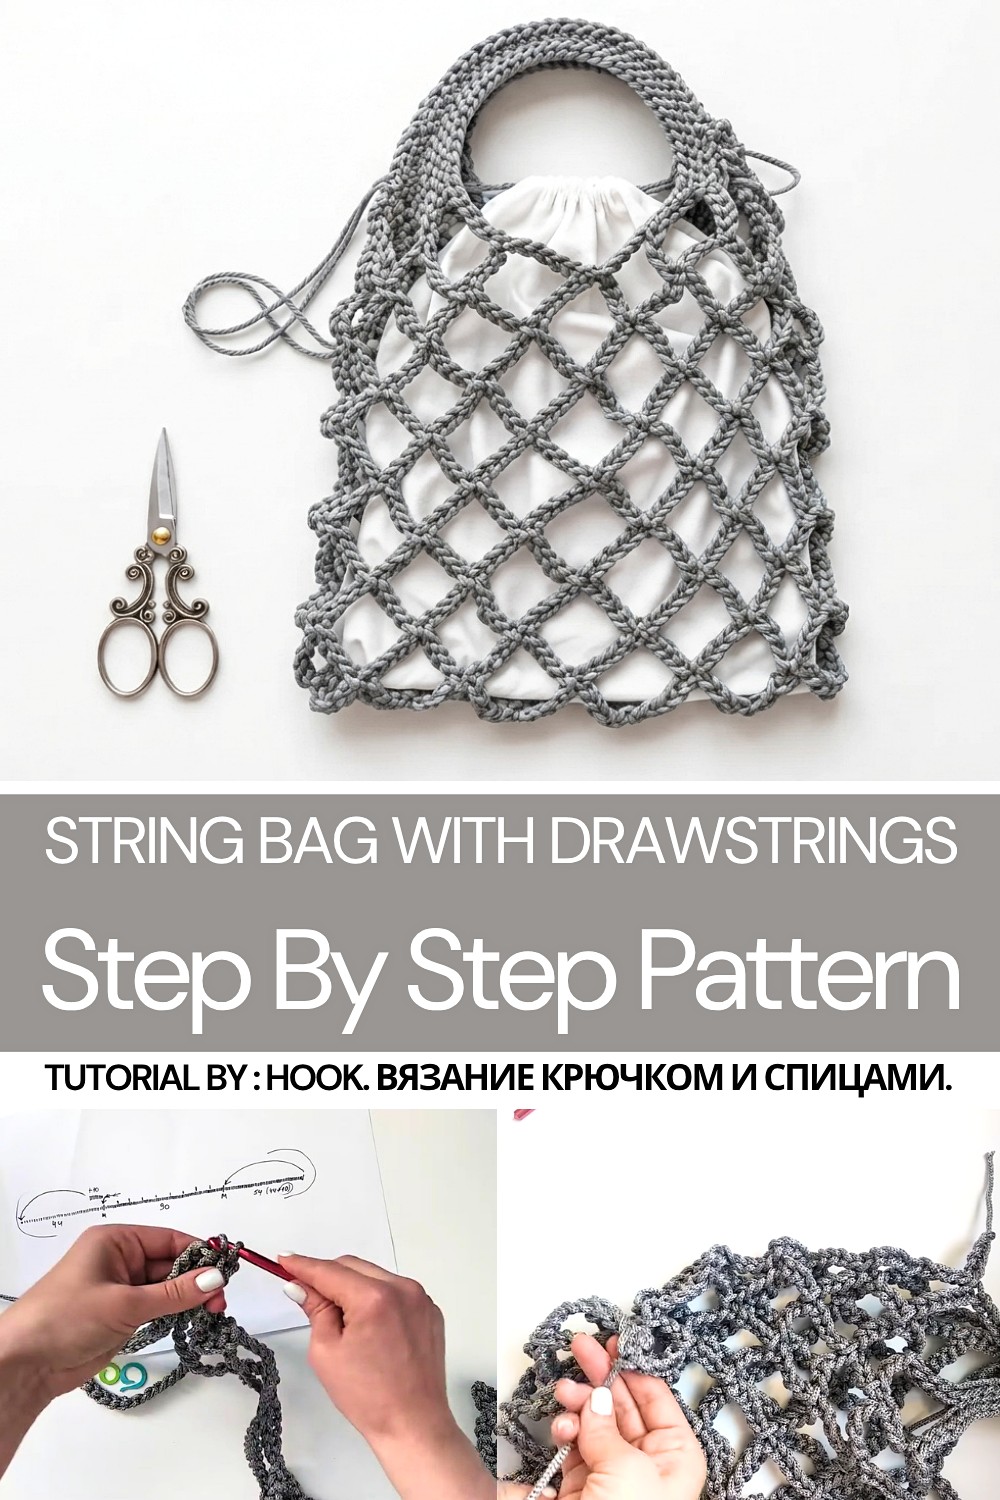
With handles formed alongside the body, the bag is comfortable to hold and offers extra durability due to the reinforcing rows of slip stitches. The texture is smooth and regular, creating an appealing interplay of light and shadow across the woven cells. The design’s minimalistic yet elegant look suits casual outings and enhances any ensemble.
This project holds great promise as a thoughtful gift, combining usefulness and aesthetic appeal. The clear and patient instructions make creating this charming string bag an enjoyable and rewarding experience. Its practical benefits and timeless style make it a wonderful addition to any accessory collection.

Crochet Market Bag (Avoska) with Inner Drawstring Bag
Skill Level: Intermediate
This crochet market bag (avoska) is a practical and versatile project, perfect for shopping or everyday errands. It combines a sturdy yet lightweight mesh pattern with strong handles, making it reusable and convenient to carry. Additionally, the bag features an optional sewn inner drawstring pouch to protect items and add style. Created using polyester cord with a size 7 crochet hook, the bag is both durable and easy to clean.
Materials
For the Crochet Bag:
- Cord: 4.5 mm polyester cord (recommended for durability, though cotton rope is an alternative).
- Hook: Size 7 mm crochet hook.
- Tools:
- Stitch markers for tracking key points in the chain and rows.
- Scissors for cutting the cord.
- Lighter (optional, to heat-seal polyester cord).
For the Inner Drawstring Bag (Optional):
- Fabric: Lightweight cotton fabric, approximately 36 cm x 40 cm (can be a single piece or two rectangles).
- Thread: Matching sewing thread.
- Tools:
- Sewing machine (or needle for hand-sewing).
- Scissors.
- Safety pin (for threading the drawstring).
- Measuring tape or ruler.
- Two pieces of cord for the drawstring.
Stitch Abbreviations
(US Terminology)
- ch – Chain
- sl st – Slip Stitch
Helpful Tips
- Cord Selection: Use polyester cord for strength and durability. If using heat-sealing, test it on a small piece first to avoid burning or excessive melting.
- Avoid Twisting: When forming the base structure, keep the foundation chain untwisted. Use stitch markers to maintain orientation.
- Symmetry Matters: Pay attention to the alignment of handles and mesh cells for a professional, symmetrical finish.
- Customization: Adjust the number of mesh rows or chained stitches in the foundation to create a larger or smaller bag.
- Drawstring Bag Assembly: Pre-wash fabric to prevent shrinkage and use a zigzag stitch or pinking shears to avoid fraying edges.
Pattern Instructions
This project is divided into five sections: the foundation chain, forming the handles and mesh cells, adding final rows, connecting sides, and sewing the inner drawstring bag (optional).
1. Foundation Chain and First Rows
The foundation chain creates the base structure, including the handles of the bag.
- Step 1:
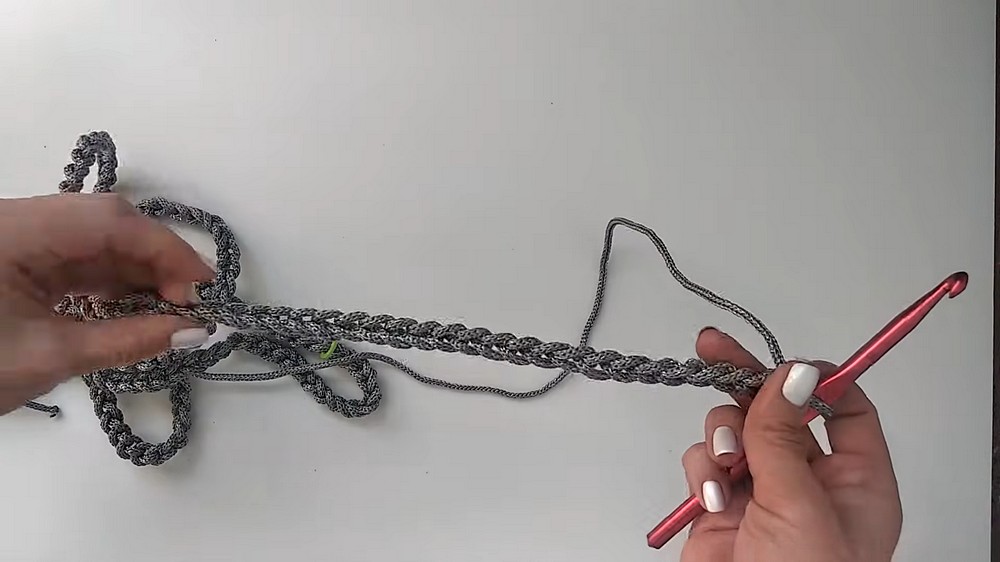
- Ch 44, place a marker at the end of this chain (this will form part of one handle).
- Ch 90, place another marker at the end (this will form the main body of the bag).
- Finally, ch 54 (this will form the second handle).
- Step 2:
- Form a loop with the chain, ensuring it does not twist. Crochet counter-clockwise around the loop.
- Step 3:
- Work sl st to join every 10th stitch along the chain, forming a circular base structure.
2. Forming the Handles and Main Mesh Cells
Mesh cells provide the bag with a lightweight structure while maintaining breathability.
- Begin Handle Binding:
- Start on one side of the bag handles. Work sl st across the entire handle section.
- Start the Mesh Cells:
- Leave 5 stitches unworked on the handle before beginning the mesh pattern.
- Ch 10 and sl st into every 5th stitch around the loop to form the mesh cells of the bag body.
- Second Side of the Handle:
- For the second side of the loop, ch 9 and connect to the base of the handle with sl st.
- Repeat Mesh Pattern:
- Continue alternating mesh rows, ensuring the arches and cells are evenly spaced.


3. Final Rows and Strengthening
The final rounds provide additional support to reinforce the bag handles and structure.
- Continue Mesh Rows:
- Work additional mesh rows around the bag, maintaining alignment with the previously established cells.
- Strengthen the Handles:
- To strengthen the bag handles, work extra sl st into the chains forming the handle base.
- Continue until reaching the 5th stitch of each cell for added durability in the handle area.
- Larger Arches:
- For the final row, create larger arches by ch 14 and connecting into the 5th stitch of the previous row’s mesh cells.
4. Connecting Sides and Finishing
Once the main mesh body and handles are completed, the sides are connected, and loose ends are woven in.
- Join Sides:
- Use a separate piece of cord to join the two sides of the bag together.
- Ch 4 at a time and connect into the 8th stitch (middle of the 14-stitch arc) of each side.
- Weaving and Sealing Ends:
- Weave any remaining cord ends into the handle structure using a tapestry needle.
- If working with polyester cord, heat-seal the ends carefully with a lighter to prevent unraveling.

5. Sewing the Inner Drawstring Bag (Optional)
The optional inner drawstring bag adds additional utility and ensures small items stay secure.
- Fabric Cutting and Preparation:
- Cut one rectangle (36 cm wide x 40 cm tall) or two smaller rectangles (18 cm wide x 40 cm tall if you opt for side seams). Add 1 cm seam allowance for all sides.
- Sewing the Sides:
- Place the fabric right sides together. Sew along the side and bottom edges of the fabric, leaving the top open.
- Leave a 2 cm gap near the top edge on both sides for the drawstring cords.
- Creating the Drawstring Casing:
- Fold the top edge down by 1 cm, then fold again by 2 cm to create a casing for the drawstring.
- Stitch close to the edge of the folded fabric to form the channel for the drawstring.
- Inserting the Drawstring:
- Thread 2 pieces of cord through the casing using a safety pin. Each cord should pass through the full loop, with ends exiting on opposite sides for a double-pull closure.


Conclusion
This market bag (avoska) is stylish, practical, and versatile. The use of sturdy polyester cord ensures durability, while the mesh structure keeps the bag lightweight and flexible. The optional inner drawstring bag enhances utility by providing added security for small or delicate items. Whether for trips to the farmer’s market or casual outings, this crochet bag is the perfect blend of functionality and design. You can customize the size, colors, and fabric to match your personal aesthetic and needs.