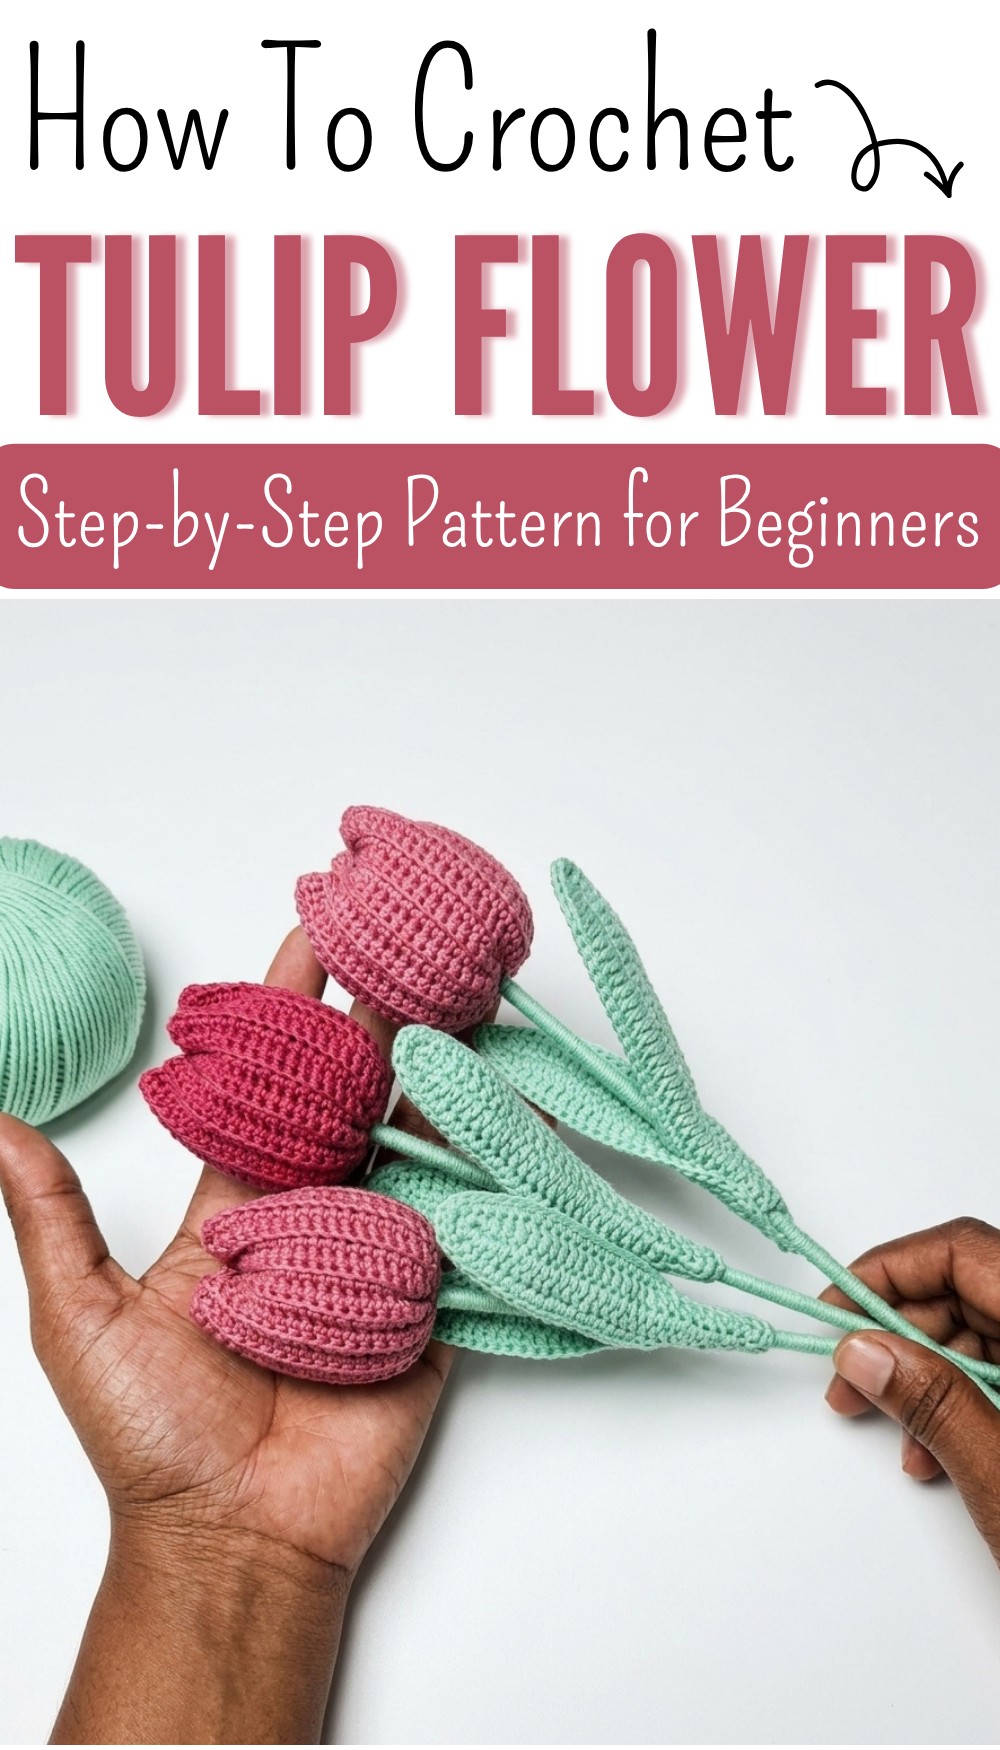
Crochet Tulip Flower Pattern with Easy Step-by-Step Tutorial
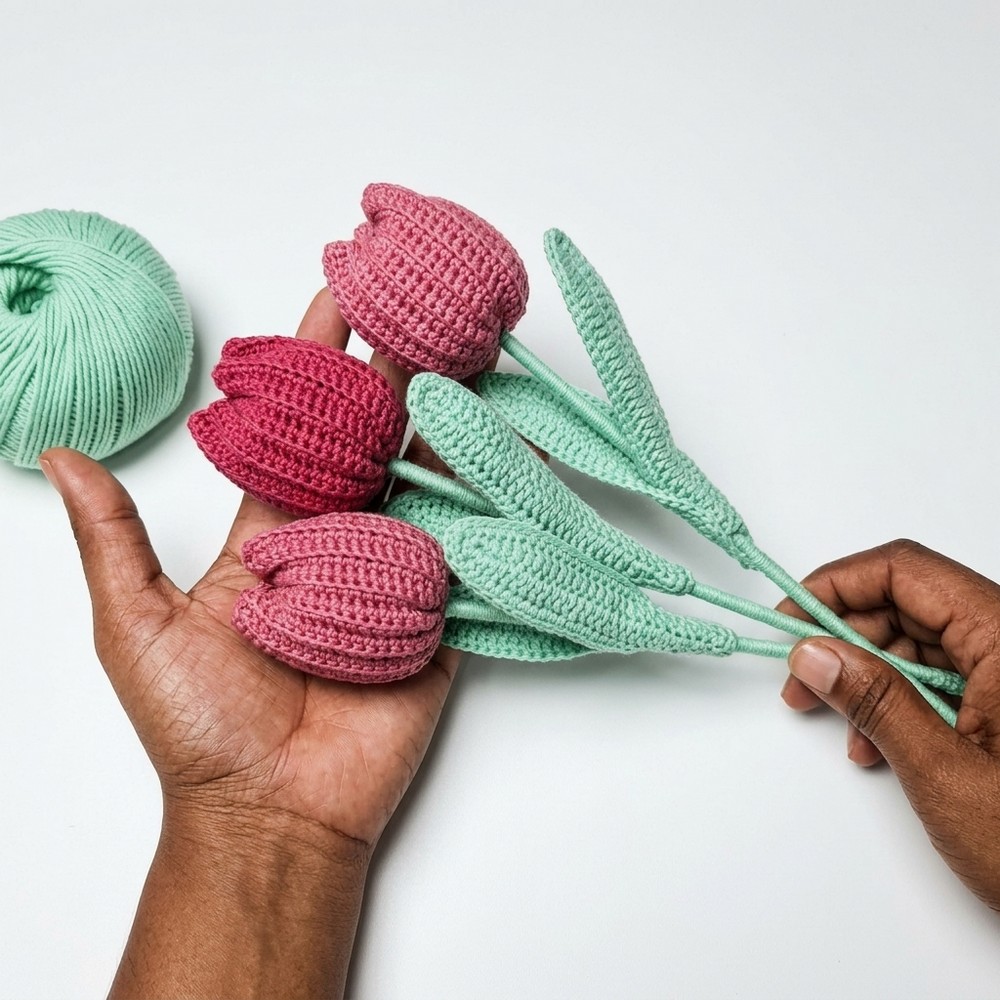
Stitch charming tulip flower with this free crochet guide, perfect for beginners and pros looking to enhance their décor with a splash of elegance.
Nothing brightens a space or adds a springtime flair like the charm of a handmade tulip flower, and crochet designs capture this beauty perfectly. The Free Crochet Tulip Flower Pattern offers a simple way to bring the elegance of nature indoors. With its delicate petals and realistic texture, this design mimics the graceful appearance of a blooming tulip, making it ideal for decorative projects.
Crochet Easy Tulip Flower: Perfect Spring Accent
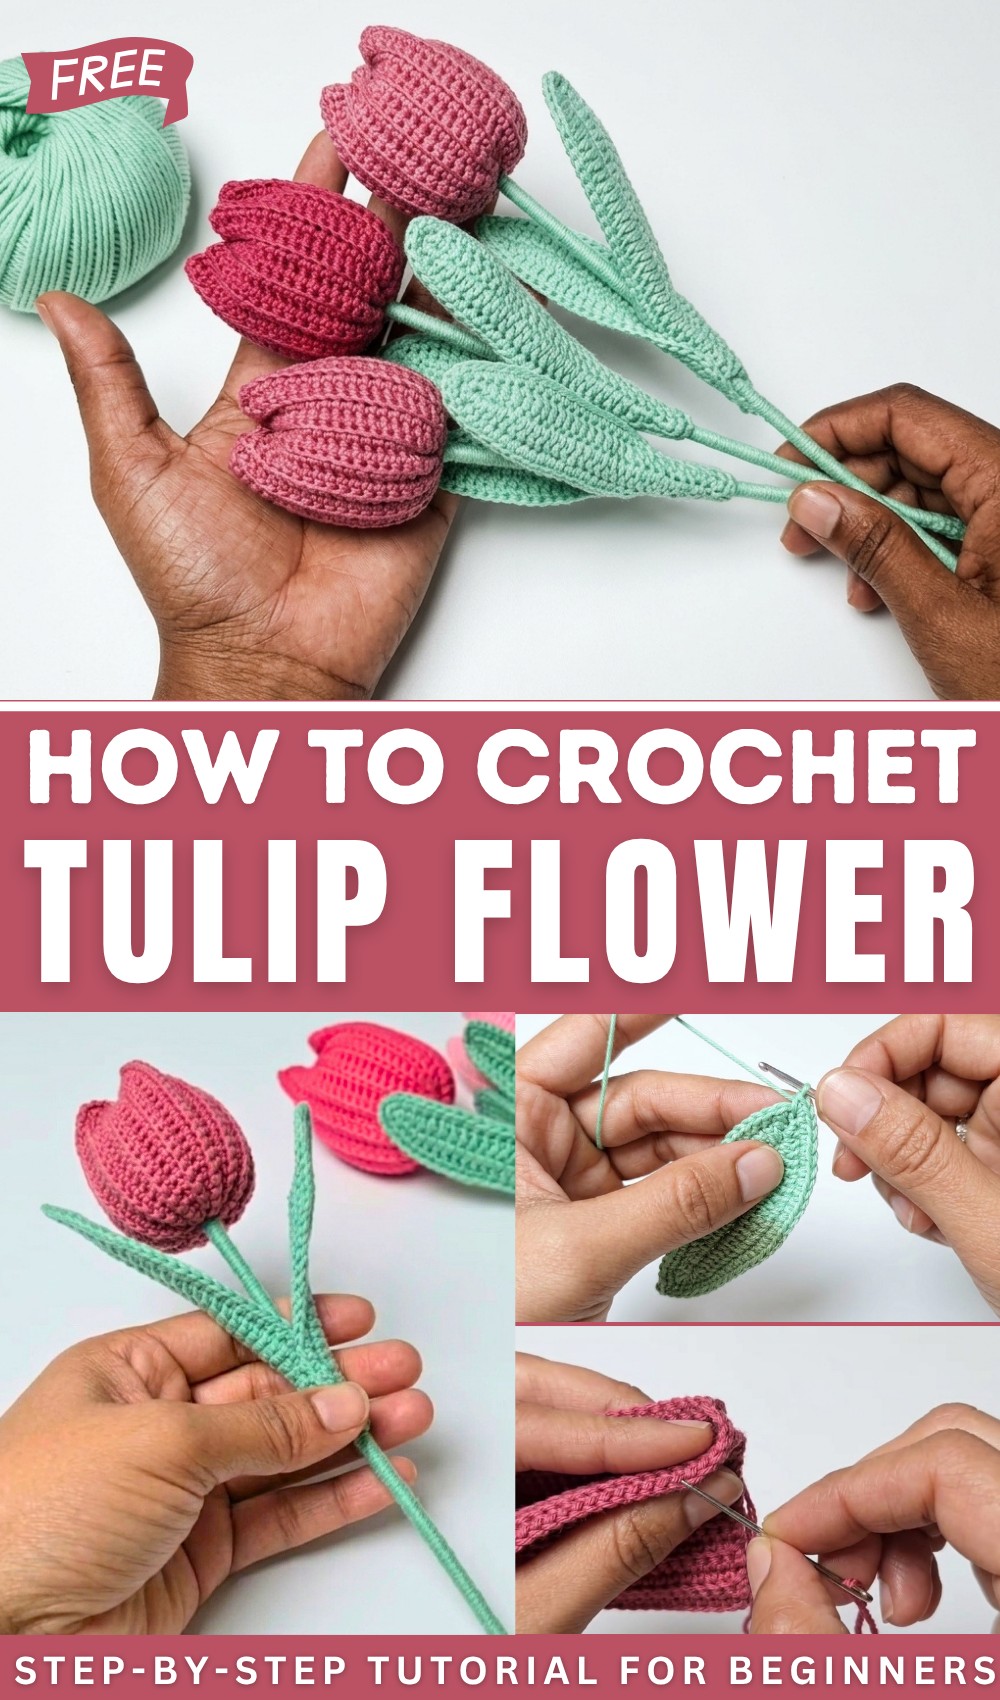
It can be used to create vibrant bouquets, adorn home décor items like cushions or garlands, or add a thoughtful touch to gifts. Its versatility means you can experiment with different colors and yarns to match any theme or mood. Whether you’re crocheting for fun, practicing your skills, or looking to add beauty to your surroundings, this pattern’s straightforward instructions make it suitable for all skill levels. A perfect project for relaxation and creativity, the tulip flower brings not only visual delight but also a calming sense of accomplishment with every stitch.
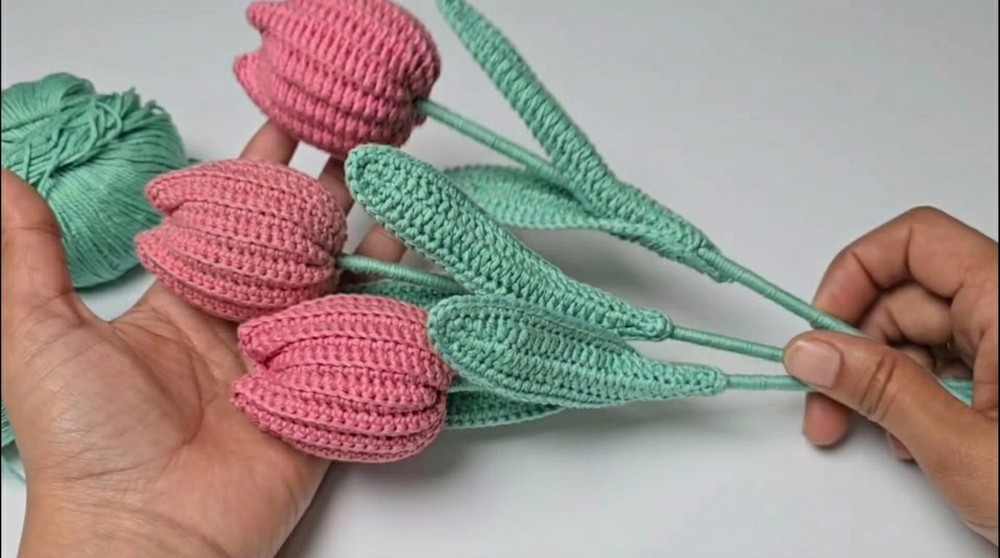
Crochet Tulip Bouquet Pattern
Materials Required
- Yarn:
- Medium-weight yarn (5-ply blend of 50% acrylic and 50% polyester).
- Colors: Pink for tulips, green for leaves and stems.
- Crochet Hook:
- 2.20 mm crochet hook.
- Tools:
- Thin wire (for leaves and stems).
- Scissors.
- Tapestry needle (for sewing and weaving).
- Glue (optional, for attaching leaves to stems).
- Stuffing material (like polyester fiberfill).
Gauge
- Single Crochet Rows:
20 stitches × 32 rows produce a rectangle measuring 7 cm wide × 12 cm tall.
You may adjust the gauge based on personal preference or yarn choice.
Finished Size
Each tulip measures approximately:
- Width: 7 cm.
- Height (stem + tulip): ~12 cm.
The leaves are approximately:
- Length: 11 cm.
- Width: 2.5 cm.
Tips for Customization
- Tulip Height:
- Increase or decrease the initial chain count.
- For taller tulips, chain more than 21. For smaller tulips, chain fewer stitches.
- Tulip Width:
- Add or reduce the number of rows.
- Leaf Size:
- Increase or decrease the number of chains or stitches at both ends.
- Colors:
- Experiment with different yarn shades to create multicolored bouquets.
Pattern Instructions
Step 1: Crochet the Tulip
Tulip Base: Crochet the Rectangle
- Foundation:
- Create a slip knot and chain 21 stitches. (Do not pull tight).
- Row 1:
- Starting in the second chain from the hook, work 1 single crochet (sc) into each chain across.
- Count: You should have 20 single crochets after completion.
- Chain 1, then turn your work.
- Row 2:
- Starting from the first single crochet, work 1 sc into the back loop only across the row.
- Count: 20 single crochets.
- Chain 1, turn your work.
- Rows 3–32: Repeat Row 2, working sc into the back loop only in every row. Be consistent with stitch count (20 stitches per row).
- Finish the Rectangle:
- After Row 32, chain 1, leave a tail, and cut the yarn.
The rectangle will measure approximately 7 cm (width) × 12 cm (height) after completing 32 rows.
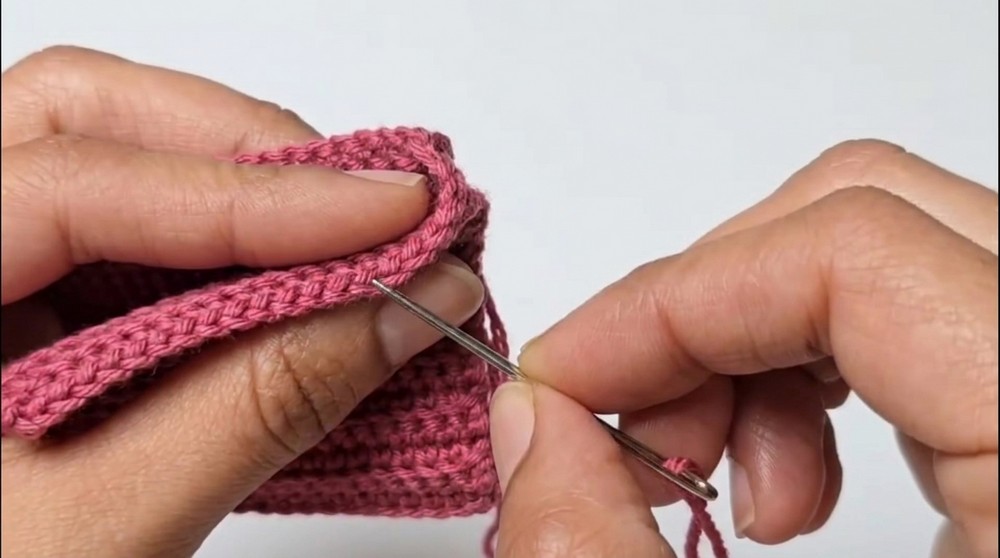
Forming the Tulip Shape:
- Fold & Join:
- Fold the rectangle in half lengthwise. Sew the two short edges together using the back loops of the single crochets on both sides for a seamless join.
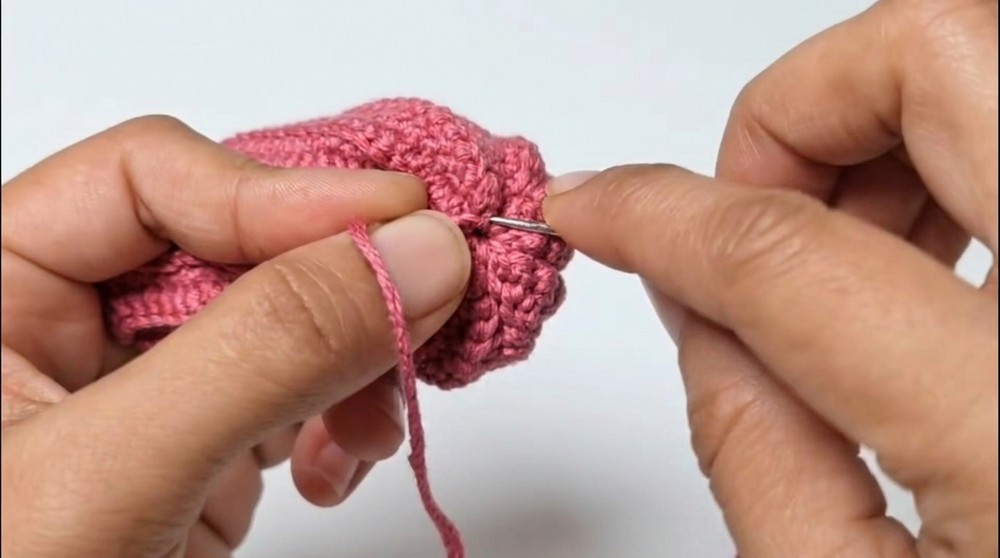
- Gathering:
- Gather the top edge of the stitched rectangle to shape the tulip. Use your yarn needle and tail to carefully cinch it together.
Step 2: Crochet the Leave(s)
Leaf Base:
- Foundation Chain:
- Create a slip knot with green yarn and chain 30 stitches.
- Shape Row:
- Work 1 sc into the second chain and third chain.
- Work 2 double crochets (dc) side by side.
- Work 20 dcs (one in each of the next 20 stitches).
- Curve Row:
- In the next 5 chains:
- Work 2 half double crochets (hdc) side by side.
- Work 2 single crochets (sc) side by side.
- In the last chain, work 3 sc to create a curved edge.
- In the next 5 chains:
- Mirror Row:
- Descend down the opposite side:
- Work 2 sc.
- Work 2 hdc.
- Work 20 dc steadily into the base stitches.
- Work 2 hdc again.
- Finish with 2 sc at the corner.
- Descend down the opposite side:
- Clean Edges:
- Work a round of single crochet around the entire leaf, ensuring smooth edges.
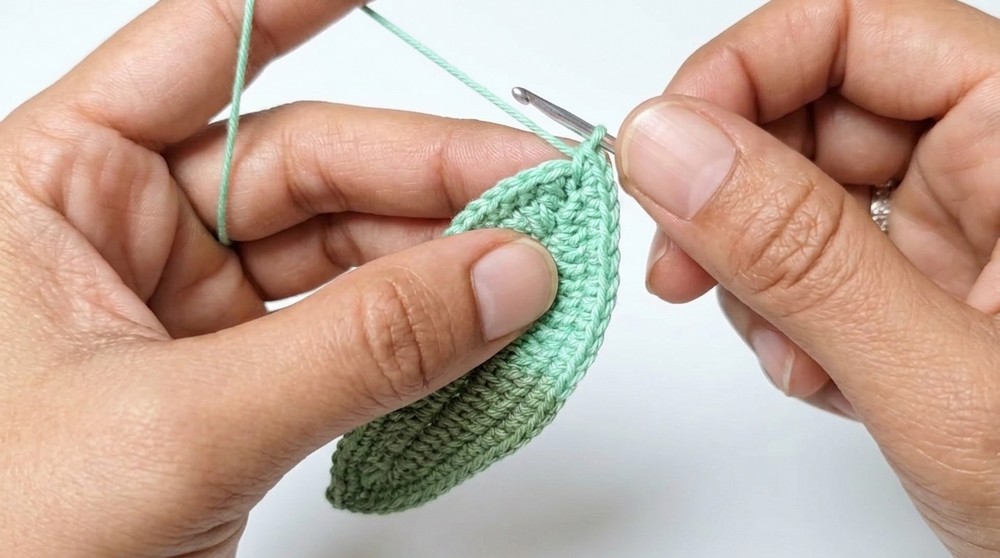
Wire Insertion for Structure:
- Guide Wire:
- Insert thin wire along the edges as you crochet the final round.
- Secure the wire at the base with a slip stitch and chain 1.
- Finish:
- Cut the yarn and weave in the tail.
Repeat these steps to make another identical leaf.
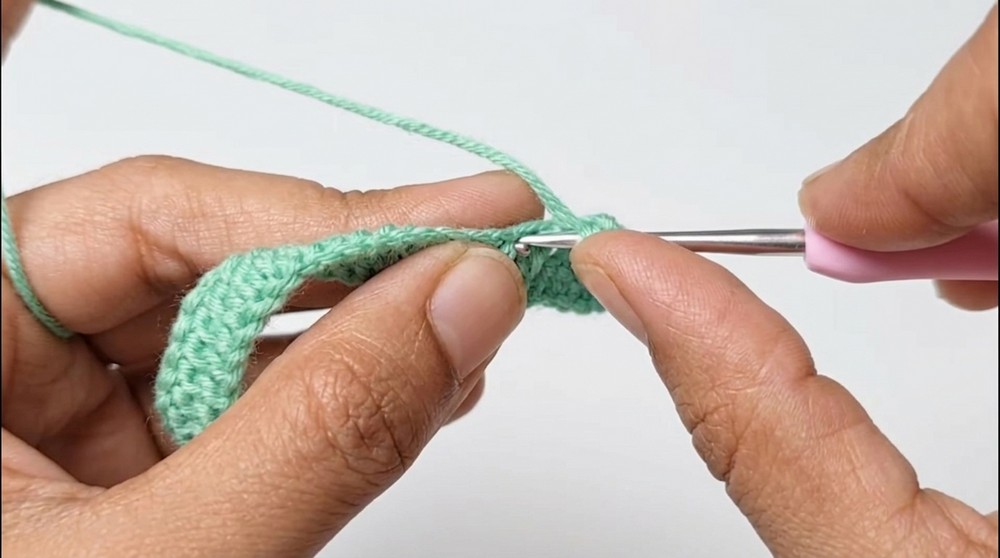
Step 3: Crochet the Stem
- Use green yarn and thin wire to create sturdy stems.
- Crochet around the wire to ensure the tulip stem maintains its structure.
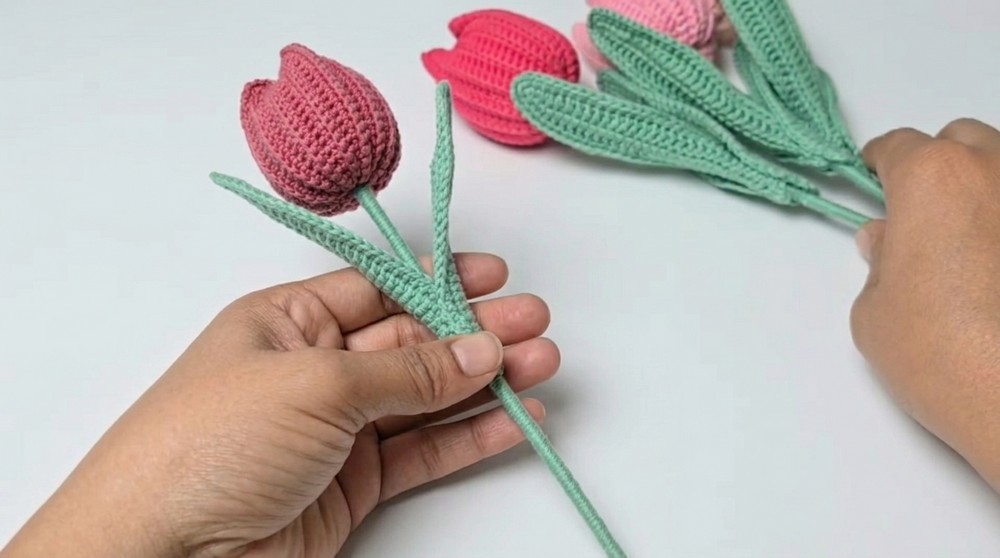
Step 4: Assembly
Stuffing and Joining:
- Insert stuffing material inside the tulip to give it volume and a realistic shape.
- Insert the stem through the center of the tulip.
Attaching Leaves:
- Using glue or yarn, attach each leaf around the base of the stem. Adjust positioning for a natural look.
Final Stitching:
- Fold the tulip gently for better shape.
- Stitch through the base to secure the overall structure.
Special Techniques
- Back Loop Single Crochet: Used for texture on tulip petals.
- Turning Corners: Add multiple single crochets in one stitch.
- Wire-Guided Edges: Used for stability in leaves.
Conclusion
Congratulations! You’ve crafted a beautiful tulip bouquet that’s perfect for home decor or gifting. The combination of vibrant colors, textures, and structural integrity creates a lifelike flower arrangement.
Important Remarks
- Final Look:
The tulip bouquet should feature bright petals, sturdy stems, and bold green leaves with smooth curves. - Care Tips:
- Keep away from moisture to maintain its shape and color.
- Wipe with a soft, dry cloth, if needed.
- Creative Ideas:
- Create tulips of varying sizes for a dynamic bouquet.
- Use multiple colors for an eye-catching effect.