How to Crochet a Dessert Granny Square Bag for Beginners

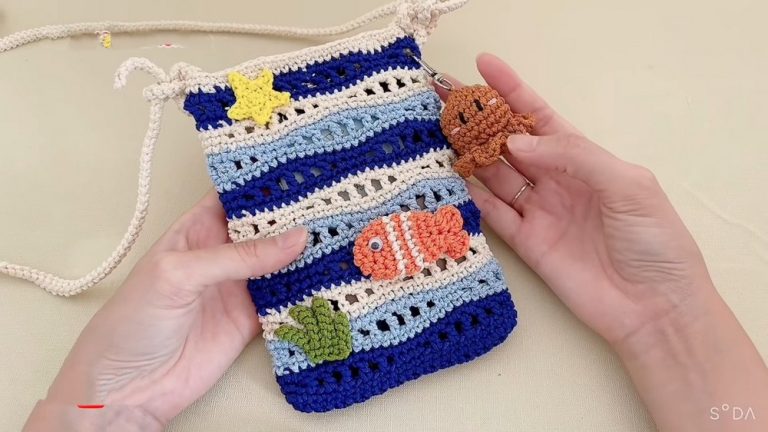
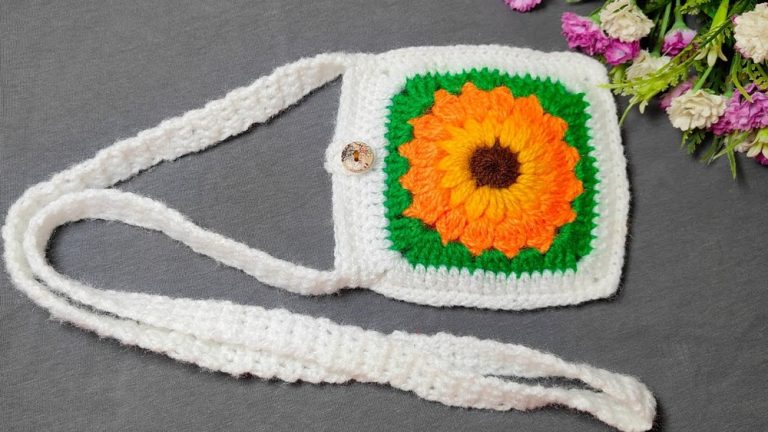
Let’s learn how to crochet an easy dessert granny square bag using solid grannies in 5 colors with a step-by-step tutorial from Misyel Shin. This crochet bag is further enhanced with a lacy strap and donut, strawberry, cupcake, and pineapple appliques making them a great choice for kids. It perfectly creates a unique and eye-catching design, especially for summer.
Being spacious, it can be used for carrying books, groceries, or personal items. You can customize this crochet granny square in numerous ways and complete it very quickly.
To learn more about this interesting crochet bag idea, follow though with us below until you find the complete video guide.

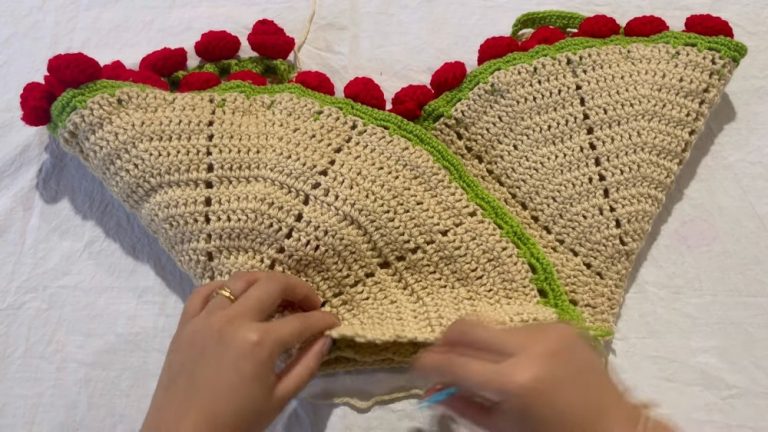
Skills Used: Slip knot formation, chaining, slip stitching, and working in rounds. It also highlights intermediate techniques like double crochets, creating granny square patterns, and joining panels seamlessly with slip stitch crochet. Additionally, the video demonstrates shaping techniques for edges and constructing durable bag handles, making it a valuable guide.
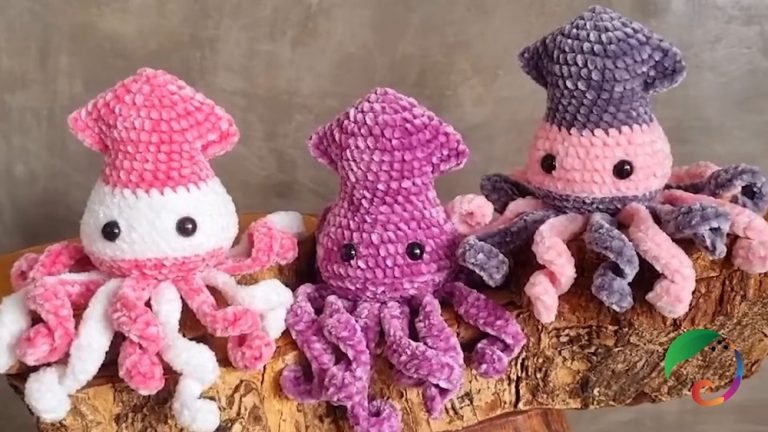
Personalization Tips: You can choose appliques of animals, other desserts, and whatever you have to adorn this crochet dessert granny square bag. Another nice color combination is fo 4th of July. You can easily adjust the length of strap.
Bag Dimensions: Finished bag size is approximately 19 cm x 19 cm. The handle length is customizable between 50-60 cm.
This step-by-step tutorial is a quick guide for crocheting something very colorful even with the solid granny squares. It emphasizes clarity and simplicity, making it accessible teaching from creating the squares to assembling and adding finishing touches like handles and optional closures.
Cheerful Crochet Square Bag Pattern
Materials
- Yarn: Big ply cotton yarn in assorted cheerful colors & white (for joining and handle)
- Crochet Hook: 5.0 mm–6.0 mm (US H–J recommended)
- Notions:
- Scissors
- Yarn/tapestry needle (for seaming, joining, and attaching handle)
- Stitch marker (optional)
- Sewing needle and thread (for extra security on handle/joining)
- Hot glue gun or fabric glue (for attaching appliqué; optional)

Abbreviations (US Terms)
| Abbreviation | Meaning |
|---|---|
| ch | Chain |
| sl st | Slip Stitch |
| sc | Single Crochet |
| hdc | Half Double Crochet |
| dc | Double Crochet |
| st(s) | Stitch(es) |
| MR | Magic Ring |
Special Notes
- Granny squares are worked from the center out; you will need 8 squares (colorful for front, white for back).
- Adjust hook size to match yarn weight for desired firmness.
- For added security, add a snap, magnetic clasp, or zipper closure after basic assembly.
Pattern

1. Granny Square (Make 8)
Foundation
- Begin with a slip knot.
Option 1:
- Ch 6, join with a sl st to form a ring.
Option 2:
- MR, continue with instructions below.
Round 1:
- Ch 4.
- Work 3 dc into ring. (Counts as 1 group)
- Ch 2, 4 dc in ring; repeat from * to * 3 more times (total 4 groups separated by ch-2).
- On the last corner (after 4th group), do NOT ch 2; instead, work 2 hdc into the corner space to finish.
- Pull yarn tight, fasten off.
Round 2:
- Join yarn to any corner. Ch 4.
- In same corner, work 1 dc, 1 dc (so you now have ch-4, dc, dc = 3 sts).
- Work 4 dc across next group space (side—match previous group count).
- In corner space: 2 dc, ch 2, 2 dc.
- Repeat around: each side gets 4 dc, each corner gets 2 dc, ch 2, 2 dc.
- On last corner, finish with 2 hdc instead of dc for neat join. Fasten off.
Round 3:
- Join yarn to any corner. Ch 4.
- Dc into same corner space.
- Work 8 dc across next side (match previous group count).
- In corner: 2 dc, ch 2, 2 dc.
- Repeat entirely around, matching group count per side.
- Finish last corner as before with 2 hdc. Fasten off.
Round 4:
- Join yarn to any corner. Ch 4.
- Dc into same space.
- Dc in each st across (1 dc per st; count as matches previous sides).
- In each corner: 2 dc, ch 2, 2 dc.
- Finish the round, fasten off.
Make 8 squares: – 4 for the front (multicolored), 4 for the back (white or a single color).
2. Joining the Squares
With white yarn (or desired color):
- Arrange squares in desired layout.
- Join at corners: slip stitch into corner space, ch 2, sl st into next square’s corner.
- Continue slip stitching along edge, joining both front loop (of one square) and back loop (of next square) for neat seam.
- Repeat until squares are joined for both front and back panels.
3. Exposed Bag Seam (Front & Back Assembly)
- Place front and back panels together (right sides facing out).
- At a side edge, begin with slip knot, join with 3 ch.
- Insert hook into next stitch on panel, make dc along edge.
- After each dc, remove hook and insert into next stitch (for careful alignment), then continue dc in next st.
- Continue all the way around three sides, leaving top open.
- Fasten off and weave in ends.
4. Handle
With white yarn:
- Make a MR, work 4 sc into ring.
- Pull tight.
- Rotate work; in first stitch, make 1 sc.
- In second st, make 3 sc.
- Rotate work; in first stitch, make 1 sc, in second st, 3 sc.
- Continue: 1 sc, then 3 sc in next st. Repeat to form a lengthening spiral.
- When desired length is achieved (~50–60 cm depending on your preference), fasten off.
Attach Handle:
- Position ends on bag top edge. Sew securely with tapestry needle and matching yarn.
- Reinforce for strength and neatness.
5. Decoration
- Attach appliqué/patches as desired.
- Use hot glue or fabric glue for felt or fabric appliqué, or sew with needle.
- Add buttons, clasps, or zipper if needed.
Pattern Correction
- Granny squares should have consistent side and corner group counts; if your squares don’t match, check your group sizes and placement of corners.
- When joining, ensure you pick up the correct loops for aligned, flat seams.
- Handle construction is a spiral/cord technique—repeat the increase pattern for an even look.
Tips
- Block squares before joining for neatness.
- Use tapestry needle for invisible joins.
- For additional security, reinforce handle stitching and consider sewing lining for added structure.
- Play with color arrangement for maximum cheerful effect.
Conclusion
This cheerful crochet square bag is customizable, fun, and practical. The granny square base makes it accessible for beginners, while appliqué and color choices offer endless creativity.
Video Guide