
How to Crochet Slip Stitch (sl st) | Tutorial For Beginners
Slip stitch is a very basic and essential stitch for every newbie to learn. You will need it often, like joining the rounds, seaming pieces together, creating the ribbings, etc. So, learn how to crochet slip stitch with this easy tutorial for beginners. Let’s get started!

Details About the Slip Stitch
Before we start the slip stitch guide, you should learn various things related to this stitch:
Abbreviation
When you are following a crochet pattern, you can recognize the slip stitch with the abbreviation “sl st.” You will mostly see it while working in the rounds.
Symbol
Slip stitch has the simplest symbol, a “dot,” on charts.
Height
Slip stitch has very little height as it is mostly used to join the rounds without weighting them up, like when crocheting a granny square.
Turning chains
Although the height of the slip stitch is less, you can still be consistent in the work by crocheting one turning chain. It is especially necessary when you are crocheting the slip stitch ribbings.
Slip Stitch | Step-by-Step Guide
In this section, you will learn the whole procedure for crocheting the slip stitch with step-by-step instructions.
Skill Level: Very Beginner
Techniques to Know Before:
- Chain Stitch or any other crochet stitch as the foundation for this stitch.
- Yarn over.
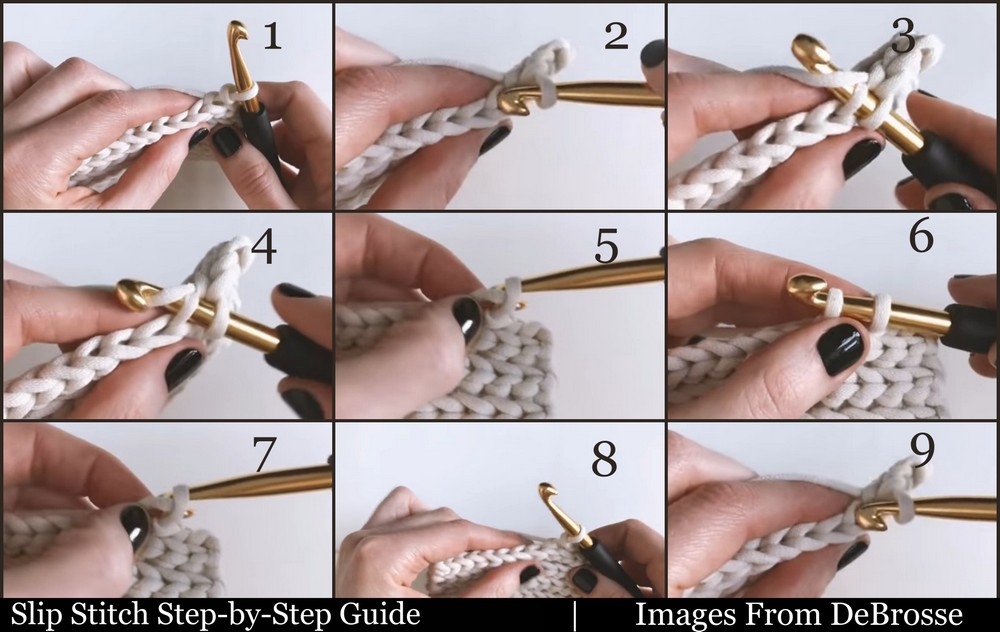
Slip Stitch Instructions
- Chain in any number if you are starting the procedure from scratch. Otherwise, keep with the existing row and identify the stitch to work the slip stitch (according to the pattern).
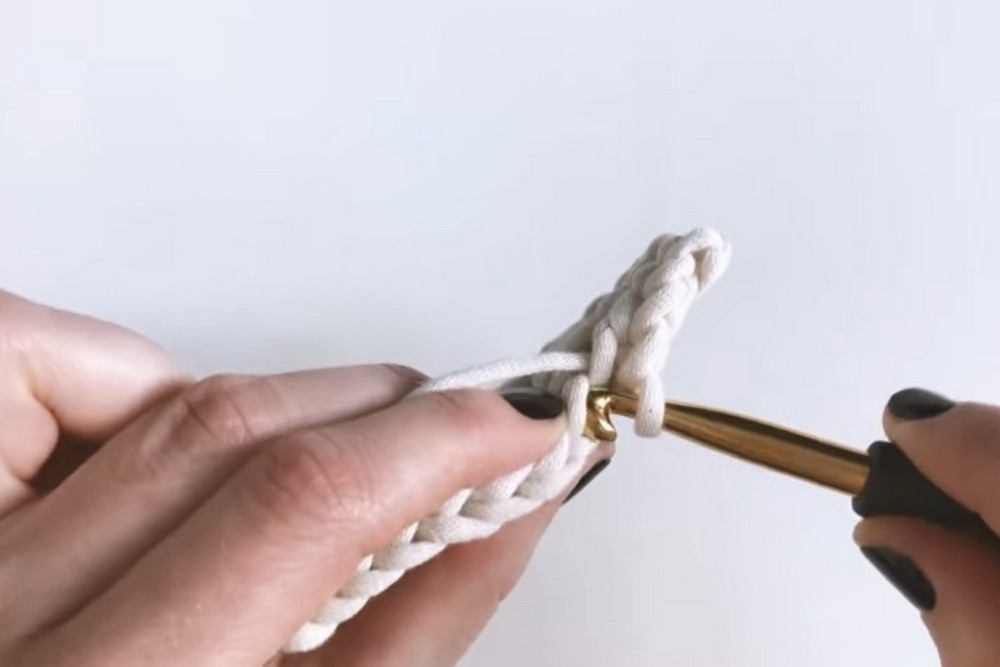
- Insert the hook into that stitch as marked by the pattern.
- The hook should be passed through enough that the stitch touches with the slip knot.
- Yarn over once.
- Pull up a loop through the stitch on the hook.
- You will have two loops on the crochet hook.
- Now, simply draw a crochet hook through that loop on the hook.
- See a short stitch.
- Make the next stitch following steps 2-8. by inserting the hook in the next stitch.
Keep repeating the steps throughout the row until you get to the end of the row. To start a new row of slip stitches, turn the work and make one turning chain.
How to Work Slip Stitch In Rounds?
To Work that stitch in rounds, insert the hook into the first chain or stitch you performed in that round. Then, yarn over and pull up a loop. Pull through the first loop on the hook. It will join the round without adding the height, and you will be able to start a new one.
Hope you liked the tutorial!


