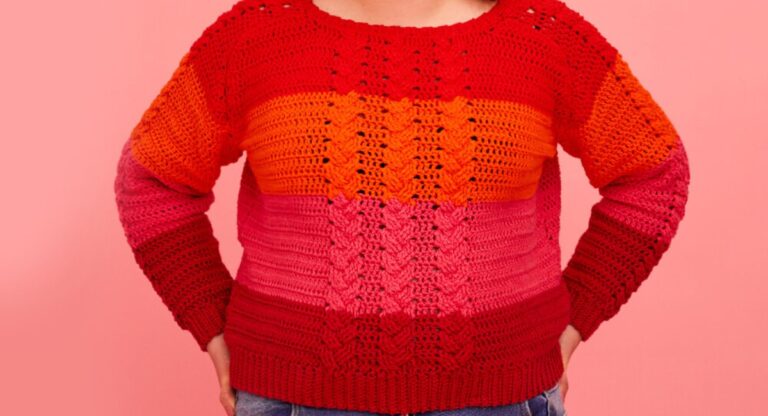
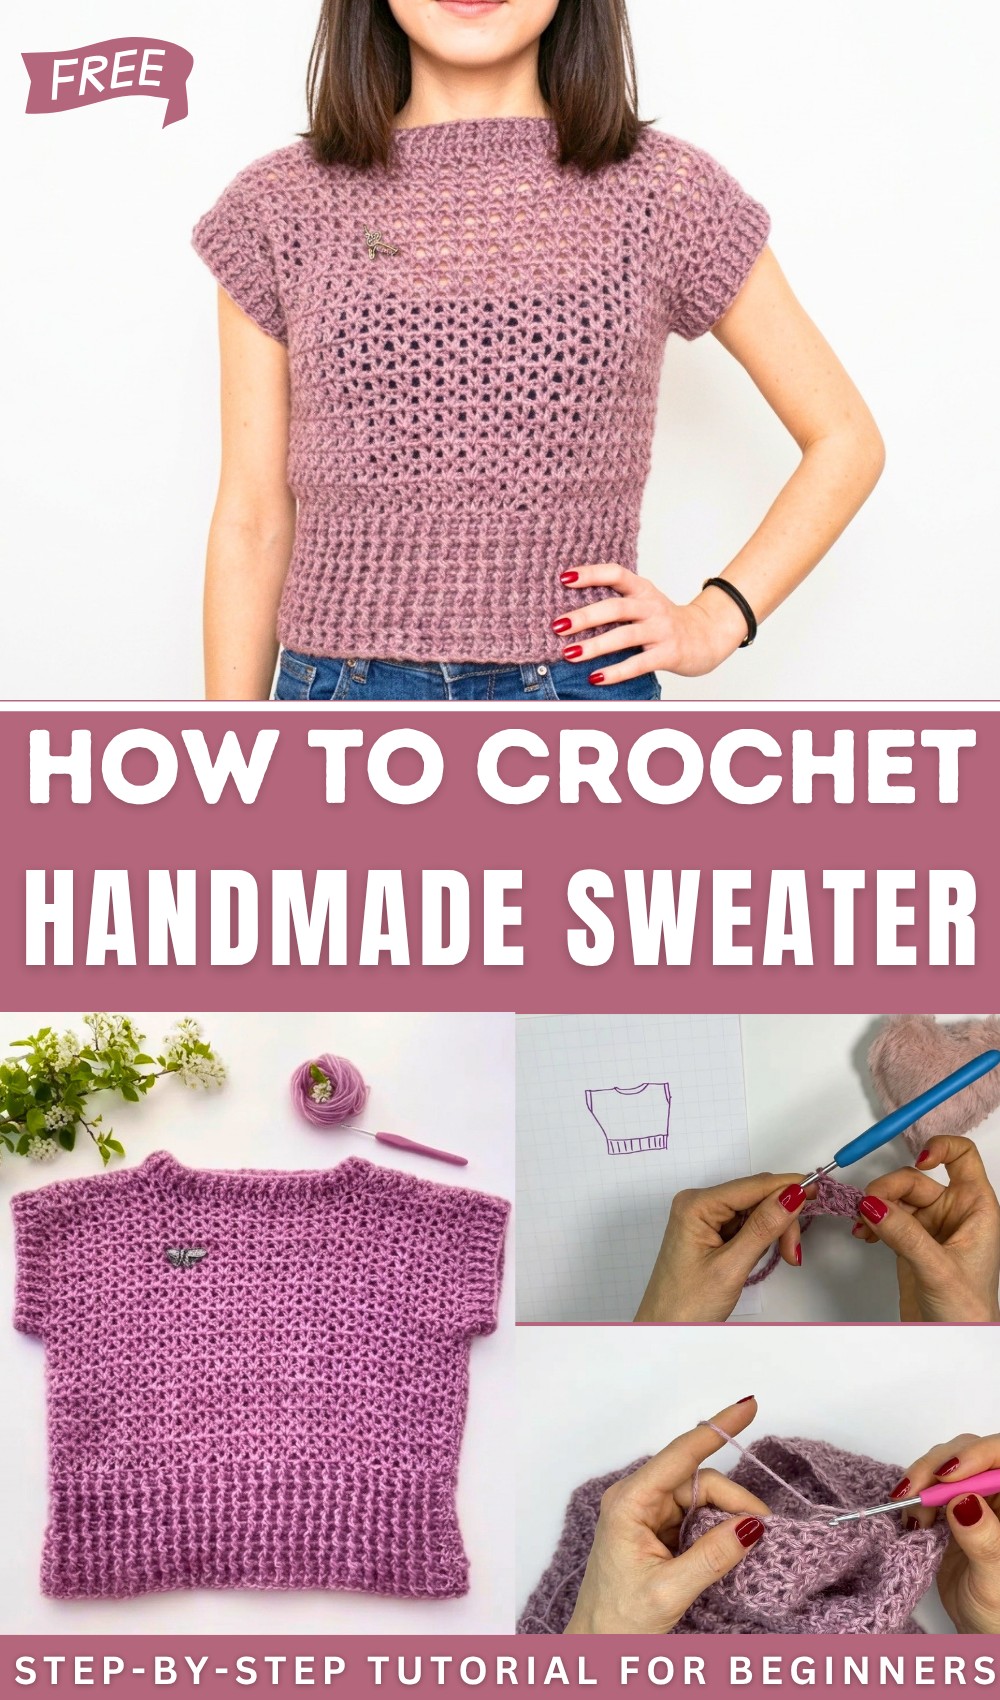
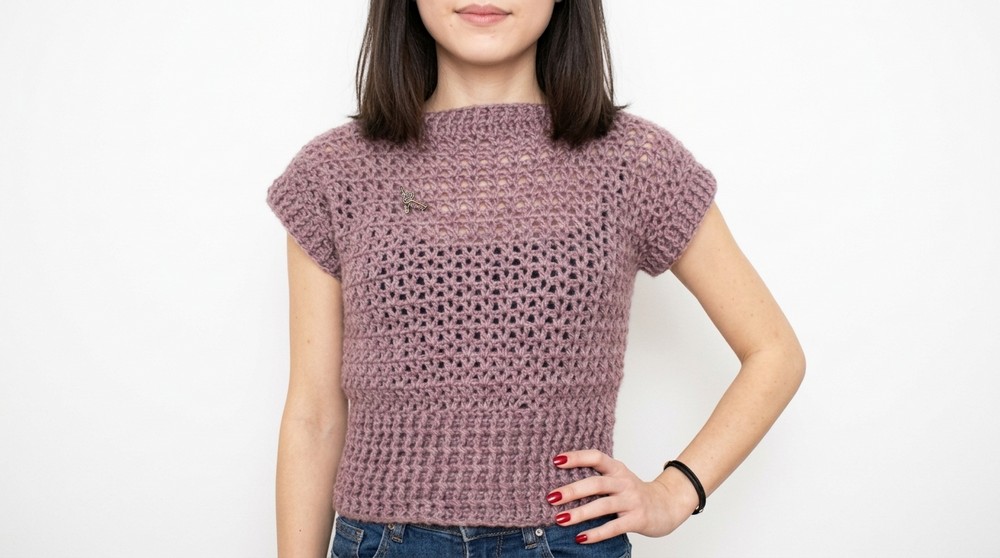
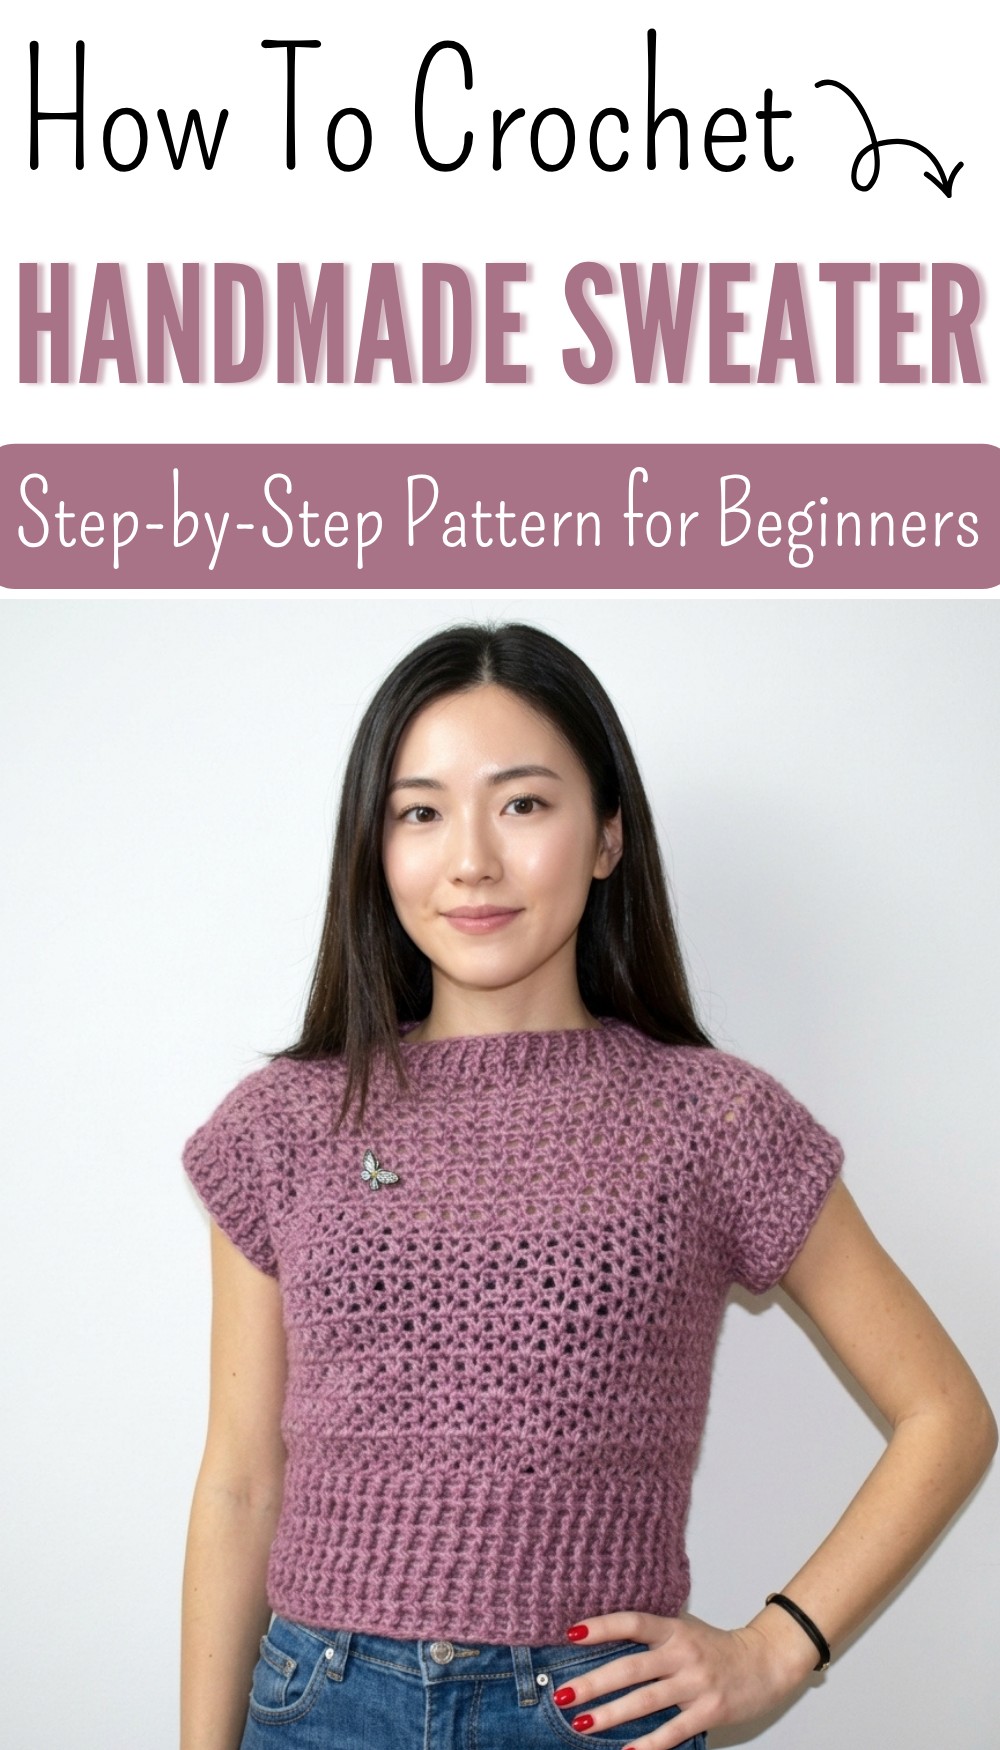
Easy Crochet Sweater With Free Pattern Using Just 100g of Yarn
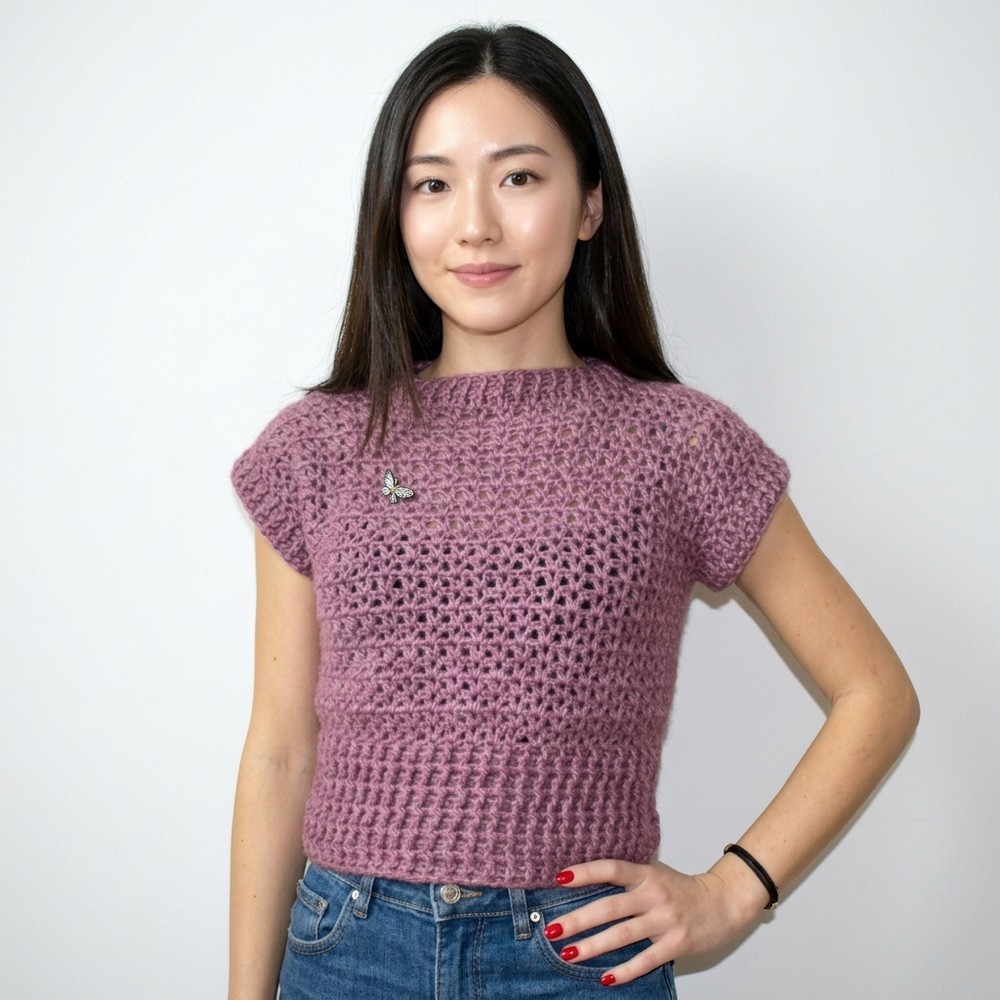
Bring to life a soft, lightweight crochet sweater with just 100g of yarn for size S, and customize colors and sizes to match your personal style effortlessly.
Creating something beautiful with your own hands brings a sense of pride and joy, and a crochet sweater is the perfect example of this. A free crochet sweater pattern is a wonderful way to craft a cozy, stylish garment without spending money on designs. This sweater is not just functional; its beauty lies in the intricate texture of the crochet stitches that create a soft, elegant look. Whether it’s a lightweight option for cool evenings or a thicker sweater to keep you warm in winter, the end result is both fashionable and versatile.
Quick & Simple Crochet Sweater Pattern for Every Size
The design fits perfectly on the body, offering comfort and style for any occasion, whether you’re relaxing at home or stepping out for a casual day. Its flowy yet well-structured appearance flatters any body type with ease. Even a beginner can follow this clear pattern, learning how simple stitches come together to create something so intricate. The process is simple, creative, and rewarding, as the yarn turns into a beautiful sweater crocheted with care. Every stitch holds the charm of handmade love.
Step-by-Step Crochet Pattern: Elastic Textured Shirt
Skill Level
Intermediate
Materials Required
- Yarn: 100% cotton mixed with alpaca or wool (44% cotton, 56% alpaca/wool blend), approx. 440m (480 yards)
- Crochet Hooks:
- 4mm (US G/6): For the ribbing or elastic portion
- 3.5mm (US E/4): For the main textured body
- Scissors
- Tapestry Needle: For weaving in ends and sewing seams
- Stitch Markers: To mark key points like sleeve openings for ease during assembly
Key Abbreviations
- ch: Chain
- sl st: Slip Stitch
- sc: Single Crochet
- dc: Double Crochet
- yo: Yarn Over
- st(s): Stitch(es)
- BLO: Back Loop Only
Special Notes
- Sizing: This pattern is for size S (40 cm wide x 46 cm long). Adjust the initial chain to achieve your desired width for larger or smaller sizes, ensuring it follows the stitch multiple rule.
- Stitch Multiple: A multiple of 2+1 is required for the V-stitch body.
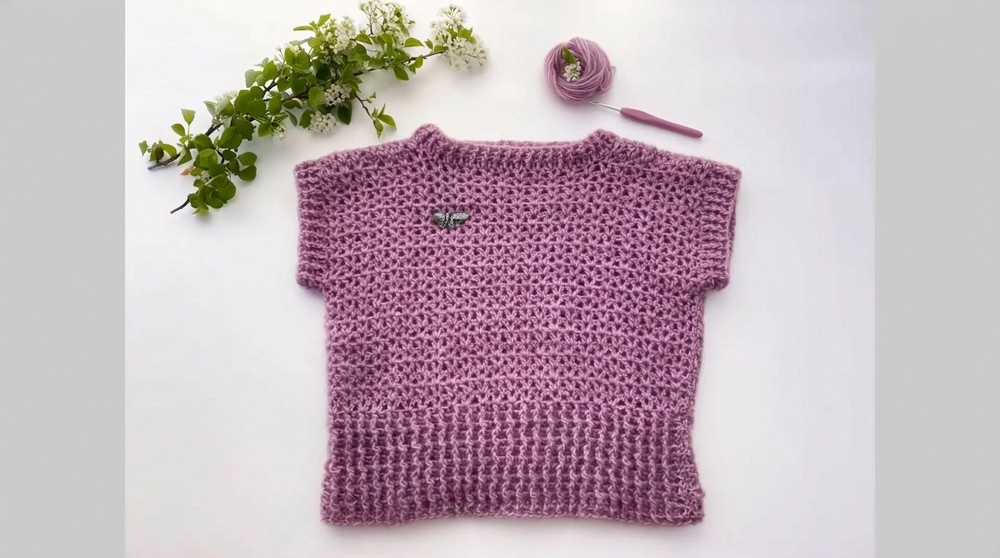
- The shirt consists of two panels (front and back), stitched together at the sides and shoulders, with optional finishing for the sleeves and neckline.
- Customization: Leave the body as is, or extend the length or width based on your preference.
- Gauge Check: Measure the initial chain’s width against the desired dimension before proceeding.
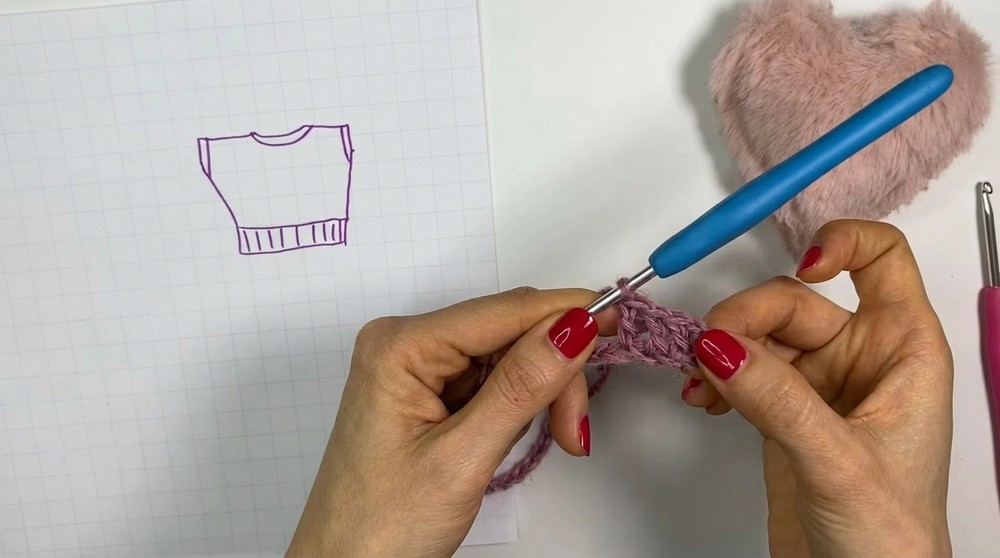
Pattern Instructions
Step 1: Create the Front and Back Panels
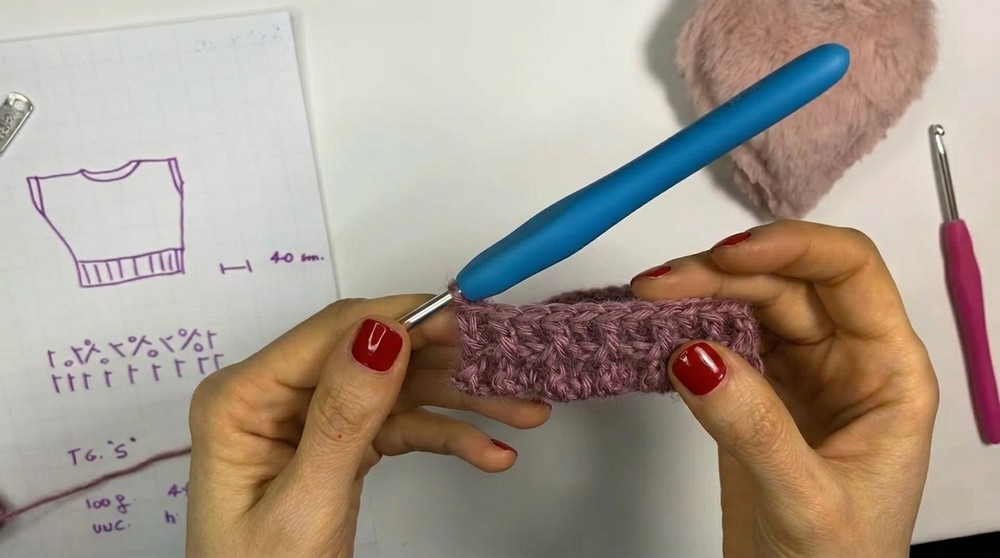
Ribbing Section
- Foundation Chains: Using the 4mm hook, chain 57 ch (or adjust for desired width as per sizing, ensuring stitch multiple is 2+1).
- Row 1:
- Ch 1, sc into each chain across (57 sc for size S).
- Row 2 (Begin Ribbing):
- Ch 1, turn. Work sc into the back loop only (BLO) for each stitch across.
- Repeat Row 2 until the ribbing reaches 11 rows or your desired height for the waistband.
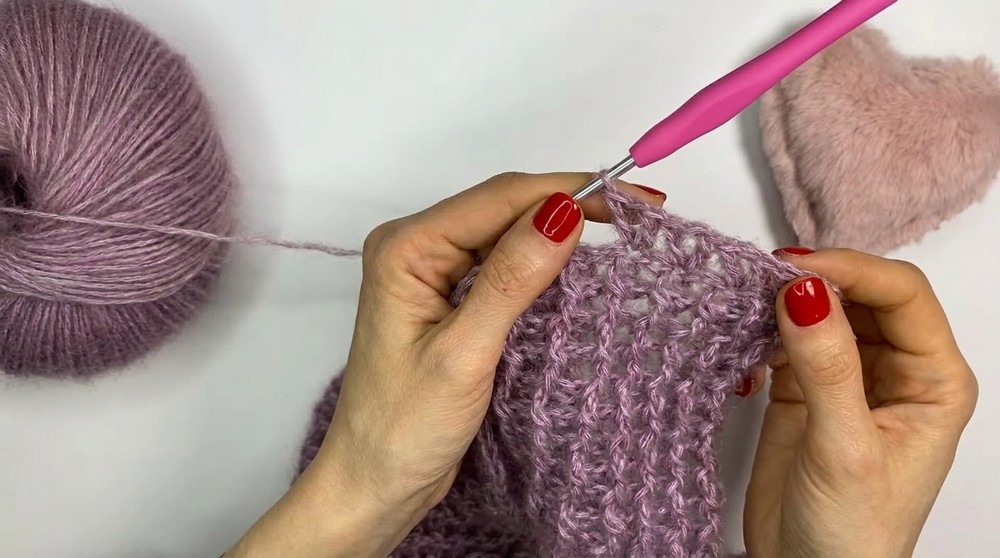
Main V-Stitch Body
- Switch to the 3.5mm hook for a tighter texture for the body.
- Row 1:
- Ch 1, turn. Dc into the first stitch.
- Skip 1 st, work (dc, ch 1, dc) into the next st (this is a V-stitch).
- Repeat (skip 1, V-stitch) across, ending the row with 1 dc into the last st.
- Row 2:
- Ch 3 (counts as first dc), turn.
- Work a V-stitch in the ch-1 space of each V-stitch from the previous row:
- (Dc, ch 1, dc) into each ch-1 sp.
- End row with 1 dc into the last stitch.
- Repeat Row 2 until the body section (above the ribbing) reaches 22 rows or desired length, leaving space for the shoulder section.
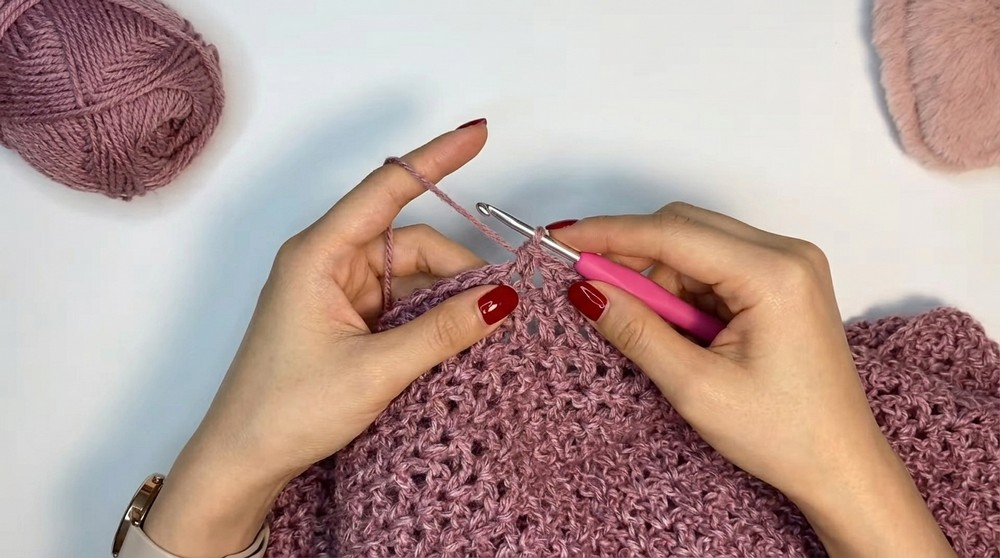
Shoulder Shaping
- To create the shoulder width, leave 7 V-stitches (or desired number for your size) on each side.
- Work the Shoulder Rows:
- Row 1: Ch 3 (counts as first dc), turn.
- Work V-stitches across the first 7 V-stitch spaces, ending with 1 dc into the top of the last V-stitch.
- Row 2: Repeat the same steps as Row 1 above.
- Row 1: Ch 3 (counts as first dc), turn.
- Finish the Shoulder: After completing the two rows, cut and tie off the yarn, leaving a tail for sewing.
- Repeat for the opposite shoulder on the same panel.
Make another panel following the same instructions.
Step 2: Assembly
Seam the Shoulders
- Place the front and back panels right sides together.
- Leaving space for the neckline, sew each shoulder seam using your tapestry needle and whip stitch or mattress stitch.
- For size S, leave a 16 cm (6.5″) head opening.
- Fasten off and weave in ends.
Seam the Sides
- Fold the panels vertically, aligning the sides.
- Mark a 16 cm (6.5″) arm opening from the top using stitch markers.
- Starting from the marker, seam the sides down to the bottom ribbing using your preferred stitching method:
- Whip stitch, mattress stitch, or crochet sl sts together.
- For durability, use the same yarn for seaming.

Step 3: Finishing Touches
Neckline
- Attach yarn at any point along the neckline using the 3.5mm hook.
- Round 1: Work sc into each stitch evenly around the neckline.
- Round 2: Work front post/back post stitches alternately to create a ribbed texture.
- Round 3 (Optional): If you prefer a snug neckline, work another round of ribbing stitches.
- Fasten off and weave in ends.
Sleeves (Optional)
- Attach yarn at the armhole with the 3.5mm hook.
- Round 1: Work sc evenly around the armhole.
- Round 2: Work front post/back post stitches to match the neckline ribbing.
- For longer sleeves, continue with dc rounds or V-stitch rounds until the desired sleeve length is achieved.
- Fasten off and weave in ends.
Final Steps
- Weave in Loose Ends: Use your tapestry needle to hide any remaining yarn tails neatly within the stitches.
- Block the Shirt: Lightly block your shirt to smooth the stitches, even out seams, and perfect the shape.
Final Words
Congratulations! You’ve crafted an elegant and versatile textured crochet shirt, ideal for layering or standalone wear. The mix of ribbing and V-stitch texture adds a sophisticated touch to this project, making it wearable for different occasions.
Tips for Success
- Sizing: Adjust the width of the foundation chains to make the shirt larger or smaller. Always maintain the multiple of 2+1 stitch count for the V-stitch pattern.
- Check Gauge: Measure your stitches periodically to ensure that your shirt fits correctly.
- Yarn Choice: Use lightweight or blended yarn for a seasonal feel. For warmer projects, swap cotton for acrylic or wool.
- Stitch Placement: For clean edges, make sure to maintain consistent stitch placement at the beginning and end of each row.