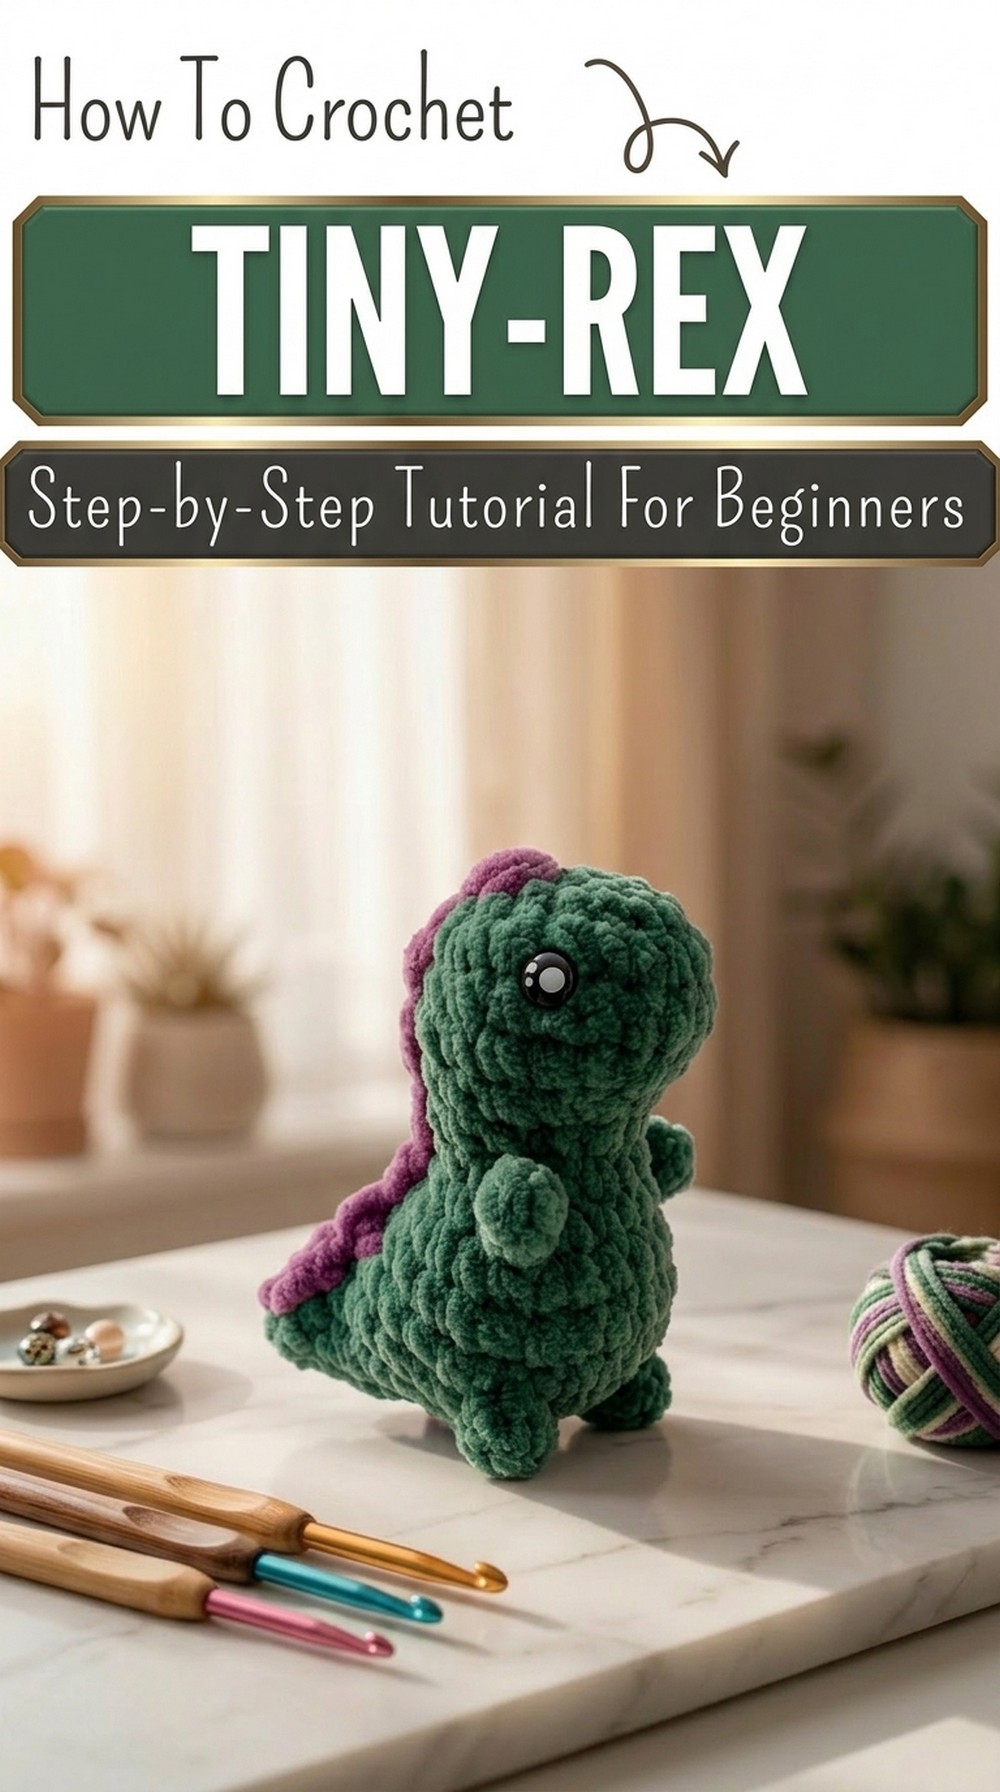
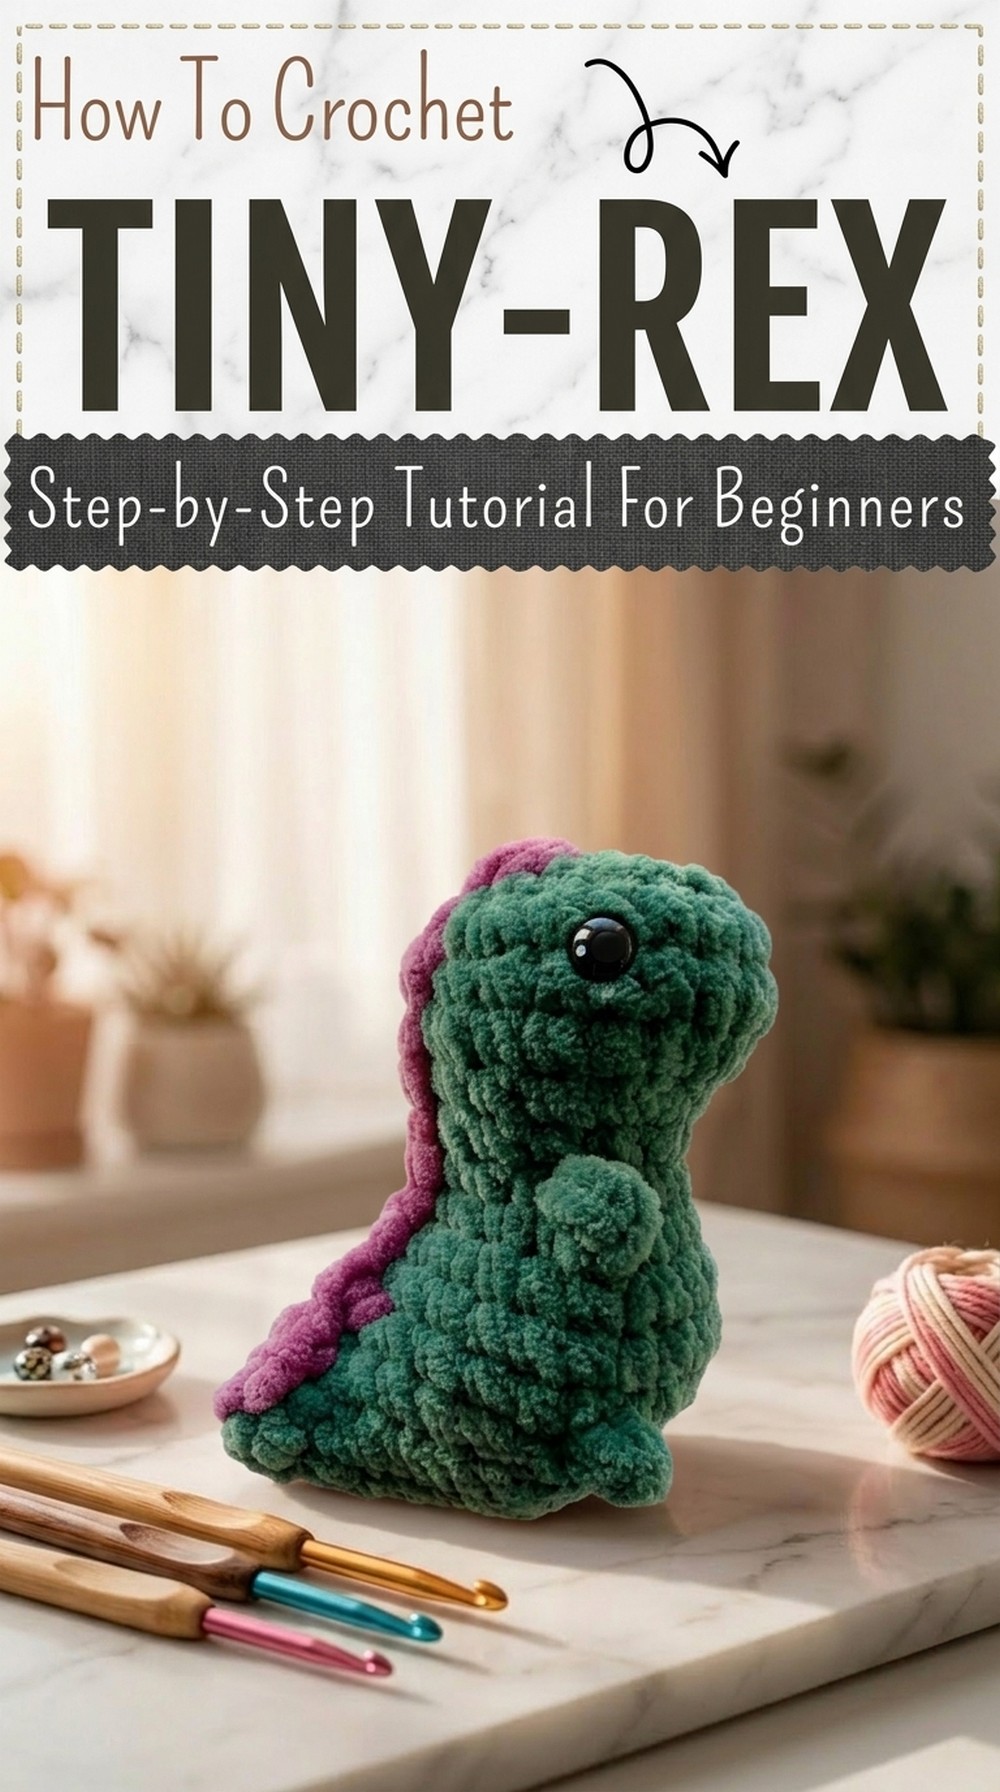
Easy Free Crochet TINY-REX Pattern for Beginners
Let a playful little Trex bring happiness with this Free Crochet TINY-REX Pattern perfect for gifts decor and endless smiles for all ages.
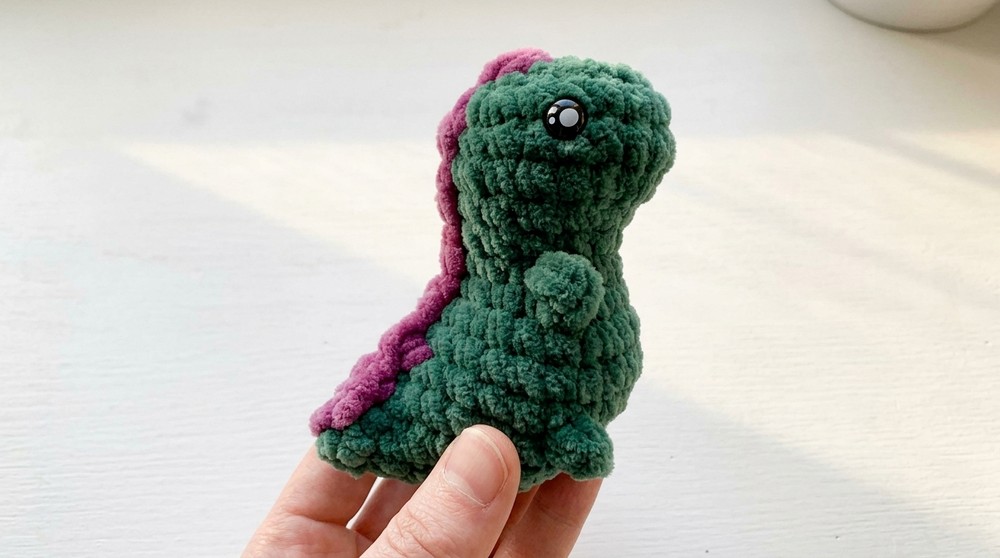
Making a tiny dinosaur with your own hands is a fun and joyful way to show love and care to someone special. The Crochet TINY-REX pattern is perfect for creating a small and cuddly dinosaur that everyone will want to hug. This cute little dinosaur has a big round head tiny arms and a plump body making it look playful and full of personality. Bright colors make it stand out and it can be used as a sweet gift or a room decoration.
Sweet Free Crochet TINY-REX Pattern for Heartfelt Presents
It is soft lightweight and easy to carry which means you can place the little Trex on shelves bags or even give it to children as a lucky charm. The steps are simple to follow and the pattern uses basic stitches for easy learning. Even beginners can make this adorable dinosaur in a short time and enjoy giving or keeping it as a precious handmade memory.
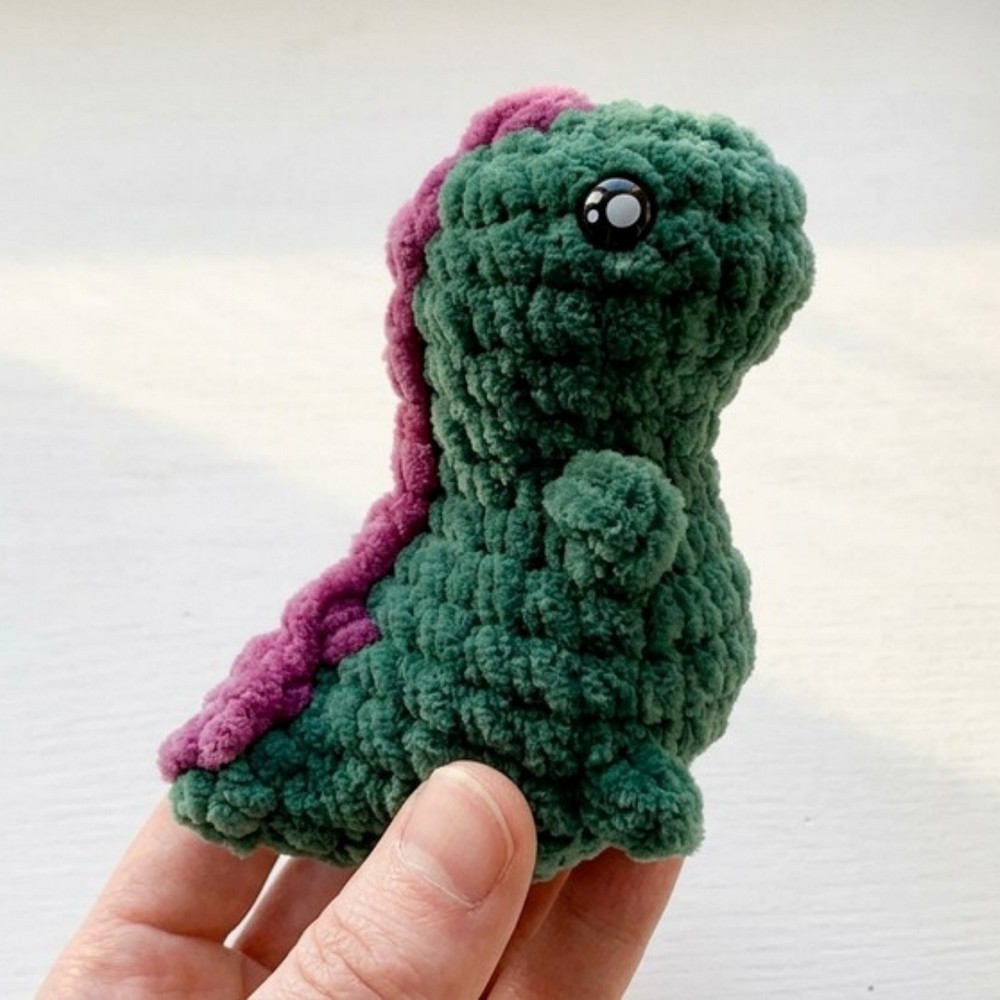
Tiny Rex No-Sew T-Rex Amigurumi
Materials
- Yarn:
- Super bulky/bulky velvet yarn (shown: Hobbii Baby Snuggle) or medium weight (for smaller version)
- Contrasting color for spikes (optional)
- Hook:
- 5.0 mm for plush yarn, or appropriate size for your yarn weight
- Safety Eyes:
- Recommended: 8 mm plastic safety eyes (kawaii style, optional)
- Stuffing: Polyester fiberfill
- Notions:
- Scissors
- Stitch marker (or scrap yarn)
- Yarn needle (to weave in ends only; NO sewing parts!)
Abbreviations (US Terms)
| Abbreviation | Meaning |
|---|---|
| ch | Chain |
| sc | Single Crochet |
| inc | Increase (2 sc in same stitch) |
| dec | Decrease (single crochet 2 together — use invisible decrease if possible) |
| st(s) | Stitch(es) |
| sl st | Slip Stitch |
| puff st | Puff Stitch (see Special Stitches) |
| FO | Fasten Off |
Special Stitches
Invisible decrease: Insert hook in front loops only of next 2 sts, yarn over and pull through both loops, yarn over and pull through both loops on hook.
Puff Stitch (for Arms/Legs):
- Small Puff (arms):
(Yarn over, insert hook in indicated st, yarn over and pull up a loop) x2 (5 loops on hook), yarn over and pull through all, ch 1 to close. - Big Puff (legs):
(Yarn over, insert hook in indicated st, yarn over and pull up a loop) x3 (7 loops on hook), yarn over and pull through all, ch 1 to close.
Notes
- This pattern is worked in a continuous spiral; do not join rounds.
- Use a stitch marker to mark the beginning of each round.
- Pattern is written for plush yarn, but size may be scaled down with thinner yarn and a smaller hook.
- Safety eyes are installed partway.
Pattern
BODY & HEAD
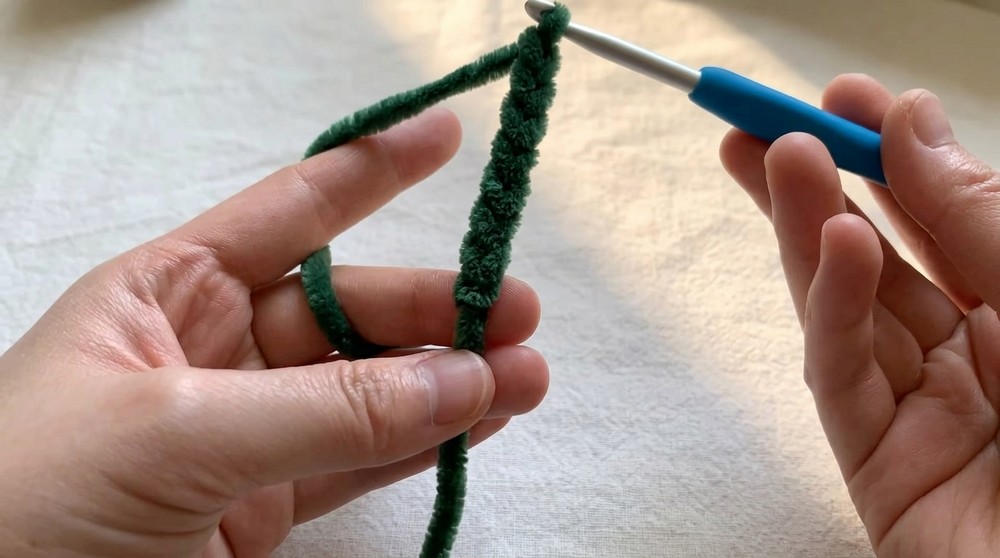
- Ch 6.
- Sc in 2nd ch from hook, sc in next 3 ch, 3 sc in last ch. Rotate to work on underside:
sc in next 3 ch, 2 sc in last ch (same as first/last ch you worked into at beginning of round). (12 sts) - Place stitch marker in first st to mark beginning of round (move up each round).
- [inc, sc 3], [inc] x3, sc 3, [inc] x2 (18 sts)
- Sc in each st around (18)
- Sc 6, [dec] x3, sc 6 (15 sts)
- Sc 4, [dec] x3, sc 5 (12 sts)
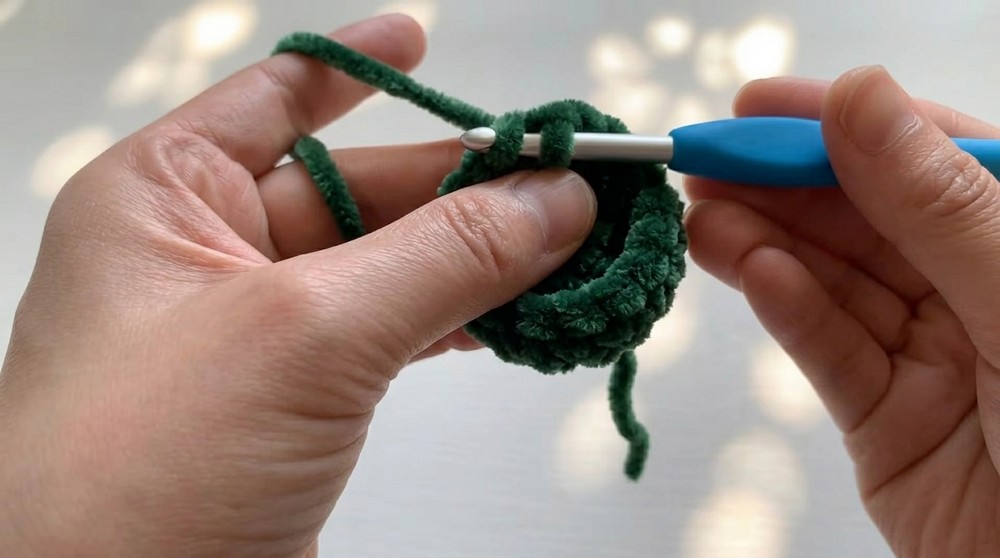
- Insert safety eyes between rounds 2 and 3, approx. 8–9 sts apart, after this round.
- Sc in each st around (12 sts)
- [sc 3, inc] x3 (15 sts)
- [sc 4, inc] x3 (18 sts)
- [sc 2, inc] x6 (24 sts)
- Sc in each st around (24 sts)
- Move to tail position: Center your hook at middle back of dinosaur (add/remove a stitch as needed).
- Ch 5 (tail base). Work back along tail: sc in 2nd ch from hook, sc in next 3 ch.
- Dec over next st and first st of round (joining tail to body).
- Sc 7, [dec] x4, sc 8 (Work into body stitches only for this part.)
- Tail shaping:
- 2 sc along tail
- [dec] x2 along tail
- Sc 2 along tail base
- Sc 6, [dec] x4, sc 6 (body)
- Tail narrowing:
- [dec] x3 along tail
- [sc 2, dec] x4 around body
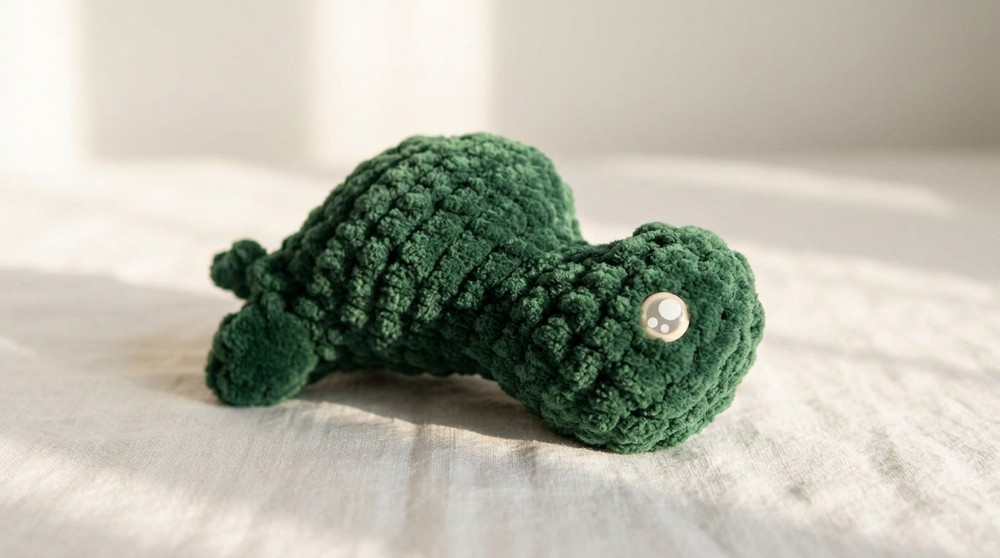
- Stuff body fully before proceeding.
- [dec] x7 (closes tail and body sharply; finish stuffing before last decs)
- Finishing: (sl st, sk 1) x4 around the opening to cinch up hole, FO, weave in end.

ARMS (Make 2, attach directly)
- Find round 7 underneath each eye.
- Pull up a loop of yarn under selected st, small puff st into this st (see above for instructions), ch 1, FO, use tail to quickly hide inside.
LEGS (Make 2, attach directly)
- Find round 11, even with/below the arms.
- Pull up a loop of yarn, big puff st (see above), ch 1, FO, weave tail through to hide.
SPINES (Optional, contrast or body color)
- Locate top center of head (between the eyes).
- Pull up a loop, work a repeat down the back as follows:
- Small puff st into st, ch 1, sl st in next st.
- Repeat down the back and onto the tail as desired.
- When finished, sl st to secure, FO and weave in ends.
Assembly
- This project is fully NO SEW—arms, legs, and spikes are made directly onto the body.
- Weave in all yarn tails neatly using your crochet hook or a needle.

Pattern Correction
- Pay special attention to centering the tail as described—if needed, add or remove stitches to position your tail at the true center back of the dino.
- Amigurumi tension should be tight; if your stuffing shows, go down a hook size.
Tips
- Use a contrasting color for spikes for extra cute effect.
- When using velvet/plush yarn, use a smaller-than-recommended hook for very tight stitches.
- Place safety eyes immediately after the decreases for the best effect.
- Stuff very firmly for the plumpest, most even shape.
- To attach to a keychain, after finishing, thread a split ring through the top spikes or head.
Conclusion
Your quick, no-sew T-Rex plush is complete! This delightful, chubby little dinosaur is perfect for gifts, party favors, or keychain companions. The method is easily adaptable to other yarn weights or for variations—try new color combos or different facial expressions for endless fun.