Free Crochet Name Customised Pouch Pattern with Clear Instructions

Personalize your style with the free crochet name customised pouch pattern that lets you create unique and practical accessories tailored just for you.
Adding a special touch to everyday accessories makes them truly meaningful and unique. The Free crochet Name Customised Pouch pattern, shared through the insightful tutorial by Nozishandwork official, is a wonderful way to create a charming and distinctive item that suits any style or occasion.
Free Crochet Name Customised Pouch Pattern & Tutorial
This pouch is a versatile and practical accessory that serves as a stylish holder for small essentials like makeup, coins, or keys. Its customized name feature adds a delightful flair, making it a perfect gift idea for birthdays, celebrations, or thoughtful keepsakes. The project combines decorative appeal with everyday use, turning a simple pouch into something memorable.

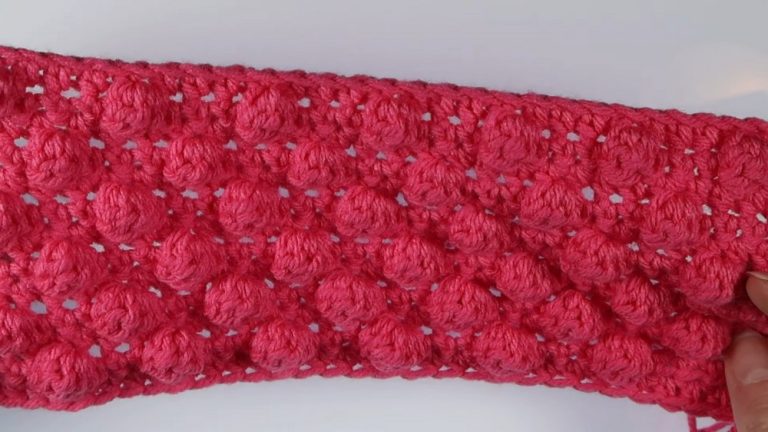
The pouch impresses with its neat rectangular shape and compact size, making it easy to carry or slip into a bag. The texture comes from soft acrylic yarn worked into tight double crochet stitches, which provide durability and a smooth finish. Finishing touches like the delicate petals along the edges and the option to add beads or buttons make the design stand out beautifully.
The pattern’s clever use of color and customization options allow endless creativity, from bold colors to subtle pastels. Its lightweight feel and sturdy build make it both eye-catching and highly functional. This pouch balances flair and practicality, truly reflecting personality through its unique handmade charm.


Crochet Pattern – Name-Customized Coin Pouch
This coin pouch pattern combines practical functionality with personalized charm by incorporating a crochet flap, textured petals, and an optional name customization. Ideal as a thoughtful gift or personal accessory, this pouch is both decorative and compact, perfect for carrying small items like coins or cards.
Skill Level
Beginner to Intermediate
The pattern employs simple crochet techniques—double crochet (dc), half double crochet (hdc), and slip stitches—with added embellishments like floral petals and name customization. Clear attention to detail and assembly is required.
Materials Needed
- Yarn: 100% Acrylic yarn in 3 colors for the pouch body, flap, and petals
- Hook: 3.5 mm crochet hook
- Tools: Scissors, yarn needle (darning needle), stitch marker
- Extras: Decorative pearls (optional), button for closure
Special Stitches Used
- Triple Crochet (tr): Yarn over twice, insert hook into stitch, yarn over and pull up a loop, (yarn over, pull through two loops) three times.
- Half Double Crochet (hdc): Yarn over, insert hook into stitch, yarn over and pull up a loop, yarn over again, pull through all three loops on the hook.
Stitch Abbreviations
| Abbreviation | Meaning |
|---|---|
| ch | Chain |
| dc | Double Crochet |
| hdc | Half Double Crochet |
| tr | Triple Crochet |
| sl st | Slip Stitch |
| st(s) | Stitch(es) |
(US crochet terminology is used.)
Useful Tips
- Stitch Counts: Carefully count stitches at the end of each row or round to avoid shaping issues.
- Name Customization: Slide beads carefully onto the yarn tail before securing the final end for smooth integration.
- Assembly: Use stitch markers to align flap placement on the pouch for cleaner finishing.
- Petals: To ensure even spacing, begin petal creation at any stitch and consistently work around the flap edge.
Step-by-Step Crochet Coin Pouch Pattern
1. Main Pouch Body (Rounds 1–7)
Foundation Chain and First Round
- Step 1: Create a slip knot and chain 20.
- Step 2: Skip the first 2 chains. Begin working dc into the 3rd chain from the hook, continuing 1 dc in each chain across.
- Step 3: In the last chain, work 3 dc to round the edge.
- Continue working on the opposite side of the chain with 1 dc in each stitch, ending with 3 dc in the final space.
- Step 4: Sl st to the first dc to join, ensuring a total of 40 stitches.


Rows 2–7
- Step 1: Ch 2 (counts as height), and work 1 dc in every stitch around the pouch.
- Step 2: At the end of each row, join with a sl st into the first dc stitch.
Repeat this for a total of 6 additional rows (7 rows total), creating the cylindrical shape of the pouch.

Name Customization
- Step 1: String beads and pearls onto the yarn tail before securing the final end. Carefully integrate beads into the tail for a personalized touch.

2. Flap Creation (Rounds 1–5)
The flap is worked in rounds to create a circular shape that fits over the pouch opening.
Round 1
- Step 1: Start with a magic ring.
- Step 2: Chain 1, and work 8 hdc into the ring.
- Step 3: Sl st to join, ensuring a clean round shape.
Round 2
- Step 1: Ch 1, and work 2 hdc in every stitch around for a total of 16 stitches.
- Step 2: Sl st to join.

Round 3
- Step 1: Ch 1, and follow the sequence:
- Work 1 hdc into the first stitch, 2 hdc into the next stitch.
- Repeat this sequence around for a total of 24 stitches.
- Step 2: Sl st to join.
Round 4
- Step 1: Ch 1, and follow the sequence:
- Work 1 hdc into the next 2 stitches, 2 hdc into the following stitch.
- Repeat this sequence around for a total of 32 stitches.
- Step 2: Sl st to join.
Round 5
- Step 1: Ch 1, and follow the sequence:
- Work 1 hdc into the next 3 stitches, 2 hdc into the following stitch.
- Repeat this sequence around for a total of 40 stitches.
3. Adding Petals (Decorative Edge)
The petals add an elegant texture around the flap edge.
- Step 1: Insert the hook into any stitch on the flap edge, ch 2, and work 2 tr into the same stitch.
- Step 2: Ch 2, and sl st into the next stitch to anchor the petal.
Repeat this pattern all around the flap edge to form evenly spaced petals.
4. Assembly
Attach the Flap
- Step 1: Place the flap over the back of the pouch, ensuring it aligns symmetrically.
- Step 2: Using a yarn needle, sew the flap securely onto the pouch, stitching along the flap’s lower edge.
Attach the Button Closure
- Step 1: Sew the button onto the front of the pouch, aligning with the flap’s center point for secure closure.

Customization Options
- Personalized Designs: Use decorative beads, pearls, or buttons to modify the pouch’s aesthetic.
- Alternative Petals: Replace triple crochet petals with scallop or shell stitch designs for variety.
- Color Variations: Experiment with bold or muted shades for different seasonal themes.
- Size Modifications: Increase the foundation chain and stitch rounds to accommodate larger dimensions.
Conclusion
This name-customized coin pouch pattern combines functionality, creative flair, and personalization, making it both a practical accessory and a thoughtful gift. Easy to adapt and embellish, the pouch offers versatility while allowing crochet enthusiasts to express their style with decorative finishing touches.