Hanging Plant Vines Free Crochet Pattern for Natural Home Vibes

Decorate your home with simple crochet hanging plant vines that look like real greenery and make any space feel fresh, warm, and natural with ease.
Bring a touch of nature indoors with stunning crochet vines that look like beautiful hanging plants. These handmade vines are a perfect way to brighten up any space, adding charm and a calming green touch to your decor. Made using simple crochet techniques, they are easy to craft and ideal for decorating your walls, windows, shelves, or even creating plant-like decor without the need for watering.
Free Crochet Hanging Plant Vines Pattern

The delicate details and realistic appearance of the vines make them a beautiful decoration for homes, offices, or any relaxing space. Their lightweight design means they can be hung anywhere effortlessly. You can even customize the length, shape, or color to match your unique style.
Crochet hanging plant vines are a wonderful choice if you love plants but struggle with keeping them alive or maintaining real greenery indoors. They’re not only creative but also long-lasting, making them perfect for all-year-round decoration. Add warmth and personality to your room with these unique crochet vines and enjoy a cozy, lively space that feels connected to nature.
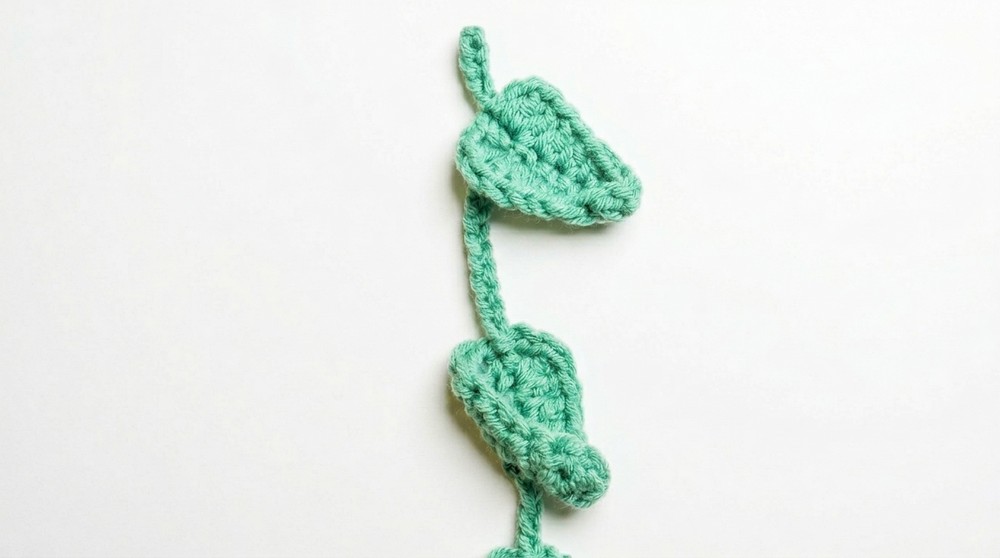
Crocheted Plant Vine with Leaves Pattern
Materials
- Yarn:
- Worsted weight yarn or DK (#3) weight yarn in light green (any shade). For smaller or more delicate leaves, thinner yarn can be used.
- Example: Cotton or acrylic yarn for versatility and texture.
- Hook:
- 3.5mm crochet hook (or suitable size to match your yarn choice).
- Notions:
- Scissors.
- Yarn Needle (for weaving in ends).
Gauge
Gauge is not critical for this pattern. However, the approximate gauge for worsted weight yarn using a 3.5mm hook is:
- 16 double crochets (dc) = 4 inches (10 cm).
Finished Size
The finished size depends on the number of leaves and the length of the connecting chains. A vine with 5 or 6 leaves will be around 12–14 inches (30–35 cm) long, with each leaf measuring:
- Larger Leaf: 2 inches (5 cm) wide by 3 inches (7.5 cm) long.
- Smaller Leaf: 1.5 inches (4 cm) wide by 2 inches (5 cm) long.
Customization Tip: Extend the length of the vine by adding more chain stitches and crocheting more leaves.
Special Techniques
- Double Crochet (dc): Yarn over, insert hook into stitch, yarn over, pull through, yarn over, pull through 2 loops, yarn over, pull through remaining 2 loops.
- Double Crochet Increase (dc-inc): Work 2 dc into the same stitch.
- Half-Double Crochet (hdc): Yarn over, insert hook into stitch, yarn over, pull through, yarn over, and pull through all 3 loops on the hook.
- Single Crochet (sc): Insert hook into the stitch, yarn over, pull through, yarn over, pull through 2 loops.
- Slip Stitch (sl st): Insert hook into stitch, yarn over, and pull through both loops on the hook.
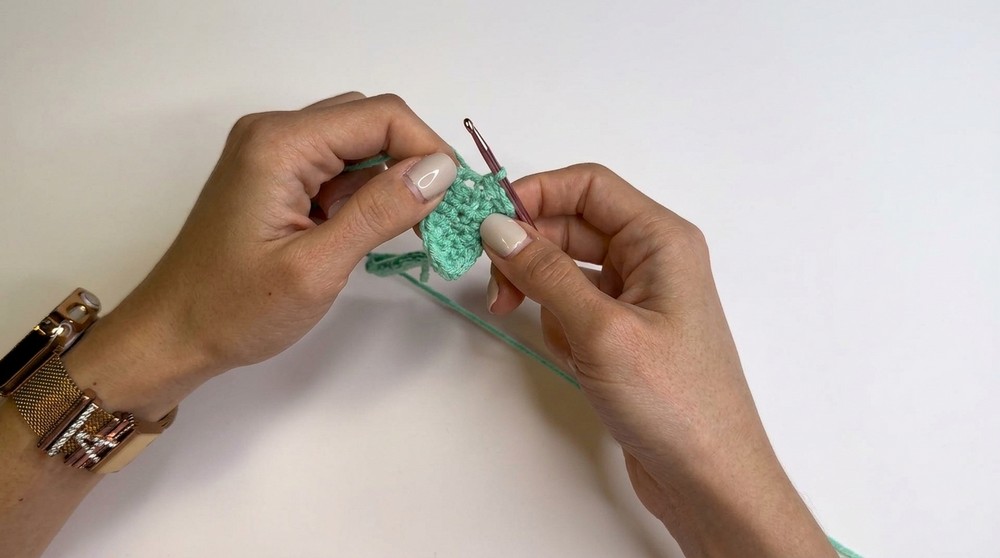
Pattern Instructions
Step 1: Preparing the Base
- Foundation Chain:
- Make a slip knot and chain 9 chains.
- Tip: The initial chain forms part of the vine that connects the leaves. Adjust the number of chains between leaves to increase or decrease the spacing of the leaves along the vine.

Step 2: Creating the First Leaf (Large Leaf)
- Chain Leaf Base:
- Chain 8 stitches.
- Work into the Chain Base:
- Starting from the third chain from the hook:
- 2 dc into the same chain (dc-inc).
- 1 dc into the next chain.
- 1 hdc into the next chain.
- 1 hdc into the next chain.
- 1 sc into the next chain.
- 1 sc into the last chain.
- Starting from the third chain from the hook:
- Work on the Opposite Side of the Chain:
- Chain 1, and continue working on the opposite side of the foundation chain:
- 1 sc into the same stitch where the last sc was worked.
- 1 sc into the next stitch.
- 1 hdc into the next stitch.
- 1 hdc into the next stitch.
- 1 dc into the next stitch.
- 2 dc into the next stitch (dc-inc).
- Chain 1, and continue working on the opposite side of the foundation chain:
- Finishing the Leaf:
- Chain 2, and sl st into the same stitch as the last dc-inc to form the tip of the leaf.
- Transition to the Next Leaf Base:
- Chain 9 stitches, which will connect this first leaf to the second leaf.

Step 3: Creating the Second Leaf (Small Leaf)
- Chain Leaf Base:
- Chain 7 stitches.
- Work on the Chain Base:
- Starting from the second chain from the hook:
- 1 sc into each of the next 6 chains.
- Starting from the second chain from the hook:
- Work on the Opposite Side of the Chain:
- Chain 2, and continue working on the opposite side of the foundation chain:
- 2 dc into the same stitch (dc-inc).
- 1 dc into the next stitch.
- 1 hdc into the next stitch.
- 1 hdc into the next stitch.
- 1 sc into the next stitch.
- 1 sc into the last stitch.
- Chain 2, and continue working on the opposite side of the foundation chain:
- Finishing the Leaf:
- Chain 1, and sl st into the starting stitch of the double crochet increase to form the tip of the leaf.
- Transition to the Next Leaf Base:
- Chain 9 stitches to move to the next leaf.
Repeating and Customizing Leaves
- Alternate Large and Small Leaves:
- Follow Step 2 to create another large leaf.
- Follow Step 3 to create another small leaf.
- Customize the Number of Leaves and Spacing:
- Continue crocheting alternating leaves until the vine reaches the desired length.
- Adjust the spacing between leaves by increasing or decreasing the number of chains connecting the leaves.

Finishing
- Fasten Off:
- When the vine reaches the desired length, fasten off, leaving a 6-inch tail.
- Use the yarn needle to weave in and secure all loose ends.
- Block (Optional):
- Lightly block the finished vine to smooth it out and flatten the leaves, ensuring an even and polished final look.
- Decorative Use:
- The vine can be hung, draped, or added to existing decor. Attach wires to make it more flexible or add embellishments like flowers or beads for a personalized touch.

Tips for Success
- Even Tension: Maintain an even tension for uniform leaves.
- Yarn Choice: Use sturdy yarn for structure or softer yarn for a flowy effect.
- Experiment with Colors: Combine different shades of green or use variegated yarn for a realistic plant look.
- Gauge-Free: This project is gauge-free, but if your tension is too tight, consider using a slightly larger hook for ease.
Conclusion
The crocheted vine with leaves is a versatile and visually appealing pattern suitable for beginners and advanced crocheters alike. The alternating large and small leaves add variety to the design, while the chaining allows for easy customization of length and spacing. Whether used as wall decor, table garland, or part of a larger project, this plant-inspired crochet creation is sure to add a touch of natural beauty to your space.
Important Remarks
- With its alternating leaf sizes and simple yet elegant structure, this is a perfect project for mastering foundational crochet techniques.
- Personalize it further with tiny flowers, beads, or even attaching multiple vines together for a fuller plant decoration.