Luxurious Free Crochet Hood Pattern to Pamper Yourself
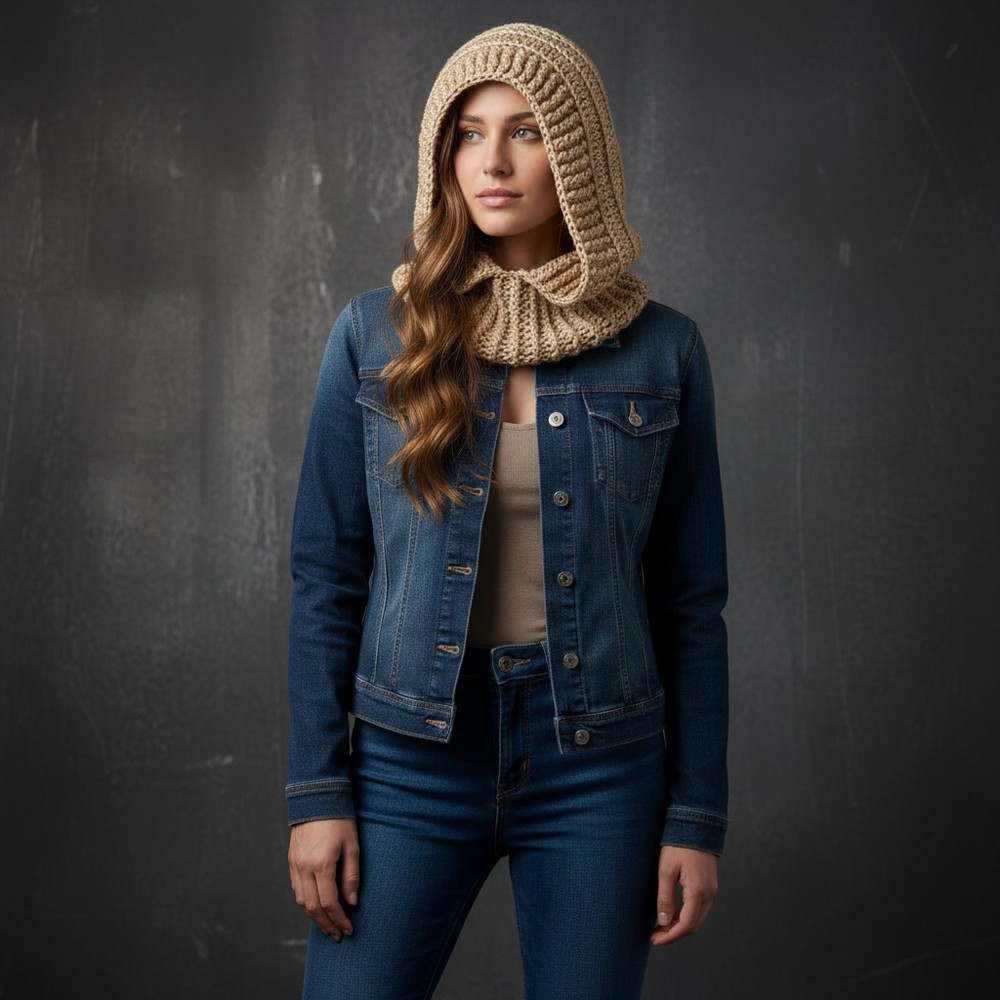
Upgrade cold-weather outfits with this free crochet hood pattern that’s blend comfort and style for beginners seeking a cozy accessory.
Looking for a simple way to stay warm and stylish during chilly mornings or breezy evenings? With a crochet hood pattern, anyone can cover their head and stay comfortable no matter the weather. This cozy hood comes in many colors and shapes, letting a person match their favorite clothes or show off their personality. The instructions are easy to follow, making it perfect for those with little reading experience.
Warm Free Crochet Hood Pattern for Fall & Winter Vibes

Besides warmth, the hood offers protection from rain and wind, making outdoor trips pleasant and worry-free. Each piece feels special because it’s made with care, and that handmade touch brings joy to anyone who wears it. A crochet hood pattern brings together beauty, comfort, and usefulness in a way everyone can enjoy.

Free Crochet Hood Pattern
Materials
- Yarn: 200 grams (approx. 430 yards) of medium weight (worsted #4) acrylic yarn, or any similar yarn (approx. 3 mm thickness)
- Crochet hook: 5.0 mm (H/8) or size to match gauge
- Notions:
- Scissors
- Yarn/tapestry needle
- Measuring tape
- Stitch markers (optional)
Abbreviations (US Terminology)
| Abbreviation | Meaning |
|---|---|
| ch | chain |
| sl st | slip stitch |
| sc | single crochet |
| hdc | half double crochet |
| dc | double crochet |
| fpdc | front post double crochet |
| bpdc | back post double crochet |
| st(s) | stitch(es) |
| rep | repeat |
| RS | right side |
| WS | wrong side |
Special Stitches:
- Fake dc (Standing double crochet): This replaces the starting ch-3 at the beginning of a row to help create straighter edges. See instructions below.
Notes & Special Instructions
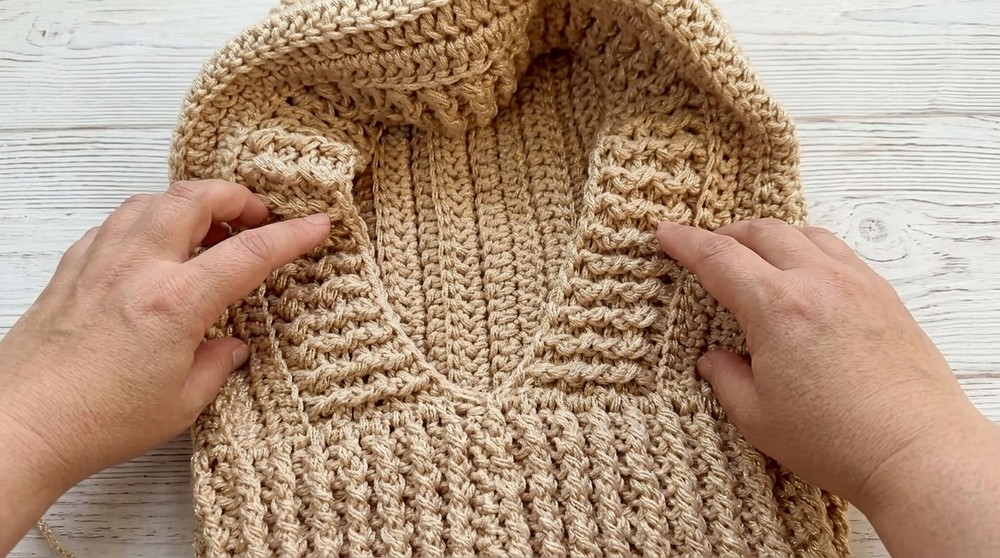
- This pattern is written in one size—fits average adult female (measurements: hood height ~33 cm, total height ~43 cm, hood width ~27 cm, neck width ~30 cm).
- You will first work flat to make the hood, then join and work in the round for the collar.
- The “fake dc” (standing double crochet) is an optional technique for a neater edge:
- Pull up a loop to the height of a dc, yo, insert hook into st, pull up a loop, yo, pull through 2, and yo, pull through 2.
- Or you can substitute with ch 3 at the row beginning.
- All rows and rounds start with a “fake dc” for non-gappy, neat edges, unless otherwise noted.
Pattern
1. Hood (worked flat)
Foundation:
Ch 40 (to measure ~35 cm in height; adjust for your preferred hood height).

Row 1 (RS):
- Do NOT count the first turning chain as a stitch.
- Fake dc (or ch 3), work 1 dc into back bump of each ch across (39 dc).
- On the last ch, make 5 dc into that ch (this curves the work to make the top of the hood).
- Now continue on the underside of the foundation chain, working 1 dc into the remaining two loops of each ch across (39 dc).
- (Total stitches for first flat section: 39 + 5 + 39 = 83 dc.)

Row 2:
- Turn, fake dc (or ch 3), working into back loops only, 1 dc in each st across to the 5-stitch curve.
- Work 1 dc in each of the 5 curve stitches.
- Continue back down the other side, 1 dc in back loop only of each st to end.
Rows 3–14:
- Rep Row 2 until your hood is approximately 23 cm (or 14 rows as model).

For a Neat Edge:
- Always use the fake dc (or ch 3) at the start of the row for a straighter edge.
2. Hood Elastic (Ribbed Edge)
Switch to double crochet ribbing for the remaining rows of the hood.
Row 15:
- Turn, fake dc, fpdc in next st, bpdc in next st; repeat [fpdc, bpdc] across row, ending with 1 dc in the last st.
Rows 16–18:
- Rep Row 15 (continue alternating [fpdc, bpdc]).
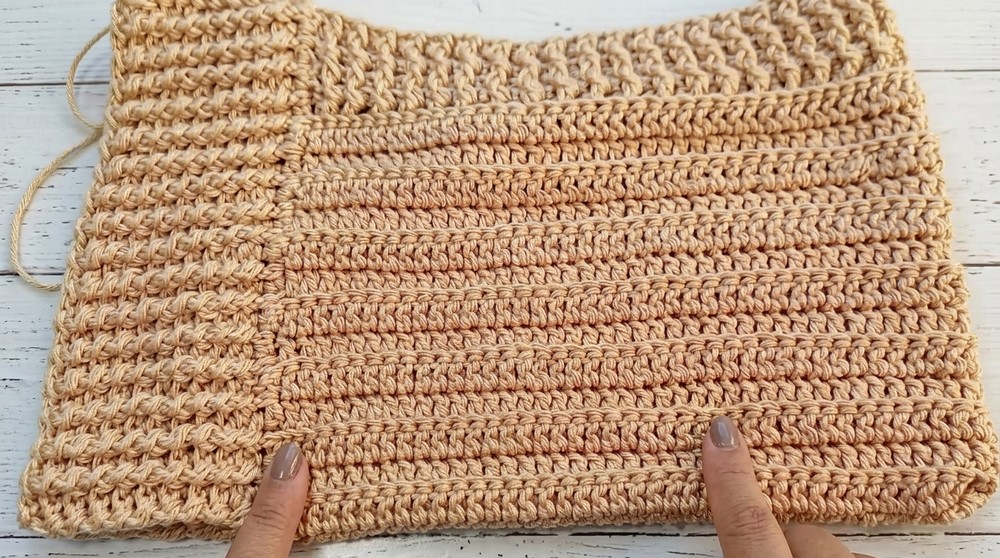
Adjust total ribbing rows to preference.
3. Join for Cowl/Collar (worked in the round)
Joining:
- Fold hood so ends meet.
- With RS facing, sl st last stitch to first stitch to form a tube for the cowl/collar base.
4. Collar/Neck in the Round
Set-up Round:
- Working into the edge of the hood/collar opening, pick up and work as follows:
- For each row-end, work 2 dc (into both loops), all the way around the opening.
- (The stitch count should be an even number for the ribbing.)
Join with sl st to top of first st.
Round 2 (and all rounds):
- Ch 1 (does not count as a stitch),
- Repeat fpdc in next st, bpdc in next st around.
- Join with sl st to first fpdc.
Repeat this round until the collar measures your desired height (10–12 cm for standard, up to 20 cm for double-height collar).
5. Finishing
- Fasten off with a sl st, cut yarn, and pull through last loop.
- Weave in all yarn tails using yarn needle.
- For the start/end yarns at the hood and collar, always hide tails vertically and horizontally within the rib for best security, turning the work wrong side out.
- Block your work if desired for extra drape.
Conclusion
Your seamless crochet hooded collar is complete! This cowl is warm, practical, soft, and sits beautifully, all with no sewing or seams. Enjoy your new cozy creation—perfect for chilly days and outdoor adventures.
Pattern Corrections & Tips
- Customize the height/width by adjusting the number of starting chains or rows.
- Try it on! Check your measurements as you go (especially when switching to the collar) for a perfect fit.
- No “holey” ribbing: Always alternate fpdc and bpdc, and work the first and last stitches of each row as standard dc for a neat edge.
- For a neater join when you work in the round, use an invisible join (sl st) and never count the turning ch as a stitch.
- If you’re new to post stitches (fpdc/bpdc), practice on a swatch before starting the main piece.