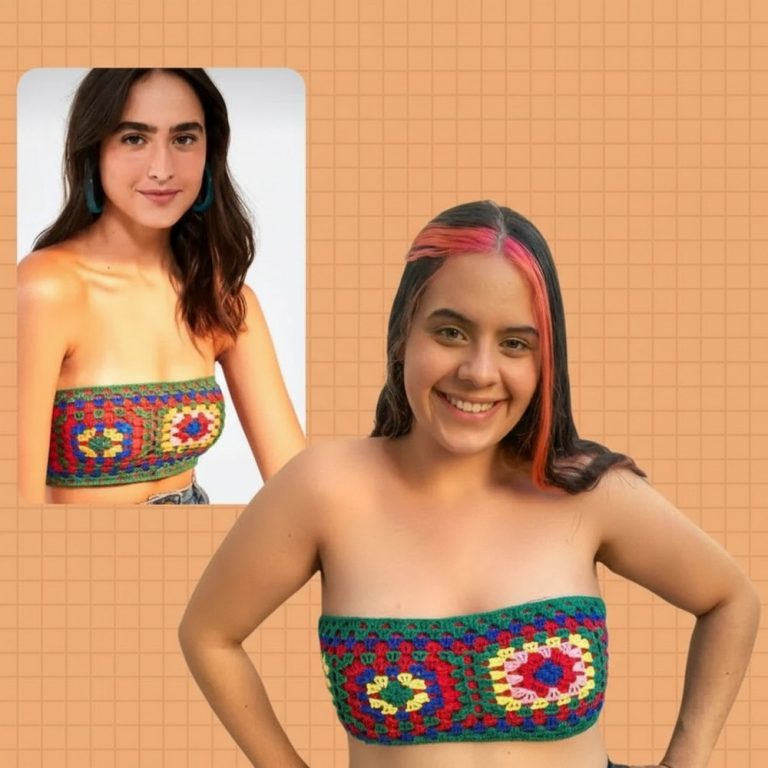
Relaxed Crochet Square Neck Top Perfect for Casual Outfits

Rock this summer in a gorgeous look with this Free Crochet Square Neck Top Pattern that’s perfect airy piece for your seasonal wardrobe.

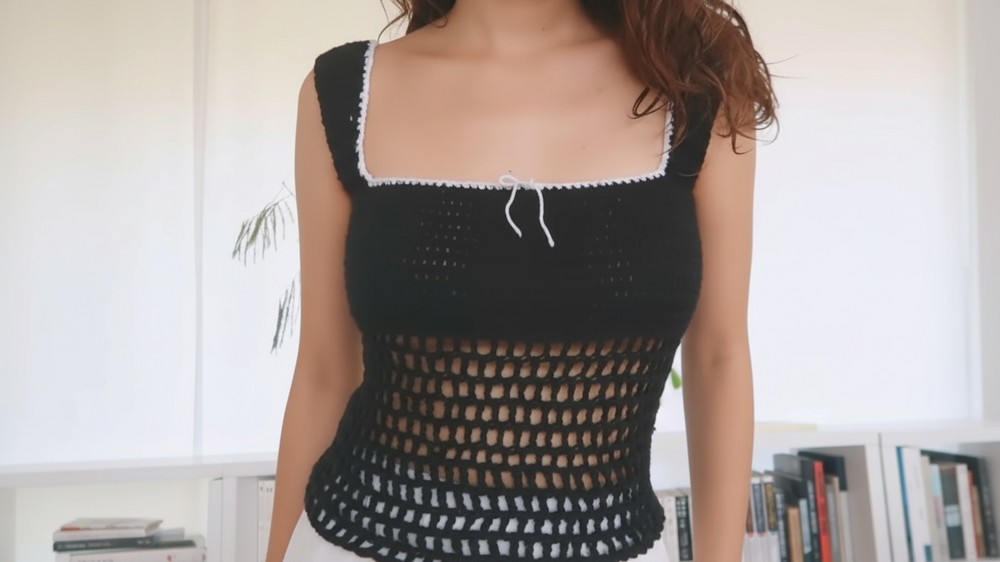
Boho Crochet Square Neck Top Great for Festivals and Vacations
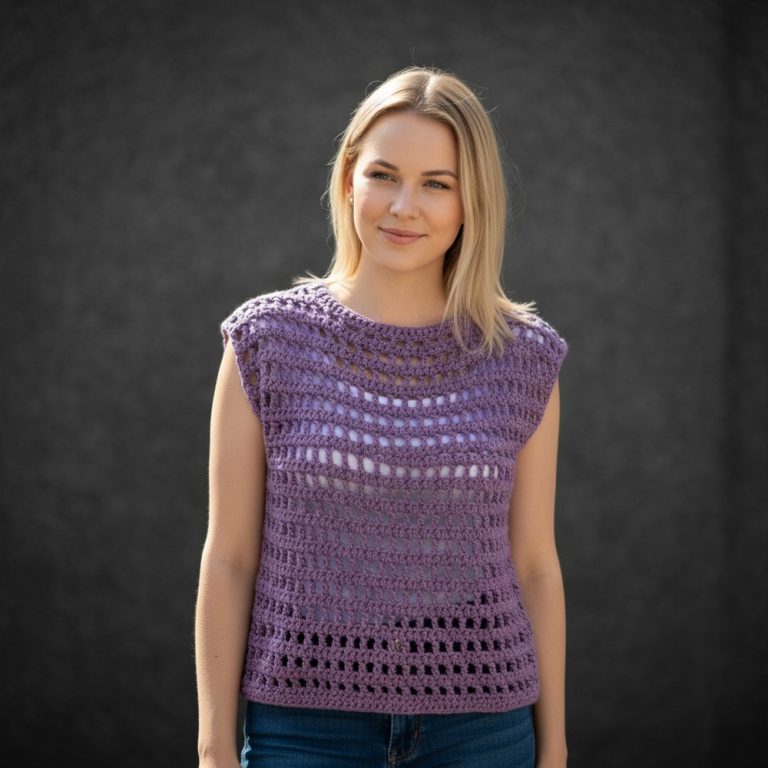
Adding a touch of classic charm to your daily wear is easy when you choose a handmade garment with a clean and open shape. A Crochet Square Neck Top Pattern provides a beautiful way to create a shirt that looks both modern and timeless. This style is very popular because the wide neckline frames the face perfectly and allows you to show off your favorite necklaces. The flat lines of the design offer a neat and tidy look that works well for a day at the office or a casual lunch with friends.
Because the fabric is made of soft yarn, it feels light and breathable against the skin, making it a great choice for warm weather. You can wear it with high-waisted jeans for a trendy vibe or a long skirt for a softer feel. This project results in a high-quality piece that stays in style year after year.
Special Features
- Stretchy ribbed back for flexible fit
- Mesh lower half for breathability and style
- Adjustable straps for comfort
- Decorative ribbon detail at the center front
- Lined interior for added pop of color and comfort
Level of Difficulty
Beginner to Intermediate:
You should be comfortable with chaining, half double crochet (hdc), single crochet (sc), triple crochet, slip stitches, and seaming pieces together.
Materials Needed
- Worsted weight yarn in two colors (main color and contrast color for lining/ribbon)
- Crochet hook (4.0–5.0 mm, adjust size for your gauge and yarn)
- Yarn needle for sewing in ends and attaching ribbon
- Scissors
- Safety pins or hair clips for marking strap placement
Step-By-Step Pattern
1. Back Ribbing
- Foundation:
- Chain 20 (for a size small; adjust for your preferred height).
- Row 1:
- Chain 2 more for turning.
- Half double crochet (hdc) in the fourth chain from hook.
- Hdc across (total 20 hdc).
- Row 2:
- Chain 3, turn.
- Working in back loops only, hdc in each stitch across.
- Repeat:
- Continue for a total of 16 rows (adjust as needed for your body width).
- Ribbing should be stretchy and snug.

Tutor’s Suggestion:
Count your stitches at the end of each row to ensure consistency, especially if you’re new to ribbing.

2. Main Front Panel (and Sides)
- Foundation:
- Without cutting yarn and starting from one long edge of the ribbing, chain 95 (adjust for your bust size).
- Row 1:
- Hdc in each chain across.
- Rows 2+:
- Continue hdc across for several rows (enough to fill between the two ribbing axes, until it reaches the other side).
- Each completed row should correspond to 2 rows on the ribbing, to allow for easy seaming later.
- Seaming:
- Use a long tail to whipstitch or sew the side seams together from the inside for a neat look.

3. Straps
- Placement:
- Try on the top and use safety pins/hair clips to mark strap locations near your armpits for a square neckline.
- Strap Construction:
- Attach yarn to marked spot.
- For first 6 rows, work 8 hdc per row.
- After 6 rows, increase to 9 hdc per row until reaching desired length (23 rows shown as an example).
- This creates a subtle outward curve at the shoulders for comfort.
- Attach to Back:
- Sew or slip stitch the end of each strap to the corresponding point on the back ribbing.
- Repeat for the second strap, ensuring symmetry.
Tutor’s Suggestion:
Keep counting your stitches and check the symmetry by counting from the ribbing edge to ensure even straps.

4. Bottom Lining
- Single Crochet Border:
- Along the bottom edge, work a round of single crochet to create a foundation for the mesh.
- Try the top on; ensure it sits well before proceeding.
5. Mesh Panel
- Foundation Row:
- Chain 4, triple crochet into the foundation, chain 1, skip 1 stitch, triple crochet next, and repeat.
- Subsequent Rows:
- At the end of each row: chain 4, turn, and continue the pattern (chain 1, skip 1, triple crochet).
- Continue for 11 rows or until reaching your desired length.
- Finishing Row:
- Seam to close the mesh at the sides if desired.
6. Lining & Ribbon
- Lining:
- Use a contrasting color (thinner yarn or whatever you prefer).
- Single crochet around the inside of the mesh or only at the hem, as needed for comfort or design.
- Ribbon:
- Crochet or use store-bought ribbon.
- Attach to the center front using a yarn needle and secure tightly.
- Weave in all ends.

Uses
- Great as a summer crop top for layering
- Wear over a tank or bandeau for a chic look
- Makes for a thoughtful handmade gift
- Ideal for experimenting with colors and yarn types
Tutor’s Suggestions
- Customization: Adjust chain counts and row numbers to match your unique measurements.
- Testing: Try the top on at various stages for the perfect fit.
- Yarn Selection: Choose soft, comfortable yarn as the top sits directly on skin.
Pro Tip
When making straps or mesh, don’t weave in your ends until after your final fitting. Adjust lengths if needed for a tailor-made fit!
Conclusion
Congratulations on making your unique mesh crochet top! With its blend of comfort, stretch, and style, this piece is sure to become a wardrobe favorite. Feel free to play with colors, finishes, and details—crochet is all about creativity and making each project your own.