Crochet Daisy Granny Square Pattern
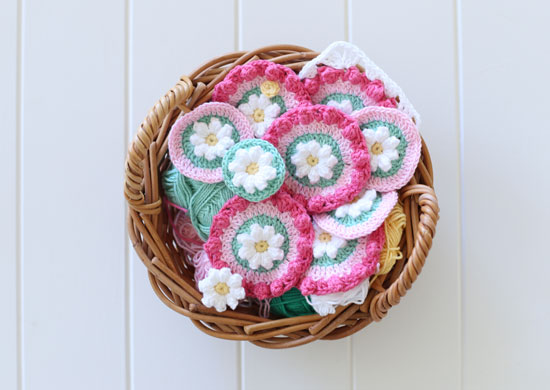
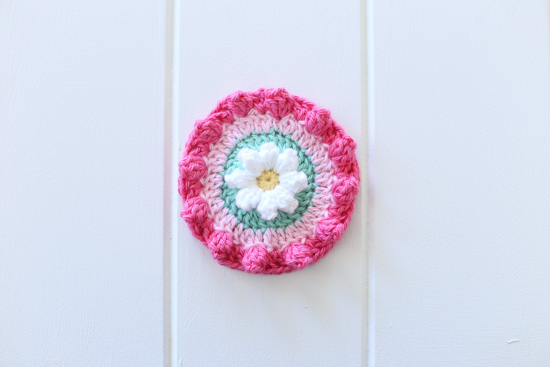
Do you want to learn how to crochet a colorful daisy granny square to brighten your handmade items this spring? It’s your lucky day because I’m here to help you with an easy and fast granny square tutorial. You will end up with a lovely daisy square featuring a sweet crochet daisy flower in the middle, surrounded by attractive raised (popcorn) and unraised dense stitch rings in bright colors. It will also be a chance to use leftover yarn while learning something new (for beginners!), and you’ll be able to make many squares quickly once learned.
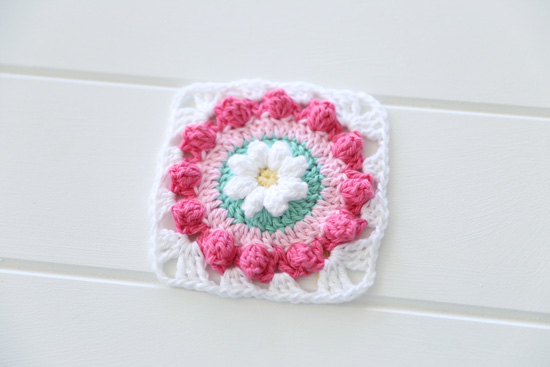
Granny squares have been the most famous motifs (and still!), and daisies are adored flowers by many worldwide. While combining these two themes, I’ve used five of my favorite colors to achieve this beautiful daisy granny square design. However, you’re welcome to choose your own favorite colors!
Whether sewing them together for a cute big blanket or even remaining single as a classical granny pocket or something else, it would be a perfect option!
Though it requires a few more skills than a basic square, don’t worry, I’m here to help you learn and practice this heart-touching granny. I’ll provide recommended materials, helpful tips, and more to guide you through this process.
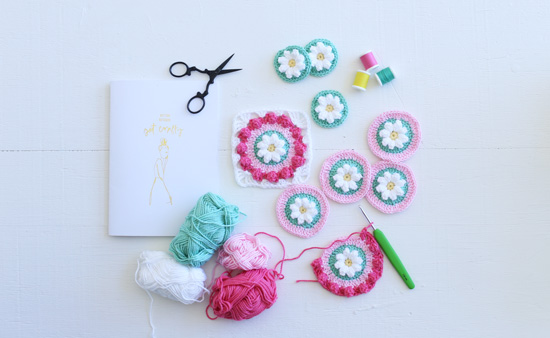
Supplies You Will Need
Before getting started, here are some tips and suggestions on choosing the right materials:
Choosing the yarn: I have chosen the DK or light worsted cotton yarn in five colors. I love it for the granny squares because it holds its shape well (this is crucial for grannies!), has so many colors available, and is super durable. However, there is no strict rule for the type of yarn to choose, but lightweight, as I used, is better to show good details. Using a specific yarn will also change by the item you will sew.
Crochet Hook: Since using the thin yarn, I am using a crochet hook with a 3.5 mm size. Following my recommended yarns and hook will achieve the same gauge. When crocheting many granny squares at a time, ensure your comfort on a specific hook!
Other Supplies: You will also need a yarn needle to weave in the ends (as changed the colors) and later to join the motifs together. A pair of scissors will be the best option when playing with many colors.
Quick Tips
- Setting your squares right after making them: After you finish making your square, you can make it look neat and hold its shape by pinning it down on a surface while it’s a little wet and letting it dry. This gives your square a nice, even shape.
- Count your stitches: Make sure you’re counting your stitches as you go. It will lessen the mistakes, and the square will look neat.
How To Crochet The Dasiy Granny Square:
Let’s start this pattern of Daisy Granny Square. Here are some quick details:
Skill Level: Intermediate – Medium
Materials: 8ply cotton yarn in Citrus Lemon as Yarn A, White as Yarn B, Pale Green as Yarn C, Pale Pink as Yarn D, and Coral Pink as Yarn E colors.
Hook: 3.5mm
Pattern Notes
- The pattern is written in UK terms, but there are shorthand instructions at the end of this tutorial, along with a chart for US crocheters.
- The Granny Square will be worked in round (mostly!)
Abbreviations and Guides:
- magic ring
- ss – slip stitch
- ch – chain
- sp – space
- dc –
- tr
- dtr
- pc
- v st
Crochet Daisy Granny Square Pattern
Round One – Using Yarn A, work 8dc into a magic ring, ss into initial dc, and fasten off. (8dc)
Round 2 – Attach Yarn B, (ch3, 4tr) in the same stitch, you now have 5tr to make your first pc, then ch1. (1pc, ch1) into each of the remaining 7 stitches, ss into back of the initial pc and fasten off. (8pc, 8ch)

Round 3 – Attach Yarn C at any ch-1 sp, ch3 (counts as first tr), 3 more tr into the same sp. Work 4tr into each of the remaining 7 ch-1 sps, ss into the third ch of the initial ch3 and fasten off. (32tr)

Round 4 – Attach Yarn D, ch3 (counts as first tr), skip a stitch, 2tr in the next. Alternate between 1tr, 2tr around. Ss into top of inital ch3 and fasten off. (48tr)

Round 5
Attach Yarn E, ch4 (counts as 1tr, ch1), tr in the same st, ch1, skip a st and work one pc into the next, ch1. * skip a st, (tr, ch1, tr) in the next, ch1, skip a st, pc in the next, ch1 * repeat from * to 10 more times. Ss into 3rd ch of inital ch4 and fasten off. (12pc, 12v st).
Round 6
Attach Yarn A at to any v st and ch4 (counts as first dtr), 2dtr, ch3, 3dtr in the same sp (this forms your first corner). Ch1, 3tr in the next v st, ch1, 3tr in the next v st, ch1. * (3dtr, ch3, 3dtr) in the next v st, ch1, 3tr in the following v st, ch1, 3tr in the next v st, ch1, repeat from * twice more and then ss into top of inital ch4. Fasten off. (4x {3dtr, ch3, 3dtr}, 8x 3tr groups at sides).

Chart
Please note that the chart does not include starting and finishing points. Use the chart in conjunction with the written instructions.

Daisy Wheel Granny Square – UK Shorthand
Rnd 1 – 8dc into a magic ring
Rnd 2 –(1pc, ch1) into each dc
Rnd 3 –4tr in each ch-1 sp
Rnd 4-alternate 1tr, 2tr around
Rnd 5 –(tr, ch1, tr, ch1) skip a stitch (pc, ch1) around
Rnd 6 –(3dtr, ch3, 3dtr) at corners (ch1, 3tr, ch1, 3tr, ch1) along sides.
Daisy Wheel Granny Square –US Shorthand
Rnd 1 –8sc into a magic ring
Rnd 2 –(1pc, ch1) into each sc
Rnd 3 –4dc in each ch-1 sp
Rnd 4 –alternate 1dc, 2dc around
Rnd 5-(dc, ch1, dc, ch1) skip a stitch (pc, ch1) around
Rnd 6 –(3tr, ch3, 3tr) at corners (ch1, 3dc, ch1, 3dc, ch1) along sides.